Meet The Lovely Hoya Macgillivrayi & Learn How To Take Care Of It
Hoya plants are getting more and more popular each day, and for good reason — they are easy to take care of, produce colorful flowers that smell absolutely amazing, and their fleshy green leaves blend in perfectly with any home decor.
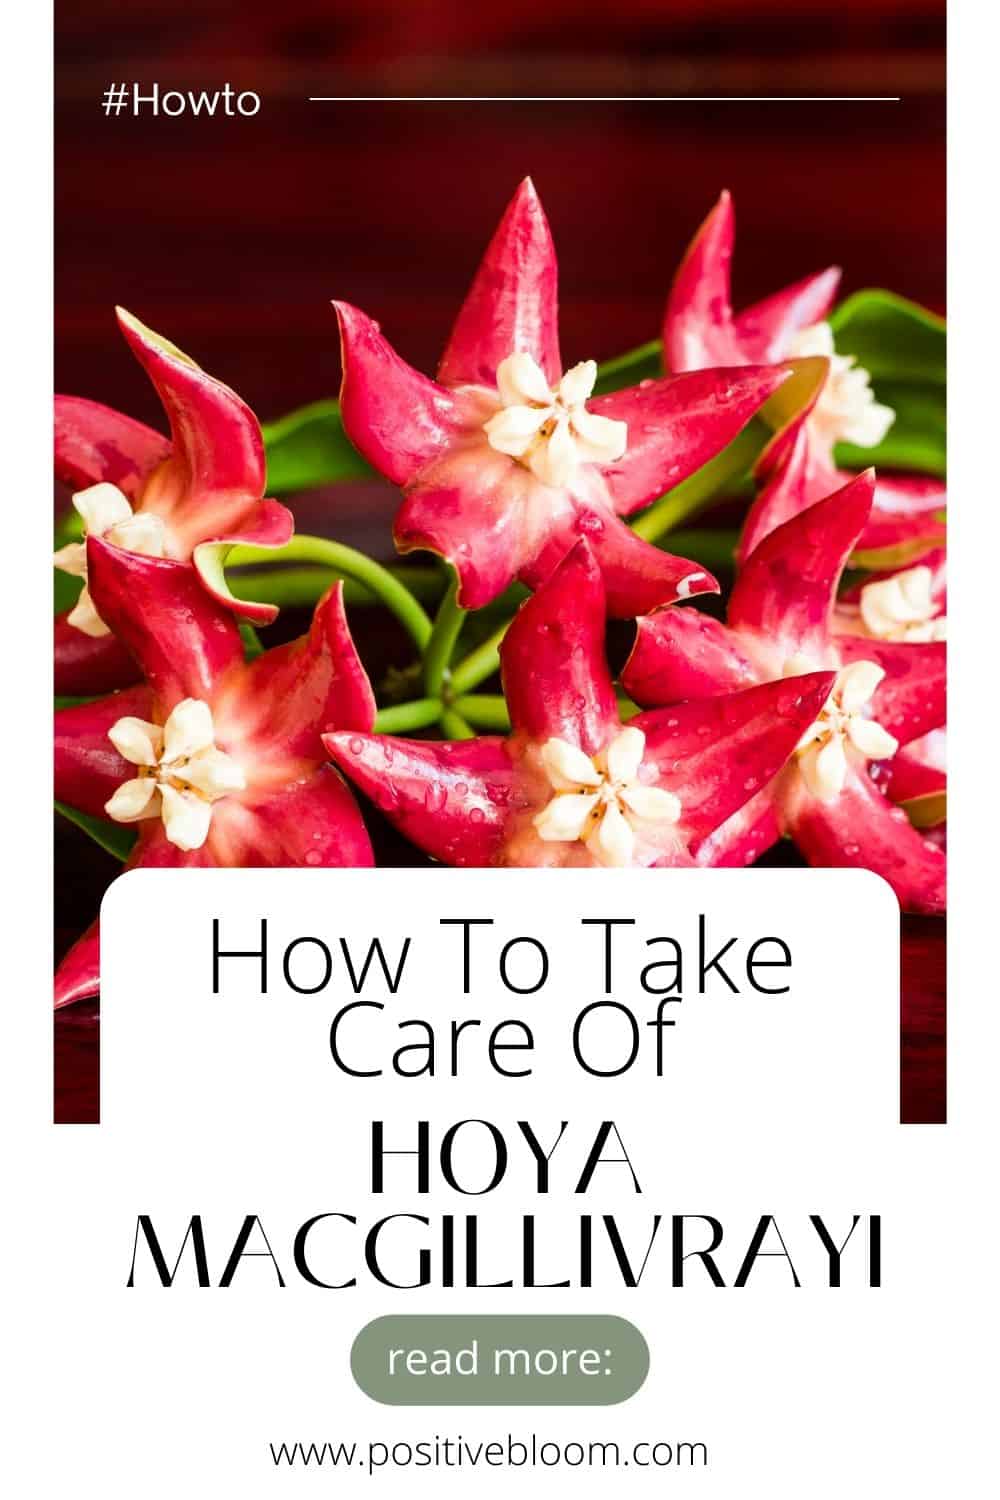
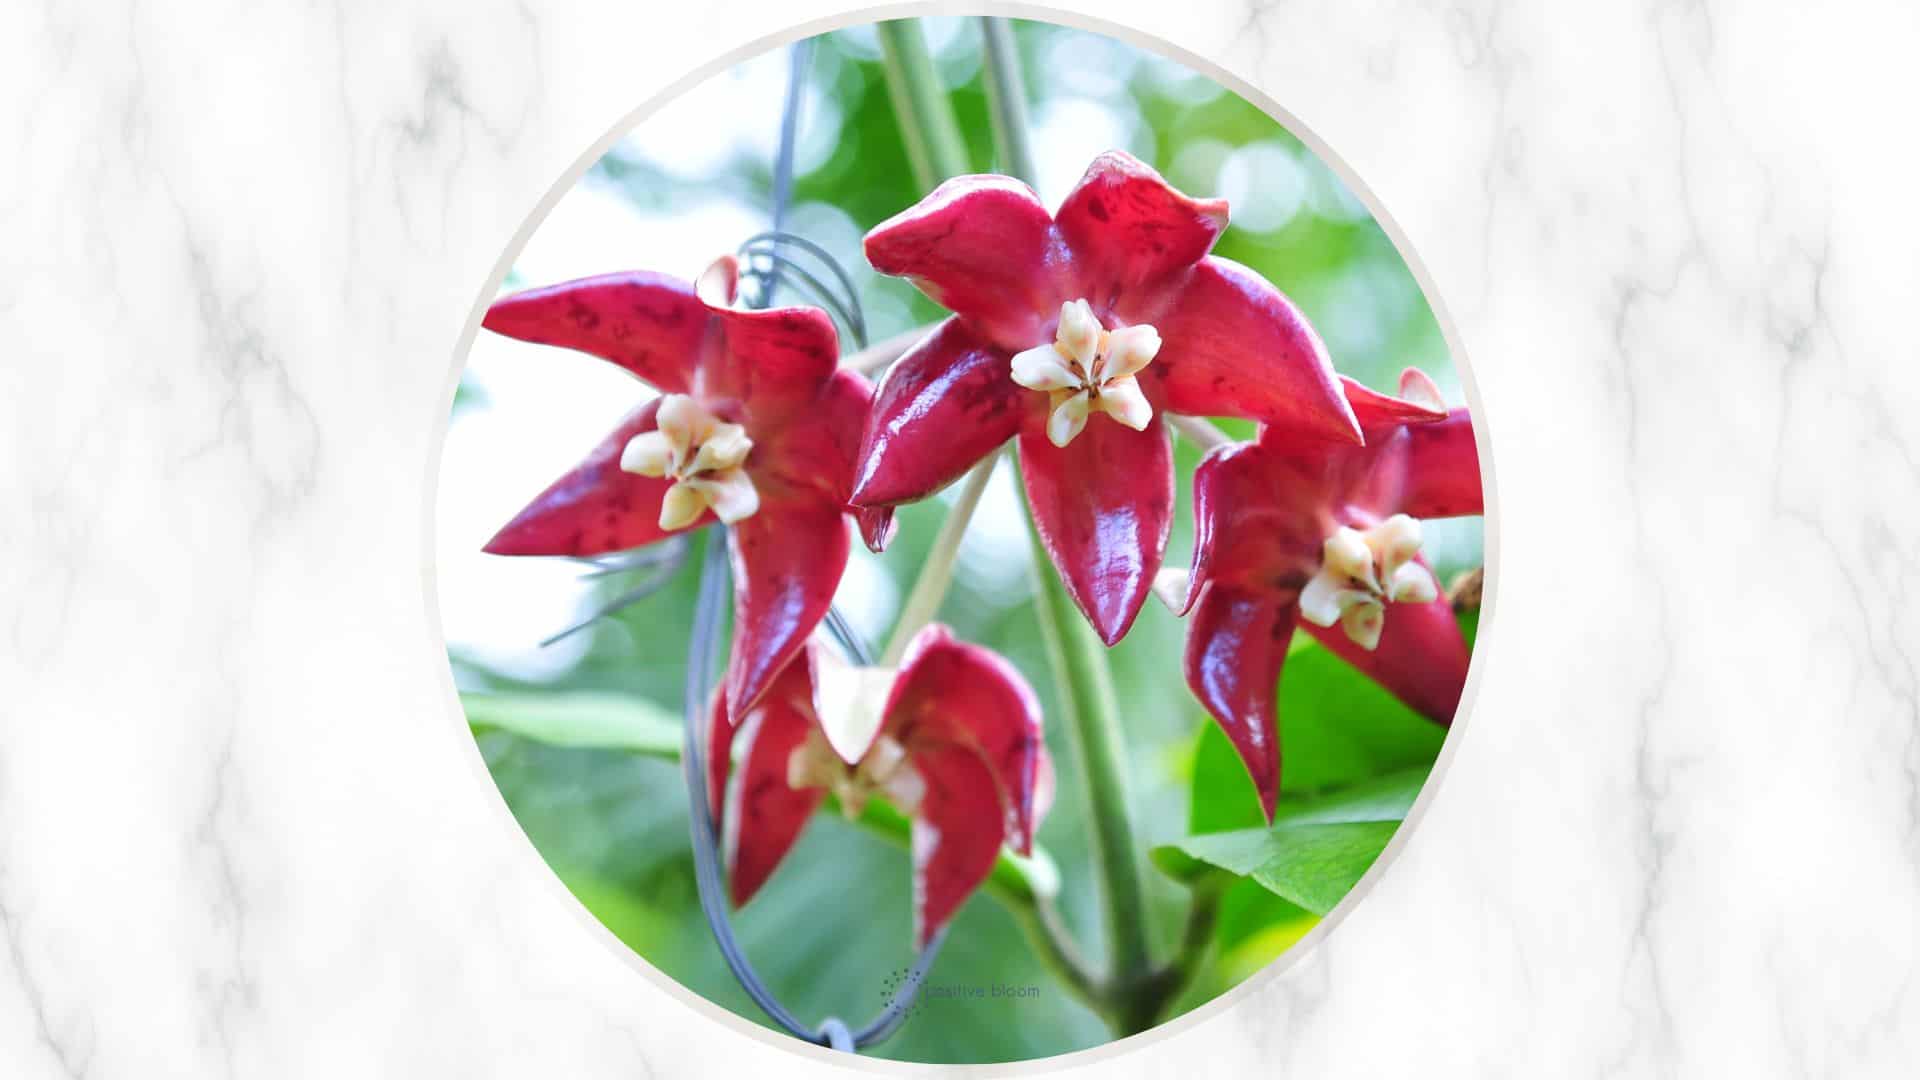
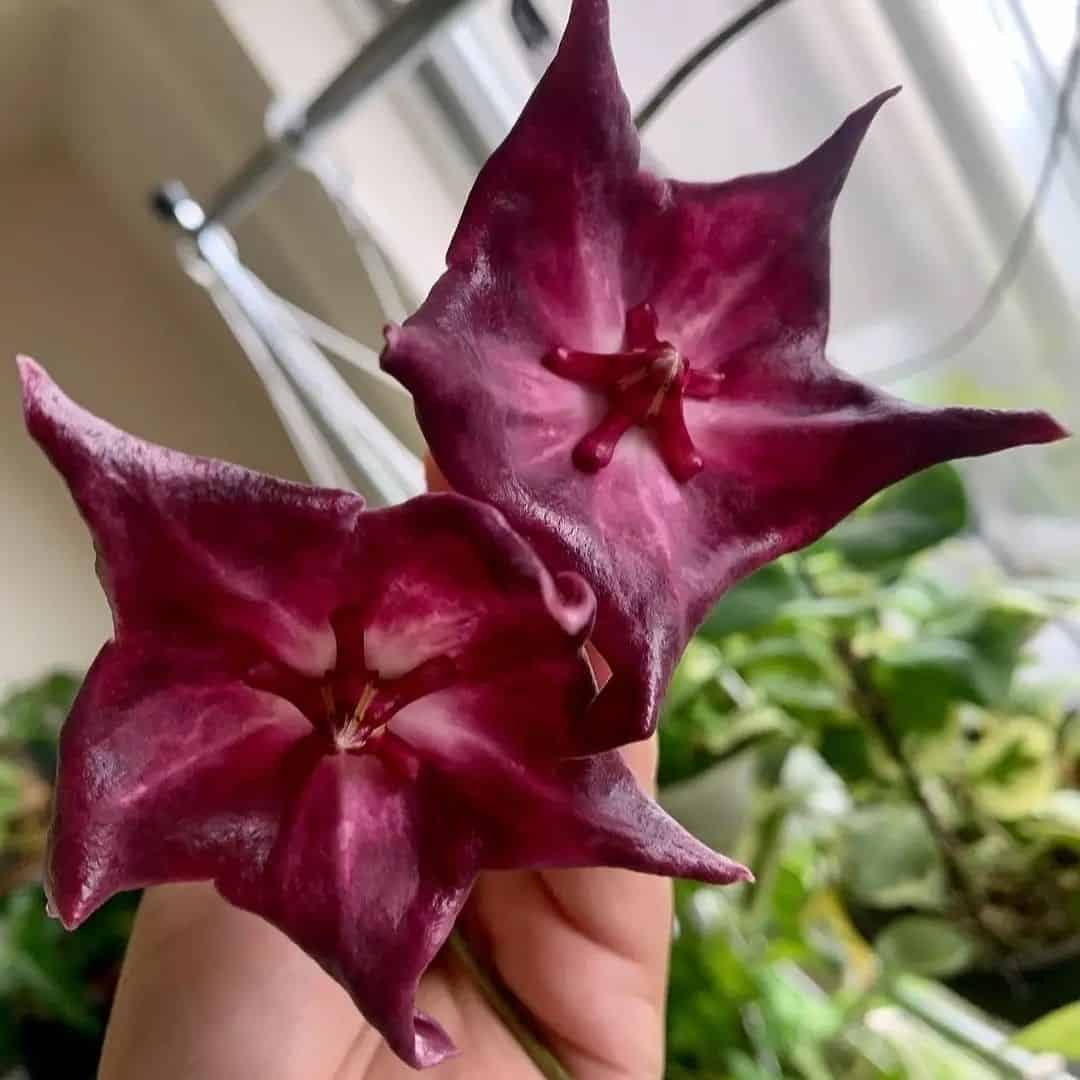
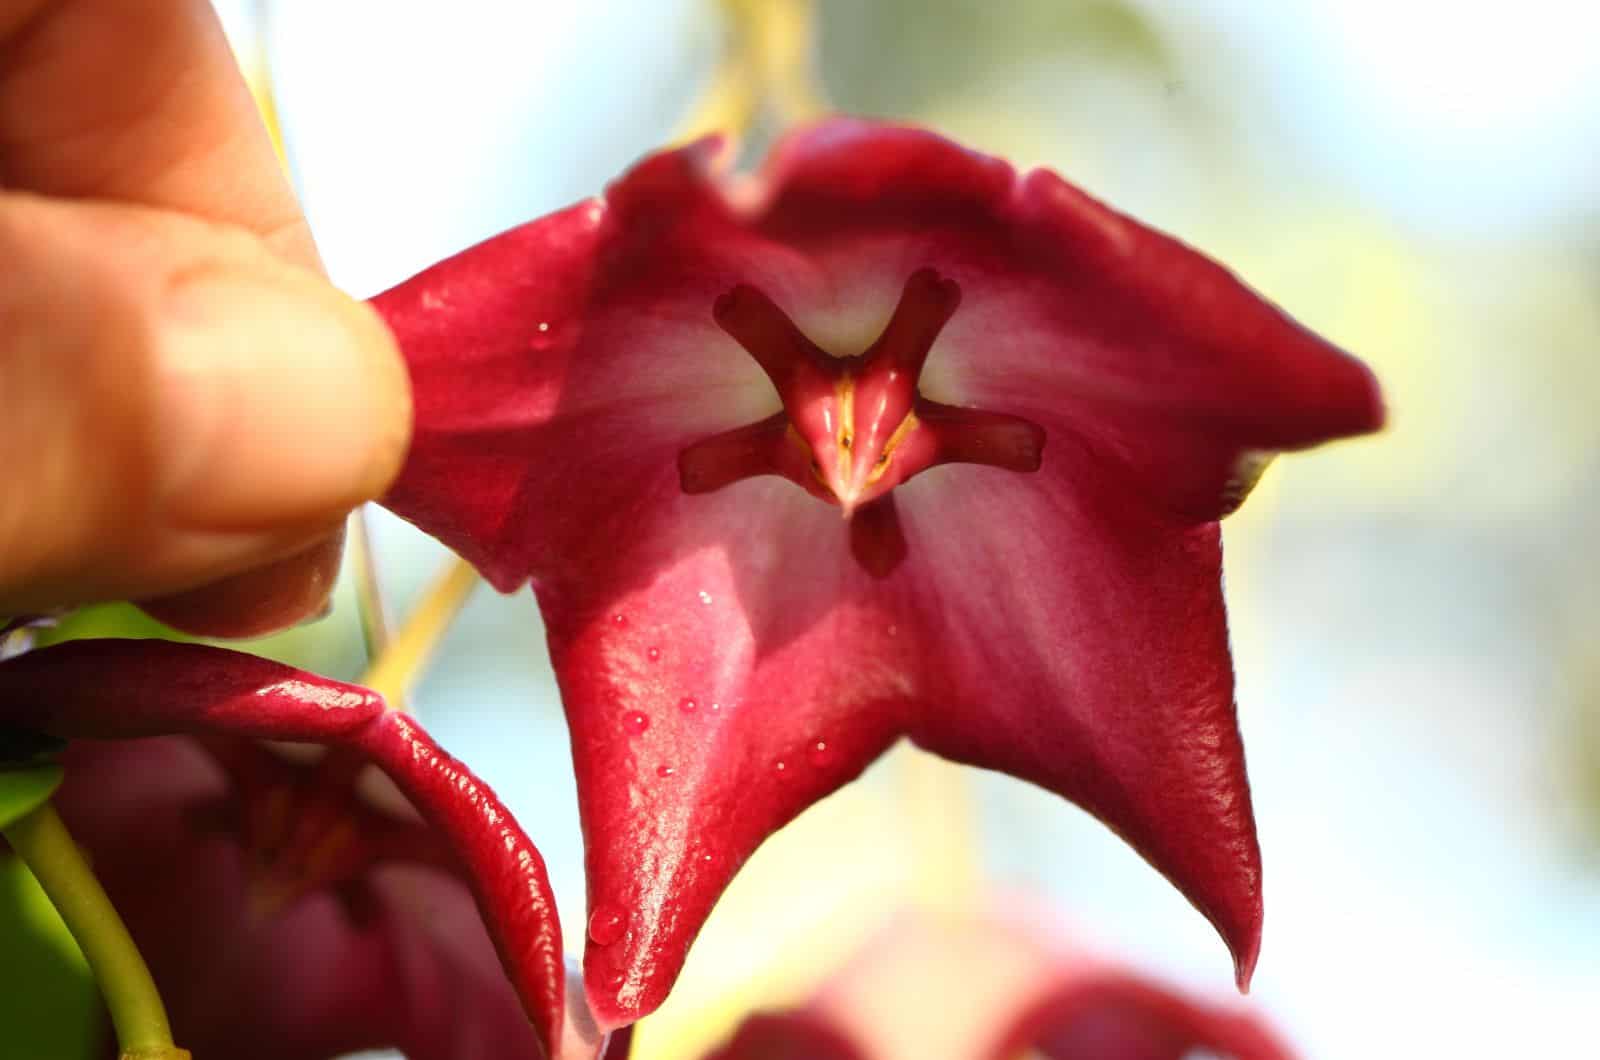
If you are not sure which houseplant to choose, you should definitely check out the beautiful Hoya macgillivrayi. These plants produce mesmerizing, dark burgundy flowers along with fleshy light green leaves that have an oval shape.
The Hoya macgillivrayi flower simply exudes elegance and luxury.
If you want to learn more about this unique plant and also how to take care of it, keep reading!
What Is The Hoya Macgillivrayi?
The Hoya macgillivrayi is an evergreen succulent-like plant that belongs to the Apocynaceae family. It is native to Australia, and is named after a naturalist called Dr. William David Kerr Macgillivray. He found this cultivar in Queensland, Australia back in the 19th century.
This plant is a climber, and it produces long vines that usually end up twining. It produces dark green, leathery, oval-shaped leaves that usually grow in pairs. However, those unique star-shaped burgundy flowers definitely steal the show!
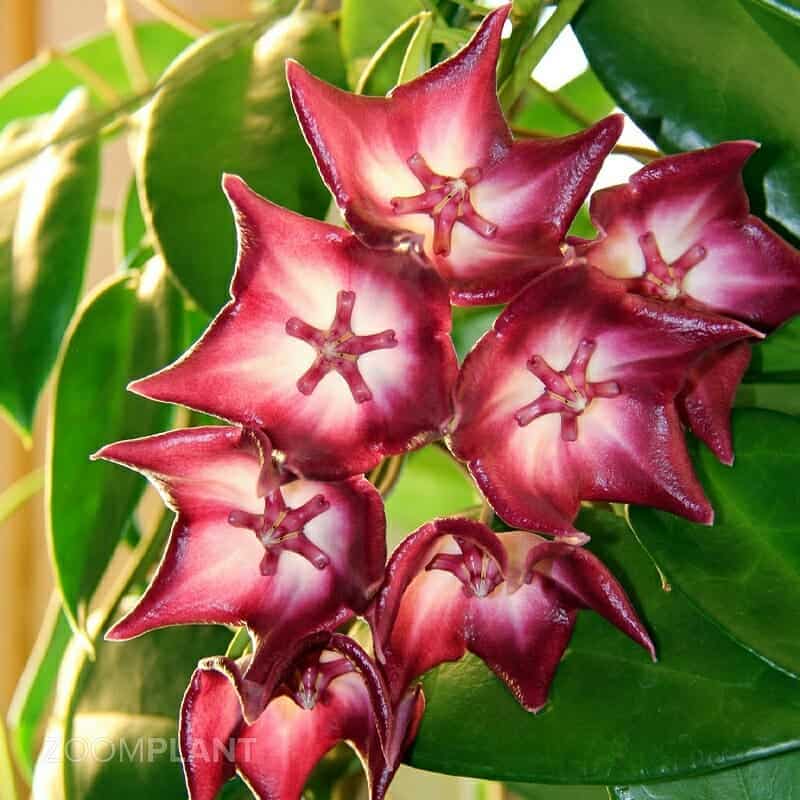
They are also fleshy, and their deep red color turns into soft white around the center — trust me, they are truly breathtaking. On top of all that, they have an amazing fragrance!
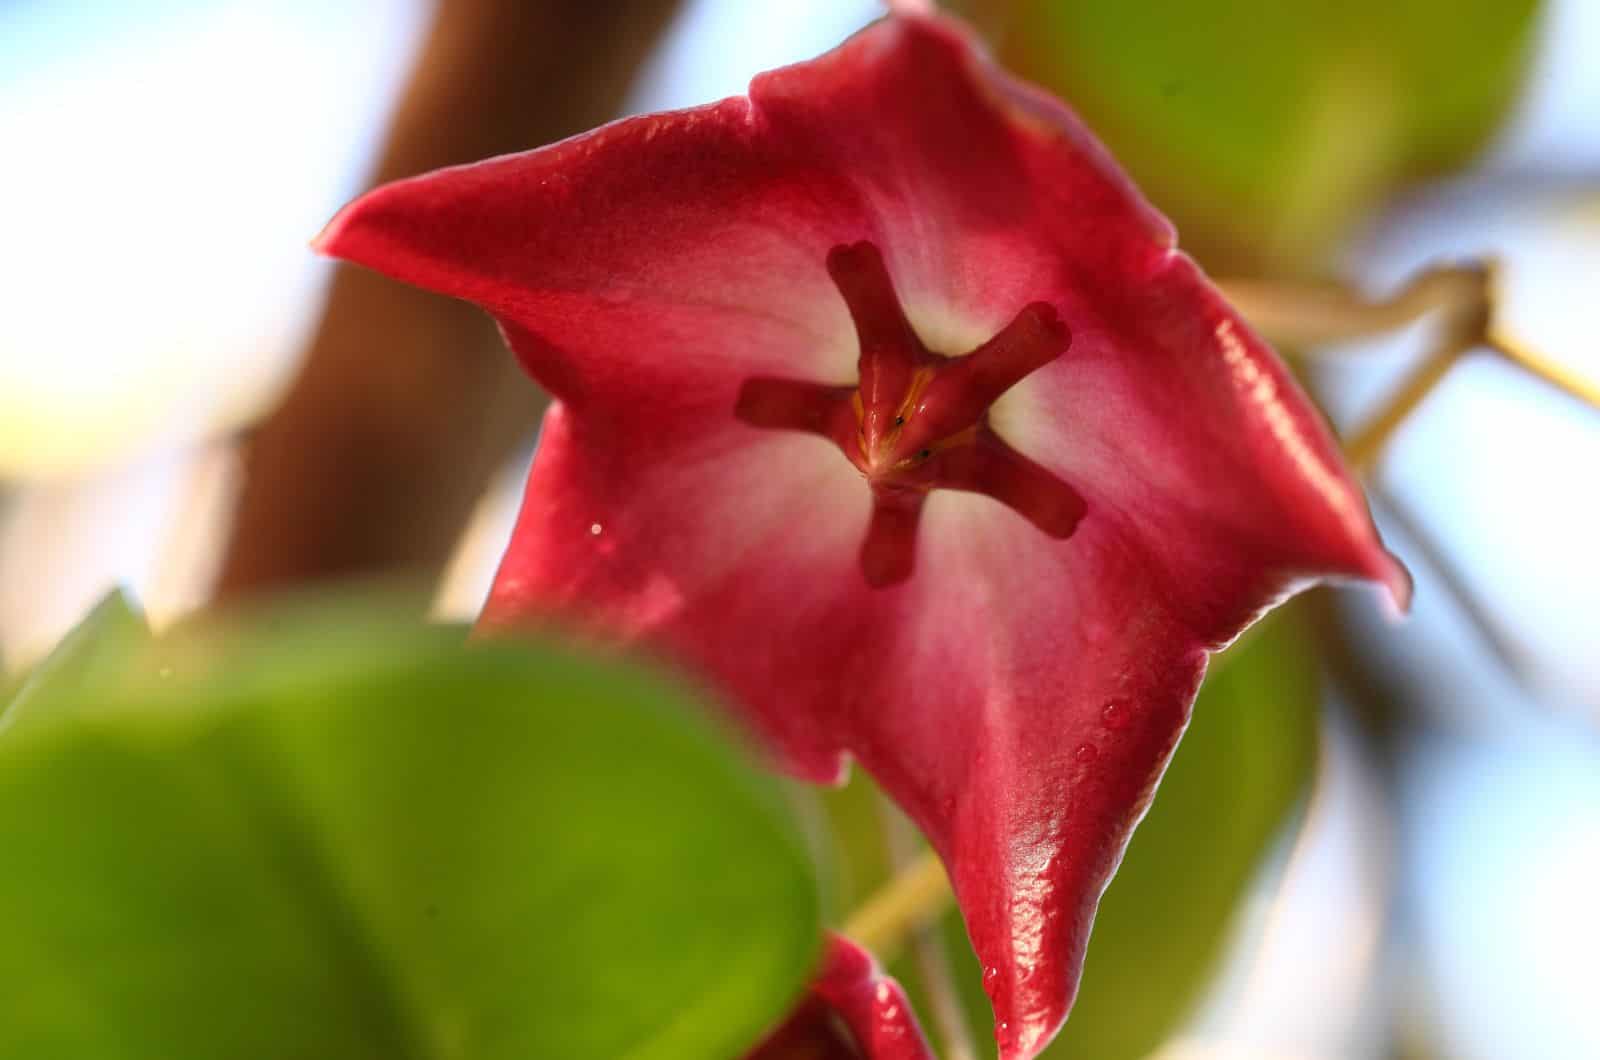
These flowers grow in a group of umbels. A total of 6 to 16 distinct flowers with a diameter of 2.5 to 3 inches make up each umbel. Although there are cultivars with purple or red blossoms, they are most frequently dark burgundy in color.
These plants are relatively easy to grow and they can really spruce up your space. If you like this cultivar, you should also check out some other Hoya varieties, such as Hoya carnosa, Hoya pubicalyx, Hoya fungii, Hoya gracilis, and Hoya Lacunosa.
Hoya Macgillivrayi Plant Care Guide
Hoya plants are semi-succulents. They like warm temperatures, high humidity, and plenty of indirect bright light. However, you should be cautious when it comes to watering, as these plants are prone to overwatering.
If you want to provide your plant with the best growing conditions, then you should try and recreate its natural habitat. Let’s look at this in more detail.
Water Requirements
We will start off with one of the most important things in the plant care guide, and that is watering habits. When compared to other houseplants, the Hoya plant has a small root system, which means that its leaves don’t totally rely on the roots for their water and nutrient supplies.
The leaves can store water because they are fleshy. This feature enables the plants to endure prolonged periods without water (but not for too long).
We have already mentioned that this plant is prone to overwatering, and this problem can be caused by overwatering or underwatering.
Because the roots of the plant are tiny, they don’t require much water. Additionally, adding extra water will just harm the plant because the leaves already have water stored.
However, the plant still needs moist soil to thrive and grow.
So, how do you manage to keep the soil moist without overwatering?
Watering Habits
You can’t find a universal watering schedule that can be applied to every plant. You must take into consideration other factors as well, such as temperature and humidity, because they also affect watering needs.
If you let the soil dry out before watering the plant again, you will most likely avoid overwatering. I never overwater since I always let the soil dry before the next watering. Don’t allow the soil to fully dry out, though, as the plant can stop growing. I never allow more than half the soil to dry out, and I always wait until the top 1–2 inches are dry before watering.
You can measure soil moisture three different ways: with your finger, a wooden stick, or a moisture meter. Any one of them will do.
Understanding exactly how to water your Hoya is the next crucial step. The solution is deep watering. Once you observe water dripping out from the drainage holes, stop adding water to the soil.
It will get to the roots easier if you pour the water. Allowing the soil to drain will stop water from accumulating around the roots.
Watering may take some time, but it’s worth it because plants that are overwatered are usually accompanied by root rot, a deadly fungal disease.
Soil Requirements

Providing the right soil conditions for your plant is essential. Overwatering is this plant’s biggest enemy, so choosing materials that enhance drainage is a must.
Hoyas won’t thrive in soil that is too compact or that holds onto moisture for too long. The ideal option for this plant is well-drained soil — therefore, a combination of materials that enhance drainage and aid in soil water retention is essential.
In order to allow the roots to breathe, the material should also increase air circulation within the soil.
There are a few potting mix combinations that will satisfy your plant’s soil needs. Use one part each of potting soil (found at all plant stores), perlite (which aids drainage), and orchid bark (alternatively, you can use coco coir to improve air circulation).
In addition to perlite, you can also use pumice, peat moss, sand, or vermiculite to improve drainage. I would also recommend you to get a pot with drainage holes in the bottom so that the excess water can drain away.
Light Requirements
If you can locate a spot for your Wax plant with bright indirect light near an east-facing window or south-facing window, your Hoya will thrive!
An east-facing window will provide your plant with the ideal amount of morning light. If a south-facing window is more appropriate, make sure it doesn’t get direct midday sunshine.
The leaves of this plant can burn and turn yellow when exposed to direct sunlight, even though they seem thick and fleshy. The leaves will need to be removed if they get sunburned because they won’t be able to recover.
If you’re worried that your prized Hoya plant will get direct sunshine, cover the window with a transparent curtain to provide some partial shade. This will mimic the tropical setting in which the plant grows, which is under the canopy of a rainforest.
Remember, this plant is an epiphyte, which means that it grows under trees with big leaves in its natural habitat. Therefore, if you plan to grow it outdoors, I would recommend you plant it under a tree.
It can tolerate some low-light conditions, but you shouldn’t keep it in low light for an extended period of time. In contrast to other indoor plants like Monsteras, it won’t suffer too much if it goes without bright light for a short while.
If you can’t find an ideal location for your Hoya macgillivrayi, you can always invest in a good set of grow lights.
Temperature Requirements
Tropical regions are all about high humidity, partial shade, warm temperatures, and abundant rainfall. Now we’ve talked about light, I’d like to give you some advice about temperature.
The optimal temperature range for your Hoya plant is between 60 and 80 degrees Fahrenheit. The plant can get stressed if temperatures fall below 50 degrees Fahrenheit or rise above 80 degrees Fahrenheit.
Lower temperatures are required for the plant’s flowers to blossom. But be careful—lower doesn’t necessarily mean freezing. A major threat to this plant is frost. This plant thrives outside, but only in climate zones 11a and 11b.
If you reside in a different zone and want to avoid problems, bring your plant indoors during the winter.
Avoid placing your Hoya close to heat sources such as radiators or fireplaces because they can cause damage — high temperatures will inhibit the growth of new leaves.
Humidity Requirements
Tropical plants are accustomed to humidity, and these little Hoya plants are no different. As you search for the ideal location for your plant, ensure the humidity level is at least 50%.
Anywhere between 40% and 60% humidity is good for growing. I’m telling you this since, in general, our homes don’t have high humidity. Therefore, even at a humidity level of 40% (not lower), the Hoya macgillivrayi will continue to thrive.
There are a few methods you can use to raise humidity levels. I advise you to get a hygrometer, which will display the humidity level in your home as a percentage.
If it consistently falls below 40%, you’ll need to find a way to raise it. Luckily, there are some easy ways to boost humidity levels.
How To Increase Humidity
I’ll start with the most expensive option because it’s also the best. An excellent tool for accurately increasing humidity levels is a humidifier. However, they are quite pricey and also require routine cleaning and checking.
The second option is to position your Hoya close to other plants such as philodendrons or aloe vera. You can also relocate your plant to the kitchen or bathroom, which have greater humidity levels by nature because of water evaporation.
You can also create a pebble tray. All you need to do is put some pebbles in a shallow tray, fill it with water, and put your plant on top. As the water evaporates, it will provide enough moisture for your plant. Ensure that the roots are not submerged in the water, as it can lead to root rot.
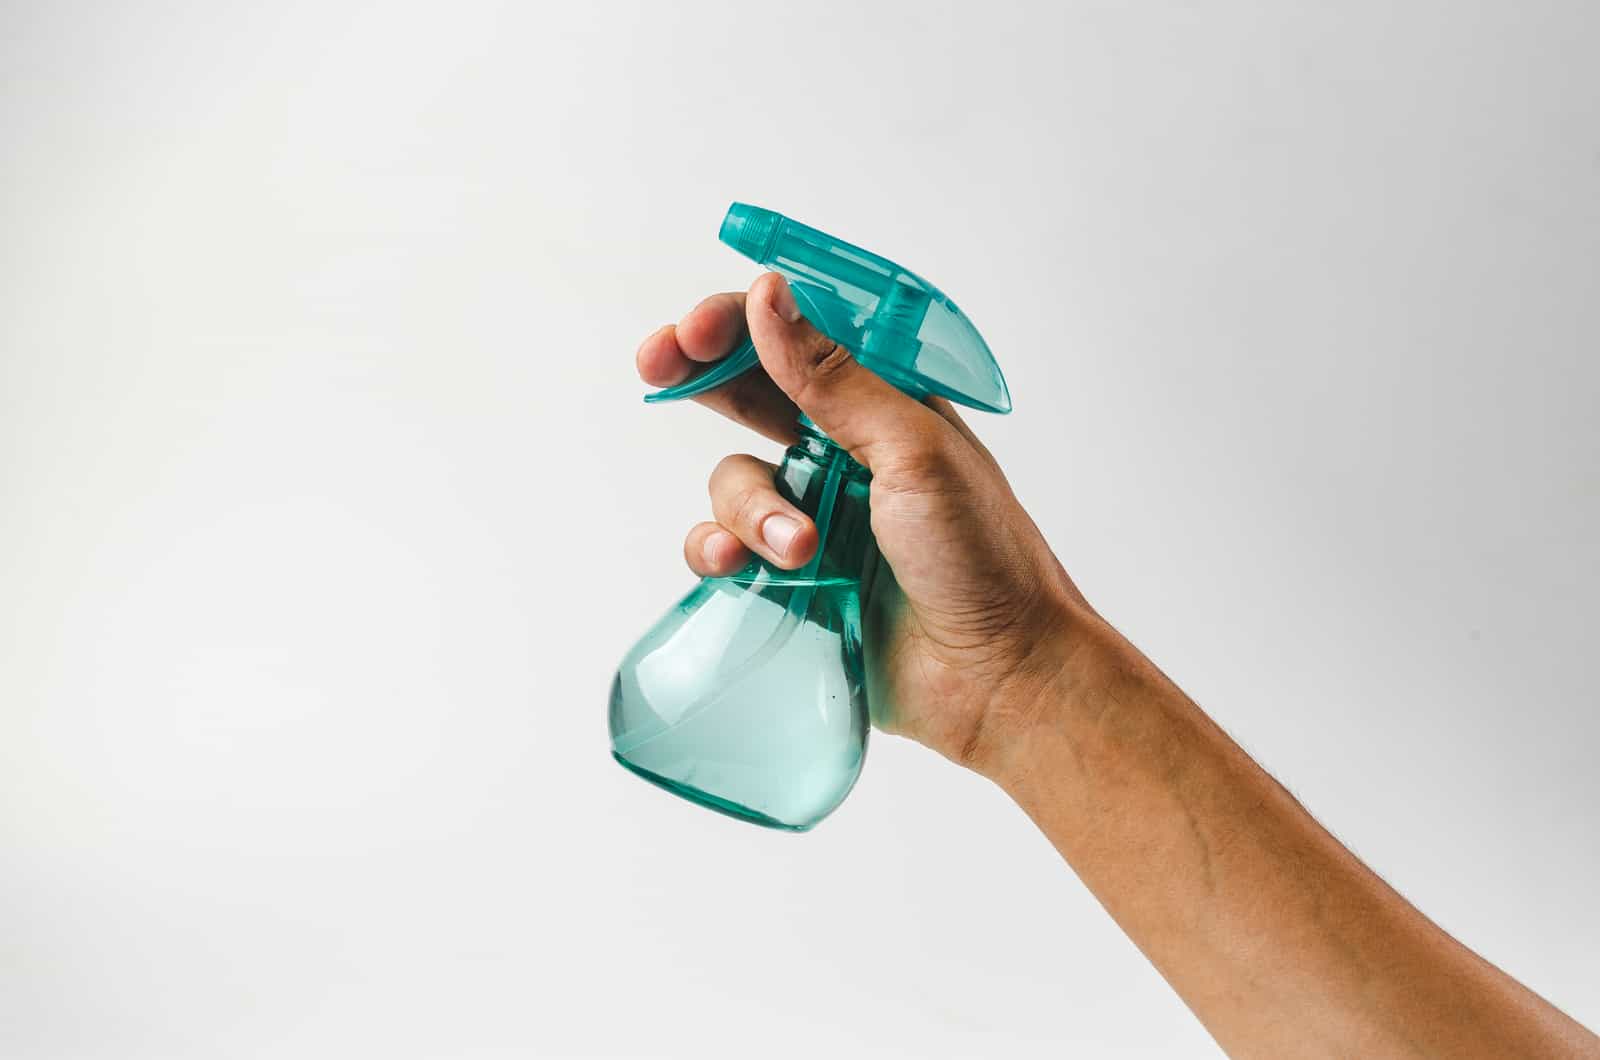
To keep the leaves moist, mist your plant twice a week, but be careful not to over-mist because this could lead to softening and rotting.
Another thing to keep in mind is that increased moisture due to high humidity will create the perfect setting for mold and fungi.
Place the plant close to a vent or leave a couple of windows open. The plant won’t tolerate chilly drafts, so make sure there is enough space between the plant and windows or vents.
Fertilizer Requirements
During the growing season, this Hoya will appreciate being fed around once a month. The fertilizer needs to be diluted to half-strength and water-soluble. You can either use a slow-release fertilizer at the beginning of the growing season, or you can try granular and liquid fertilizers.
Never apply fertilizer to dry soil because the chemical concentration will be higher and cause the soil to burn. Wait till you have watered the plant.
The roots of your Hoya will be burned, and the leaves will turn yellow if the fertilizer’s chemicals are oversaturated. These plants don’t grow vigorously during the winter months, which means they don’t need fertilization. The Wax plant blooms and produces flowers without the need for fertilizer.
Choose a bloom booster over a fertilizer high in nitrogen, and fertilize the plant before it begins to bloom instead. You should select a phosphorus-rich fertilizer, such as 4-6-3. (the 6 is its phosphorus content).
Repotting
The Hoya plant enjoys being lightly rootbound. Small roots take roughly two to three years to begin emerging from the drainage holes.
Actually, that is the indication that you should repot the plant. Depending on the conditions you give your beloved plant, it may take less or more time for the roots to begin emerging from the drainage holes.
When repotting, a larger pot is not necessary because the roots will have too much soil surrounding them otherwise, which would increase the risk of waterlogging. Consequently, your plant may develop root rot.
Make sure the plant has enough room to grow if you detect any changes such as stunted growth. This can be achieved by repotting to a pot that is only slightly larger than the current one.
Pruning & Cleaning
The Hoya macgillivrayi is a vining plant that is typically planted in hanging baskets, which highlights its beauty. Pruning your plant frequently will prevent it from taking over your living space.
This plant requires support because it is a climber. If you choose to cultivate this plant in a container, use a trellis, bamboo hoop, or moss pole.
You can decide when to prune your plant if you want it to have a particular shape. However, if you see any yellowed, damaged, or dead leaves, or twining vines, I suggest trimming them off so that your plant looks nice and tidy.
One final tip: to prevent the spread of contagious diseases, always sanitize your pruners.
Propagation
Propagating Hoya plants is relatively easy. There are two methods that you can use: stem cuttings and seedlings. If you choose to grow plants from stem cuttings, you can plant the cuttings in sphagnum moss, soil, or water.
You can follow these steps to successfully propagate your plant.
Propagating By Stem Cuttings
I’ll start by demonstrating how to take stem cuttings.
Choose a stem that is healthy (4-6 inches long) and trim it just below the lower node. There should be at least two or three leaves on the stem.
The node can be seen by removing the bottom leaves. This is a crucial stage because the roots will spread and the leaves will retain water, which might ruin the entire process.
Let’s look at how to plant a stem cutting in soil now that you have one:
1. Take a fresh pot, and fill the bottom third with a proper potting soil.
2. Dig a hole with your fingers in the ground, then bury the stem cutting approximately two inches deep.
3. To prevent it rotting, firmly pack the soil around the cutting and make sure the leaves are not in contact with it.
4. After placing the pot in bright indirect light, water the soil.
5. Frequently mist the soil.
If you want to propagate a stem cutting in water, do the following:
1. Insert the cutting into a jar filled with water. Once more, no water should be touching the leaves.
2. Place the container in strong and direct light.
3. Frequently change the water.
In two to three weeks, the nodes should begin to form roots. When the roots are 2 to 3 inches long, put the plant in a container.
Propagating With Seedlings
Get a seedling tray and some Hoya seeds first. Make sure you buy your seeds from a reliable source because some suppliers can try to trick you by offering seeds from completely other species.
Let’s examine the process of growing a Wax plant from seedlings!
1. Add a proper potting mix to the seedling tray.
2. Carefully press each seedling into the soil as you place it into the potting mix. Make sure there is at least 1 inch of space between each seedling.
3. To boost humidity and temperature, wrap the tray with plastic wrap.
4. Position the tray in a cozy area with plenty of indirect light (a bathroom or kitchen will do well).
After a few months, you’ll start to see new growth. Repot the seedlings in a new pot after roots and shoots have been established.
Common Issues
The Hoya plant is susceptible to certain pests and diseases. Luckily, there are some methods that you can use to deter these little critters completely. You should know that these annoyances usually don’t attack healthy plants, so keep up with plant care!
Pest Infestation
The most common pests that infest the Hoya macgillivrayi are aphids, spider mites, mealybugs, and fungus gnats.
Little insects known as aphids are typically found on the undersides of leaves. They usually congregate in large groups, mostly damage new growth, and ingest plant juices, which weakens the plant.
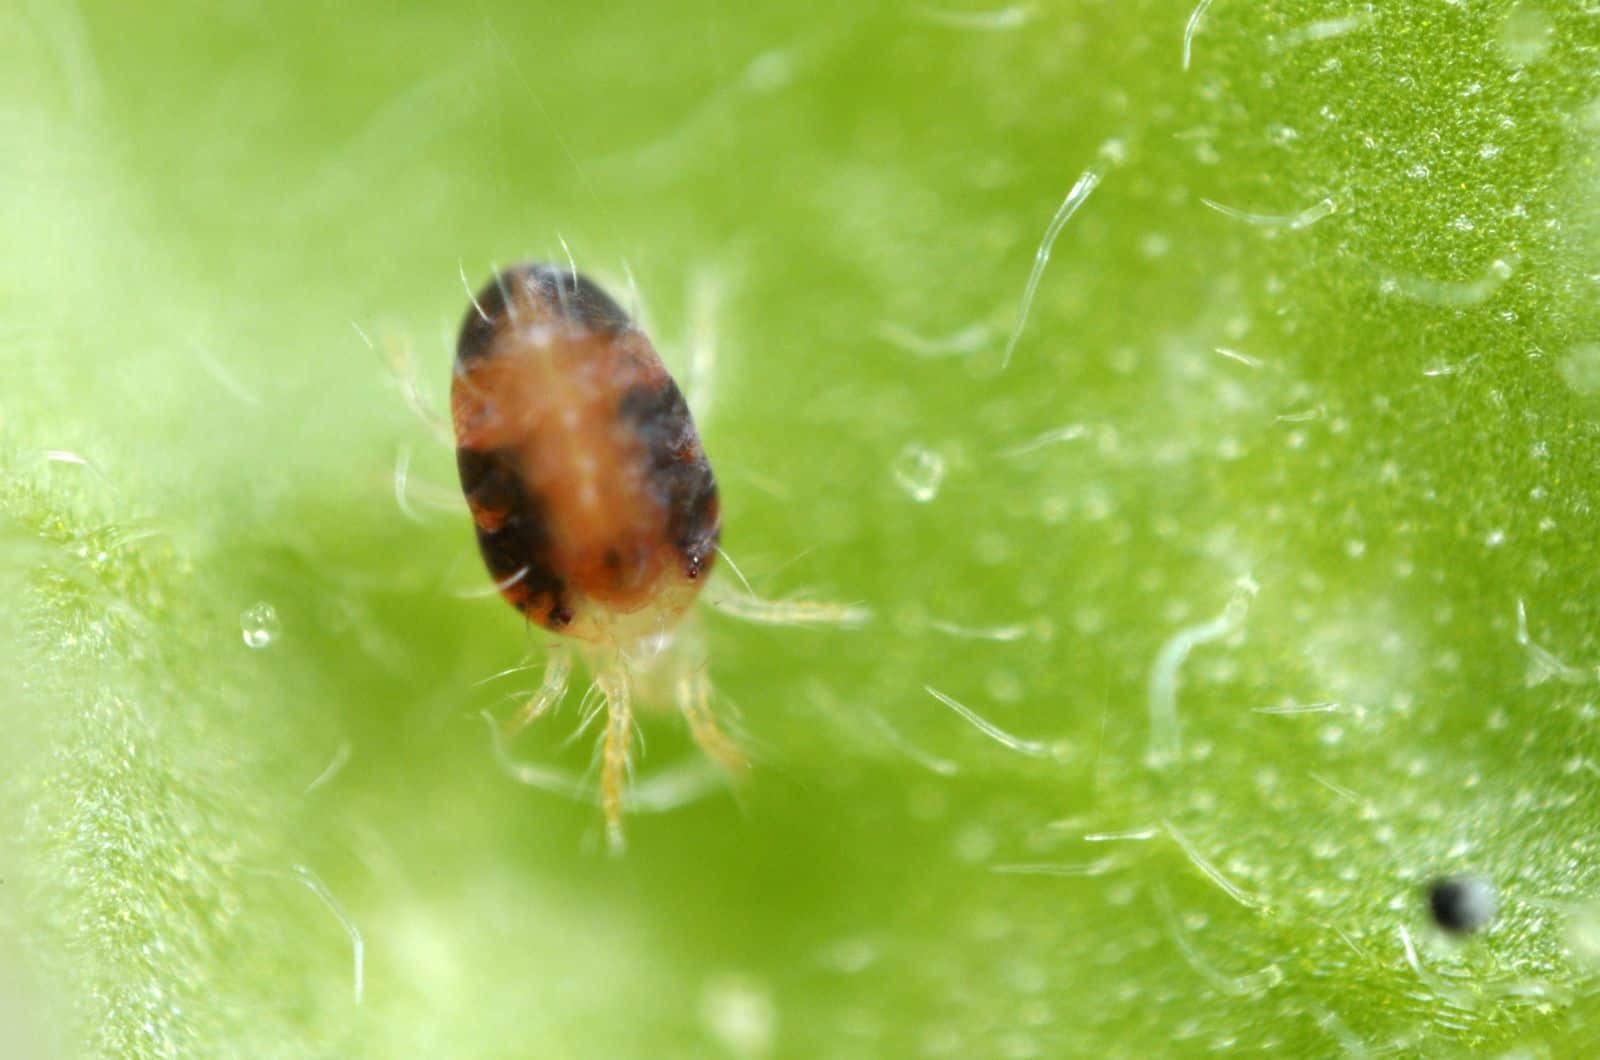
Spider mites produce webbing on plant leaves. They primarily hide on the undersides of leaves and suck the plant’s sap.
Fungus gnats are occasionally observed near houseplants. They have an impact on potting soil, organic materials, and other places where organic matter decomposes. Because their larvae consume roots, they can pose a threat to indoor plants, nurseries, and greenhouses. Drains, damp soil, sick plants, and organic soil waste all attract these little annoyances.
Mealybugs are small, resemble cotton in appearance, and like damp environments.
So, how to get rid of these pests?
Insecticides and insecticidal soaps are efficient treatments for mealybugs.
Plant flies can be removed with a number of methods. For instance, adding pebbles to the surface of the soil or introducing plant fly predators are effective fly traps. Spider mites can be eliminated by putting a towel in a solution of rubbing alcohol and water and then brushing the leaves.
Similarly to how spider mite infestations are handled, aphid infestations can be controlled through the use of insecticides, neem oil, or physical removal (but they are super tiny, so this could be hard).
Plant Diseases
The two fungal diseases that most typically attack Hoya plants are botrytis blight and sooty mold.
Your plant may have botrytis blight if you see gray spots on the leaves and stems. If left untreated, it can result in sizable spots on the leaves that gradually soften and eventually fall off.
On the other hand, your plant may develop sooty mold if aphids or scales come in touch with the leaves for a long time.
Act quickly if you see honeydew on the leaves of your plant because it could badly damage them!
Apply a strong fungicide after removing any leaves with severe infections.
Wrapping Up
The Hoya macgillivrayi is definitely a one-of-a-kind plant that truly captures an intriguing tropical spirit. It represents one of the best natural works of art!
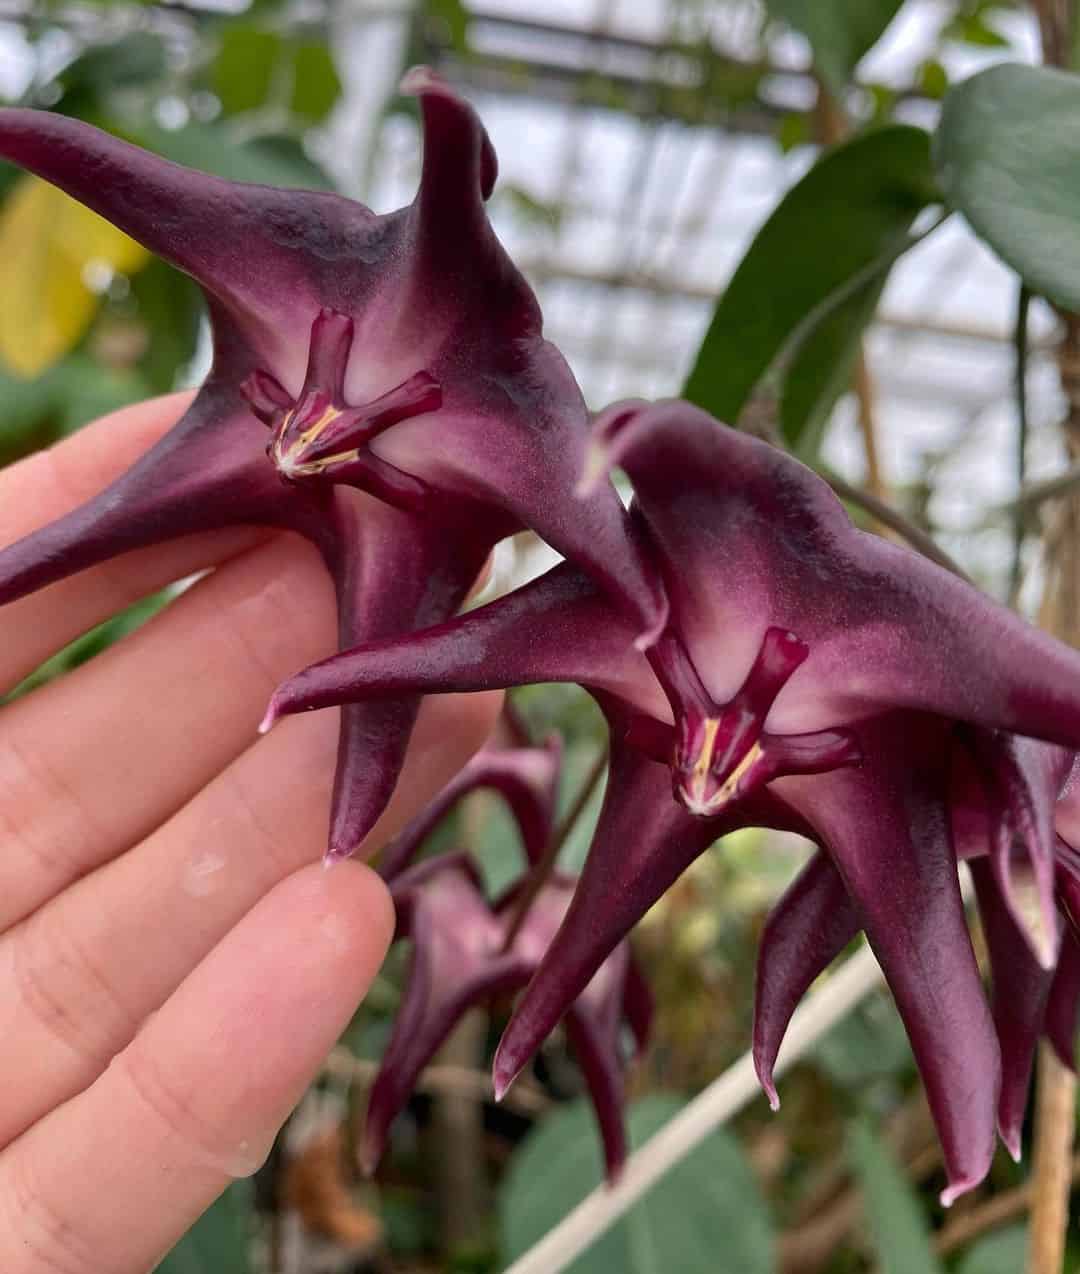
Their burgundy, star-shaped flowers look like something that could come from another world. Not only are these flowers mesmerizing, but they also have a beautiful aroma that will make your home smell amazing.
With their relatively easy plant care requirements, Hoya plants are getting more attention each day. However, the Hoya macgillivrayi cultivar is still considered to be rare. So, if you manage to get one for yourself, make sure to propagate it and keep it happy and alive!
That’s it, folks. I hope this article was helpful.
Until next time!
Like this post? Share or pin it for later!