Tomato Seedling Stages: Growing Your Own Tomatoes At Home
Positive Bloom is an Amazon Associate and we earn from qualifying purchases through these links at no extra cost to you.
I know I’m not speaking only for myself when I say that I simply can’t wait for the summer to bring in my tomato harvest! Tomatoes are one of those vegetables we can always put to use, whether in a stew or a homemade tomato sauce.
With those feelings in mind, I have decided to reveal some secrets for growing this veggie and guide you step by step through the entire process, from planting tomato seeds to analyzing the tomato seedling stages.
Before we get into detail, let’s look at the main tomato info:
[table id=188 /]
This article also contains a care guide for tomatoes so you know how to care for them and increase your yield.
Finally, we love to include a nice Q&A section and answer some of the most frequently asked questions; and there are many when it comes to tomatoes.
Let’s start exploring the wonderful world of tomatoes!
Understanding The Tomato Seedling Stages

Knowing when to plant tomatoes and how to care for them during their first few days is crucial, and will decide whether you’ll have anything to harvest when the time comes.
We have decided to explain the process of planting and growing tomatoes in great detail to help you do the best you can.
Let’s begin!
1. Preparation
Preparation is the first stage of growing tomatoes, and it precedes planting. It includes many things you probably wouldn’t even normally consider.
The main thing is to decide which variety of tomato you want to plant, whether it’s cherry tomatoes, oxheart, disease-resistant hybrids, etc.
Therefore, you must first determine whether you wish to cultivate early, mid-season, or late-season tomatoes.
Researching specific tomato cultivars may help you find the right type for your garden. For that reason, knowing the differences and similarities between Black Krim and Cherokee purple tomatoes, for instance, may solve your dilemma once and for all, because not all varieties take the same amount of time to ripen.
Also, not all tomatoes keep producing fruit after harvest. Determinate tomatoes fruit only once and the plant starts dying after you collect its crops. However, there are many indeterminate varieties such as beefsteak, heirloom tomatoes, almost all cherry varieties, and so on that you can pick multiple times through their growing season.
Preparing The Soil And Trays
Most growers usually start their tomato seeds indoors and transplant them outside once they’re strong enough. You need to consider the type of soil you’re using.
Thankfully, agriculture has progressed tremendously and you can get seed starting mixes in any garden center. These mixes are light and loose and ensure good drainage because they contain perlite, vermiculite, and peat moss.
Another thing that has made my life much easier is moistening the seed starting blend before filling the trays with it. This method prevents uneven soil moisture and ensures that your seeds have the best growing medium.
Furthermore, I always use seedling trays with drainage holes because I know exactly how many seeds I have planted that way.
I don’t have to worry about whether I spaced them properly, if I should thin the plant once it starts growing, or whether the water will accumulate and kill my tomato seeds.
However, you don’t have to get seedling trays just for this purpose; you can always use milk or egg cartons, yogurt containers, etc.; just clean them, fill them with soil, and they’re ready for planting!
2. Planting

The next stage is planting, and timing is important in order to get your tomato growing. If you plan on starting your seeds indoors and then transplanting them outside, you should know that it takes about a month and a half to two months for tomato seeds to grow and be ready for transplanting.
Also, tomato seedlings should only be transplanted once the frost has passed, so check the weather forecast and research the last frost date. Aim to transplant the seeds a week after the frost has gone just to be on the safe side.
Don’t sow your seeds too early as it can result in leggy seedlings that don’t transplant very well.
However, if you live in a warmer climate with plenty of warm days and a long growing season, you can plant your tomato seeds directly outdoors. But still, beware of frost and plant the seeds only after all danger of frost has passed (so, at least one week after the last frost date).
Planting seeds outside will result in a later harvest because you lose those 6-8 weeks of growing indoors. If you live in the tropics or an equally warm climate, you don’t have to worry about this!
How To Plant Tomato Seeds
There’s a special technique I use when planting tomatoes that I learned from my mother. Use a broken pen (or some other, equally thin tool), make a hole quarter of an inch (6 mm) deep, and plant two seeds per hole.
Lightly cover the seeds with moist soil, then sit back and relax because one part of the job is now done!
Of course, your work doesn’t end there. You have to monitor the seeds and ensure that they are warm enough, and ensure that the growing substrate is moist. The ideal soil temperature for the seeds to germinate is between 65 and 85°F (18-29°C), so invest in a heating mat or set your thermostat to the desired temperature.
Finally, you should raise the humidity for germination. You can loosely place a plastic wrap over the tray to ensure there is plenty of moisture for the seeds without constantly having to water them. This will also ensure that there’s good air circulation.
You can also use the humidity dome that comes with seedling trays.
3. Seed Germination
The next stage is seed germination. Tomatoes typically don’t take too long to germinate, so you should start seeing sprouts 3-15 days after planting.
[lasso id=”3894″ link_id=”4184″ ref=”amzn-vivosun-durable-waterproof-seedling-heat-mat-warm-hydroponic-heating-pad-10-x-20-75-met-standard”]
You can turn off the mat once half of the seeds have germinated.
There’s lots going on beneath the soil before sprouting, which is actually seen as the culmination of the entire process.
The seed opens and the radicle, which later develops into a primary root, shoots out. If the conditions are favorable, the hypocotyl, a stem of the germinated seed, will start to form above the radicle and the plant moves on to the next stage.
4. Sprouting
Once the seeds have fully germinated and the hypocotyl is protruding from the ground, you’ll notice two tiny leaves opening. These aren’t the true leaves and are known as cotyledons.
However, they can also photosynthesize and store the nutrients necessary for plant development, so you should move your seedling tray to a bright area where it can get plenty of light.
Natural light is often unpredictable and uncontrollable, so I always advise my beginner gardener friends to start their seeds under some grow lights for plants.
It is important to keep the light approximately 4 inches (10 cm) away from the sprouts to ensure there’s always enough sunlight and prevent your seedlings from being leggy.
Don’t forget to water the growing medium; the substrate should always be moist, so water the sprouts when the topsoil is dry.
You can start fertilizing your seedlings at this stage, but don’t use too much fertilizer. Apply a balanced fertilizer diluted to quarter-strength so you don’t harm this delicate plant.
If you’re afraid of over-fertilization, which you should be because it can destroy your plant, you can apply organic fertilizers without worrying about your tomatoes.
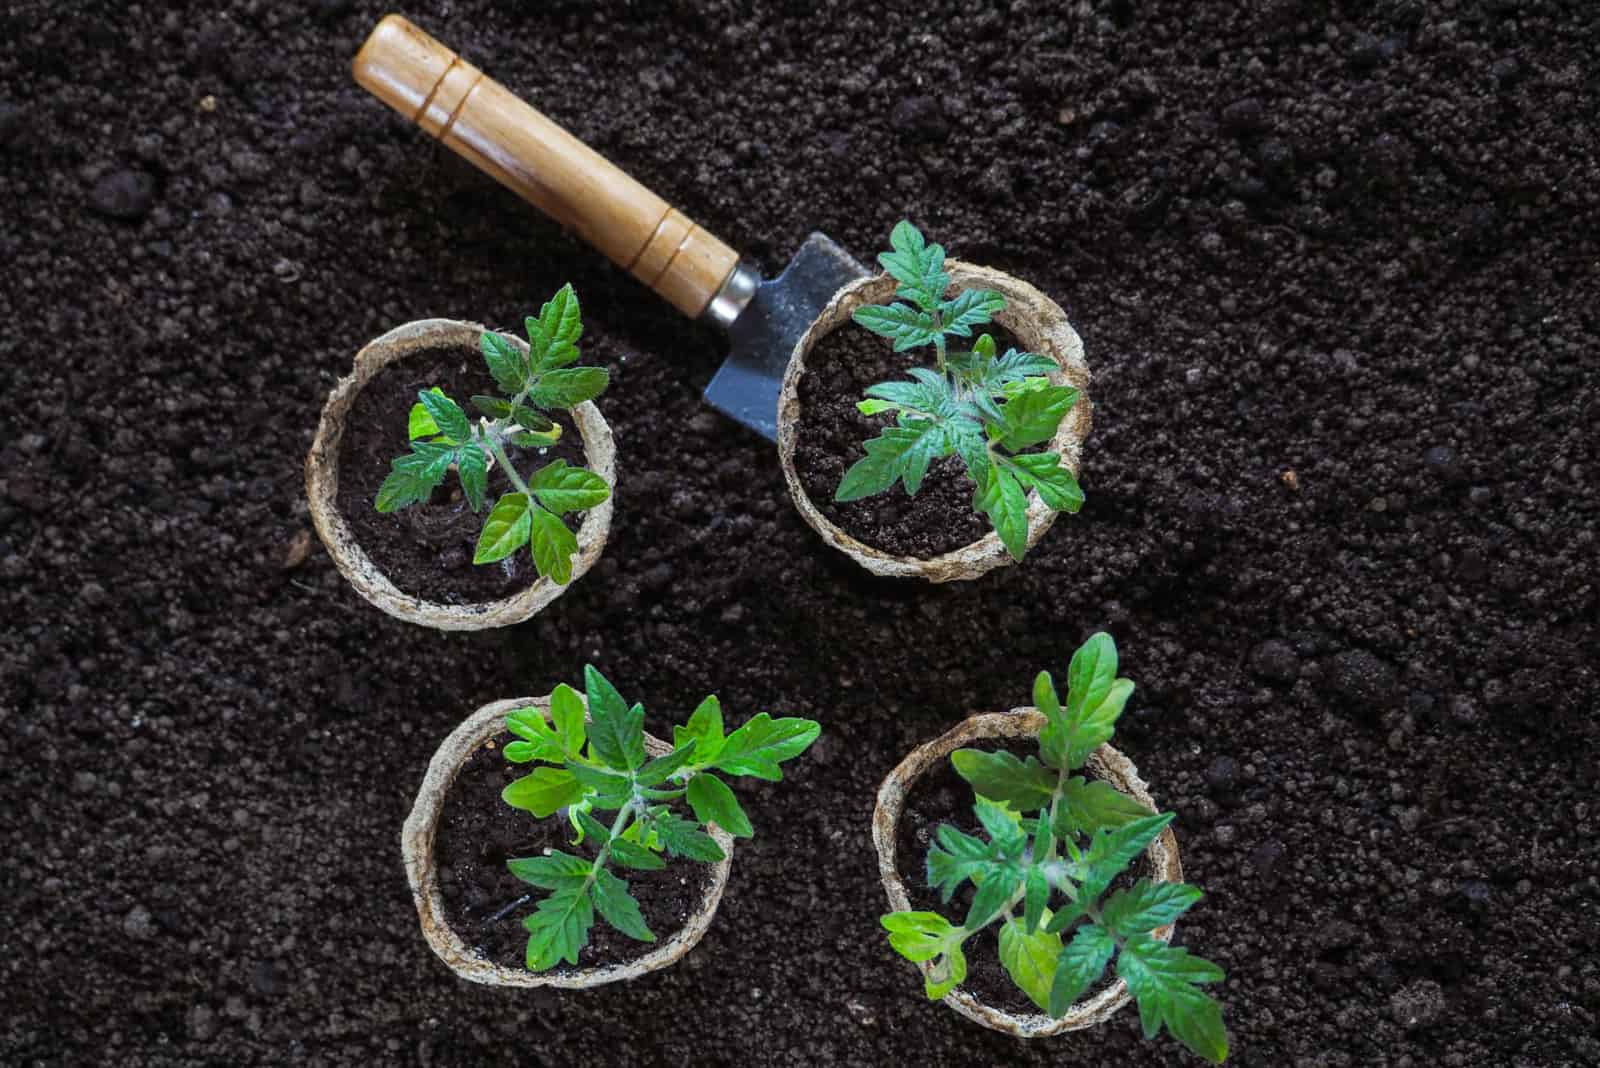
5. Appearance Of True Leaf Forms
Growth is still slow after the appearance of cotyledons, but soon the first set of true leaves will form. The young plant doesn’t have enough food, even though the early leaves can photosynthesize.
However, once the first true leaves appear, growth begins to speed up as they start producing more and more food, so you should repot them in individual containers filled with a well-draining potting mix.
You’ll be seeing the third set of true leaves before you know it.
Plant growth hormones work diligently, and the new leaves quickly develop. As they develop, the plant grows more rapidly as there’s more green surface that can photosynthesize and produce food and energy.
The first and third sets of true leaves are important because the first set of leaves starts producing food and energy on a larger scale than the cotyledons, while the third set looks like a young version of the adult leaves.
The food and energy these leaves produce can be used to develop a root system, and as it develops the plant can grow exponentially because there’s more than just a radicle to carry its weight.
As well as supporting the plant’s weight, extensive roots can also absorb more nutrients and water from the soil and contribute further to the tomato’s speedy growth.
The root system is no longer a single radicle and expands into a taproot, before a fibrous root net is formed and continues to grow.
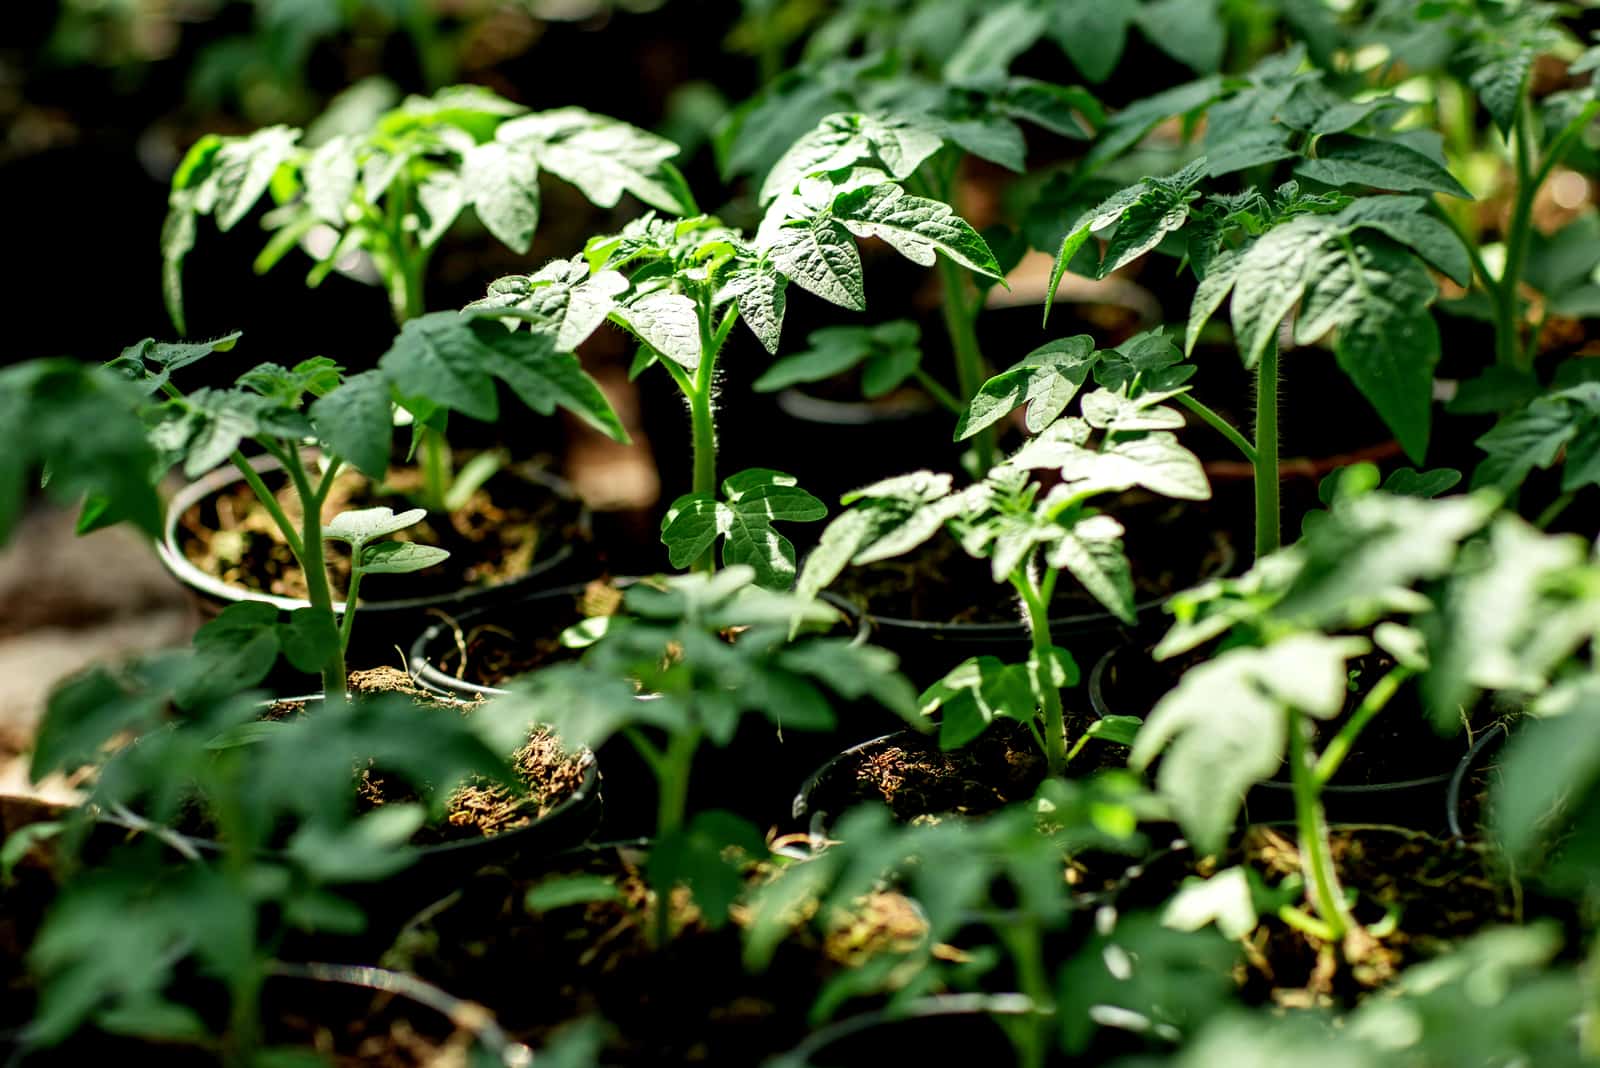
6. Vegetative Growth
Before the roots completely developed, you might not have noticed an increased growth pace. However, once the root system finishes its growth all the food and energy are distributed to plant growth and the development of leaves.
This makes it a good idea to keep your tomato plants in a sunny window and water them frequently so the soil is never completely dry.
7. Hardening The Seedlings
Once the last frost date approaches and your seedlings are about 3-4 inches (7.5-10 cm) tall, you should begin hardening off your tomato seedlings. Start the process 7-10 days before you transplant them outside.
It is important to harden the seedlings as they have a higher chance of surviving the transplant and won’t be as susceptible to breakage and sunburn.
Expose the plants to outside conditions every day, but start slowly. Take them outside to a shaded and protected area where direct sunlight won’t burn them, then take them back inside after a few hours. Raise their exposure throughout the following week and gradually introduce the plants to some direct light.
It is vital to monitor the progress of the seedlings, and if they start dropping or wilting you must move them to a protected area and give them some water.
The last test is to leave the young plants to spend the night outside. However, you’re not working against them, so ensure that the night temperature isn’t lower than 50°F (10°C).
If your plant survives the night and keeps its vigor, you can start preparing for the transplant.
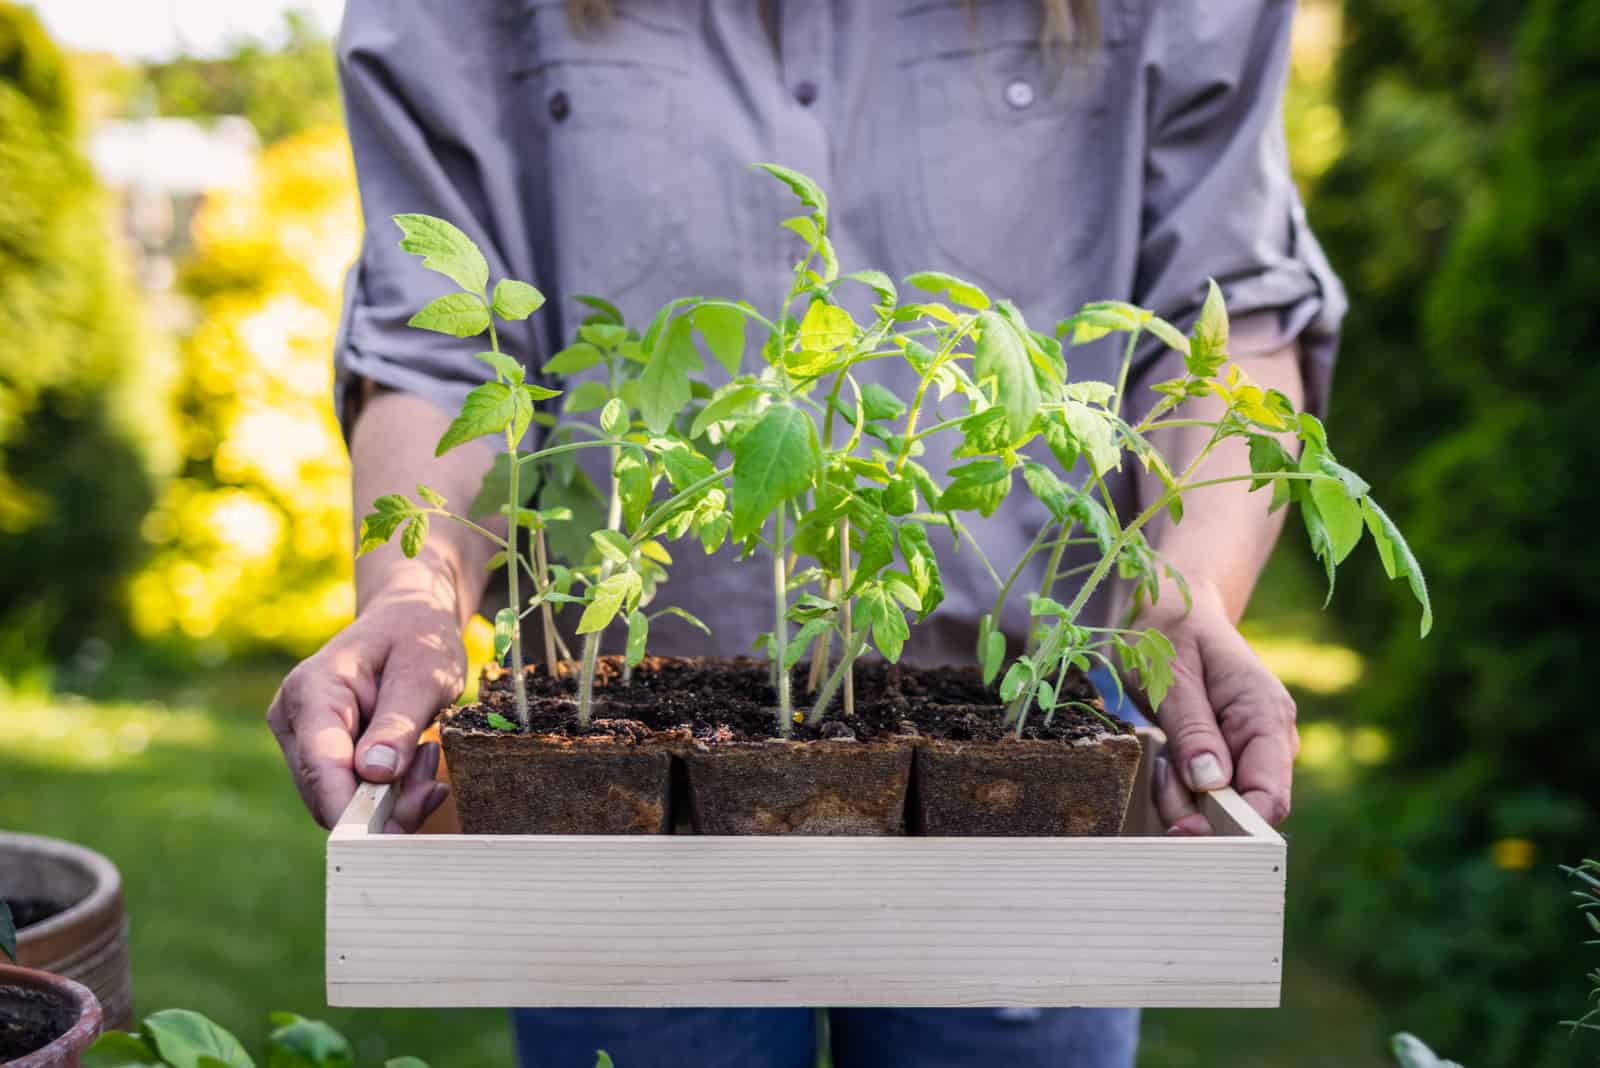
8. Transplantation Of Seedlings
If you want to grow your tomatoes outside, in a greenhouse, or a garden bed, you will eventually need to transplant them. Tomatoes can also be grown in bags; you just have to decide what size grow bag is best for your tomatoes.
The first step is to prepare the soil. Loosen up the top 8 inches (20 cm) of the soil and mix 2-3 inches (5-7.5 cm) of compost into the garden soil.
Make short mounds approximately 4 inches (10 cm) wide, dig holes deeper than the pot you kept your seedlings in, and space the tomato seedlings 30-60 inches (76-152 cm) apart.
Plant the young tomatoes, pat the soil to make it firm, and then water. Tomatoes are vining plants so you can grow them on trellises or stakes, which makes it easier to access the fruit once it starts ripening.
You can also dig a deeper hole and fill it with a fertilizer high in phosphorus, like bone meal. Then cover that hole with some soil and plant your tomatoes on top of it. The roots will soon grow into the “fertilizer trench” and use the phosphorus for better root establishment.
After a few weeks, you can apply some fish emulsion to the tomato bed surface, which is rich in nitrogen and will promote plant growth.
Finally, water your plants whenever you feel that the soil’s top two inches (5 cm) are dry. After a month or so, you can mulch your tomato garden with grass clippings or straw to inhibit weed growth and keep the soil moist.
Here’s a video to help you transplant your tomatoes:
What Happens After Transplanting Tomatoes?
Tomato growth doesn’t end after transplantation. You need to ensure they get proper care during all the other stages of the tomato life cycle to get a large yield.
This section has a detailed account of what happens after the seedling stage and how to care for your tomatoes during the subsequent phases.
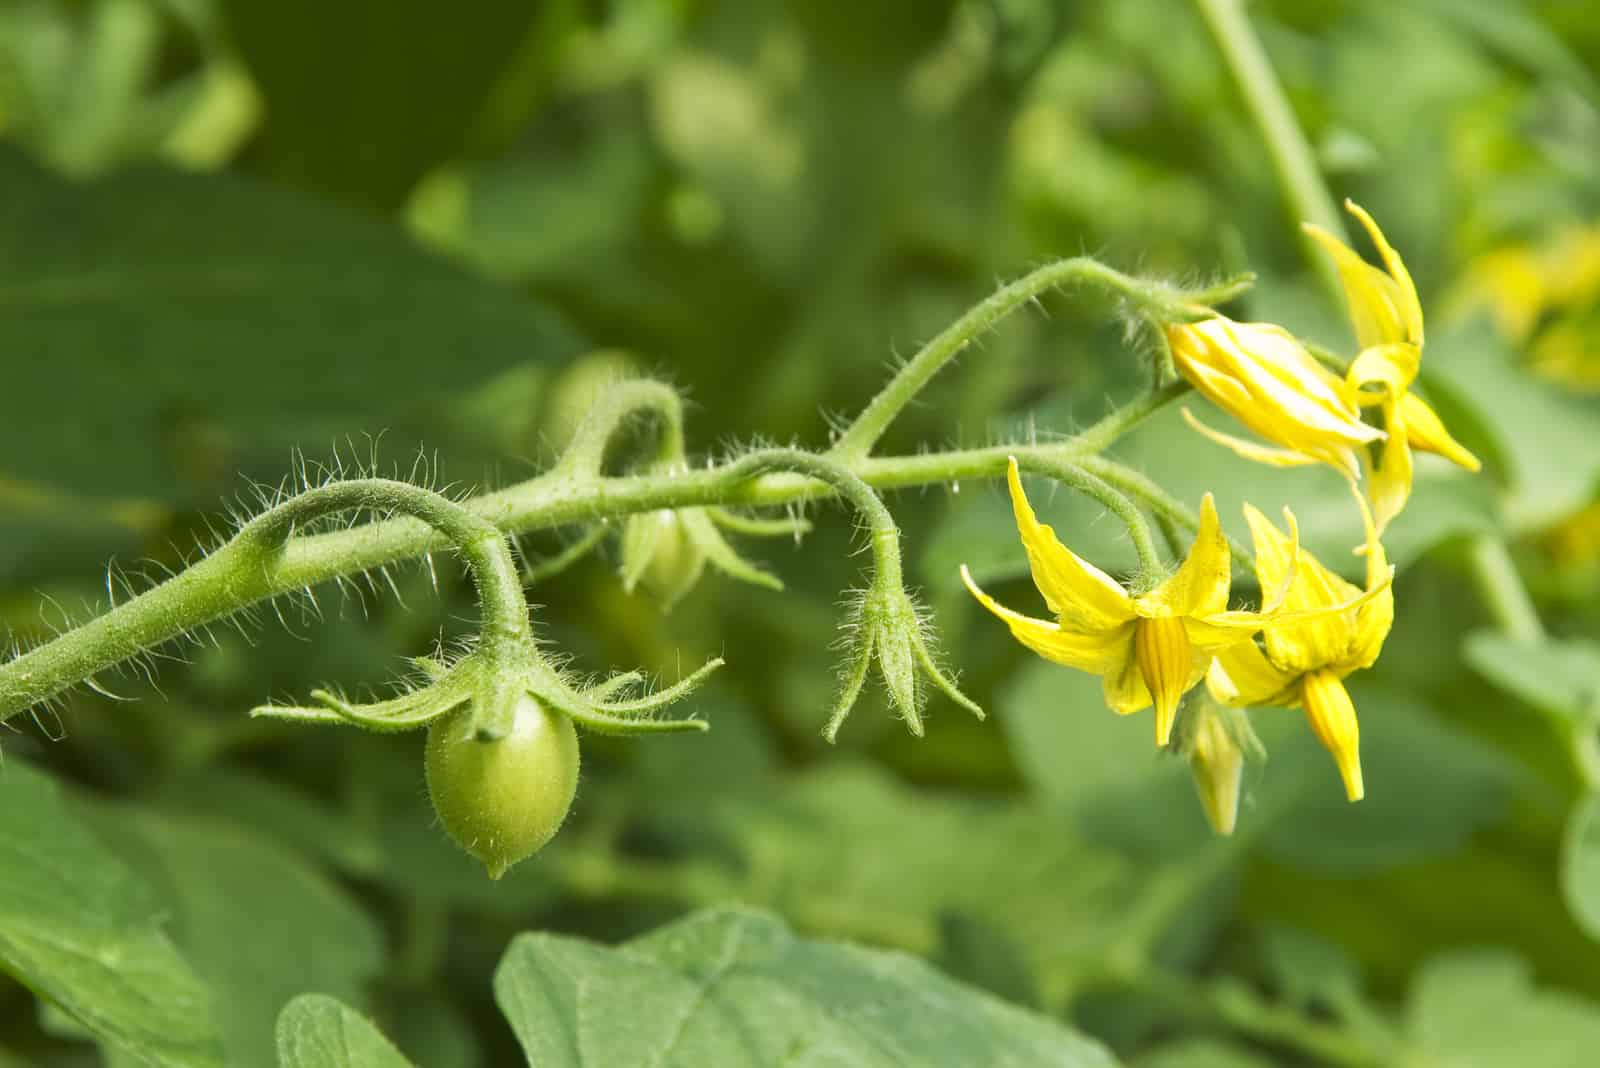
1. Flowering
The tomatoes will start growing after being transplanted, and once they have 10-13 leaves and are approximately 1-1.5 feet (30-45 cm) tall, they’ll produce side stems.
These new stems branch out, and you’ll notice tiny flower buds appearing on their tips. When these buds open, you’ll recognize the signature yellow flowers and pollination can begin.
Furthermore, tomato flowers contain both male and female parts, which means they can self-pollinate and don’t need bees or any other insect to do the job for them.
2. Fruit Production
If pollination is successful, the fruit will set and your plant enters the next stage of growth. However, this stage is difficult and your plants can easily catch blossom end rot disease, which is caused by uneven watering and a lack of calcium in the soil.
However, you can avoid it by adding some crushed eggshells or growing cultivars that can tolerate low calcium levels.
At this stage, you should also use fertilizers with less nitrogen and higher phosphorus and potassium levels to encourage the production, growth, and development of flowers and fruits.
You’ll have to wait approximately 45-70 days before your tomatoes are ready to be picked. However, it mainly depends on the weather conditions and the variety you grow. If you’ve planted an indeterminate tomato type, you should remove the side stems and branches so the sunlight can get to the main stem and encourage further fruit production.
Once the fruit starts changing color it’s almost ready for harvesting. At first, you’ll notice a few blotches of red or orange on the tomato skin, which soon spreads until the whole fruit is a shade of pink or pale orange.
However, the tomato is still not mature enough to be picked so you’ll want to wait until the color intensifies and becomes even darker before doing so.
3. Harvesting
Harvesting tomatoes is really not rocket science. Once they are ripe, simply take the fruit in one hand and gently pull it while holding the stem in your other hand so that you don’t damage the stalk.
You can also harvest tomatoes that aren’t entirely red and simply leave them inside to ripen.
One thing about tomatoes is that they contain lectins, which aren’t that healthy, so knowing how to remove lectins from tomatoes is crucial if you want to avoid stomach issues, leaky gut syndrome, and more.
Determinate varieties can only be harvested once, but indeterminate tomatoes keep ripening until frost kills the plant. This means that harvesting indeterminate tomatoes while they’re still orange can increase your overall yield so you’ll be left with more tomatoes than last year, which is a great thing.
4. Senescence
The last stage of the tomato life cycle is senescence. This stage occurs after you have harvested all the tomatoes and the plant is ready to finish its growing season.
The seeds are already inside the fruit, so there’s no need for their production. The plant can simply release growth hormones that induce senescence, and the plant slowly wilts and eventually dies.
Care Tips For Growing Tomatoes
Understanding the tomato growth cycle is quite helpful because it doesn’t require the same care at every stage. However, knowing the amount of light and water it needs, as well as what type of soil and fertilizer to use, is another crucial thing when growing tomatoes.
We mentioned some of these in the previous sections, but you can find definitive and detailed answers to all your questions about tomato care below.
Lighting
Tomatoes require full sun conditions to flourish, which means they need at least 8 hours of sunlight each day. However, that’s the bare minimum, and you should try and expose them to 12-16 hours of light every day if you want the juiciest and sweetest fruit.
You can always invest in some grow lights if your region doesn’t get this much sunlight.
Watering
Tomatoes always need plenty of moisture, but the watering needs of garden and potted tomatoes differ.
Garden tomatoes need approximately 1-2 inches (2.5-5 cm) of water every week. In contrast, potted tomatoes need more because the substrate heats faster in pots and the soil moisture evaporates more quickly.
When it comes to garden tomatoes, don’t pour the 2 inches of water all at once as that won’t have much effect. Instead, water the tomato plants slowly once a day (preferably early in the morning before the midday heat), or even twice a day if the temperatures are over the top.
Potted tomatoes, on the other hand, should be watered until you notice water draining through the bottom holes. Water them in the morning, just like the garden tomatoes, and then check the soil again in the evening. If the top 1 inch (2.5 cm) of the soil is somewhat dry, water the plant again.
Climate And Temperature
Tomatoes thrive in moderate to slightly high humidity levels and low humidity can lead to drying of the pollen, whereas high humidity can negatively influence its release.
The ideal relative humidity is between 65% and 85%, which makes this plant a great choice for a summer greenhouse.
Tomatoes also love mild temperatures, and anything between 55 and 85°F (13-29°C) is perfect. However, if the temperatures get below 50°F (10°C) or above 85°F (29°C), the plant probably won’t set fruit, and even if it does the fruit won’t change color.
Soil And Fertilizer
Tomatoes prefer mildly acidic soils with a pH level between 6.2 and 6.8. The soil should also be well-draining and loose to ensure proper air circulation, so loam and sandy loam substrates are the best options.
However, the tomato isn’t a demanding veg and will grow in almost any type of soil but heavy clay.
This red fruit vine requires plenty of nitrogen during the vegetative growth stage, but once it starts flowering you should reduce nitrogen and increase phosphorus and potassium, which aid blooming and fruiting.
Well-balanced fertilizers work like a charm, but if the soil has plenty of nitrogen you can use formulas with a higher concentration of phosphorus.
Finally, if you’re unsure about fertilizers you can always switch to alternative ways of feeding your tomatoes. Applying compost based on loam soil has proven to be a reliable source of organic content, for example.
Pruning
The last care tip we have concerns pruning. It is essential to trim your tomatoes if you want a large harvest, especially with indeterminate tomato varieties.
Removing suckers (stems between the main stem and the main leaf branch) has proven quite beneficial because the plant doesn’t have to distribute energy to as many different parts, but can divert everything to the main stem instead.
Of course, you can leave a few of these side shoots to bear fruit if you like, but not pruning them results in a smaller yield as the main stem won’t have enough energy.
Removing suckers and the bottom leaves also improves air circulation and reduces humidity, which lowers the possibility of bacterial and fungal diseases in turn.
You can start pruning your tomatoes once they flower so you can clearly distinguish between suckers and fruit-bearing stems, and continue pruning them every two weeks.
Use a sharp knife or a pair of pruning shears and cut the suckers as close to the main stem as possible.
You can watch this video if you need additional information about pruning tomatoes:
Frequently Asked Questions
Tomato plants are an inexhaustible subject, so it’s not surprising that there are still some things we haven’t covered.
In this additional section, you can find the answers to your most frequently asked question and learn more about tomato seedlings.
Why are my tomato seedlings growing slowly?
The most common cause of slow tomato growth is overwatering or underwatering. Always water the tomato seedlings when the topsoil is somewhat dry.
However, not fertilizing your plant and not giving it enough light can also slow its growth and make it leggy, so always meet your tomato’s requirements to get to harvest sooner.
How many stages are there in the life cycle of a tomato plant?
There are nine stages of the tomato life cycle: planting, seed germination, sprouting, appearance of true leaf forms, vegetative growth, flowering, fruit production, harvesting, and senescence.
What stage is a tomato seedling?
The tomato seedling stage begins with the appearance of cotyledons, which happens in the third stage of the tomato growth cycle.
Tomato seedlings develop, but remain seedlings until you transplant them and they start producing flowers. Therefore, the tomato seedling stage extends through the following stages of tomato growth: sprouting, appearance of true leaf forms, and vegetative growth.
What is the difference between a seedling and a plant?
A seedling is essentially a young plant, especially one grown for transplanting, whereas the plant is an adult organism that is established and can photosynthesize.
Plants are sturdier and hardier than seedlings, and less susceptible to stressful conditions.
To Sum Up
This article examined the tomato growth and tomato seedling stages in great detail, so you can now monitor your plant’s growth, tend to its imminent needs, and harvest it when the time comes.
We also included a care guide to help you care for your tomatoes, and have answered some of the fundamental questions about tomatoes you’ve frequently asked.
We hope you have a wonderful time planting your tomatoes.
Until next time!
Like this post? Share or pin it for later!