What Georgia Azaleas Need After They Bloom So Next Year’s Flowers Aren’t Lost
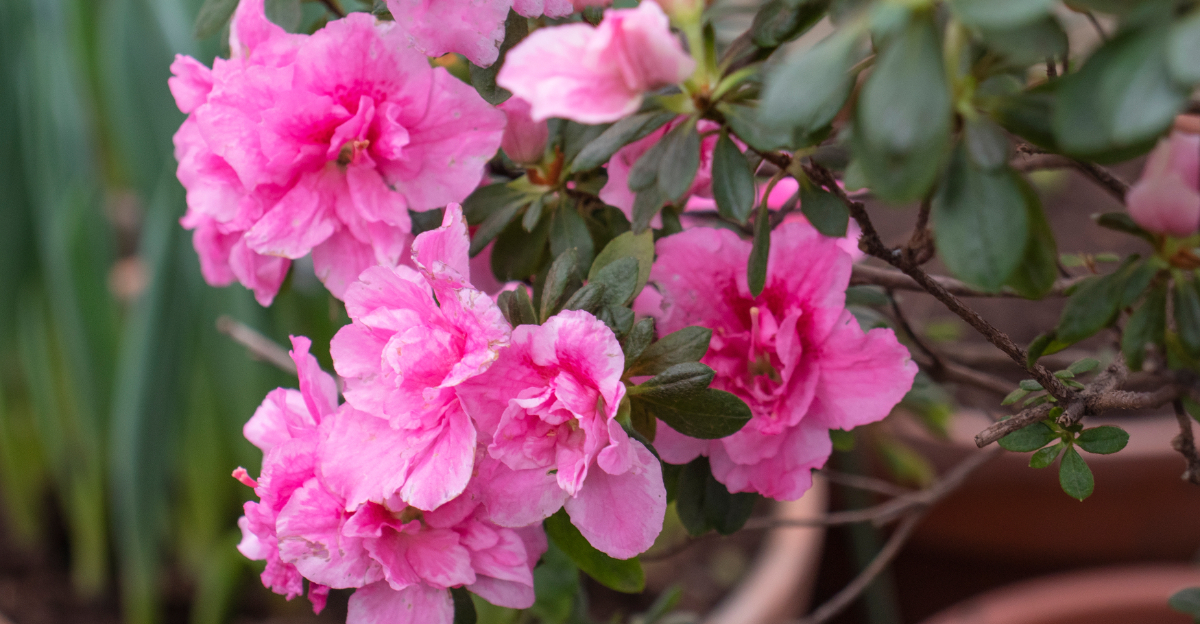
Azaleas can look completely finished once the spring flowers drop. Green leaves take over, the color disappears, and most people move on to other parts of the yard.
That quiet period matters more than it seems.
Late spring is when azaleas begin setting many of the buds that open next year. A few common habits during this stretch can leave shrubs with far fewer flowers once the next blooming season arrives.
Heavy pruning is one of the biggest problems. Extra fertilizer can also push weak growth at the wrong time.
Hot weather and dry soil create even more stress once summer starts building across Georgia.
Healthy azaleas usually keep forming buds without much trouble, but timing makes a huge difference. Small changes after blooming often decide whether shrubs stay covered in flowers next spring or barely bloom at all.
1. Cutting Back Spent Branch Tips Before Buds Start Setting

Grab your pruning shears right after the last petal drops. Waiting even a few weeks too long can mean cutting off buds that are already forming underneath the surface.
Timing really does make or break next year’s bloom count.
Azaleas set their flower buds for the following spring during summer, usually within six to eight weeks after flowering ends. Pruning during that window removes those developing buds before they ever get a chance to open.
A little patience upfront saves a lot of disappointment later.
Focus your cuts on the tips of branches that just finished blooming. Remove spent flower clusters along with about one to two inches of stem just below them.
Sharp, clean cuts reduce stress on the shrub and help it bounce back faster.
Avoid pruning more than one-third of the overall plant at once. Removing too much growth at one time can shock the root system and slow recovery through the heat of summer.
Light, targeted trimming is almost always the smarter move.
Shaping is fine at this stage, but keep it minimal. Straighten uneven branches, remove anything crossing through the center, and tidy up the outer profile without going overboard.
Overly aggressive shaping right after bloom can push the plant into survival mode rather than bud production mode.
2. Waiting Too Long To Trim Can Reduce Spring Color

Every week past the ideal pruning window is a week closer to cutting off next year’s buds. Most gardeners do not realize the damage is already done until spring arrives and the blooms are thin or missing entirely.
By then, there is nothing left to fix.
Azalea flower buds form on wood that grew during the current season. If you prune after those buds set, you remove them along with the branches.
The plant will survive just fine, but blooming potential takes a serious hit for the following year.
A good rule of thumb is to finish all pruning no later than mid-July across most of the Southeast. That window gives the plant enough time to push new growth and set buds before cooler temperatures slow things down.
Your Georgia Garden Changes Every Week. Your Plan Should Too.
Gardening in Georgia changes quickly throughout the season. Every Friday you’ll receive a simple weekly plan showing exactly what to plant, prune, fertilize, harvest, and protect so you never miss the right timing.
Earlier is almost always better than later.
Some gardeners skip pruning entirely to avoid the risk. That approach works short-term, but dense, unpruned shrubs tend to develop airflow problems and weak interior branches over time.
A yearly light trim keeps the structure balanced and healthy.
Watch for the tiny swelling nodes that appear along stems after bloom. Those are early signs that bud development has already started.
Once you spot them, put the pruning shears away for the season.
3. Deep Soaking During Dry Weather Supports Stronger Growth

Shallow watering does almost nothing useful for azaleas. Roots need moisture to reach down into the soil, not just sit at the surface.
Light daily sprinkles actually encourage roots to stay shallow, which makes the plant weaker during dry stretches.
After bloom, azaleas are actively pushing new growth and beginning bud formation. Both processes demand consistent moisture.
A dry spell during this phase can slow development enough to noticeably reduce the following spring’s flower count.
Deep soaking means letting water penetrate six to eight inches into the root zone. Running a slow trickle at the base of the shrub for thirty to forty-five minutes works well.
Checking soil moisture with your finger after watering tells you whether enough water actually reached the roots.
Sandy soils drain fast and may need more frequent watering than clay-heavy ground. Knowing your soil type helps you build a smarter watering schedule.
There is no universal answer that fits every yard.
Morning watering is preferable to evening. Wet foliage overnight creates conditions where fungal issues can develop more easily.
Keeping water directed at the base rather than sprayed over the leaves reduces that risk significantly.
4. Pine Bark Mulch Helps Roots Stay Cooler In Summer

Azalea roots are surprisingly shallow and sensitive to heat. When soil temperatures climb during summer, those roots struggle to absorb water and nutrients efficiently.
A good layer of mulch acts like insulation between the roots and the brutal afternoon sun.
Pine bark mulch is a natural fit for azaleas because it breaks down slowly and adds mild acidity to the soil as it decomposes. Azaleas prefer slightly acidic conditions, typically a pH between 4.5 and 6.0.
Pine bark supports that environment without requiring extra amendments in most cases.
Apply a two to three inch layer around the base of each shrub, keeping mulch pulled back a few inches from the main stem. Piling mulch directly against the bark traps moisture and can lead to rot over time.
A small gap between the mulch and the stem is all it takes to avoid that problem.
Refresh the mulch layer once a year, usually in late spring after the blooms finish. Old mulch compacts over time and loses its insulating ability.
Adding a fresh top layer restores both the appearance and the practical benefits quickly.
Pine straw is another commonly used option across the South, and it works reasonably well. However, pine bark tends to stay in place better during heavy rain events and breaks down more slowly.
5. Lace Bug Damage Often Starts Under The Leaves

Flip a leaf over. If the underside looks speckled with tiny dark dots and the top surface appears bleached or silvery, lace bugs have already moved in.
Most people never look under the leaves until the damage is obvious from a distance, and by then the population has grown considerably.
Azalea lace bugs feed by piercing leaf tissue and drawing out the cell contents. Each feeding point leaves a tiny pale mark.
Multiply that by hundreds of insects feeding repeatedly and entire shrubs can look washed out and stressed within a few weeks.
Lace bugs tend to be most active during hot, dry weather. Plants already under heat or drought stress tend to show more severe damage than well-watered, mulched shrubs.
Keeping the plant healthy reduces vulnerability but does not eliminate the risk entirely.
Check the undersides of leaves every couple of weeks from late spring through summer. Catching an infestation early when populations are still small gives you far more options.
A strong spray of water from a hose can knock off and disrupt early-stage populations without any chemical involvement.
Insecticidal soap or neem oil applied directly to the undersides of leaves works well for moderate infestations. Coverage matters more than quantity.
Missing the undersides while spraying the tops wastes product and accomplishes very little.
6. Heavy Fertilizer Applications Can Trigger Weak New Growth

More fertilizer does not mean more flowers. Overfeeding azaleas after bloom pushes a flush of fast, soft new growth that looks lush but performs poorly.
That kind of growth is more vulnerable to heat stress, fungal issues, and insect pressure than growth that develops at a normal pace.
Azaleas are not heavy feeders compared to many other landscape shrubs. A single application of a balanced, slow-release fertilizer formulated for acid-loving plants right after bloom is typically enough for the entire season.
Repeating applications through summer rarely adds benefit and often creates problems.
High-nitrogen fertilizers are the most common culprit behind weak, floppy new growth. Nitrogen drives leafy growth fast, but without adequate phosphorus and potassium to balance it, that growth lacks structural strength.
Read fertilizer labels carefully before purchasing and applying.
Granular slow-release products are generally safer than liquid fertilizers for azaleas. Liquid fertilizers deliver nutrients quickly, which can overwhelm the root system if applied too generously.
Granular formulas release nutrients gradually as the plant needs them, reducing the chance of overfeeding.
Always water thoroughly after applying granular fertilizer. Dry granules sitting on the soil surface without moisture can burn surface roots if they stay concentrated in one spot.
Watering moves the nutrients down into the root zone where they are actually useful.
7. Thinning Dense Branches Improves Airflow Around Shrubs

A packed, tangled interior is one of the most overlooked problems in mature azalea shrubs. When branches cross and crowd each other, air stops moving freely through the plant.
Stagnant, humid conditions inside a dense canopy create the exact environment where fungal problems take hold.
Thinning is different from shaping. Shaping trims the outer profile of the plant.
Thinning removes specific branches from the interior to open up the structure and let light and air reach the center. Both practices are useful, but thinning is the one most gardeners skip.
Start by identifying branches that cross through the middle of the plant or rub against other stems. Remove those first.
Next, look for stems that are noticeably weaker or thinner than the surrounding growth and remove those as well. You are not trying to make the shrub look sparse, just breathable.
Old, woody stems that no longer produce much foliage can be removed at the base. Removing one or two of the oldest stems each year gradually refreshes the plant’s framework without causing major disruption.
Consistent light thinning over several seasons is far gentler than a single heavy cutback.
Good airflow also reduces the conditions that attract spider mites and certain fungal pathogens. Plants that dry out quickly after rain or irrigation stay healthier across the board.