Why More Arizona Gardeners Are Switching To Ollas For Watering
Some gardening jobs never seem to end. You water one day, the soil looks dry again the next, and the whole routine starts over.
It can be frustrating to spend so much time with a hose or watering can and still wonder if your plants are getting what they need. When summer heat settles in, keeping everything alive can start feeling like a full-time job.
That is often the point when gardeners begin looking for a better way. Not a bigger sprinkler or another expensive gadget, but something simple that actually works.
Sometimes the best ideas are the ones that have been around for generations and quietly find their way back into modern gardens.
More gardeners in Arizona are giving ollas a try because they offer a different approach to watering. Their growing popularity is not just about using less water.
They can also help keep moisture where plants need it most, making summer gardening a little easier.
1. Ollas Send Water Straight To Plant Roots
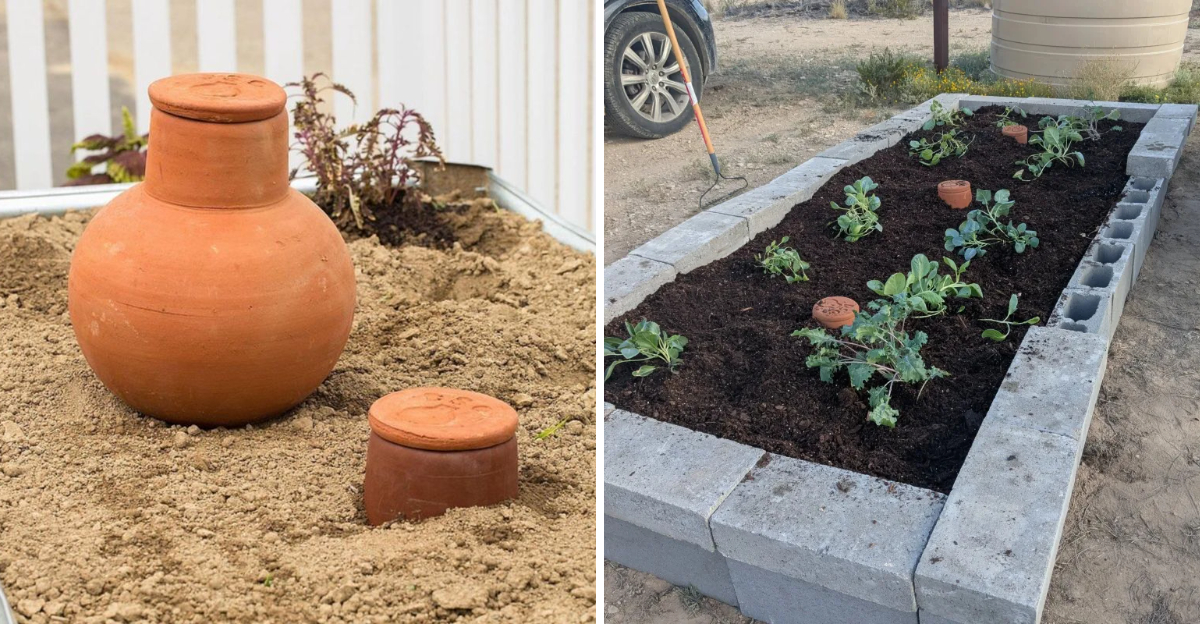
Forget surface watering. Ollas skip the topsoil entirely and deliver moisture exactly where plants need it most.
When water sits on top of dry desert soil, much of it evaporates before roots ever reach it. Buried clay pots work differently.
Water seeps slowly through the porous walls and moves outward into the surrounding soil at a pace plants can actually absorb.
Root systems naturally grow toward the moisture. Over time, they press right up against the clay surface and pull water in steadily.
No puddles, no runoff, no waste.
Surface watering also encourages shallow root growth. Roots chase water upward instead of reaching deeper into the soil.
Ollas pull roots downward, which makes plants more stable and better able to handle heat stress.
Drip systems deliver water near roots, but ollas go one step further. Moisture spreads in all directions from a buried pot, creating a full zone of hydration rather than a narrow line.
For dense plantings like raised beds, that kind of even coverage is hard to beat.
Gardeners who make the switch often notice stronger, more resilient plants within just a few weeks.
2. Choose The Right Size For Each Garden Bed
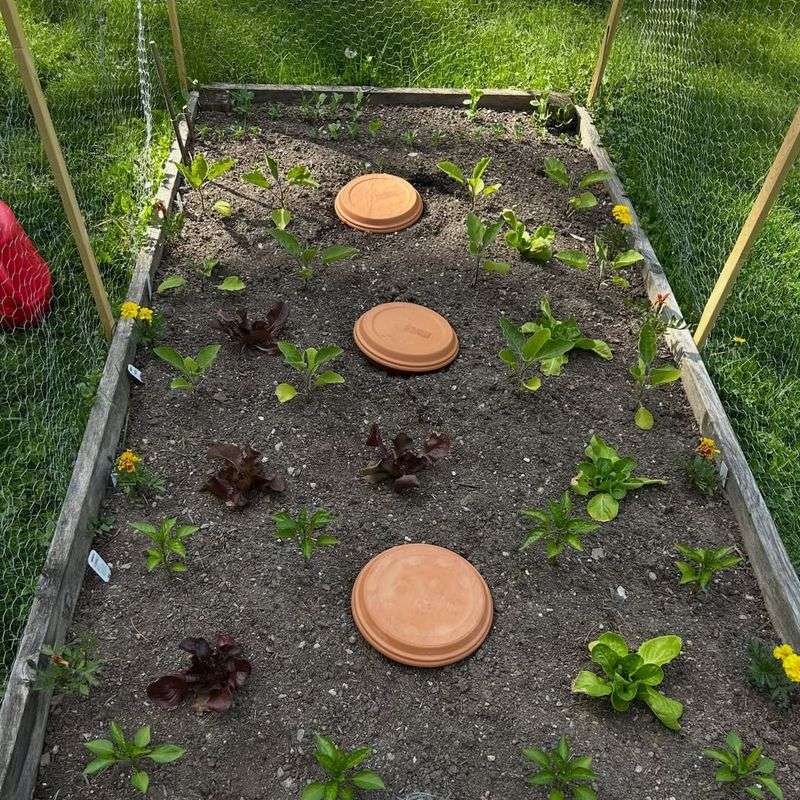
Size matters more than most people expect when picking an olla. A pot that is too small will need constant refilling.
One that is too large can waterlog roots in compact soil.
Small ollas holding around half a gallon work well for containers or tight raised beds. Medium sizes between one and two gallons suit most standard vegetable rows.
Larger pots work best in wide open beds with deep-rooted crops like squash or tomatoes.
Spacing between plants also affects which size you need. Wider plant spacing means each olla has to cover more ground.
In that case, go larger rather than relying on more pots.
Soil type plays a role too. Sandy desert soil drains quickly, so a larger olla helps maintain moisture longer between refills.
Clay-heavy soil holds water better, which means a smaller pot may be enough to keep roots satisfied.
Your Arizona Garden Changes Every Week. Your Plan Should Too.
Gardening in Arizona changes quickly throughout the season. Every Friday you’ll receive a simple weekly plan showing exactly what to plant, prune, fertilize, harvest, and protect so you never miss the right timing.
A good rule of thumb is to match pot volume to the number of plants it will serve. One medium olla can typically support two to four plants depending on their water needs and how close together they are planted.
Buying a mix of sizes gives you flexibility across different parts of the garden. Start with a few of each and pay attention to how quickly each one empties.
That feedback will guide every purchase after that.
3. Bury Them So Only The Neck Stays Above Ground
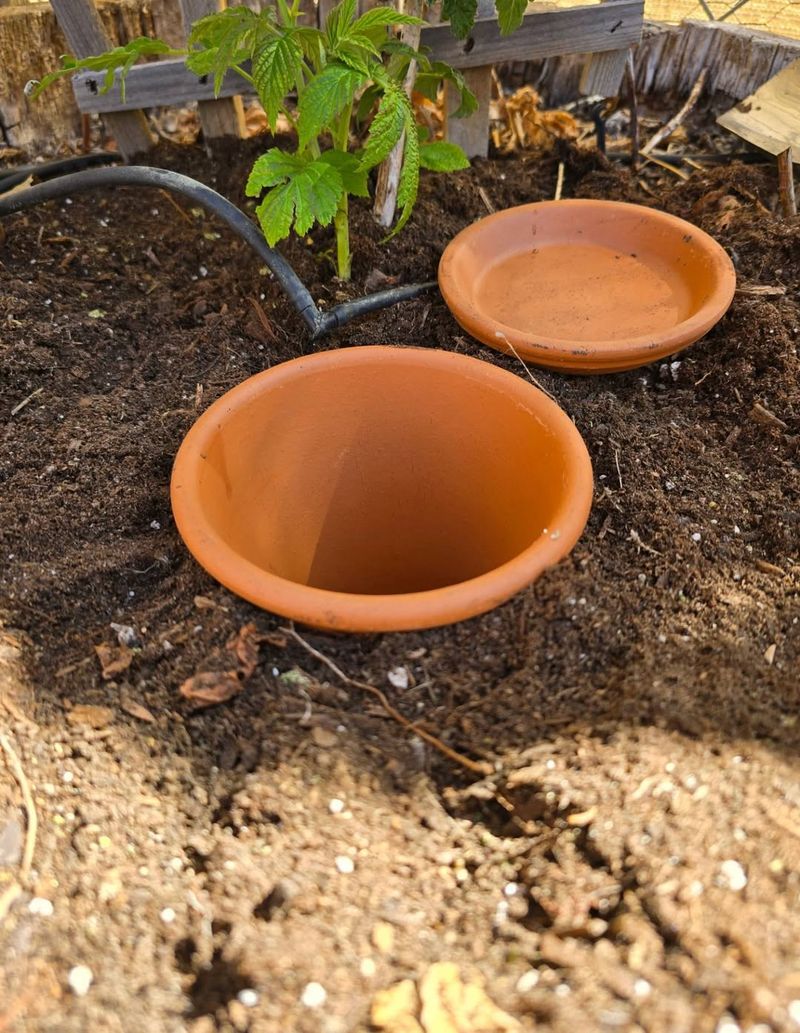
Getting the depth right is one of the most overlooked parts of using ollas. Too shallow and the water zone stays near the surface.
Too deep and the moisture may never reach the root zone effectively.
Most ollas should be buried so the widest part of the pot sits at or just below the level where roots are most active. For vegetables, that is usually between four and eight inches down.
Deeper is not always better.
Leaving only the neck above ground serves two purposes. It makes refilling easy and it prevents soil from falling into the pot.
A neck that sits flush with the soil surface is easier to find and harder to trip over.
Dig the hole slightly wider than the pot itself. Packing soil too tightly against the clay can slow the seepage process.
Loose, settled soil around the olla allows moisture to spread naturally in all directions.
In raised beds, burying depth is easier to control. You know exactly how deep your growing medium goes, which takes the guesswork out of placement.
Ground-level desert garden beds may require more digging depending on how hard the caliche layer sits.
Once planted, press the soil gently around the neck. A snug fit at the top keeps debris out and makes the whole setup look tidy.
Consistent depth across your garden also helps you water more evenly.
4. Refill Them Before They Run Completely Dry
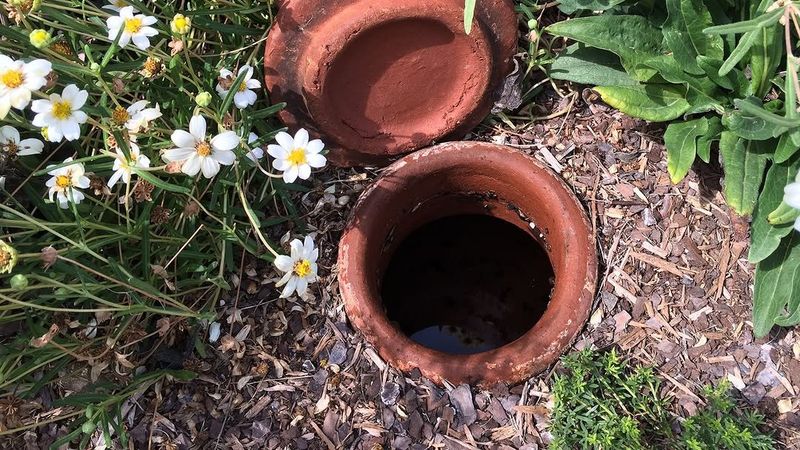
An empty olla does not help anyone. Once the pot runs dry, the surrounding soil loses its moisture buffer and roots feel the stress quickly in hot weather.
Check your ollas every two to three days during peak summer heat. Temperatures above 105 degrees Fahrenheit speed up soil evaporation and increase plant water demand at the same time.
What lasted four days in spring may only last two in July.
A simple way to check water level is to press a finger into the soil near the pot neck. Dry soil within an inch of the surface is a good sign the olla is running low.
You can also use a thin stick to probe the pot opening and check depth.
Refilling before the pot empties completely keeps the clay walls moist and seeping. Dry clay can temporarily lose its seepage rate until it rehydrates, which creates an uneven watering cycle.
Consistent refills prevent that lag.
Early morning is the best time to refill. Cooler temperatures mean less evaporation from the neck opening during the fill process.
It also gives plants a full day of steady moisture during the hottest hours.
Keeping a simple watering log helps during busy weeks. Note how long each olla lasts under different temperatures and you will quickly spot patterns that make your schedule easier to manage.
5. Space Them To Match Your Planting Layout
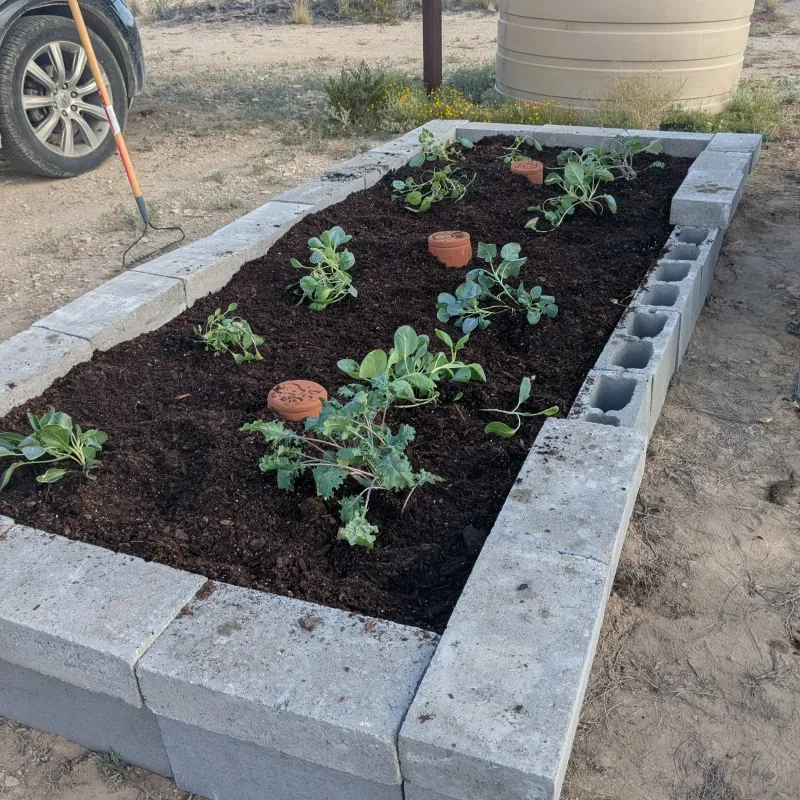
Randomly placing ollas without a plan leads to dry pockets and overwatered spots. A little layout thinking upfront saves a lot of frustration later in the season.
Each olla has a moisture radius. For a standard one-gallon pot, that radius extends roughly twelve to eighteen inches in loose soil.
Knowing that number helps you map out spacing before you plant anything.
Place one olla between every two to three plants in a row. For block-style planting, position each pot so it sits at the center point of four surrounding plants.
Draw a quick sketch of your bed before digging to make sure coverage overlaps slightly.
Avoid placing ollas too close to the edge of raised beds. Moisture can seep through the sides of the bed rather than reaching the root zone.
Keeping pots at least eight inches from the wall retains more water where it belongs.
Crop type also affects spacing decisions. Heavy drinkers like cucumbers and peppers need ollas placed closer together.
Drought-tolerant plants like herbs can manage with wider spacing and fewer pots overall.
Hot desert summers leave little room for error. A well-spaced olla layout means every plant in your garden stays within reach of steady moisture even on the most punishing afternoons.
Revisit your spacing plan each season as your planting layout changes and your experience with ollas grows.
6. Cover The Opening To Slow Evaporation
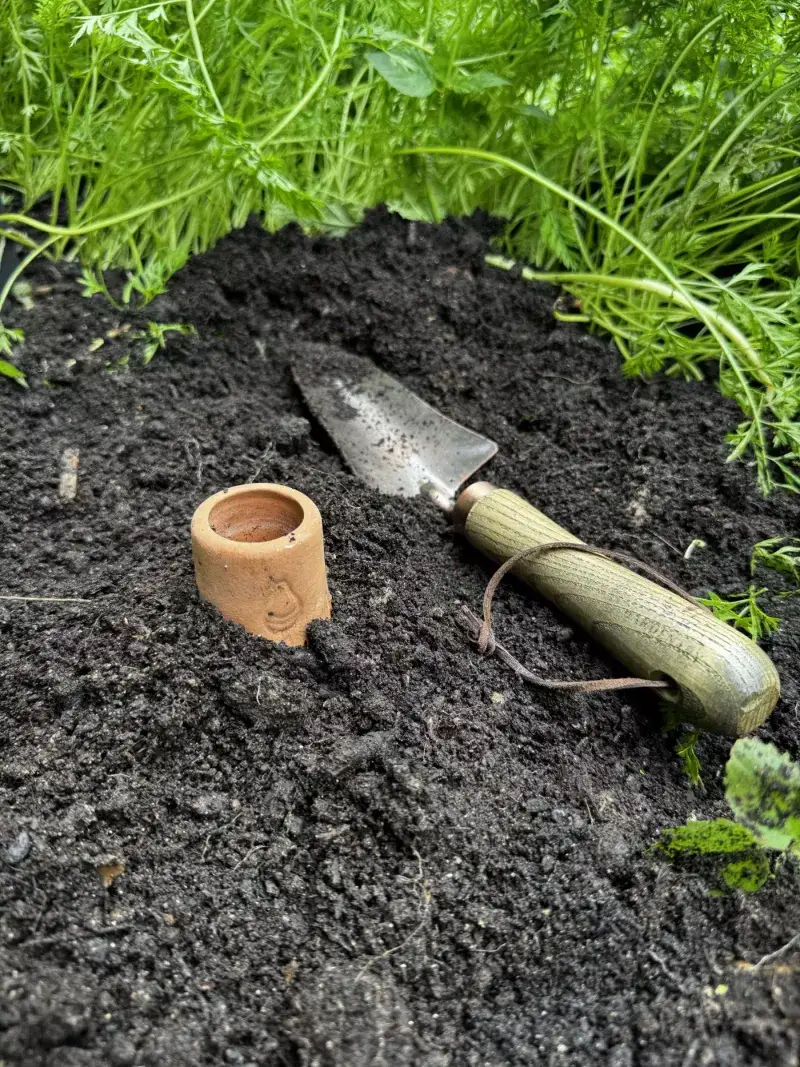
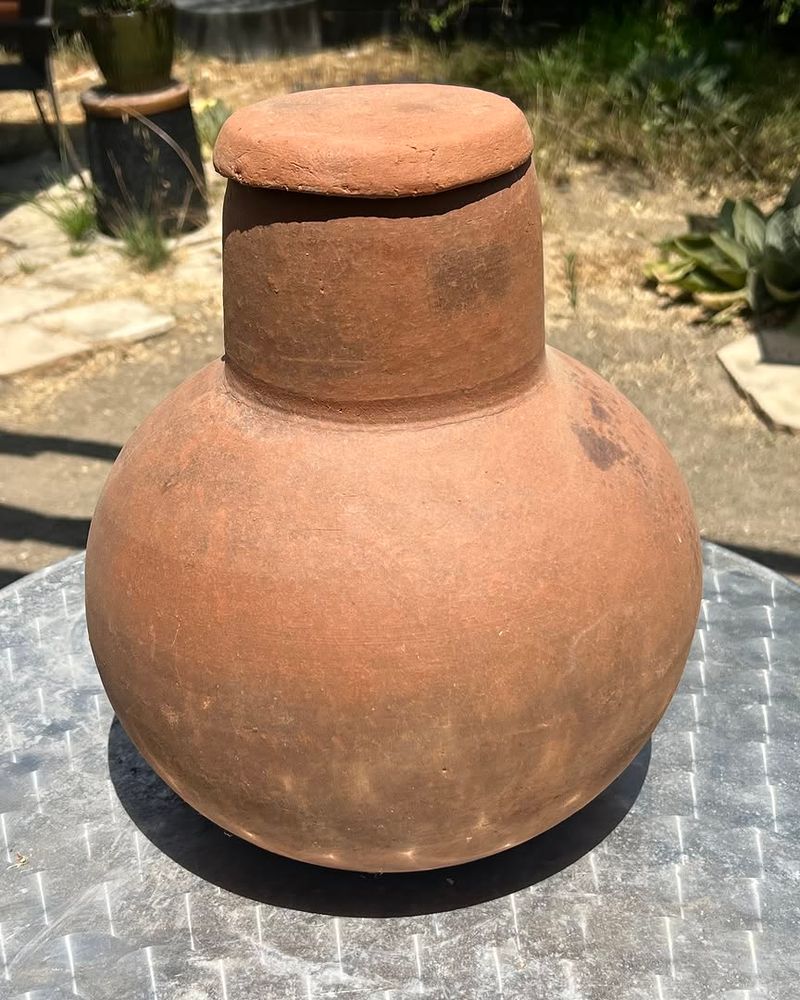
An open olla neck is an invitation for evaporation. In the blazing heat of a Southwest summer, an uncovered opening can lose a surprising amount of water before it ever reaches the soil.
A simple clay saucer placed over the neck does the job well. Flat stones, broken pot shards, or custom-fitted caps work just as effectively.
The goal is to block direct sun and air movement from reaching the water surface inside the pot.
Covering the opening also keeps out debris, insects, and soil. Ants are especially drawn to water sources in dry conditions.
A tight-fitting cover discourages them from setting up camp inside your olla.
Mosquitoes can breed in standing water. A covered olla eliminates that concern entirely since the opening stays sealed between refills.
Backyard gardeners with kids around appreciate that extra layer of safety.
Some gardeners use a dab of clay or waterproof sealant around the rim to create a more secure fit. That approach works well in areas with strong afternoon winds that can knock lightweight covers off.
Dark-colored covers absorb heat and can slightly warm the water inside, which may speed up seepage on cool days. Light-colored or reflective covers keep water temperature lower during peak heat hours.
Experimenting with both helps you find what works best in your specific garden setup.
7. Clean Them Regularly To Prevent Mineral Buildup
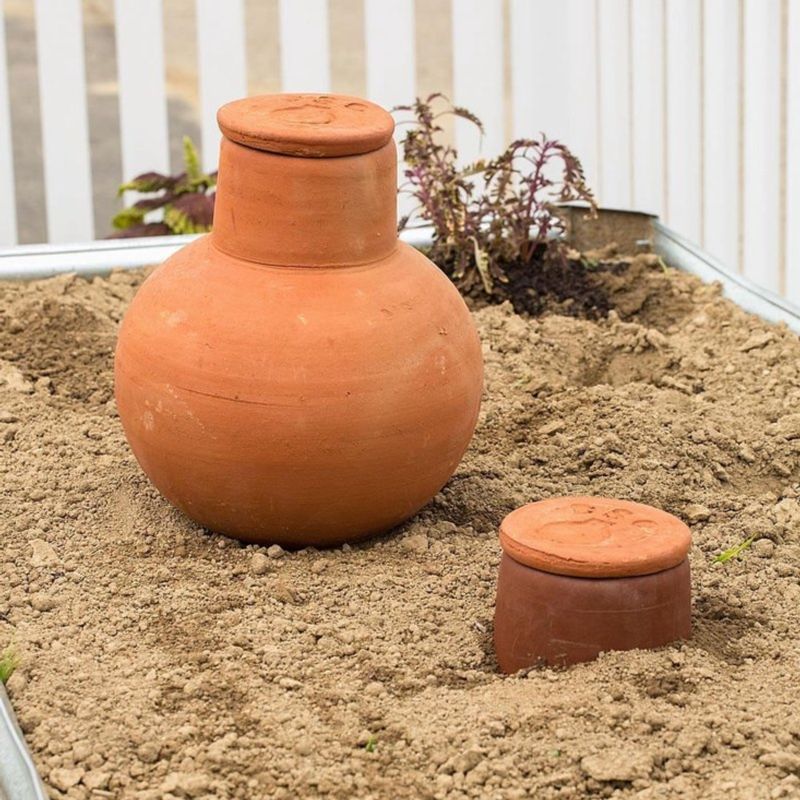
Hard water is a real issue across much of the desert Southwest. Over time, mineral deposits from calcium and magnesium build up inside olla walls and slow down the seepage rate significantly.
A pot that once sweated moisture freely can start to feel almost sealed after a full growing season of use. Running your finger along the inside wall and feeling a chalky white crust is a clear sign it is time to clean.
Pull ollas from the ground at the end of each season. Scrub the inside and outside with a stiff brush and plain water.
Avoid soap or chemical cleaners since residue can leach into soil and affect plant health.
A soak in a mixture of one part white vinegar to four parts water works well for stubborn mineral deposits. Let the pot sit submerged for several hours, then scrub again.
Rinse thoroughly before replanting.
Inspect the clay surface for hairline cracks during cleaning. Small cracks can expand under freeze-thaw cycles in winter.
Catching them early lets you decide whether to repair or replace before the next planting season begins.
Storing ollas out of direct sun during off-season months helps preserve the clay. Extreme heat followed by dry storage can cause micro-fractures over time.
A shaded garage or covered patio keeps them in better shape for years of reliable use.