Why Your New Jersey Banana Plant Has Black Spots And How To Save It
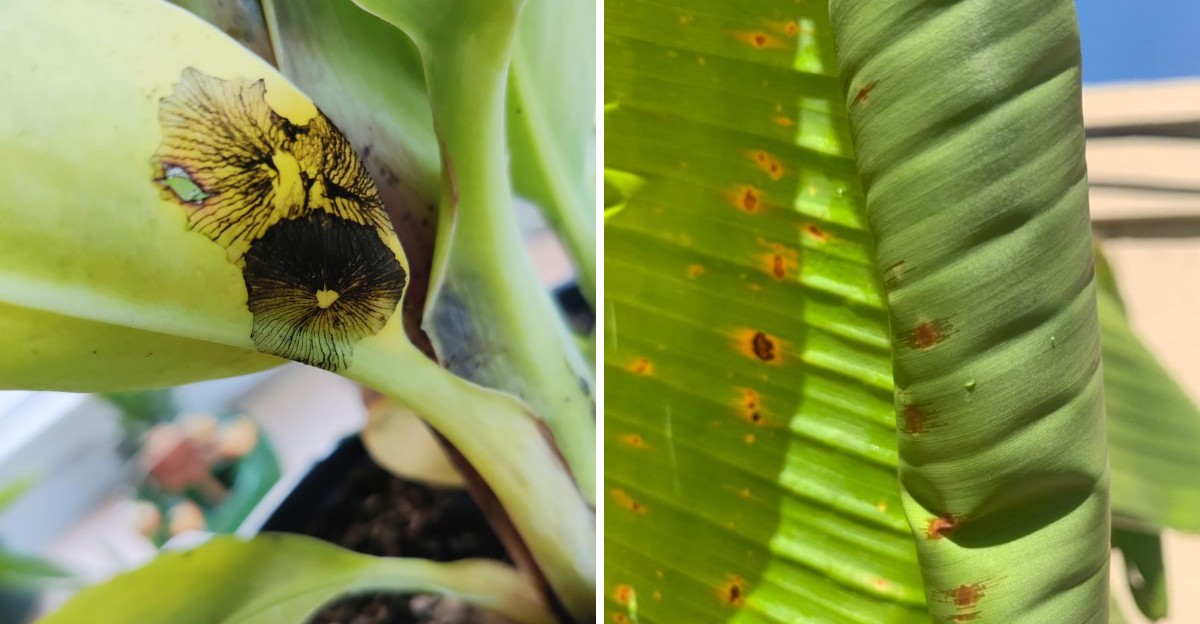
Dark patches just covered the giant leaves you bragged about all summer. New Jersey frost explains some of it, yet you face several other triggers.
Cold snaps, soggy soil, and microscopic spores leave distinct fingerprints on foliage. Guesswork misreads those marks, but you can decode them in minutes.
Fungal spots wear yellow halos and spread through damp, crowded plantings. Nutrient gaps stripe leaves yellow and darken the edges in older growth.
Frosty nights turn tissue glossy, then soft, within hours. Sorting these triggers takes only a magnifier and a fingernail.
You join New Jersey growers who revive tropical showpieces each autumn. Healthy corms still rest beneath your soil, ready for a comeback.
Treat the wrong trigger, and you lose valuable growing weeks before winter arrives. Spot the halo, the stripe, or the glossy patch, and your next move becomes obvious.
1. Chilly Nights Damage The Leaves
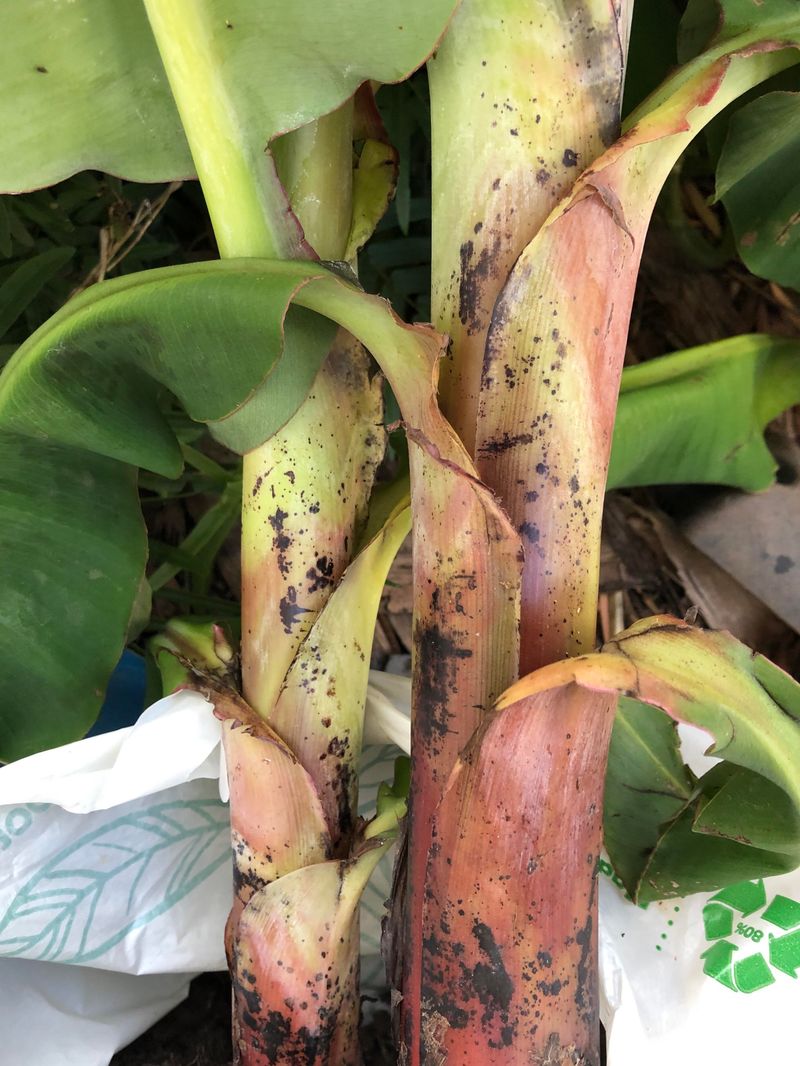
Picture wearing flip-flops to a New Jersey football game in late October. Your toes would protest, and your leafy friend feels much the same way.
Many banana plants come from warm tropical regions where nights stay mild all year. Once temperatures dip below about 50 degrees, the leaf cells start to sustain damage.
Gardeners call this chilling injury, and it shows up fast. Dark or water-soaked patches appear on the leaves, often within a day or two.
In northern and central Jersey, October nights can drop into the upper 30s or low 40s, and the first frost often arrives by mid to late October. Even the shore towns get surprise cold snaps that sneak in after sunset.
Frost causes more severe damage, turning whole leaves glossy, then dark and soft, overnight. However, chilly air alone can cause visible spotting.
Look closely at where the damage appears first. Cold injury usually hits the most exposed leaves, especially the top ones facing open sky.
Check your local forecast each evening during fall. The National Weather Service posts forecasts and alerts when lows reach the 40s.
Damaged leaves will not turn green again, sadly. Luckily, the underground stem, called a corm, usually survives if the soil does not freeze.
Think of the spotted leaves as a weather diary your plant kept for you. They hint at how cold your yard got last week.
So, if spots popped up right after a chilly night, cold is a likely cause. Cover the plant on cold nights and check the care steps below.
2. Soggy Soil Can Rot The Roots
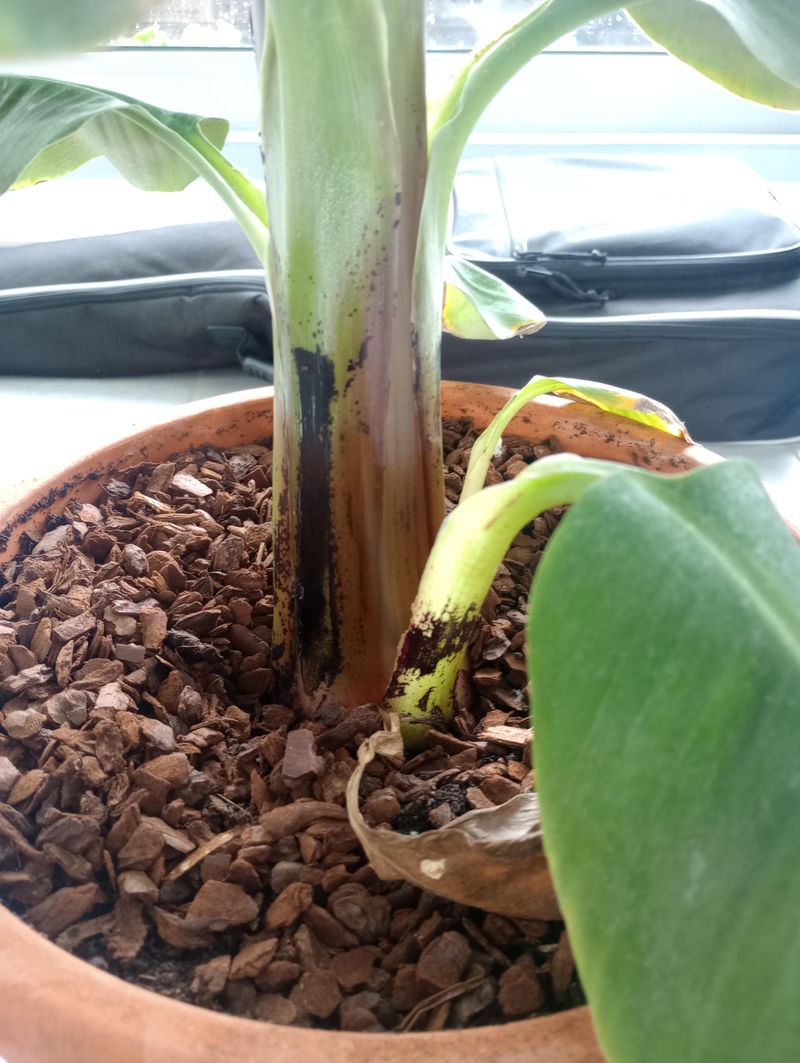
Too much water is an easy-to-miss problem. Soggy soil can contribute to dark spots, and it often causes yellowing and drooping too.
Roots need air just as much as they need moisture. When soil stays wet for days, tiny air pockets fill with water and roots lose oxygen.
Stressed roots can start to rot, turning brown and soft instead of firm and white. Then they cannot send water and food up to the leaves.
Leaves respond by developing black or brown patches, often near the edges first. Sometimes the base of the stem feels soft or smells sour too.
Your New Jersey Garden Changes Every Week. Your Plan Should Too.
Gardening in New Jersey changes quickly throughout the season. Every Friday you’ll receive a simple weekly plan showing exactly what to plant, prune, fertilize, harvest, and protect so you never miss the right timing.
Fall can increase this risk in New Jersey. Cooler days mean the plant drinks less, yet many gardeners keep watering like it is August.
Rainy autumn weeks add even more moisture to the mix. Heavy clay soil, common across parts of Jersey, holds water like a sponge. Want a quick test? Push your finger two inches into the soil and feel for dampness.
If it feels wet or cold and muddy, skip watering for now. Potted plants should drain freely, with water running out the bottom holes.
Lift the pot gently and notice its weight. A heavy, waterlogged pot is a clear warning sign that roots are sitting in a puddle.
Gently tip a potted plant out and peek at the roots if spots keep spreading. Trim any soft, discolored roots with clean scissors, then repot in fresh, airy mix.
Your plant will thank you with healthier growth next season. Think of it as letting your plant finally take a deep breath.
3. Fungal Spores Speckle The Leaves
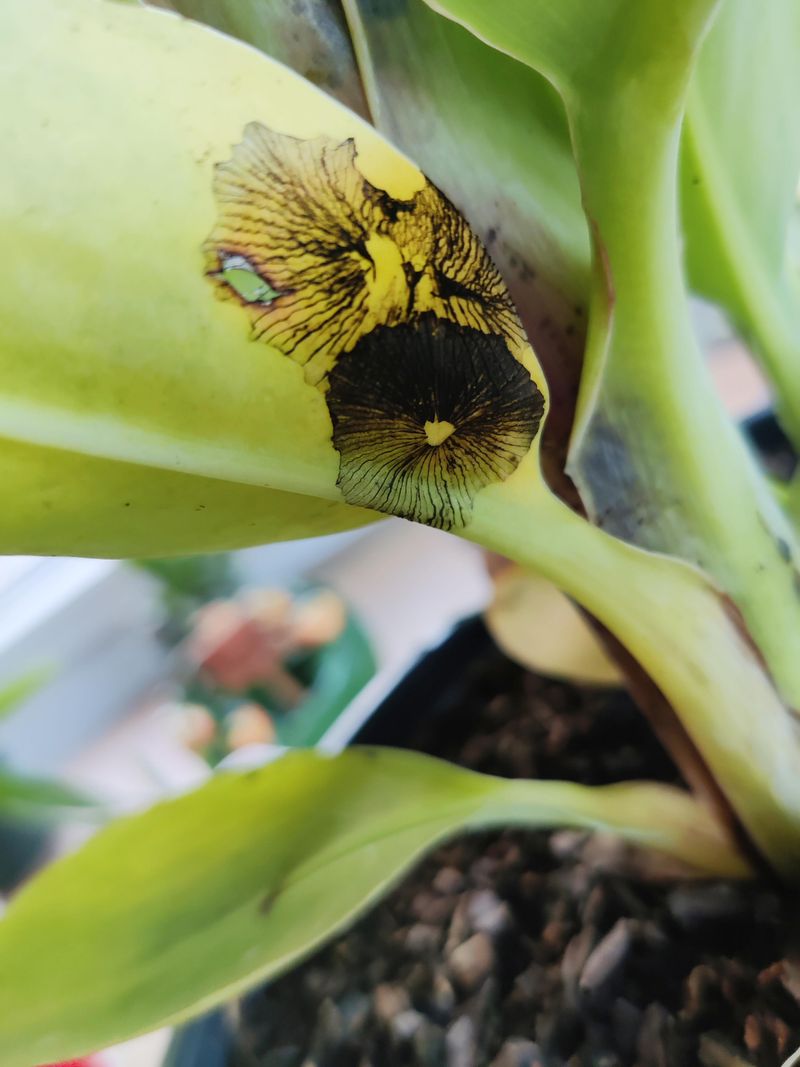
Somewhere in your yard, invisible spores are floating around like tiny dust bunnies. A few of them would love to move onto your plant.
Fungal leaf spot diseases, like Cordana, can affect these plants, while Sigatoka is mainly a tropical concern. They create small dark specks that slowly grow into larger patches.
Many spots have a yellow ring or halo around them. A halo can point to fungus rather than cold, though bacteria and nutrient problems can cause it too.
Late summer and early fall in New Jersey bring muggy mornings and heavy dew. Fungi adore that dampness, since spores need water to sprout.
Crowded plants make things easier for the fungus too. Leaves that touch each other stay wet longer and pass spores back and forth.
Splashing water also spreads the problem quickly. Rain or hose spray can splash spores from the soil onto low leaves.
Grab a magnifying glass and take a closer look at a fresh spot. Fungal spots often look ringed or streaked, sometimes with a yellow edge.
Older leaves near the bottom usually show symptoms first. Spots then creep upward if the weather stays damp and warm.
Unlike cold damage, fungal spots spread a little more each week. Snap a quick photo every few days to track any changes.
Did you know a soil fungus called Panama disease severely reduced the Gros Michel, the main grocery store variety, in the 1950s? Farmers switched to Cavendish.
It is a soil-borne wilt disease, not a leaf spot. Spotting fungus early gives you a real advantage. Quick action keeps a small speckle from becoming a leaf full of blotches.
4. Plants Can Lack Key Nutrients
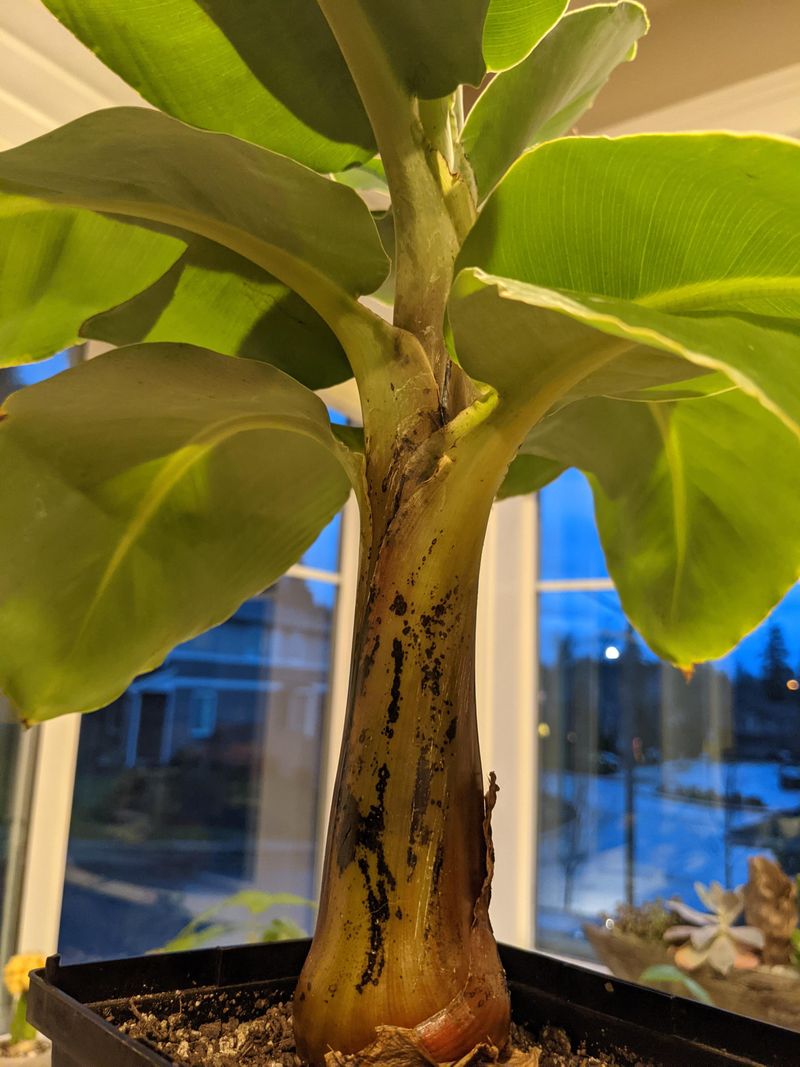
Food matters for plants just as much as it does for hungry teenagers. Fast-growing tropical giants are some of the biggest eaters in any garden.
Potassium is the nutrient they crave most of all. Without enough, leaf edges turn yellow, then brown, then develop dark, dry patches.
Magnesium shortages cause trouble too, often showing up as yellow stripes between veins. Later, those areas can darken and turn brown.
After a long summer of growth, the soil in your pot may simply be empty. Watering can wash some nutrients out through the drainage holes.
New Jersey garden soil can also be fairly acidic in many towns. Very acidic soil makes some nutrients harder for roots to absorb.
Nutrient spots tend to look more even and patterned than fungal spots. They often follow the leaf edges instead of appearing randomly.
Older leaves usually show signs first, since the plant moves nutrients to fresh growth. Picture a parent sharing the last slice of pizza with a kid.
A simple soil test kit can clear up the mystery. Rutgers Cooperative Extension also offers affordable soil testing for Jersey residents.
Wait on heavy feeding until spring, though, because October is resting season. Fertilizing now could push weak growth that struggles in winter.
Instead, jot down notes about what you see right now. Those notes will help you build a smarter feeding plan when warm weather returns.
A little planning today means bigger, greener leaves next summer. Your plant just needs a better menu.
5. Move The Plant Indoors Early
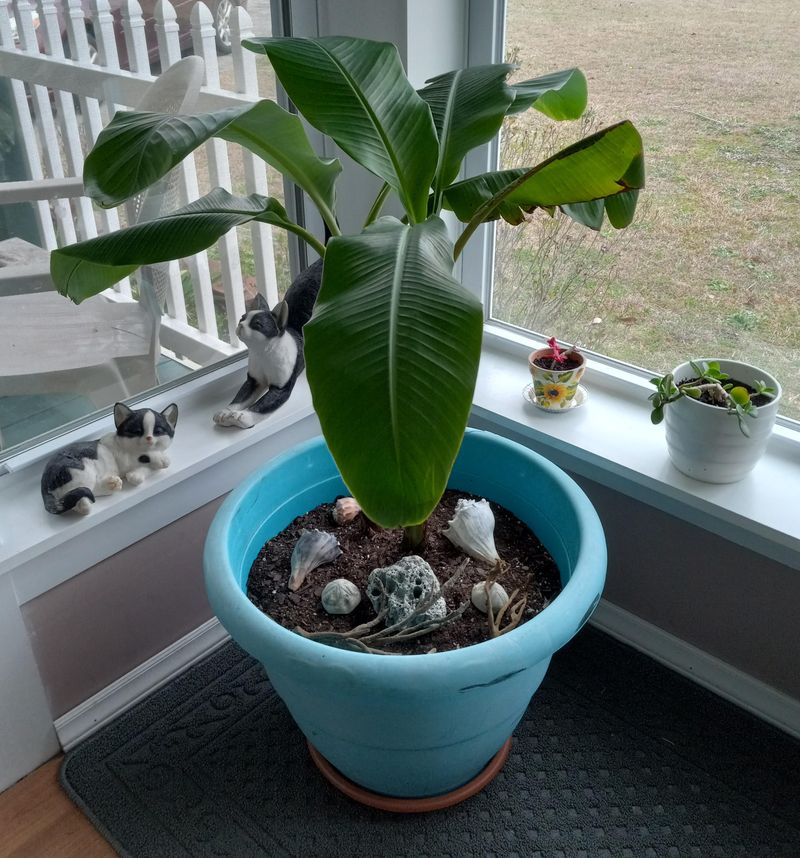
Think of this step as booking your plant a cozy winter vacation. Timing matters, and earlier is generally better.
Aim to bring potted plants inside once nights fall below 55 degrees. In most of New Jersey, that happens by early to mid-October.
Before moving, check under leaves and around the soil for hitchhiking bugs. A quick rinse with a hose can send spiders and aphids packing.
Pick a bright spot near a sunny south or west window. These plants love light, even during gray November afternoons.
Keep them away from heating vents and drafty doors. Blasts of hot or cold air can create fresh spots and crispy edges.
Large in-ground plants need a different plan. Many Jersey gardeners cut the stems down to about a foot after the first light frost.
Next, they dig up the corm, let it dry a few days, and store it. A cool basement or garage that stays above freezing works nicely.
Wrap stored corms loosely in newspaper or tuck them into a box of dry peat. Check them once a month for soft or moldy areas.
Cold-hardy types, like Musa basjoo, can stay outside with heavy mulch. Pile shredded leaves or straw at least a foot deep over the base.
Expect some leaf drop after the move indoors, which is normal adjustment. Your plant is simply getting used to its new address.
Patience pays off once spring warms things up again. By May, fresh green leaves should start unrolling like party streamers.
6. Trim The Spotted Leaves Away
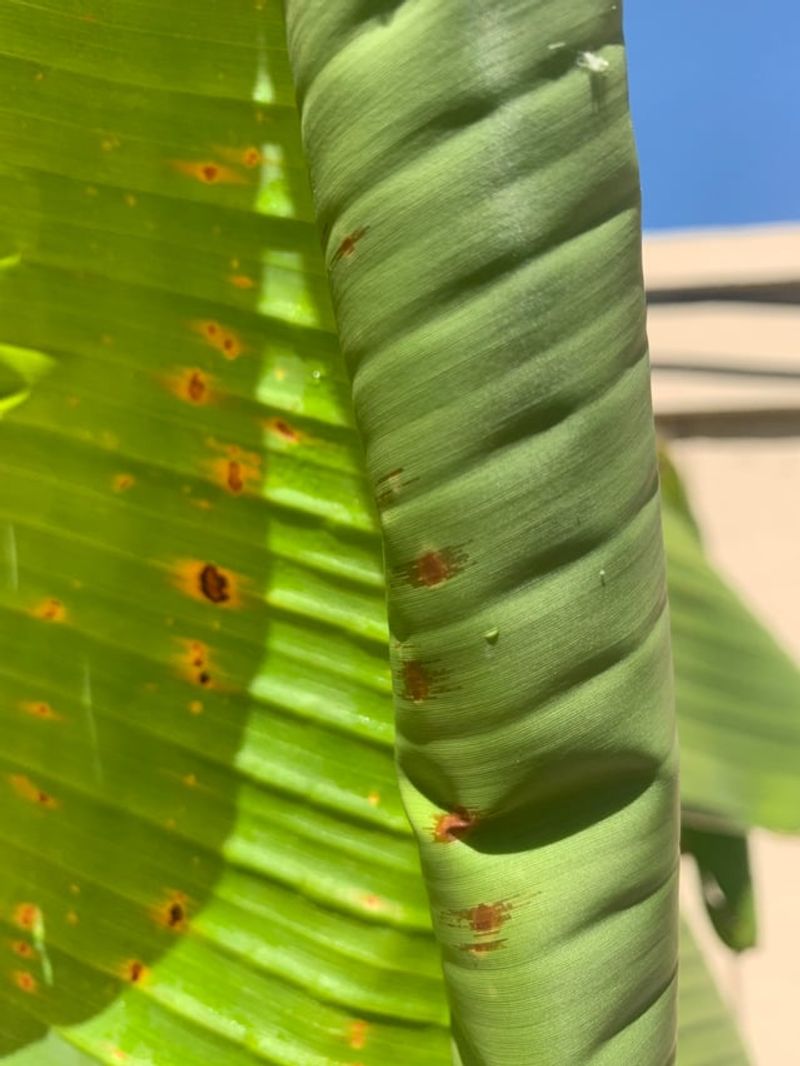
Grab your garden scissors, because a little haircut can work wonders. Removing damaged leaves helps your plant focus energy on healthy growth.
Heavily spotted leaves cannot recover their green color. Worse, fungal spots on old leaves can keep spreading spores to new ones.
Start by cleaning your tools with rubbing alcohol or a bleach and water mix. Dirty blades can carry germs from one cut to the next.
Cut leaves off close to the main stem, using one smooth snip. Ragged tears heal slowly and give fungus an easy doorway.
Leaves with only a few small spots can stay for now. They still make food from sunlight, which the plant badly needs.
A smart rule is removing no more than one third of the leaves at once. Taking too many can stress the plant and slow recovery.
Bag up the trimmed leaves and toss them in the trash. Composting them could spread fungal spores right back into your garden next year.
Clean up fallen leaves around the pot or garden bed too. Autumn debris makes a perfect hiding place for lingering spores.
Wash your hands after handling infected leaves, just to be safe. Then disinfect your scissors again before storing them away.
Trimming feels a little scary at first, like giving your first haircut to a friend. Remember, healthy new leaves grow surprisingly fast in warm weather.
Your plant might look a bit bare for a while. Soon, though, it will reward you with a tidy, fresh appearance.
7. Water Less As Days Cool
Summer habits are hard to break, especially with a watering can. Fall calls for a slower, gentler routine that matches cooler weather.
Shorter days mean less sunlight, so your plant grows much slower now. Slower growth means it drinks far less water than in July.
Let the top two inches of soil dry out before watering again. For many indoor plants, that means watering about once a week or less.
Use room temperature water instead of icy water straight from the tap. Cold water may stress sensitive roots.
Water the soil directly, not the leaves. Wet leaves in cool air are an open invitation for fungal spots.
Morning is the best time to water during fall. Any splashes have all day to dry before chilly evening air settles in.
Empty saucers under pots about 30 minutes after watering. Standing water lets roots soak, which can lead back to rot.
Dry indoor heat creates a different challenge, though. Furnaces can make the air so dry that leaf edges turn brown and dry.
Placing a small humidifier nearby can help. A tray of pebbles and water under the pot also adds gentle moisture to the air.
A cheap moisture meter takes the guessing out of watering. Simply poke it into the soil and read the dial before reaching for the can.
Some gardeners set phone reminders to check soil every few days. Checking first, then watering only when needed, keeps roots happy.
Think of it as switching your plant from summer snacks to cozy winter meals. Less really can be more right now.
8. Protect Leaves With Copper Fungicide

Sometimes trimming alone is not enough to stop a persistent fungus. Copper fungicide is a trusted helper that gardeners have used for generations.
Copper works by stopping fungal spores from sprouting on leaf surfaces. It protects healthy leaves rather than curing spots already there.
Start by reading the label carefully, since every brand mixes a bit differently. Wear gloves and safety glasses while you mix and spray.
Spray both the tops and undersides of the leaves until lightly coated. Skip spraying on windy days or right before a rainstorm.
Treat outdoor plants on a calm, dry morning, and check the label for temperature limits. Indoor plants are easier to spray in a bathtub or shower.
Follow the label’s repeat schedule, often every 7 to 14 days. Keep going until no new spots appear on fresh leaves.
Prefer a gentler option? Neem oil may slow fungal growth and can deter some insects.
Baking soda spray is another kitchen trick some gardeners swear by. Mix one teaspoon with a quart of water and a drop of dish soap.
Test any spray on one leaf first and wait a day. Some plants react with leaf edge damage if the mix is too strong.
Good airflow makes every treatment work better. Space plants apart and run a small fan nearby if they live indoors.
Garden centers often stock copper sprays in the fall. Staff can often point you toward the right product for your needs.
With steady care, your plant can push out fresh, clean leaves by spring. The old spotted leaves will not recover, but new growth should come in clean.