Incredibly High Yield 2-in-1 Tomato And Potato Growth
Imagine a garden where tomatoes and potatoes thrive side by side, sharing the soil and creating a wonderful harvest. This is the magic of 2-in-1 tomato and potato growing!
In fact, you won’t be growing tomatoes and potatoes together – you will be growing so-called pomatoes or tomtatoes.
Discover the art of planting these two favorites together, boosting their growth, and enjoying a fantastic harvest from your garden. So, let’s learn how to grow the infamous pomatoes.
What You’ll Need
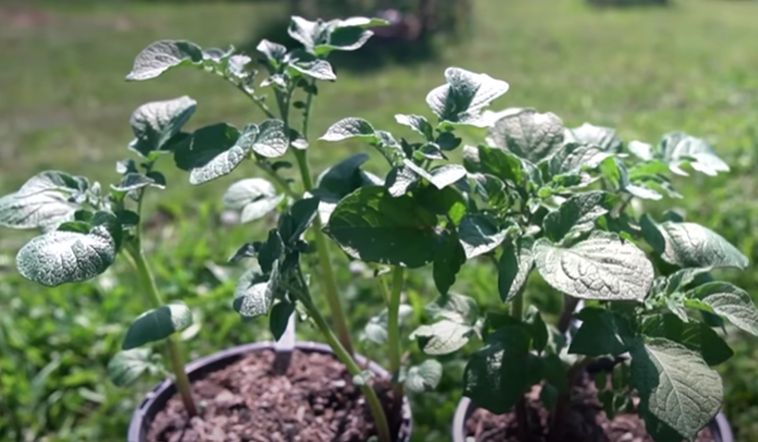
To start this project, you will need a tomato plant and a potato plant. You can start by sowing tomato seeds in seedling trays in early spring. You will notice a bunch of little tomato leaves growing in the trays.
You can keep them growing indoors by a sunny windowsill because it’s still a bit cold to plant them outside. If they outgrow their seedling trays, you can repot them in a bigger pot before planting them in the garden.
What you should also do is save some potatoes and leave them in a bright place so that they can start to sprout. Simply plant them in small pots and they should easily catch up with the tomato plants that were previously planted!
It’s best to plant your potatoes in a mix of compost and potting mix. Once both your tomato and potato plants have grown, it’s time to graft them together!
Step 1: Grafting
Before you start, make sure to clean your gardening equipment. If you don’t have a grafting knife, you can use a Stanley knife or box cutter instead – just make sure that they are nice and sharp.
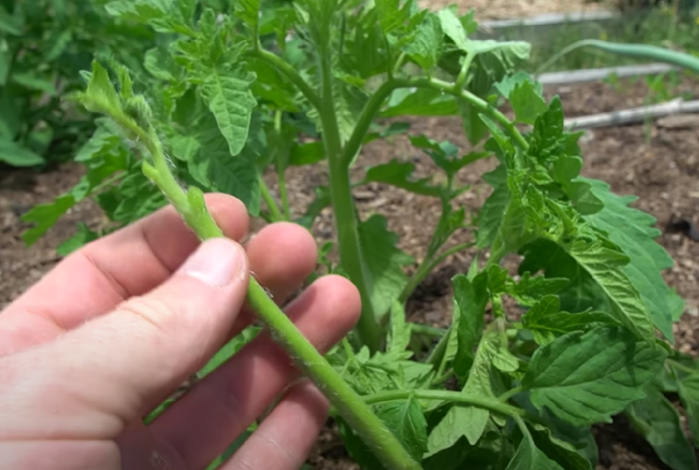
The first thing that you are going to do is take some cuttings from the tomato plants that are about the same thickness as the stem of the potato plants. Look for some side shoots that are suitable for grafting.
Remove most of the leaves off the cutting because the more leaves you have, the faster the cutting will lose moisture, dry out, and potentially die. Make sure to leave the growing tip intact at the top.
Now when it comes to grafting, start by cutting the potato plant off at a point that matches the same thickness of your tomato cutting. It’s best to do this in a shaded area away from the wind.
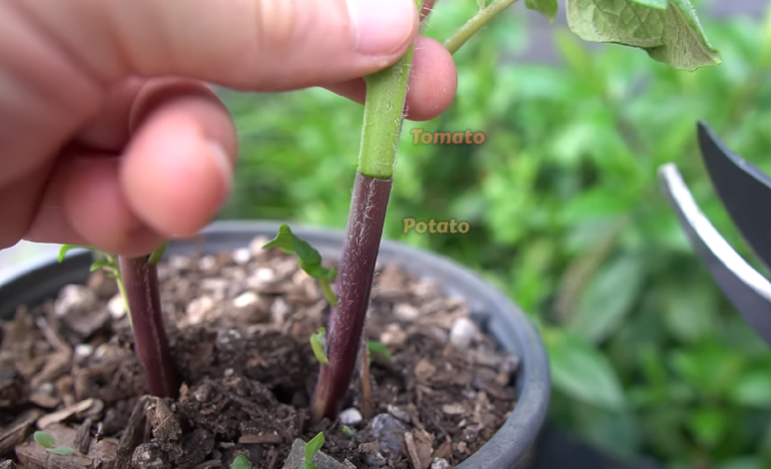
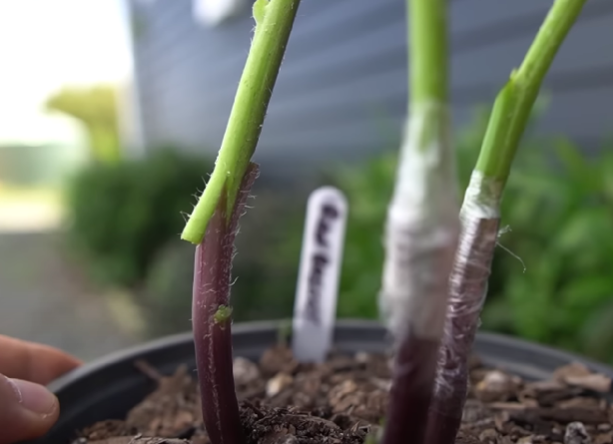
Then, slice down the middle of the potato stem a few centimeters deep. Make a long angled cut on both sides of the tomato cutting so that it matches the slice made in your potato stem.
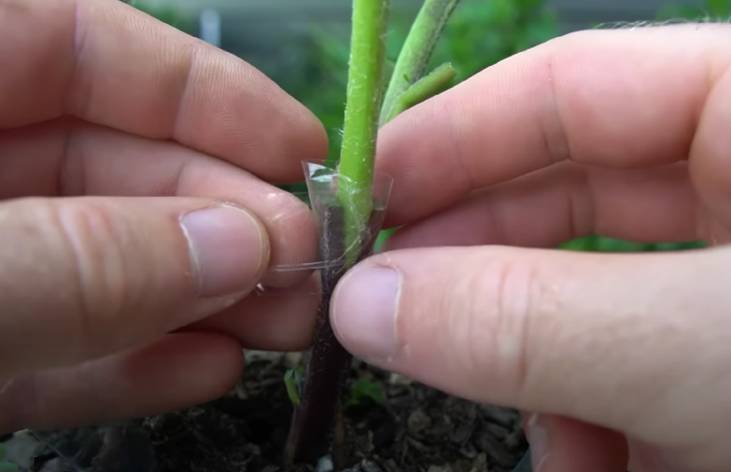
After this, simply push the tomato plant into the potato stem. Also wrap around some grafting tape to hold it tightly together. If you don’t have any tape, you can use a grafting clip instead. It should look like this:
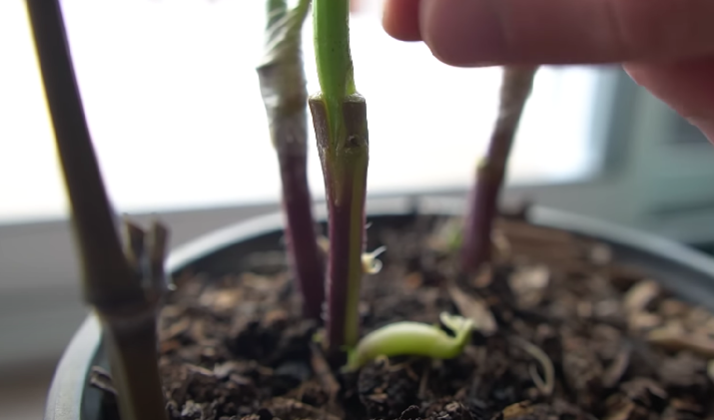
You can also take another cutting and experiment with different grafting techniques. For instance, you can do a whip and tongue graft. Just make an angled cut and slice down the stem on both cuttings. Slide them together and the tongue should hold them in place.
Then, wrap them in grafting tape nice and tightly. Here’s how it looks like before the grafting tape:
If your potatoes have grown multiple stems, you can increase your chances and graft onto every stem. You can combine different tomato varieties, too. Now, you are going to end up with different tomatoes growing on the same plant!
Bring the pot indoors and put it in the shade while the grafts heal, which should take around a week or so. You can cover them with a bag to increase the humidity.
Step 2: After Graft Care
After a few days, you will notice that some of your stems look droopy, while others are standing perfectly fine. In this case, keep on misting twice a day if you don’t cover them with a bag.
Remove all new potato stems that have started growing from stems so that all energy can just be focused on the tomatoes. Then, you should leave the bag half off to start acclimatizing your plants.
About 6 days after grafting, you can entirely remove the bag and move your plants somewhere with a bit more sun. Continue misting the plants to keep them nice and fresh.
Once 2 or 3 days have passed, you can start unwrapping them to see how they have healed. If they are not, keep them wrapped for a couple of days more.
Step 3: Planting The “Pomatoes”
Now it’s time to get the plants outside!
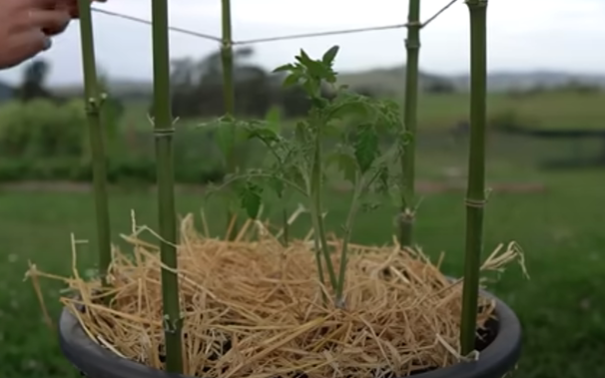
Use a mixture of compost and potting mix, and you can also add a few sheep manure pellets. Get your pomatoes out of their pots and put them in new soil. Make sure that the grass is above the surface so that tomatoes don’t put down their own roots.
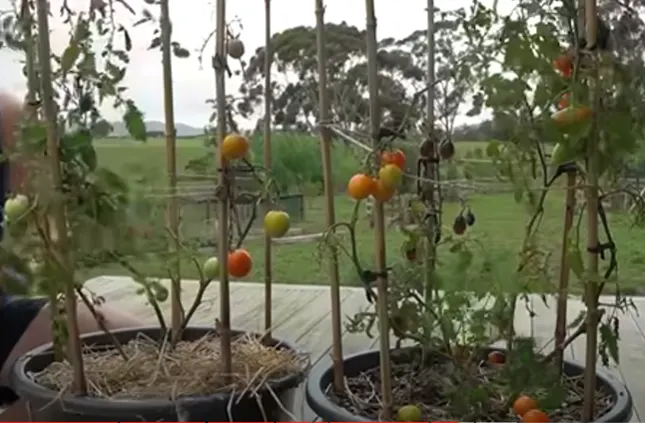
Water thoroughly and mulch your pomatoes with straw. Make a bamboo tower to support the plants as they grow.
Step 4: Unwrapping The Grafts
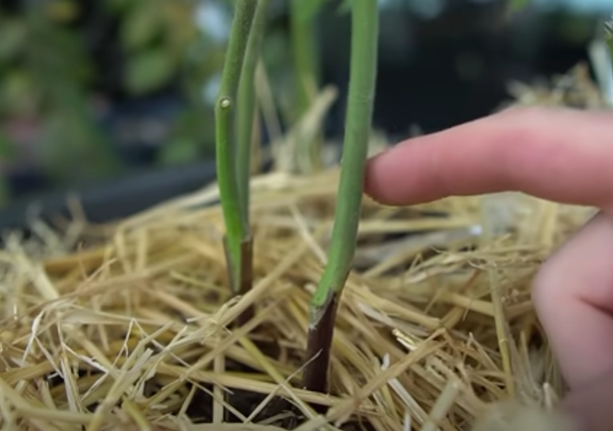
About 16 days after grafting, start removing all graft tapes. You might notice that the stems with cleft grafts have healed better than the other ones.
If you end up with scrappy whip and tongue grafts, instead of redoing it, you can wrap it again and see if it will work.
Step 5: Adding Worm Tea
After a month has passed since grafting, you can give your plants some diluted worm tea to boost their growth.
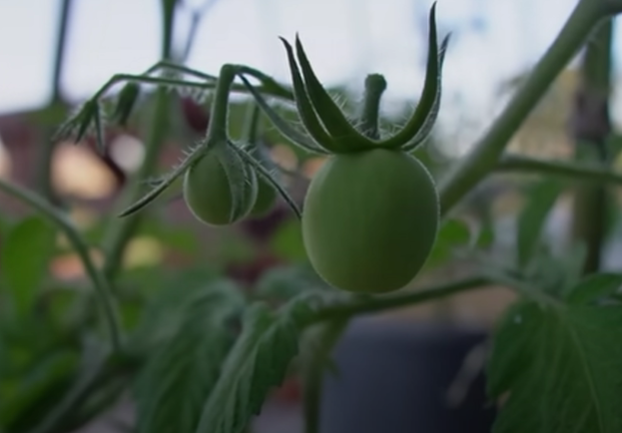
You might also notice that there are some flowers and even some fruit forming on some of the tomato stems.
Also read: A Complete Guide To Fertilizing Tomato Plants
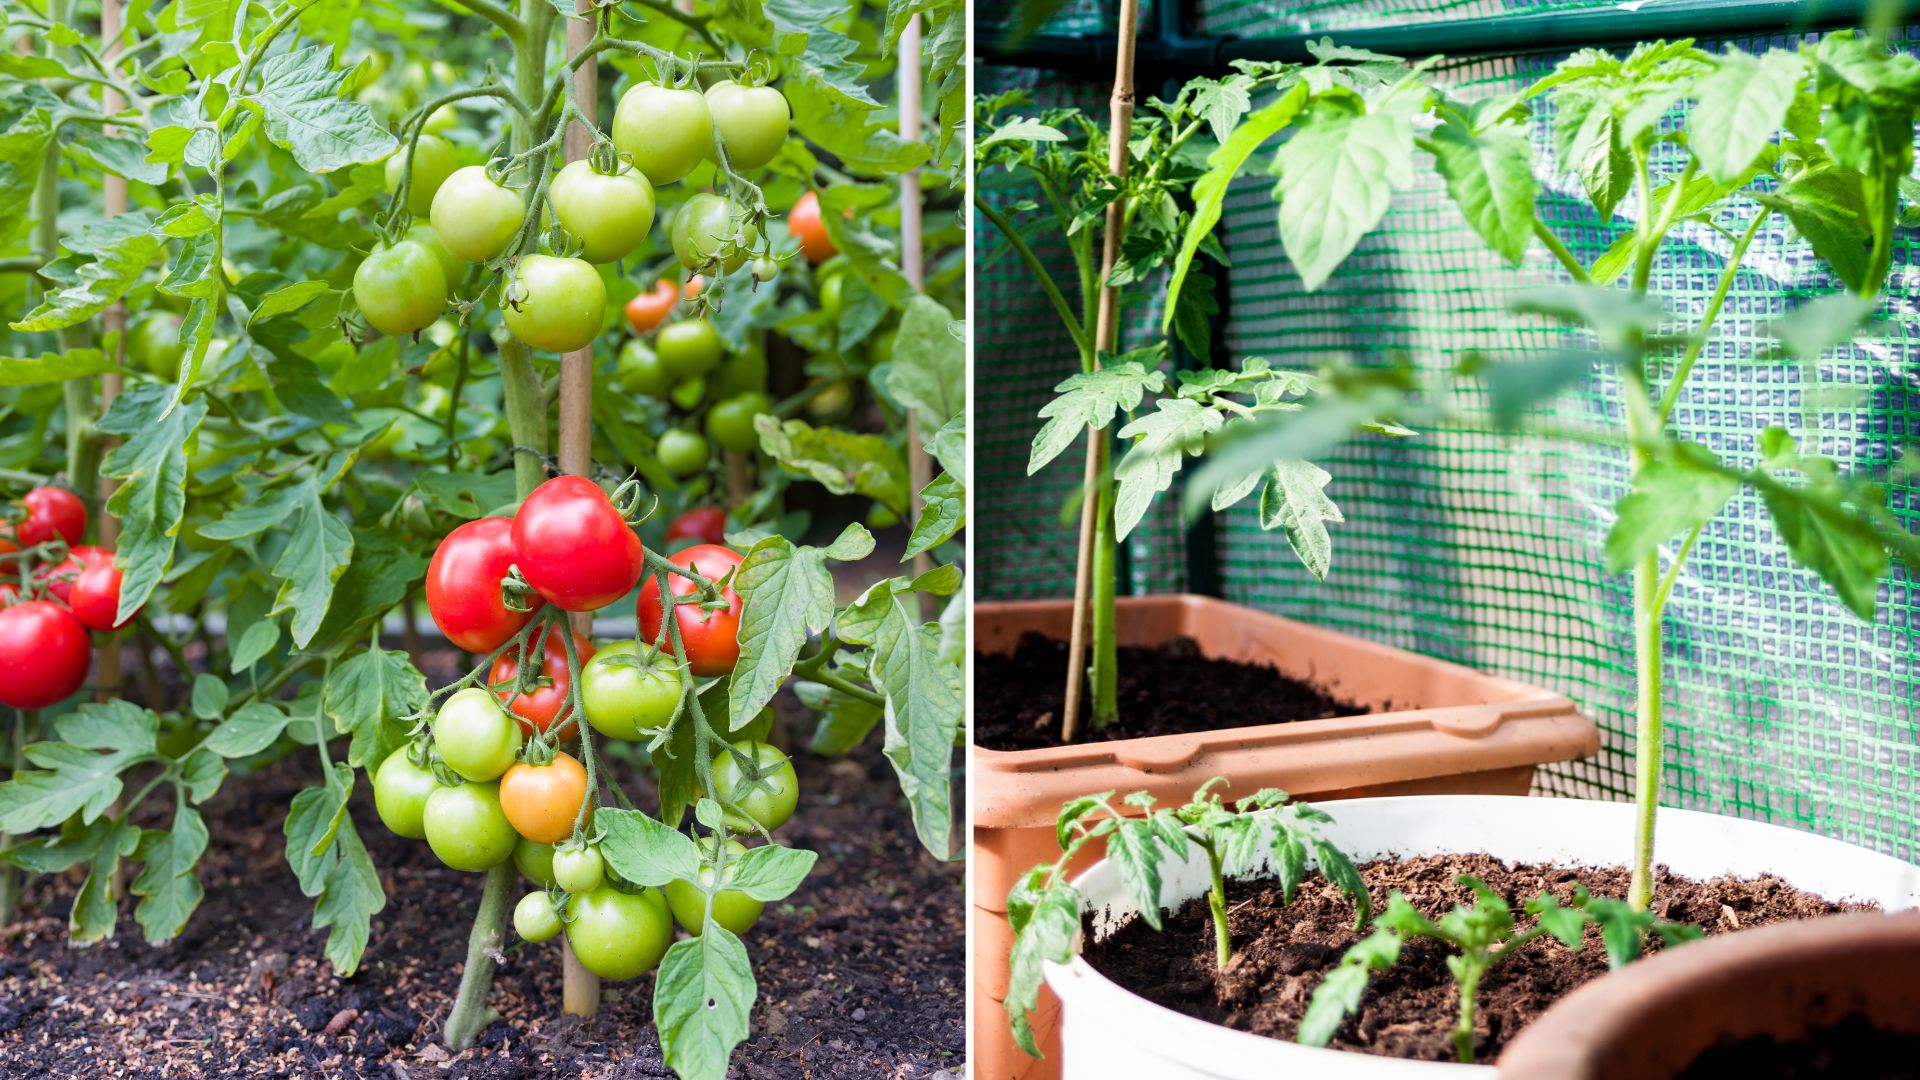
Step 6: Harvesting
After a few weeks, you will probably have some red tomatoes growing. What’s great is that you will have a bunch of different varieties growing on the same plant!
Go ahead and taste one, I bet that they are going to be juicy and delicious just like your normal tomatoes.
But hey, don’t forget about the potatoes!
Continue harvesting tomatoes throughout the season until they are all finished. Once the plant starts dying back, it’s time to harvest your potatoes. Simply pull the plant to see if there are any potatoes.
I’m sure that there will be some; however, don’t expect large potatoes. There will be a couple smaller ones from one plant.
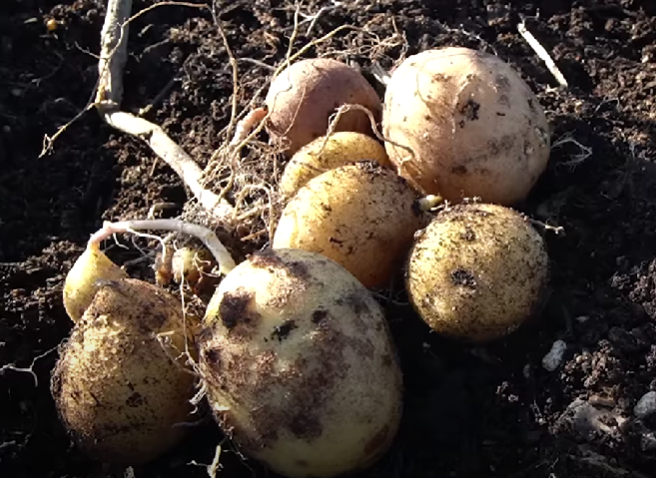
Now you can use them to make ketchup and fries – all the ingredients harvested from one plant.
Enjoy!