The Right Way To Plant Seed Potatoes For A Bigger Harvest In Oregon
Potatoes are one of those vegetables that feel foolproof until you dig up your harvest and realize something went wrong somewhere.
Small yields, hollow centers, weirdly shaped tubers that definitely were not what you had in mind. The plant looked fine all season. So what happened?
More often than not, it comes down to how the seed potatoes were planted in the first place. Most gardeners underestimate how much the planting process actually matters with potatoes.
Depth, spacing, soil prep, chitting, cutting, curing, it all adds up, and skipping or rushing any of it shows up later in the harvest. Oregon’s growing conditions are genuinely great for potatoes.
The soil here can be incredibly productive when it’s set up correctly. Getting the planting right from the start is what separates a decent harvest from an absolutely loaded one, and the steps are straightforward once you know exactly what you’re doing.
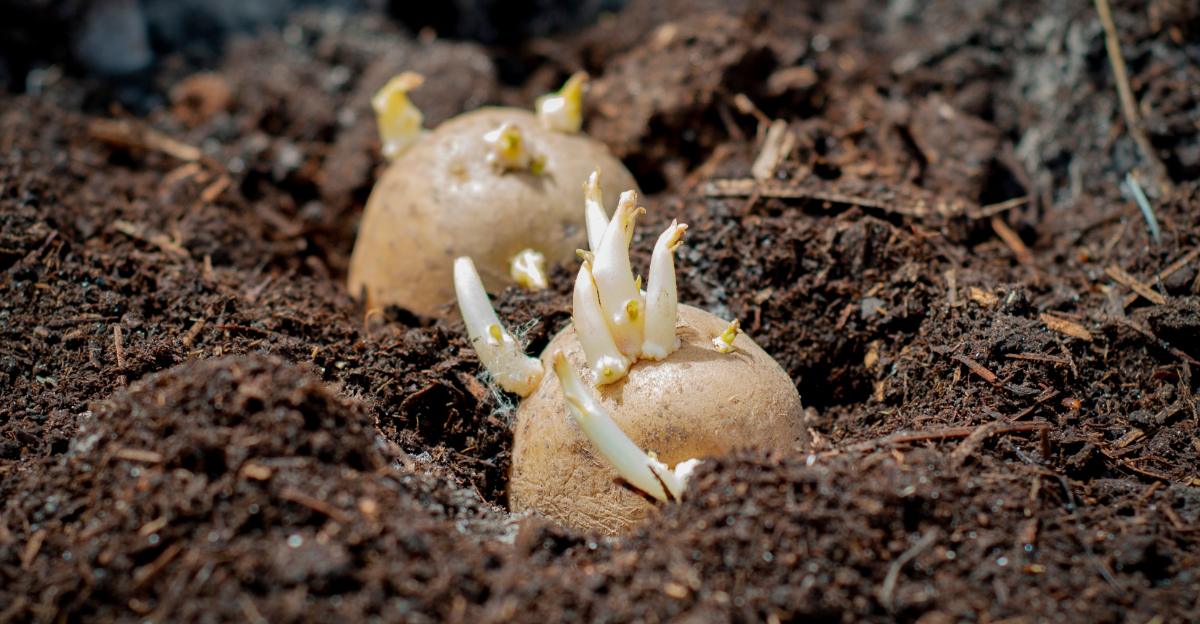
Start With Certified Seed Potatoes
Not all potatoes are created equal, and the ones you plant make a huge difference in your final harvest. Certified seed potatoes are specially grown and tested to be free of common diseases that can ruin a whole crop.
Buying certified seed potatoes from a trusted nursery or farm supply store in Oregon gives your garden the cleanest possible start.
Regular grocery store potatoes may look the same, but they are often treated with sprout-inhibiting chemicals. Those chemicals slow down growth and can seriously limit your yield.
Certified seed potatoes, on the other hand, are ready to sprout and grow with energy right from the start.
Many Oregon gardeners swear by popular varieties like Yukon Gold, Russet Burbank, and Red Pontiac. Each variety performs a little differently depending on your region.
Western Oregon gardeners often find that early-maturing varieties work best because of the shorter dry season. Ask your local nursery which varieties do best in your specific part of Oregon for the strongest results.
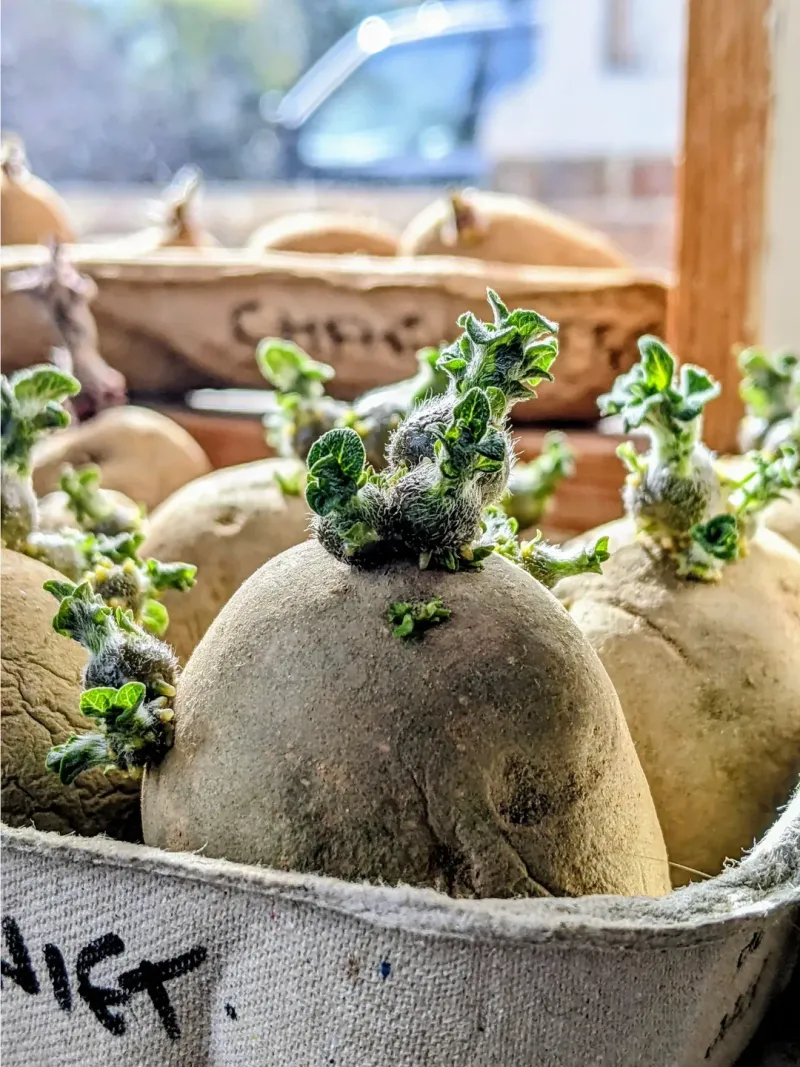
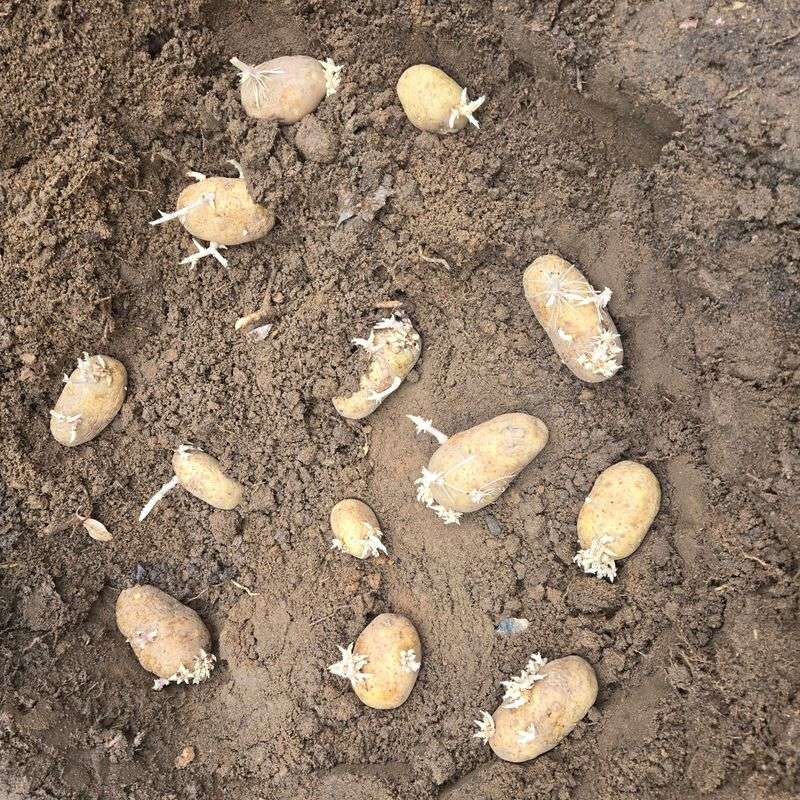
Cut And Cure Larger Seed Pieces
Bigger seed potatoes give you more to work with, but planting them whole is not always the best move. Cutting larger seed potatoes into smaller pieces lets you stretch your supply and actually encourages more vigorous sprouting.
Each piece you cut should have at least one strong eye, which is the small indented spot where a sprout will emerge.
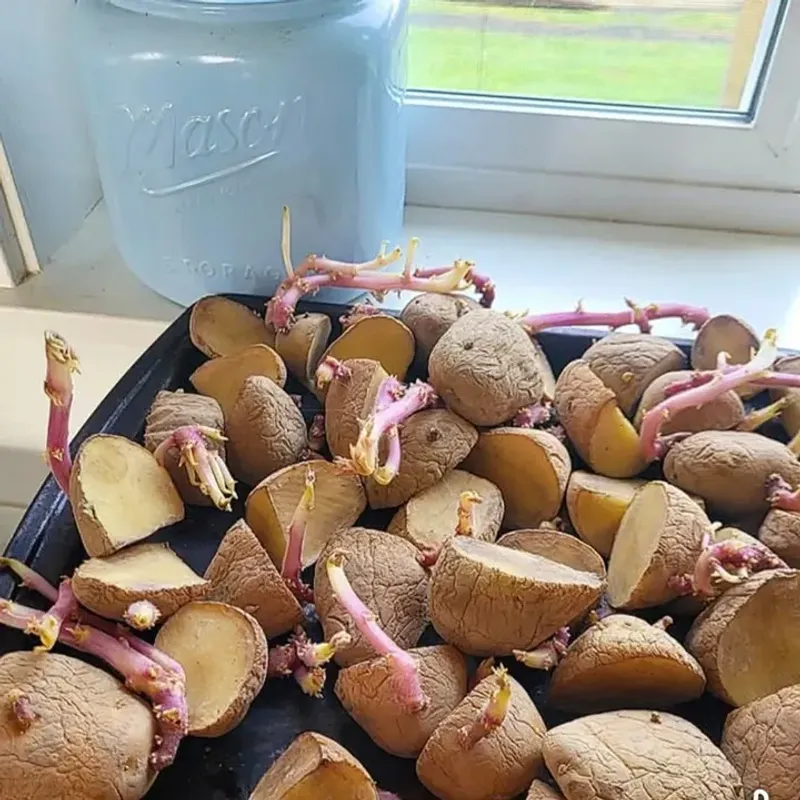
After cutting, do not rush to plant them right away. Letting the cut pieces rest in a cool, dry spot for one to three days allows a protective layer called a callus to form over the exposed surface.
This callus acts like a natural bandage, lowering the chance of rot once the pieces go into the ground.
Oregon springs can be cool and damp, especially west of the Cascades, which makes curing even more important. Wet soil combined with fresh-cut potato pieces is a recipe for disappointment.
A simple trick is to lay your cut pieces on a dry towel or newspaper in a shaded garage or porch. Once the cut surfaces feel dry and slightly leathery, your seed pieces are ready to plant and will have a much better chance of thriving in Oregon soil.
Plant At The Right Spring Timing

Timing your planting correctly can mean the difference between a modest crop and an overflowing harvest basket. Potatoes need soil that has warmed to at least 45 to 50 degrees Fahrenheit before they are placed in the ground.
Planting in cold soil slows sprouting and increases the risk of rot, especially in the wet springs that are common across much of Oregon.
In Western Oregon, including the Portland metro area and the Willamette Valley, late March through late April is usually the sweet spot for planting. Central and Eastern Oregon gardeners typically wait until April or even early May because those regions stay colder longer.
A simple soil thermometer, available at most garden centers, takes all the guesswork out of deciding when to plant.
Watching the weather forecast also helps a lot. A late frost can set back young potato sprouts, so keep an eye on nighttime temperatures after planting.
If a cold snap is coming, a light layer of straw mulch over your rows can provide just enough insulation to protect early growth. Getting the timing right is one of the easiest ways Oregon gardeners can boost their potato harvest without any extra effort.
Prepare Loose, Rich Soil
Potatoes are underground crops, which means the quality of your soil directly shapes the size and health of every tuber you grow. Loose, well-draining soil allows tubers to expand freely in all directions.
Compacted or heavy clay soil squeezes developing potatoes and limits their growth, which is why soil preparation is one of the most important steps in the whole process.
Before planting, work your garden bed to a depth of at least 10 to 12 inches. Mix in generous amounts of compost or aged manure to boost fertility and improve soil structure.
Oregon soils vary quite a bit across the state, from the rich valley soils of the Willamette to the sandier or harder soils found in Eastern Oregon, so amending with organic matter almost always helps.
Aim for a slightly acidic soil pH between 5.8 and 6.5. Potatoes actually prefer a bit of acidity, and staying in this range helps prevent a skin disease called scab.
You can test your soil with an inexpensive kit from a garden center. If your soil is too alkaline, adding sulfur can bring the pH down.
Taking time to prepare your soil properly before planting sets every potato plant up for strong, healthy growth throughout the Oregon growing season.
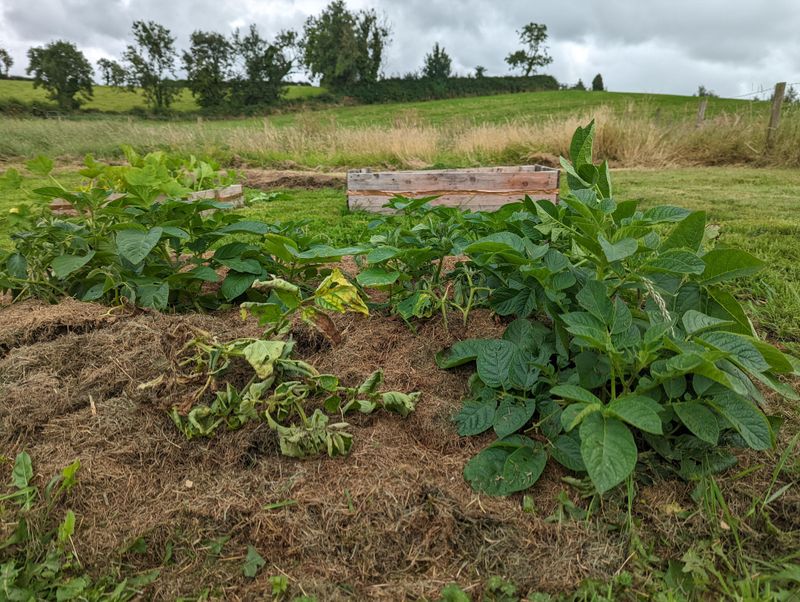
Space Potatoes For Bigger Tubers
Crowding your potato plants is one of the most common mistakes home gardeners make, and it costs them a lot of harvestable potatoes every single season. When plants are too close together, they compete for water, nutrients, and space underground.
That competition leads to smaller tubers and a much lighter harvest than what the plants are actually capable of producing.
For best results, plant seed pieces about 12 inches apart within each row. Leave 2 to 3 feet of space between rows so plants have room to spread and so you can easily walk between them for hilling and watering.
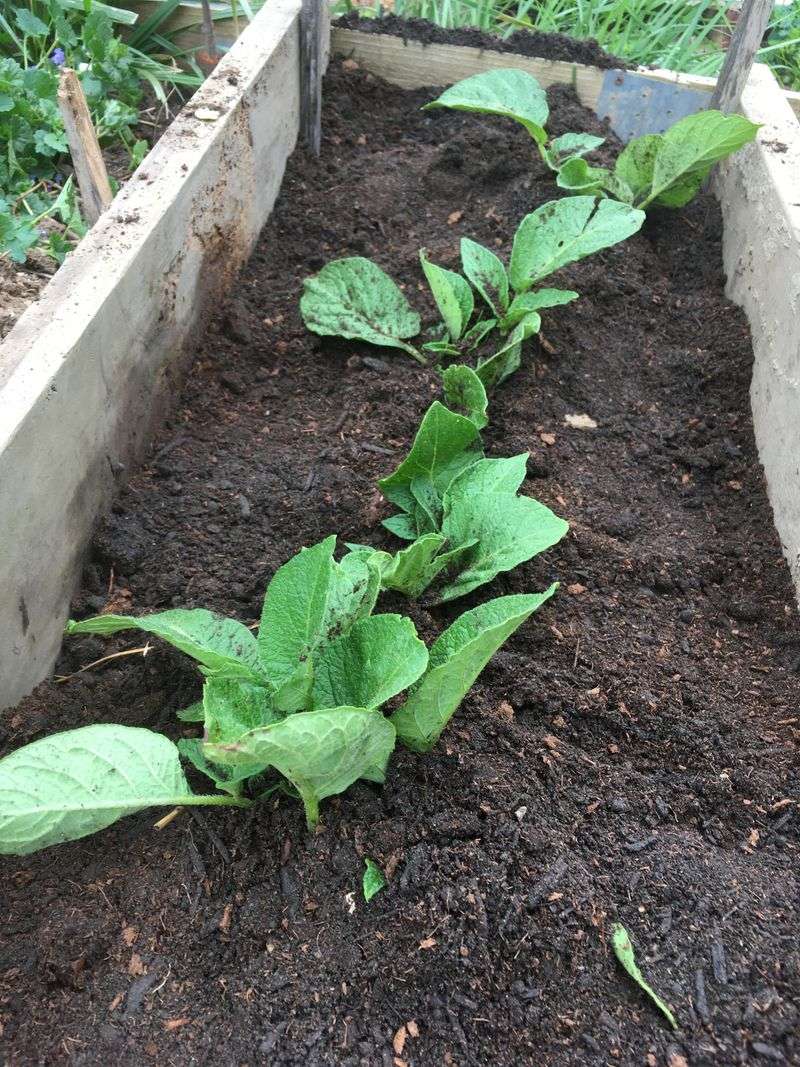
Plant each seed piece about 4 to 6 inches deep with the eyes facing upward toward the sky.
Proper spacing is especially helpful in Oregon gardens where soil moisture can vary a lot between spring and summer. Giving each plant its own territory means roots can spread out and find water more efficiently during dry stretches.
More root space also means more underground stems, called stolons, which are exactly where tubers form. Every extra stolon your plant produces is a potential potato on your dinner table.
Spacing correctly from the start is one of the simplest investments you can make for a noticeably bigger Oregon potato harvest.
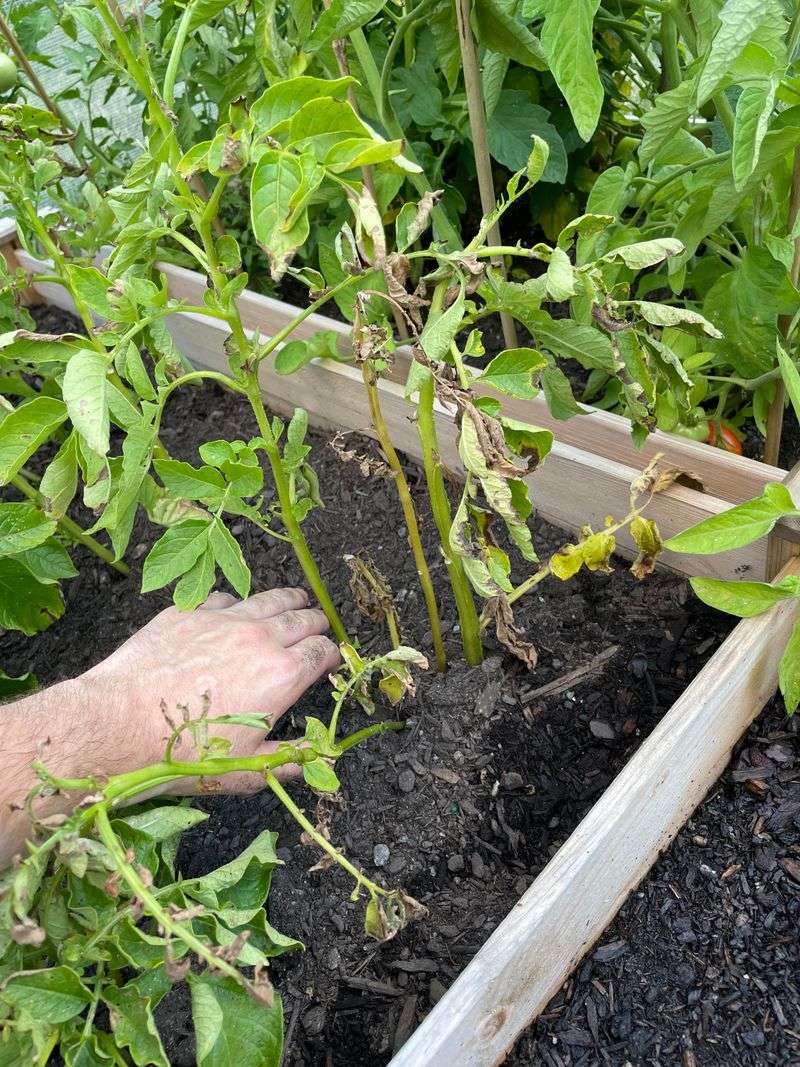
Hill Soil As Plants Grow
Hilling is one of those old-school gardening tricks that really works, and it is a must-do step for anyone serious about growing potatoes in Oregon. The practice involves pulling or pushing loose soil up around the base of your potato plants as they grow taller.
It might look like extra work, but hilling directly increases the number of tubers each plant produces.
Start hilling when your plants reach about 6 inches tall. Mound soil around the stems, leaving just a few inches of leafy growth sticking out from the top.
Repeat this process every two to three weeks or whenever the plants grow another 6 inches or so. Over time, each plant will sit inside a small raised mound of earth.
Hilling does two important jobs at once. First, it gives developing tubers more soil to grow into, which means more potatoes per plant.
Second, it keeps forming tubers covered and away from sunlight. Potatoes that are exposed to light turn green and develop a bitter compound called solanine, which makes them unpleasant to eat.
In Oregon, where spring rains can wash soil away from plant bases, regular hilling also helps protect shallow roots from drying out during the warmer summer months ahead.
Keep Soil Evenly Moist
Water is the fuel that drives potato growth, and keeping your soil consistently moist is one of the best things you can do for a heavy harvest. Potatoes need roughly 1 to 2 inches of water per week, either from rain or irrigation.
In Oregon, spring rains often take care of early watering needs, but by summer many parts of the state get quite dry, so supplemental watering becomes essential.
Uneven watering causes a problem called hollow heart, where the inside of the potato develops an empty cavity. It also leads to cracked or misshapen tubers that are harder to cook and store.
Consistent moisture keeps tubers growing smoothly and steadily from the time they form until harvest day arrives.
Drip irrigation works especially well for potatoes because it delivers water directly to the root zone without wetting the foliage. Wet leaves can encourage fungal diseases like late blight, which has been a problem for Oregon potato growers in past seasons.
Mulching around your plants with straw or wood chips helps the soil hold moisture between watering sessions and also keeps soil temperatures more stable. With steady watering and good mulch, your Oregon potato plants will stay hydrated, healthy, and on track for a harvest worth bragging about.