Florida Lawn Pests That Look Exactly Like Drought Damage And How To Tell The Difference
You cut back the water. You wait.
The brown patches spread anyway. So you cut back even more, convinced you’ve been overwatering, and two weeks later half your lawn looks like it gave up on life.
Sound familiar? Here’s the gut punch: you never had a drought problem.
You had bugs. Chinch bugs, armyworms, and sod webworms are the great impersonators of the Florida lawn world.
They cause damage so convincing that even experienced gardeners misread it completely, cut the water, and accidentally roll out the red carpet for a full-blown infestation. By the time the real culprit reveals itself, the damage is already done and your lawn is toast.
Brown grass is not always thirsty grass. Knowing the difference between pest damage and drought stress is one of those skills that separates a thriving Florida lawn from a patchy, frustrating mess all summer long.
Let’s break down exactly what to look for.
1. Check Sunny Patches For Chinch Bugs

Hot, open areas of your St. Augustinegrass lawn are prime real estate for southern chinch bugs, and the damage they cause can fool even experienced homeowners.
Yellowing turf that slowly turns brown and spreads outward from sunny spots looks almost exactly like classic drought stress.
The grass wilts, dries out, and refuses to bounce back no matter how much you water – because watering is not the problem.
Chinch bugs feed by sucking plant juices from grass stems while injecting a toxic substance that stops the grass from moving water and nutrients properly.
The damage usually starts in the hottest, most exposed parts of your lawn, often near driveways, sidewalks, or open areas that get full afternoon sun.
Look for a distinct border between healthy green turf and the stressed-looking patch – chinch bug activity tends to expand from that edge outward.
To check, part the grass near the edge of the affected area and look down into the thatch.
Chinch bugs are tiny – adults are only about one-fifth of an inch long – but they move quickly and may be visible in large numbers if the infestation is active.
A flotation test, where you press a bottomless can into the soil, fill it with water, and watch for bugs to float up, can help confirm their presence according to UF IFAS guidance.
Avoid the common mistake of cranking up your irrigation hoping the brown patches will recover. Overwatering stressed turf does not address chinch bugs and can create soggy conditions that encourage lawn disease.
Confirm the pest, check your grass type, and consult UF IFAS or your local Extension office before applying any treatment.
2. Look For Chewed Blades From Sod Webworms

Warm, humid evenings are perfect conditions for tropical sod webworms, and by the time most homeowners notice the damage, the caterpillars have already been feeding for days.
The lawn starts looking thin, patchy, or slightly scalped – almost like it dried out too fast or got mowed too short.
Grass blades appear ragged at the tips rather than cleanly cut, which is one of the first clues that something is chewing rather than drying.
Your Florida Garden Changes Every Week. Your Plan Should Too.
Gardening in Florida changes quickly throughout the season. Every Friday you’ll receive a simple weekly plan showing exactly what to plant, prune, fertilize, harvest, and protect so you never miss the right timing.
Tropical sod webworms are the larval stage of small, tan moths you might see fluttering low over your lawn in the evening. The moths themselves do not cause damage, but they lay eggs in the grass, and once those eggs hatch, the caterpillars get to work quickly.
St. Augustinegrass, bermudagrass, and zoysiagrass are all targets. Damage can appear almost overnight during peak feeding periods in late summer and early fall.
Before reaching for any product, get down close and look at your grass blades. Ragged, chewed edges are a strong indicator of caterpillar activity.
A soap flush – mixing a small amount of dish soap with water and pouring it over a square foot of turf – can bring caterpillars to the surface within a few minutes. It helps you confirm their presence. UF IFAS recommends this method as a useful scouting tool.
Do not treat based on thin or patchy turf alone. Drought stress, poor mowing height, shade, and nutrient deficiencies can all produce similar-looking results.
Positive identification of larvae or clear feeding signs should come before any pesticide application, according to Florida Extension guidance.
3. Test Loose Turf For White Grubs

Spongy, weak turf that peels back like a loose rug is one of the most unsettling things a homeowner can discover in their yard.
White grubs – the larval stage of beetles like the masked chafer or June beetle – feed on grass roots below the soil surface, cutting off the plant’s ability to take up water.
The result is turf that looks drought-stressed from above but has no roots holding it in place from below.
Because the damage happens underground, it is easy to misread. Brown, thinning patches that do not respond to watering are a common early sign.
The key difference between grub damage and true drought stress is that grub-affected turf lifts easily from the soil with very little resistance.
If you grab a handful of brown grass and it pulls up cleanly, exposing white or tan grubs curled in a C-shape in the soil beneath, you have found your answer.
Other clues include animals like raccoons, armadillos, or birds digging into the lawn – they are often following the scent of grubs below the surface. Sandy soils make it easier for grubs to move around, which can speed up root damage during warm months.
To inspect, use a flat shovel or trowel to peel back a small section of turf and examine the top few inches of soil.
Keep in mind that not every loose or brown patch means grubs are present. Poor soil contact, disease, drought, and shallow rooting from compacted sandy soil can all produce similar symptoms.
Confirm pest presence before treating, and review UF IFAS thresholds for grub management before choosing any product.
4. Watch For Mole Cricket Tunnels

Few pests are as sneaky as mole crickets when it comes to mimicking drought damage.
These burrowing insects tunnel just below the soil surface, severing grass roots and disrupting soil contact as they move.
The result is turf that looks thin, uneven, and parched – especially in bahiagrass and bermudagrass, which are common targets.
Mole crickets are most active in spring and early summer. Adults are moving and laying eggs, but the damage from late-season nymphs often becomes obvious during the dry, hot stretch of summer.
Homeowners notice irregular patches of wilting or thinning grass and assume the irrigation system is missing those spots.
Checking the coverage is always a good first step, but if the system is working fine and the patches keep spreading, it is worth looking closer at the soil itself.
Signs of mole cricket activity include raised, spongy soil trails just below the surface, loose or disturbed-looking earth, and turf that feels slightly elevated or uneven underfoot.
A soap flush – the same technique used for caterpillar scouting – can bring mole crickets to the surface for confirmation, as noted in UF IFAS scouting guidelines.
Early evening is often the best time to check, since mole crickets tend to be more active after dark.
Avoid writing off thin patches as simple summer stress without checking the soil first. Mole cricket problems that go unaddressed can expand significantly through a season.
Contact your local UF IFAS Extension office to confirm identification and get guidance on appropriate management timing. Treating at the right life stage makes a significant difference in effectiveness.
5. Spot Armyworms Before Damage Spreads

Speed is what makes armyworms so alarming.
A lawn that looked perfectly fine on Monday can have large, ragged patches by the weekend. Many homeowners initially chalk it up to a sudden dry spell or a missed irrigation cycle.
Fall armyworms are among the most aggressive turf feeders in Florida, and they tend to peak during the warm, humid months from late summer into fall.
Early damage looks like drought stress or uneven mowing. Grass appears thin, slightly scalped, and faded.
But look closer and you will notice the blades are not just wilted – they are actually being consumed. Ragged, chewed tips and missing leaf tissue are telltale signs.
Birds feeding actively in one section of the lawn are another strong clue, since they are often tracking caterpillar activity below the canopy.
Armyworm caterpillars hide low in the turf during the heat of the day, so early morning or evening inspections are more productive. Part the grass and look near the soil surface for green or brownish caterpillars with distinct stripes running along their bodies.
A soap flush can also help bring them to the surface if visual inspection is inconclusive, as recommended by UF IFAS Extension resources on lawn caterpillars.
The biggest mistake homeowners make is waiting too long to investigate. Armyworms can move through a lawn quickly, and by the time large sections are visibly affected, the population may already be peaking.
Do not treat without confirming larvae are present and active. Misidentified patches treated with the wrong product waste money and may not address the real problem at all.
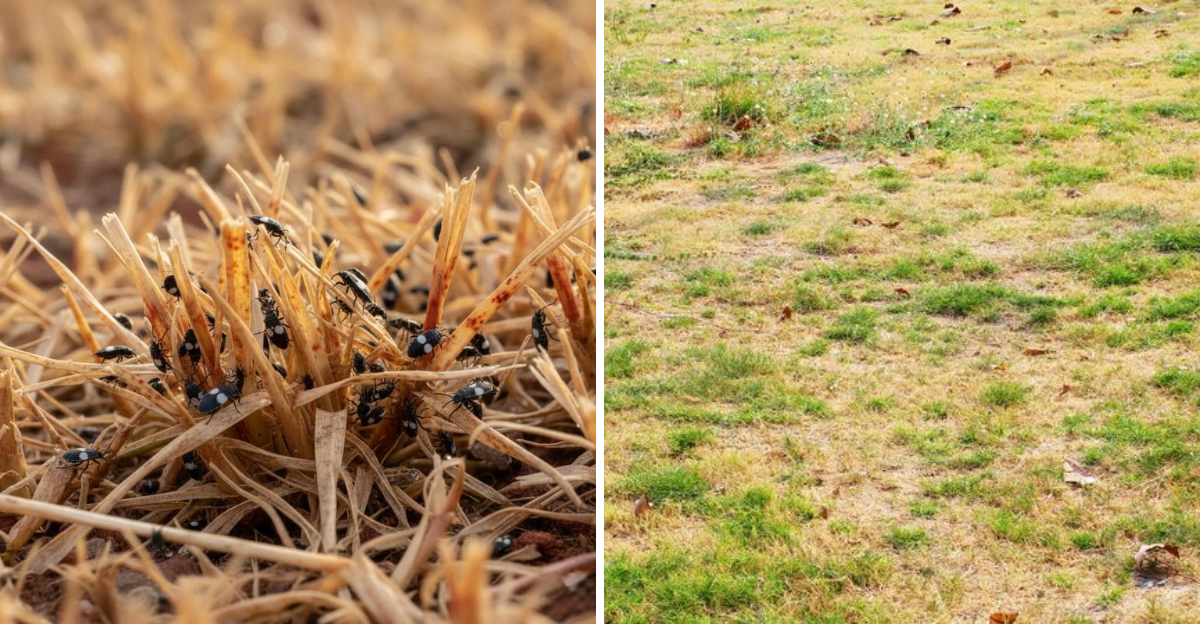
6. Compare Pest Patches With Drought Stress

Learning to read your lawn like a detective can save you a lot of trouble. True drought stress has a pretty consistent look across turfgrass types.
Grass blades fold inward lengthwise, the lawn takes on a bluish-gray tint, and footprints or mower tracks linger long after you walk across it.
Importantly, drought-stressed turf usually improves noticeably within a day or two of proper, consistent irrigation.
Pest damage behaves differently. Patches caused by insects tend to expand irregularly, often spreading from a focal point outward regardless of how much water the lawn receives.
The grass does not recover after watering because the problem is not moisture – it is feeding, root destruction, or toxic injection.
Pest patches may have visible borders between affected and healthy turf. They may also appear in uneven shapes that do not follow sun or shade patterns, with physical evidence like chewed blades, tunneling, or loose turf.
Before assuming pests or drought, check your irrigation coverage with a simple catch-cup test to confirm every zone is working evenly. Probe the soil in the affected area – if it is dry two to three inches down, drought may genuinely be part of the story.
Also consider your mowing height, grass type, recent fertilizer use, soil compaction, and any shading changes that may have occurred recently.
Multiple problems can overlap at the same time. Drought-stressed turf is actually more vulnerable to chinch bugs and other pests, so one issue can mask another.
When patches do not respond to corrective irrigation within a reasonable time, inspect carefully and consider reaching out to your local UF IFAS Extension office.
7. Call Extension Before Spraying Blindly

Grabbing a bottle of pesticide and treating the whole lawn without knowing what you are dealing with is one of the most common – and costly – lawn care mistakes. Pesticides are tools, not guesses.
Applying the wrong product, at the wrong rate, can waste money and harm beneficial insects. Targeting the wrong pest or treating at the wrong time can also leave the actual problem untouched.
UF IFAS and Florida’s county Extension offices offer free or low-cost lawn pest identification help. They are genuinely one of the most underused resources available to homeowners.
Before you treat anything, take clear photos of the affected area from multiple angles.
Close-up shots of the grass blades, the soil surface, and the edge of the patch where healthy and stressed turf meet.
Note your grass type, how long the patches have been there, your irrigation schedule, your recent mowing height, and whether you have fertilized recently.
If you can collect a sample – a small section of affected turf including roots and a bit of soil – your local Extension office may be able to examine it directly.
Some counties also offer diagnostic lab services through the UF Plant Diagnostic Center for a small fee. It can identify diseases, pests, and nutrient issues that are difficult to spot in the field.
When a pesticide is recommended and appropriate, always read the full label before mixing or applying anything. The label is the law.
Never mix products unless the label specifically allows it, and never treat a larger area than necessary just to be safe. Spot treatments are often more effective and far less disruptive than blanket applications across a healthy lawn.