This Is What Ohio Roses Need Before The Summer
Roses have a way of exposing every gap in a care routine, and summer in Ohio has a habit of arriving before most gardeners feel ready. The weeks between late spring and the first serious heat wave are not a waiting period.
They are the most important window of the season for setting roses up to perform when temperatures climb and stress starts testing every plant in the garden.
What happens in that window, in the soil, at the roots, and along the canes, determines whether summer brings a flush of blooms or a season spent troubleshooting.
Ohio summers can be humid, unpredictable, and hard on roses that went into the heat underprepared. A little focused attention right now pays back more than anything applied mid-summer when the damage is already showing.
Roses reward the gardener who thinks one season ahead.
1. Clear Away Winter-Damaged Canes First

Before anything else happens in the rose bed, take a close look at every cane. Ohio winters, especially in northern regions and frost-prone areas, can leave roses with real damage.
You may find canes that are brown and dry all the way through, tips that shriveled back after a late freeze, or stems that look cracked and weak near the base.
Start by cutting away anything that is clearly damaged. Use clean, sharp pruning shears and wipe the blades with rubbing alcohol between cuts when possible.
This simple habit helps prevent spreading any fungal issues from one cane to another.
When you make a cut, look at the center of the cane. Healthy tissue should appear white or pale green inside.
If the center looks brown or discolored, keep cutting lower until you reach clean tissue.
Sometimes that means cutting a cane much shorter than expected, and that is perfectly fine.
Weak, spindly canes that survived winter but show little promise should also come out. These thin stems rarely produce strong blooms and tend to invite pest pressure.
Removing them now gives the stronger canes more room and resources.
One important timing note: do not rush this work if late cold is still possible in your area. In northern parts of the state, a hard frost can follow what looks like a warm stretch.
If tender new growth gets hit after you have already pruned back, you may need to remove a bit more damaged tissue. Waiting until forsythia blooms nearby is a widely used and reliable signal that the worst of winter is likely behind you.
Cleaning up around the base of each plant at the same time, removing old fallen leaves and debris, helps reduce early disease pressure before warmer weather arrives.
2. Prune For Shape Before Growth Gets Too Dense

Shaping roses before new growth fully fills in is one of those tasks that is much easier done early. Once stems are leafed out and buds are swelling everywhere, it becomes harder to see the structure of the plant and make thoughtful cuts.
Catching it now, while the framework is still visible, gives you a real advantage.
Your Ohio Garden Changes Every Week. Your Plan Should Too.
Gardening in Ohio changes quickly throughout the season. Every Friday you’ll receive a simple weekly plan showing exactly what to plant, prune, fertilize, harvest, and protect so you never miss the right timing.
The goal with shaping is not to make every rose look like a formal hedge. It is to improve light penetration and air movement through the plant.
Canes that cross and rub against each other create small wounds that invite problems. Inward-facing growth that crowds the center of the plant traps moisture and reduces airflow, both of which matter a lot once humid weather arrives.
For most shrub roses and landscape roses, the approach is fairly straightforward. Remove crossing canes, take out any stems growing toward the center of the plant, and cut back weak or wiggly growth that is unlikely to support a strong bloom.
You are not trying to reshape the entire plant in one session.
Hybrid tea roses and climbing roses have their own pruning requirements that differ from shrub types. If you are growing a specific variety you are unsure about, check with your local extension office or a reliable rose society resource before making major cuts.
Shearing all roses the same way is a common mistake that can reduce blooming on certain types.
Sharp, clean tools matter here just as much as they did for removing damaged canes. Ragged cuts heal more slowly and leave more entry points for disease.
After shaping, step back and look at the plant from a few feet away. A well-shaped rose should have an open, balanced appearance with good light reaching toward the center.
3. Feed Roses After New Growth Begins

Timing fertilizer correctly makes a noticeable difference in how roses perform heading into summer. Feeding too early, before active growth is visible, is not very effective because the roots are not yet ready to take up nutrients efficiently.
Waiting until you can clearly see new leaves and stems pushing out is the better approach.
Roses are heavy feeders compared to many other landscape plants. They need steady nutrition to support the energy required for producing leaves, building strong stems, and pushing out repeated flushes of blooms.
Without enough nutrition, plants may look pale, grow slowly, or produce fewer flowers through the season.
A balanced rose fertilizer, one with relatively equal parts nitrogen, phosphorus, and potassium, works well for most situations. Follow the label directions carefully.
More is not better with fertilizer, especially with high-nitrogen products. Overfeeding can push lots of soft green growth that is more attractive to aphids and more vulnerable to fungal problems.
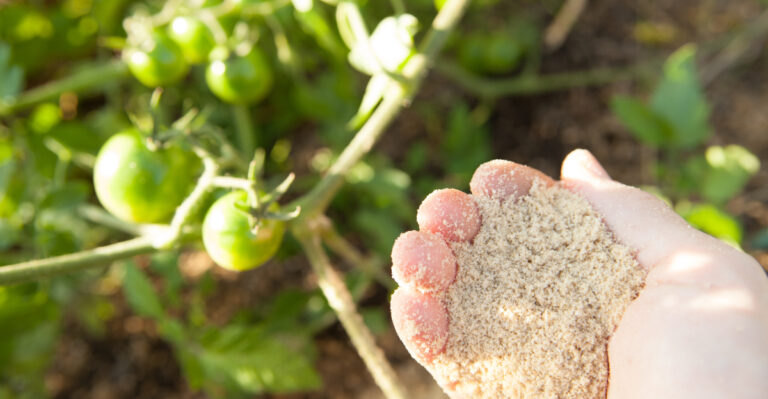
Compost is a reliable option that many gardeners prefer. A few inches of finished compost worked lightly around the base of each plant adds organic matter, improves soil structure, and releases nutrients slowly over time.
It is harder to overdo compost compared to concentrated synthetic fertilizers.
If you have never had your garden soil tested, it is worth doing at least once. The OSU Extension office and many local extension resources offer affordable soil testing.
Knowing your soil’s nutrient levels and pH takes the guesswork out of feeding and helps you avoid applying things your soil does not actually need.
After the first feeding, many gardeners continue on a regular schedule through the season. Stopping fertilizer applications about six weeks before the first expected fall frost is a common and sensible practice.
4. Refresh Mulch Without Burying The Crown

Mulch is one of the most practical tools in a rose gardener’s seasonal routine. A fresh layer applied before summer heat builds can do a lot of quiet, useful work.
It slows moisture loss from the soil, moderates soil temperature during hot stretches, and cuts down on the weeds that compete with roses for water and nutrients.
Shredded bark, composted leaves, and clean organic mulch are all solid choices. Avoid anything too fine or compacted that might mat down and block water from reaching the soil.
A layer about two to three inches deep is generally enough to be effective without creating problems.
Here is where many gardeners make an easy mistake: piling mulch too close to the base of the plant. Mulch pushed against the crown, the graft union, or the lower canes holds moisture against the wood.
That trapped moisture can encourage rot and fungal issues, especially during the wet, warm stretches that local springs often bring.
Keep a small gap, a few inches at minimum, between the mulch and the base of each plant.
You want the crown and lower canes to have good airflow and to stay reasonably dry at the surface.
The mulch should protect the soil around the plant, not smother the plant itself.
Refreshing mulch does not always mean stripping everything out and starting over. If last year’s mulch is still in decent shape, you may only need to add a thin new layer on top and fluff up what is already there.
If the old mulch has broken down completely into the soil, a fuller refresh makes more sense.
Pulling weeds before laying fresh mulch gives the new layer a cleaner start and reduces competition right as roses head into their most active growing period.
5. Water Deeply Before Heat Settles In

Watering seems straightforward until you realize how many rose problems trace back to doing it wrong. Quick, shallow splashes at the surface do not do much for a rose with a root system that can reach well below the top few inches of soil.
Deep, consistent watering that soaks down to where the roots actually live is far more useful.
How often to water depends on your soil type, recent rainfall, and the weather. Sandy soils drain faster and may need more frequent watering.
Heavy clay soils, which are common in many parts of this state, hold moisture longer but can also stay waterlogged after heavy rain. Checking the soil a few inches down before watering helps you avoid both underwatering and overwatering.
Watering at the soil level, rather than overhead, is a habit worth building. Wet foliage is one of the conditions that helps black spot and other fungal issues spread.
Soaker hoses and drip irrigation are practical options that deliver water where it is needed without wetting the leaves.
Morning is generally the best time to water. If some foliage does get wet, morning watering gives it more time to dry out before evening when cooler, calmer conditions allow moisture to linger.
Evening watering that leaves leaves wet overnight is a setup for fungal problems during warm, humid weather.
During dry stretches in spring, before summer rains become more frequent or less predictable, checking moisture regularly is important. A rose that goes into summer already stressed from inconsistent spring watering is less equipped to handle the heat.
Building good watering habits now, before conditions get tough, gives plants a stronger foundation for the months ahead.
6. Watch Early For Black Spot And Aphids

Spring growth on roses is tender, fast-moving, and, unfortunately, attractive to a couple of the most common rose problems around. Black spot and aphids both tend to show up early in the season.
Catching them before they spread widely is much easier than dealing with a full-scale outbreak in midsummer.
Black spot is a fungal disease that shows up as, predictably, dark circular spots on the leaves. Infected leaves often yellow and drop early.
The spores spread quickly in wet conditions, which is exactly what many local springs deliver. Once a plant starts losing leaves repeatedly, it puts a lot of energy into replacing them instead of pushing flowers.
Removing affected leaves as soon as you spot them and disposing of them away from the garden helps slow the spread. Do not compost rose leaves that show signs of black spot.
Avoiding overhead watering and improving airflow around plants both make a real difference. Keeping the area under rose bushes clean of fallen leaves also helps manage this disease over time.
Aphids cluster on the soft new tips of canes and on developing buds. A light infestation can sometimes be knocked off with a firm stream of water from the hose.
Checking plants regularly, at least a couple of times a week during active spring growth, lets you catch clusters before populations build up.
Extension-backed guidance generally recommends starting with the least intensive approach. Physical removal, improving plant health, and adjusting cultural practices come before reaching for any spray product.
If a problem persists despite those efforts, consult your local extension office for regionally appropriate recommendations before using any treatment.
Healthy, well-fed, well-watered roses with good airflow are naturally more resilient. Prevention through good care is always the most practical first line of defense.
7. Give Roses Better Airflow Before Humidity Builds

Humidity is one of those seasonal realities that rose growers in this part of the country know well. When warm, wet air settles in during summer, crowded plants trap moisture around their leaves and stems.
That makes them much more vulnerable to the fungal diseases that thrive in those conditions. Getting ahead of this before the humidity builds is a smart move.
Start by looking at the space between your rose plants and everything growing nearby. Overgrown perennials, weeds, and sprawling ground covers that have crept close to rose canes can reduce airflow significantly.
Trimming back neighboring plants and pulling weeds from inside the rose bed opens up space for air to move through more freely.
Inside each plant, pruning for an open center can help air circulate through the canes. Use this approach where it is appropriate for the rose type, rather than letting air get trapped in a dense, leafy mass.
This is not about cutting plants back severely. It is about removing enough interior growth to let some light and air reach into the middle of the plant.
Spacing matters too, especially for newer plantings. Roses placed too close together, even if they looked well-spaced at planting time, can grow into each other quickly once summer growth kicks in.
If crowding is already a problem in an established bed, it may be worth considering whether some plants need to be relocated in fall.
Keeping the ground beneath rose plants clean also contributes to better airflow at the base level. Fallen leaves, spent blooms, and accumulated debris hold moisture and can harbor fungal spores.
Clearing that material regularly throughout the season, not just once at cleanup time, is one of the more effective low-effort habits you can build.
Better airflow will not make roses completely immune to disease pressure. Still, it gives them a measurable advantage heading into the most challenging part of the growing season.