How To Root Hydrangea Cuttings In Georgia Before Summer Heat Arrives
Hydrangeas are one of those plants people always seem to want more of once late spring arrives in Georgia.
Large blooms quickly brighten empty corners of the yard, and healthy shrubs can completely change how garden beds look heading into summer.
Buying several new plants gets expensive fast, which is why cuttings become so popular this time of year.
Late spring also gives hydrangea cuttings a better chance to root before intense heat settles in. Soft new growth responds much faster while temperatures still feel moderate and moisture remains easier to manage around young plants.
Waiting too long can create problems quickly. Hot afternoons dry out tender stems much faster, especially when fresh cuttings receive strong sun or uneven watering.
Even small mistakes during the first couple of weeks can slow rooting or weaken new growth before summer arrives.
Cuttings started at the right time usually establish much better and often grow into healthier shrubs before the hottest part of the season begins.
1. Choose Healthy Green Stems Before Temperatures Rise

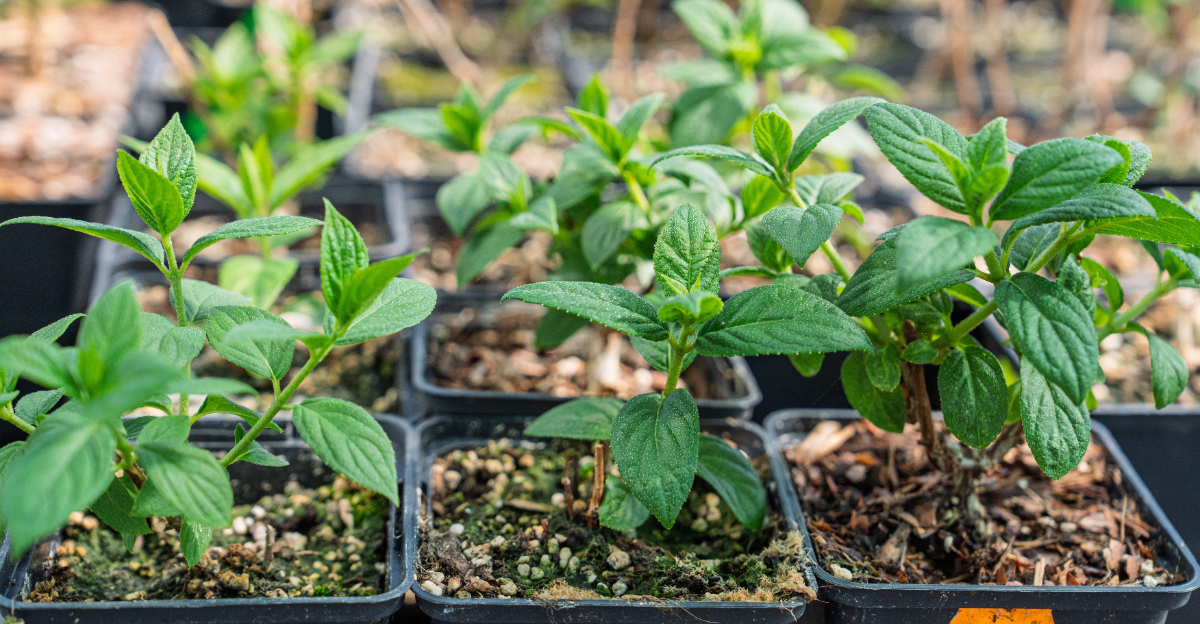
Not every stem on your hydrangea is worth cutting, and choosing the wrong one can set your whole project back by weeks. Look for stems that are soft and green, not woody or brown at the base.
Georgia gardeners working in late April or early May will usually find plenty of new growth that fits this description perfectly.
Avoid stems that already have flower buds forming. A stem that is putting energy into blooming will not redirect that energy toward growing roots.
Pinch off any buds you spot and move to a different stem entirely.
Healthy stems should feel slightly firm but still flexible when you bend them gently. Brittle stems snap too easily and tend to rot before rooting.
A good cutting is about four to six inches long, with at least two sets of leaves and a clean green color from top to bottom.
Stems showing spots, yellowing, or soft mushy sections should be skipped completely. Even one unhealthy cutting placed among healthy ones can introduce fungal issues to the whole batch.
2. Take Cuttings Early In The Morning For Better Moisture

Morning is genuinely the best time to take cuttings, and it is not just a gardening myth. Plants in Georgia have been absorbing overnight moisture and are fully hydrated before the sun begins pulling water from their leaves.
Cuttings taken at this time carry more internal moisture, which gives them a stronger start before roots form.
By midday, even on mild spring days in Georgia, stems lose moisture quickly once cut. A cutting taken at noon or later is already at a disadvantage before it ever touches soil.
Early morning cuttings placed into soil or water right away show noticeably better results over time.
Bring a small container of water with you when you go out to collect cuttings. Drop each stem into the water immediately after cutting rather than letting it sit exposed to air.
This simple habit keeps the cutting hydrated during the short walk back to your potting area.
Your Georgia Garden Changes Every Week. Your Plan Should Too.
Gardening in Georgia changes quickly throughout the season. Every Friday you’ll receive a simple weekly plan showing exactly what to plant, prune, fertilize, harvest, and protect so you never miss the right timing.
Use clean, sharp pruning shears or a sharp knife for every cut. Dull tools crush the stem instead of cutting cleanly, which slows root development and opens the door to bacterial problems.
Wipe your blades with rubbing alcohol between plants to keep things clean.
Cut just below a leaf node at a slight angle rather than straight across.
3. Remove Lower Leaves Before Placing Cuttings In Soil

Stripping the lower leaves off your cutting before planting is one of those steps that feels minor but actually matters a lot.
Leaves buried in soil trap moisture against the stem and create conditions where rot can develop quickly, especially in Georgia where spring humidity already runs high.
Removing them takes about ten seconds per cutting and saves a lot of frustration later.
Keep only the top two leaves on each cutting, and if those leaves are large, cut them in half horizontally. Big leaves pull moisture out of the cutting faster than small roots can replace it.
Reducing the leaf surface area slows that moisture loss and gives the cutting a better chance of surviving long enough to root.
Once the lower leaves are removed, you will see the nodes clearly. Nodes are the small bumps or joints along the stem where leaves were attached.
Roots will emerge from these points, so make sure at least one or two nodes are buried in the soil when you plant.
Some gardeners in Georgia also lightly scrape the bottom inch of the stem with a knife before planting. Scraping exposes the cambium layer just under the outer skin, which can encourage faster root development.
It is an optional step but worth trying if your cuttings have been slow to root in the past.
4. Use A Loose Potting Mix That Drains Well

Soil choice is where a lot of beginner mistakes happen. Dense, heavy soil holds too much moisture around the stem base, which leads to rot before roots ever develop.
Young hydrangea cuttings in Georgia need a mix that stays lightly moist without becoming waterlogged, especially during the warm and unpredictable spring weeks leading up to summer.
A simple mix of half perlite and half standard potting soil works reliably well for most hydrangea varieties. Perlite is lightweight, keeps air pockets in the mix, and prevents compaction around the developing roots.
Garden soil straight from your yard is too heavy and often carries fungal spores that can harm unrooted cuttings.
Fill small nursery pots or four-inch containers rather than large ones. Smaller containers dry out at a more manageable pace, making it easier to maintain the light moisture level that cuttings need.
Large pots stay wet too long and increase the chance of stem problems.
Before placing your cutting, poke a small hole in the center of the mix with a pencil or stick. Pushing a cutting directly into the soil without a guide hole can scrape off the rooting hormone you applied or damage the tender base of the stem.
5. Keep Cuttings In Bright Shade Instead Of Full Sun

Direct sun is one of the fastest ways to lose a cutting before it ever has a chance to root. Unrooted cuttings have no way to pull water from the soil because they have no roots yet, so any heat or sun that pulls moisture from the leaves cannot be replaced.
Where late spring sun can become intense even before summer officially arrives, shade placement is not optional.
Bright, indirect light is the sweet spot. A spot under a large tree, on a covered porch, or along the north side of a structure gives cuttings the light they need for photosynthesis without the stress of direct exposure.
Morning light with afternoon shade is a reliable setup that works well in most regions.
Watch your cuttings during the first few days after planting. Wilting is common in the first 24 to 48 hours and does not always mean something has gone wrong.
Once the cutting adjusts and begins developing roots, it will perk back up on its own without intervention.
Avoid placing cuttings near heat reflecting surfaces like white walls, metal fencing, or concrete patios. Radiant heat from these surfaces can raise the temperature around your pots significantly, even in shade.
Late spring temperatures climb fast enough without adding extra heat sources nearby.
6. Maintain Light Moisture Without Soaking The Soil

Watering cuttings is a balance that trips up even experienced gardeners. Too little moisture and the cutting wilts before roots develop.
Too much moisture and the stem base sits in wet soil long enough for fungal rot to set in. In Georgia’s humid spring climate, the soil stays moist longer than it would in drier regions, so you often need to water less frequently than you might think.
Check soil moisture by pressing one finger about an inch into the mix. If it feels slightly damp but not wet, leave it alone.
If it feels dry and pulls away from the pot edge, give it a light drink. Checking daily in the first week helps you learn the rhythm of how fast your specific mix dries out.
A small spray bottle works better than a watering can for young cuttings. Pouring water directly from a can can displace the cutting or soak the soil too heavily.
Misting the soil surface and lightly spraying the leaves keeps humidity around the cutting without flooding the root zone.
7. Transplant Cuttings Before Hot Weather Settles In

Rooted cuttings need to move into their permanent spot before summer heat locks in for the season.
Once daytime temperatures consistently push past 90 degrees, even established plants struggle, and newly transplanted cuttings face serious stress trying to adjust to a new location in that kind of heat.
Aim to transplant by late May or very early June at the latest.
Check that your cutting has actually rooted before moving it. Tug gently on the stem with two fingers.
Resistance means roots have formed and anchored into the soil. No resistance means it needs more time, and transplanting too early can set the whole process back significantly.
Choose a transplant spot that gets morning sun and afternoon shade. Hydrangeas perform best when they are protected from the harsh western afternoon sun that peaks in summer.
A spot along the east side of your home or under a canopy of tall trees often works very well.
Dig a hole slightly wider than the pot and the same depth as the root ball. Loosen the soil around the edges of the hole so young roots can spread outward without hitting a wall of compacted earth.
Adding a small amount of compost to the backfill gives the cutting a nutrient boost right from the start.