How Arizona Gardeners Turn Lemon Cuttings Into Thriving Backyard Trees
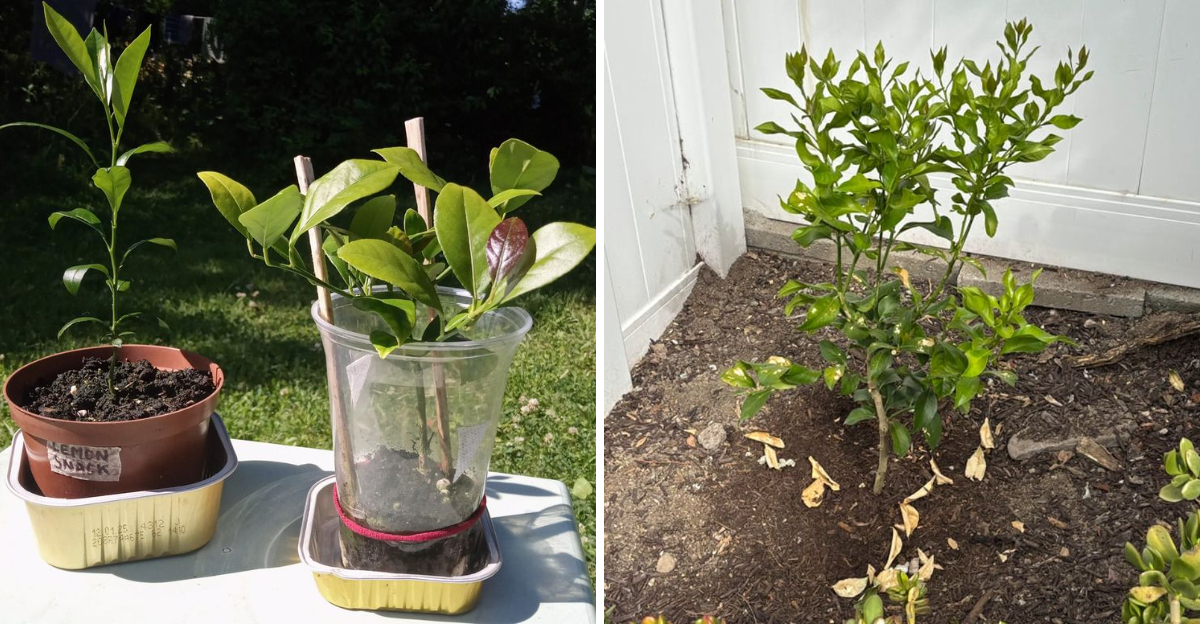
Arizona gardeners do not always start lemon trees from seeds anymore. Cuttings have become much more popular because they grow faster, stay true to the parent tree, and often begin producing sooner in warm climates.
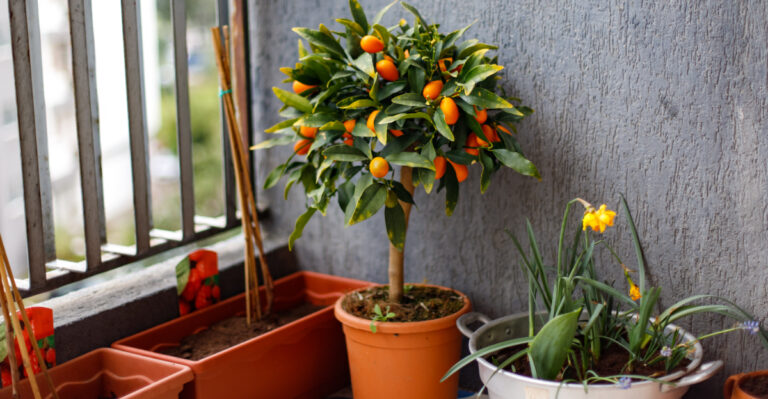
One healthy branch can eventually turn into a productive backyard tree with the right setup early on.
Late spring is usually when many people try rooting lemon cuttings before extreme heat settles across the state. Warm temperatures help roots form faster, but strong afternoon sun can dry stems out surprisingly quickly.
That balance is where most beginners run into trouble.
Container choice matters more than people expect too. Poor drainage, soggy soil, and crowded pots can slow growth before roots even develop properly.
Even healthy cuttings can struggle when conditions stay too wet during warm weather.
Once new leaves finally appear, the entire process starts feeling much more rewarding and far less intimidating for first time gardeners.
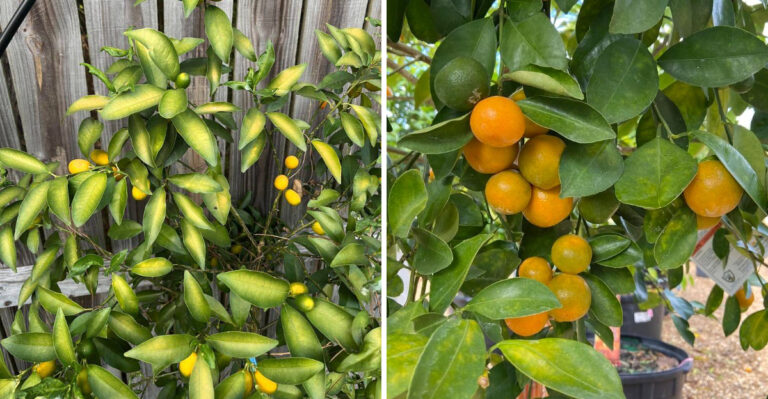
1. Choose A Healthy Branch With Fresh Spring Growth

Spring growth is the secret weapon most gardeners overlook. When a lemon tree pushes out soft, bright green shoots in early spring, those new stems carry the highest rooting potential of any time of year.
Look for branches that are pencil-thick and flexible. Avoid anything woody, cracked, or showing signs of pest damage.
A stem with two or three sets of leaves and no flower buds is exactly what you want.
Healthy parent trees produce the best cuttings. Before you snip anything, make sure the tree you are pulling from has no yellowing leaves, spotted bark, or signs of citrus disease.
Diseased wood will not root well, and it can spread problems to your new plant.
Check the branch in morning light when you can see color and texture most clearly. Fresh spring wood bends without snapping and has a clean, slightly citrusy smell when scratched.
Selecting the right branch takes only a few minutes but makes a huge difference in your success rate. Experienced growers often say that good cuttings start long before the pruning shears come out.
Spend time choosing carefully, and your rooting process will go much more smoothly from the very first day.
2. Cut Stems Just Below A Leaf Node

Placement of your cut matters more than most people realize. Cutting just below a leaf node, which is the small bump where a leaf meets the stem, gives the cutting its best chance to sprout roots.
Use clean, sharp pruning shears. Dull blades crush the stem tissue instead of slicing cleanly, and crushed tissue struggles to callous properly.
Aim for a cutting between four and six inches long. Shorter pieces dry out too fast.
Longer ones demand more energy than a rootless stem can support on its own.
Cut at a slight angle rather than straight across. An angled cut increases the surface area exposed to rooting hormone and potting mix, which gives more cells a chance to develop into roots.
Make your cut in the early morning when stems hold the most moisture, especially in Arizona where dry air and rising temperatures can dehydrate fresh cuttings quickly.
Your Arizona Garden Changes Every Week. Your Plan Should Too.
Gardening in Arizona changes quickly throughout the season. Every Friday you’ll receive a simple weekly plan showing exactly what to plant, prune, fertilize, harvest, and protect so you never miss the right timing.
Cuttings taken midday in warm weather can wilt quickly before you even get them into soil.
Work fast, keep cuttings shaded, and get them into your rooting medium within an hour of cutting. Small habits like these add up to noticeably better results over time.
3. Remove Lower Leaves Before Planting The Cutting

Bare stems root faster than leafy ones. Stripping the lower leaves off your cutting before planting reduces moisture loss and prevents rotting where the stem meets the soil.
Leave only two or three leaves at the top of the cutting.
Those remaining leaves still photosynthesize and provide the cutting with a small but steady energy supply while roots are forming underground.
Pull lower leaves off with a firm downward motion rather than tearing sideways. Sideways tears leave ragged wounds that invite fungal problems.
Clean removal points heal over quickly and stay less vulnerable to rot in moist potting mix.
If any leaves look spotted, pale, or damaged, remove those regardless of their position on the stem. Only clean, healthy foliage should stay on a cutting you plan to root.
Some gardeners also lightly scrape the bottom inch of the stem with a knife before planting. Scraping exposes the inner green layer called the cambium, which roots more readily than the outer bark.
Combined with clean leaf removal, this small step can noticeably speed up root formation. Keep your work area clean and your tools sharp for the smoothest possible prep process.
4. Use A Fast Draining Potting Mix To Prevent Rot

Soggy soil is the fastest way to lose a cutting. Roots need oxygen just as much as moisture, and a dense, waterlogged mix will suffocate new root growth before it even begins.
A reliable mix for lemon cuttings combines equal parts perlite and potting soil. Perlite keeps the mix loose and airy, allowing excess water to drain away quickly.
Pure potting soil alone tends to compact and hold too much moisture in small containers.
Some growers use a blend of coarse sand and peat moss instead. Either approach works well as long as water flows freely through the bottom of the pot within a few seconds of watering.
Always use a container with drainage holes. No exceptions.
Even the best potting mix turns problematic if water pools at the bottom with nowhere to go.
Moisten your mix before inserting the cutting rather than watering heavily afterward. Pre-moistened soil surrounds the stem with just enough humidity to encourage rooting without oversaturating the medium.
Check the mix every two to three days by pressing a finger about an inch deep. Water only when it feels almost dry.
Consistent moisture control at this early stage separates successful propagations from failed ones.
5. Keep Cuttings In Bright Shade During Early Rooting

Full sun sounds ideal for a citrus plant, but a fresh cutting has no roots yet. Without roots to pull water from the soil, direct sun will dry out and stress the cutting far faster than it can handle.
Bright shade is the sweet spot. A spot under a patio cover, a shade cloth, or beneath a larger tree that filters afternoon sun works very well.
The cutting still gets plenty of light to stay active without being overwhelmed by heat and UV intensity.
Watch the leaves closely during the first two weeks. Slight wilting in the afternoon is normal and usually recovers overnight.
Heavy, persistent wilting means the cutting needs more shade or a light misting on the foliage during the hottest part of the day.
Avoid placing cuttings near reflective walls or concrete surfaces that trap and radiate extra heat. Even indirect heat buildup can stress unrooted stems significantly in warm months.
Once you notice new leaf growth emerging from the top of the cutting, that is a reliable sign that roots are forming below. At that point, you can begin gradually introducing more direct morning light.
Move slowly and watch how the plant responds before making any big changes to its light environment.
6. Water Lightly Until Strong Roots Begin Forming

Too much water damages more cuttings than underwatering does.
Light, consistent moisture is the goal during rooting, not saturated soil that stays wet for days at a time.
Water your cutting every two to three days depending on how quickly your potting mix dries out. In warm, dry weather, the mix may need attention every other day.
In cooler or more humid conditions, you can stretch that schedule a bit longer without issue.
A spray bottle works well for the first few weeks. Light misting keeps the top layer of soil damp without flooding the deeper portion of the pot where the stem base sits.
Flooding that zone leads to stem rot, which can end a cutting’s progress quickly.
Gently tug the cutting after three to four weeks. A small amount of resistance means roots are anchoring into the mix.
No resistance at all means the process needs more time, and you should keep up your light watering routine.
Patience matters more than technique at this stage. Some cuttings root in three weeks.
Others take six or seven weeks depending on stem thickness, season, and potting mix composition. Keep conditions steady and avoid the temptation to repot or disturb the cutting before strong roots have formed.
Consistency at this phase pays off significantly later.
7. Transplant Young Trees Gradually Into Full Sun

Rushing a young lemon tree into full sun is a common mistake. Even after rooting successfully, a cutting-grown tree needs time to adjust before it can handle intense direct sunlight all day long.
Start the transition by moving the plant into morning sun only. Early sun is gentler and helps the tree build tolerance without the stress of peak afternoon heat.
After one to two weeks of morning exposure, add another hour or two of afternoon light gradually.
Watch the leaves for signs of sunburn. Pale patches or bleached edges mean the tree needs more time in partial shade before moving further into full sun.
Healthy adjustment shows up as darker, glossy leaves and steady new growth.
When transplanting into the ground or a larger container, choose a spot with well-draining soil and at least six to eight hours of daily sun once fully established.
Lemon trees are heavy feeders and light lovers, but they need to reach that stage through a careful, gradual process.
Water deeply after transplanting and mulch around the base to retain soil moisture and regulate root temperature. Avoid fertilizing for the first four to six weeks after transplanting.
Let the roots settle and anchor before you push the tree toward heavy growth. A patient approach here sets the foundation for years of productive fruiting.