This Is The Best Way To Propagate Roses From Cuttings In Ohio
Why buy a rose when the one you already love is growing right outside? Ohio gardeners who figure out cuttings never look at a garden center price tag the same way again.
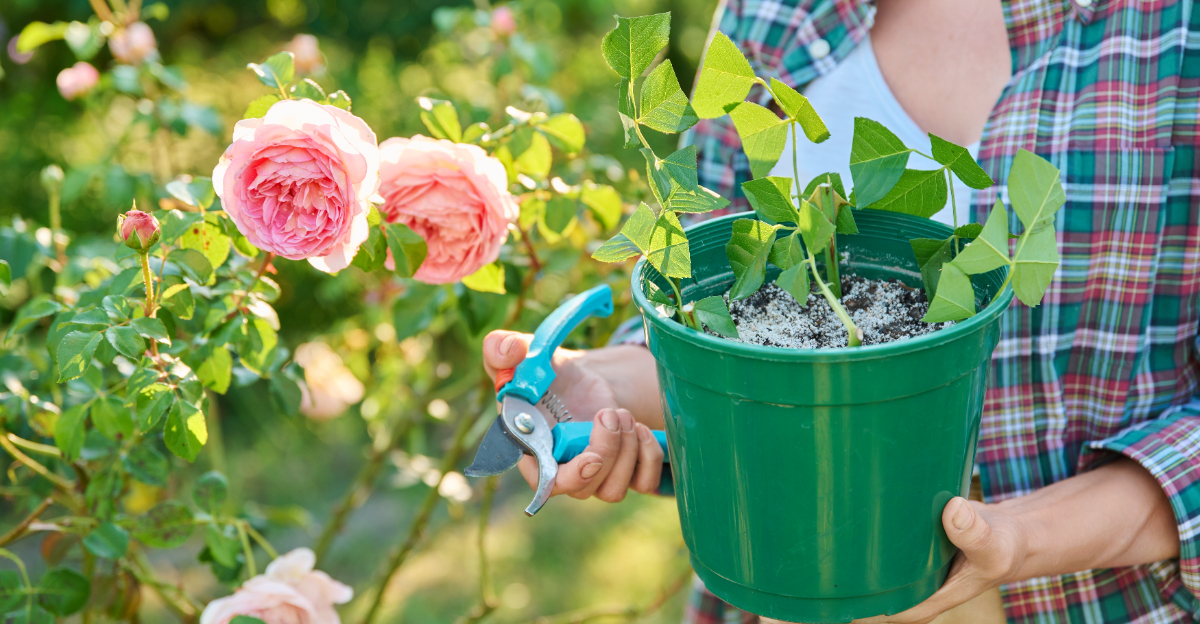
A healthy stem taken at the right moment can become a fully rooted plant by fall.
No special equipment. No expert knowledge. Just the right technique applied during a window that the growing season hands you every year.
Most gardeners assume propagating roses is complicated. It is not.
It is specific. Nail the specifics and the garden starts multiplying itself.
That rose that has been turning heads for three seasons is also the best cutting source you will ever find. This is how Ohio gardeners grow more of what they love without spending another dollar.
1. Start With Softwood Cuttings In Late Spring

Late spring is one of the best windows to try propagating roses from cuttings, and right now many Ohio backyard gardens across the state are perfectly timed for the job.
Roses push fresh, bendable new growth from roughly late May into June, and that soft, flexible wood is exactly what you want for softwood cuttings.
The stems should bend without snapping, but they should not be so young and limp that they flop over when you hold them.
Timing does vary depending on where you are in the state. Southern regions tend to warm up earlier, so roses there may already be producing strong new growth by mid-May.
Central areas usually follow close behind. Northern regions and Lake Erie-influenced areas sometimes run a week or two later, so gardeners there may find that early June is actually a better target than late May.
Softwood cuttings are different from hardwood cuttings, which are taken from fully dormant, woody stems in late fall or winter. Softwood cuttings come from actively growing shoots that have not yet matured into firm wood.
That active growth phase is part of what makes this time of year such a useful starting point. Just keep in mind that not every variety roots equally well, and some results will always depend on the plant itself.
2. Take Stems From Healthy New Growth

Choosing the right stem is one of the most important decisions you will make during this whole process. Cuttings should always come from plants that look healthy, with no signs of disease, heavy insect damage, or stress.
A stem from a struggling plant is already working hard just to survive, and asking it to also grow roots is usually too much.
Look for shoots that have recently finished blooming or are in the middle of active growth. These stems tend to be firm enough to handle without wilting immediately after cutting.
Avoid any stem that looks weak, yellowed, spotted, or heavily covered in aphids or other pests. Diseased material can introduce problems into your propagation mix and reduce your chances before you even get started.
Stems with flower buds still attached can sometimes work if you remove the buds before planting.
Your Ohio Garden Changes Every Week. Your Plan Should Too.
Gardening in Ohio changes quickly throughout the season. Every Friday you’ll receive a simple weekly plan showing exactly what to plant, prune, fertilize, harvest, and protect so you never miss the right timing.
Fully open blooms tend to draw too much energy away from root development. A stem that has just finished blooming and is now pushing new side growth can be a solid choice.
Some rose varieties root more easily than others.
Older garden roses, species roses, and shrub roses often root more reliably than modern hybrid teas. Check whether your rose is patented before propagating, since reproducing patented varieties without permission is not allowed.
3. Cut In The Morning Before Heat Builds

Morning is genuinely the best time to take rose cuttings, and it is not just gardening folklore. Stems hold more moisture early in the day before the sun and heat cause them to lose water through their leaves.
A well-hydrated cutting has a much better chance of surviving long enough to grow roots than one taken at noon on a hot June afternoon.
Before you head outside, get your supplies ready so you are not scrambling after making cuts. Have a clean container of water or a damp paper towel ready to hold your cuttings the moment they come off the plant.
Even a few minutes of exposure to dry air and heat can stress a freshly cut stem enough to hurt your results. A small bucket with an inch or two of water works well as a temporary holding spot while you finish collecting material.
Try to work quickly and move cut stems out of direct sun right away. If you are collecting several cuttings from different plants, labeling them as you go saves confusion later.
A simple piece of masking tape and a marker on each container is enough. Cuttings left sitting on a table in the sun while you search for supplies are already at a disadvantage.
A little preparation before you step outside makes a real difference to your success rate.
4. Trim Each Cutting Below A Leaf Node

Once you have your stems collected, it is time to prepare each one carefully. A good softwood cutting is typically four to six inches long and includes at least two or three leaf nodes.
Nodes are the small bumps or joints along the stem where leaves attach.
Roots are much more likely to form from these points than from the smooth sections of stem between them.
Make your lower cut cleanly, just below a node, using sharp pruners or a clean knife. A clean cut reduces the chance of stem damage that can slow rooting or invite problems.
Crushed or torn stem ends do not root as well as smooth, precise cuts, so dull tools are worth skipping. Wipe your blades with rubbing alcohol between plants to keep things clean.
Remove the lower leaves from the bottom half of the cutting so they do not end up buried in the rooting mix. Buried leaves can break down and cause problems in the propagation container.
Leave a few healthy leaves at the top of the cutting so it can still process some light, but remove any flower buds or open blooms.
Flowers and buds pull energy toward reproduction rather than root development, and at this stage, roots are the only goal.
Trim carefully and handle the cutting gently to avoid bruising the stem.
5. Use Rooting Hormone To Improve Your Chances

Rooting hormone is not a magic solution, but it can genuinely improve your odds, especially if you are new to propagating roses. The hormone encourages the cutting to produce roots faster and more reliably than it might on its own.
You can find rooting hormone in powder, gel, or liquid form at most garden centers, and all three can work well when used correctly.
For powder formulas, moisten the cut end of the stem slightly.
Then dip it into the powder so a thin, even coating sticks to the bottom inch or so. Tap off any excess before planting.
For gel or liquid types, follow the directions on the product label, since concentrations and timing vary between brands. More hormone is not better, and overdoing it can actually slow or prevent rooting rather than help it.
One important habit to build early: never dip your cuttings directly into the main bottle or container of rooting hormone. Pour a small amount into a separate dish for each session.
Dipping stems directly into the original container can introduce moisture and plant material that may reduce the shelf life of the product or cause contamination. After you are done, discard any leftover hormone from the dish rather than pouring it back.
It is a small step that keeps your supplies in better shape for next time.
6. Place Cuttings In A Light, Well-Drained Mix

What you root your cuttings in matters more than many beginners expect. Rose cuttings need a medium that holds just enough moisture to keep the stem from drying out.
It should also drain freely enough that the base of the cutting never sits in soggy conditions. Heavy garden soil is one of the most common mistakes people make, and it almost always leads to disappointment.
Garden soil compacts in containers, drains poorly, and carries organisms that can work against tender cuttings.
A clean seed-starting mix works well, especially when blended with perlite to improve drainage. Some gardeners use pure perlite or a half-and-half mix of perlite and coarse sand.
The goal is a loose, airy medium that roots can push through easily as they develop. Whatever you use, make sure it is fresh and has not been sitting in an open bag outdoors where it could have picked up unwanted guests.
Fill small pots or a propagation tray with your chosen mix and water it lightly before inserting the cuttings. Use a pencil or chopstick to make a small hole first so the rooting hormone coating does not scrape off when you push the stem in.
Firm the mix gently around the base of each cutting so it stands upright without leaning. Label each pot with the rose variety and the date so you can track your results over the coming weeks.
7. Keep Humidity High While Roots Form

Softwood cuttings have one serious vulnerability: they lose moisture fast. Before roots form, the cutting has no way to pull water up from the soil, so it depends entirely on the moisture already in its stems and leaves.
Keeping humidity high around the cutting helps slow that moisture loss and gives the stem more time to develop roots before it runs dry.
A clear plastic bag, a humidity dome, or a clear plastic bottle with the bottom cut off can all work as simple covers.
Prop each cover so it does not touch the leaves. The goal is to trap humid air around the cuttings without letting the cover rest directly on the leaves, which can cause problems where contact occurs.
Check under the cover every day or two and remove it briefly to let fresh air in.
The rooting mix should stay lightly and evenly moist throughout this period. If it dries out completely, the cuttings will struggle.
If it stays soaked, the stem base may break down before roots ever appear. Find that middle ground by watering gently when the surface feels barely dry to the touch.
Keep the cuttings out of hot direct sun, which can turn a covered propagation setup into an oven very quickly. Bright, indirect light is much kinder to new cuttings than harsh afternoon sun during late spring and early summer.
8. Move New Roses Outside Only After Roots Settle

Getting a cutting to root is a real accomplishment, but the work is not over once you see signs of new growth. Rooted cuttings are still fragile, and moving them outside too quickly, or into full sun without any adjustment period, can set them back significantly.
Patience in these final weeks pays off just as much as the careful work you put in at the start.
Before transplanting, check that roots have actually developed by gently tugging the cutting. If it offers slight resistance rather than pulling free immediately, roots are likely present.
Some gardeners wait until they can see roots beginning to emerge from the drainage holes at the bottom of the pot.
Either way, give the plant a little more time in its propagation container after you confirm roots, letting it grow a bit stronger before the big move.
When you are ready to transition the young plant outside, do it gradually over several days. Start with a shaded or partly shaded spot outdoors and increase sun exposure slowly over one to two weeks.
This process, sometimes called hardening off, helps the plant adjust to outdoor light, wind, and temperature swings without shock. Once planted in the garden, young roses need consistent watering during their first season as they establish.
Avoid letting the soil dry out completely, and hold off on heavy fertilizing until the plant looks settled and is putting out steady new growth.