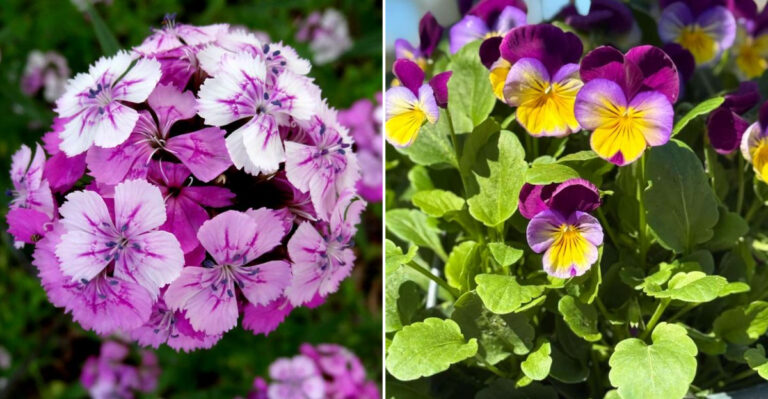
How To Prune Oregon Lavender In Late Spring Without Ruining The Shape
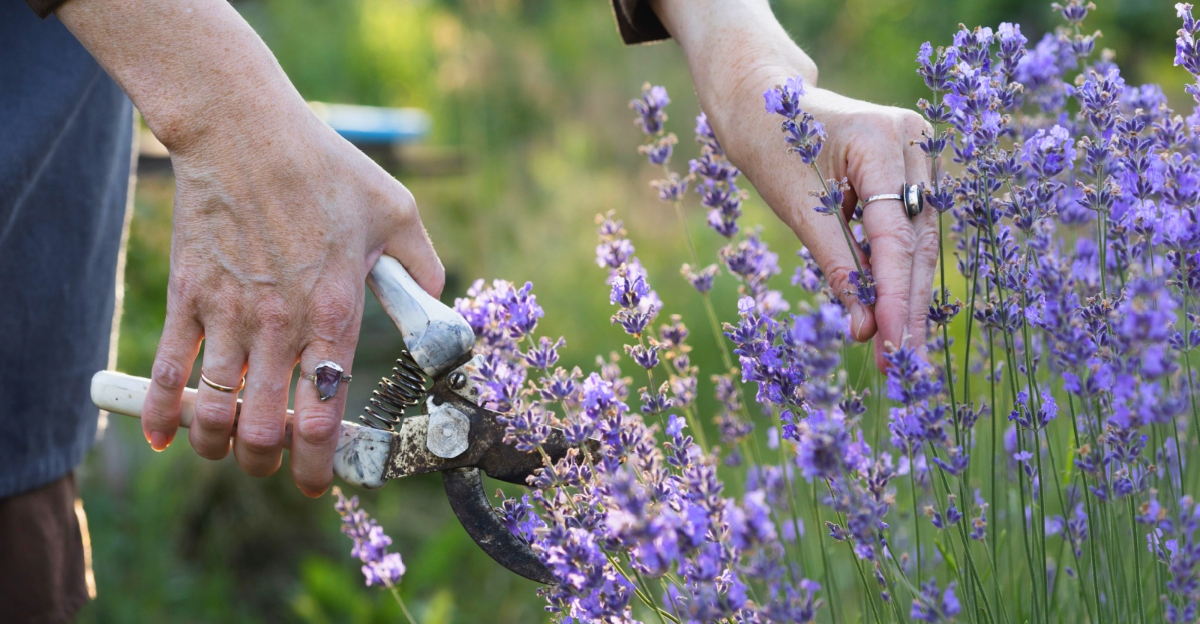
Pruning lavender in late spring feels straightforward until you are actually standing in an Oregon garden with a pair of shears and a plant that looks a little rougher than expected.
Oregon winters can be wet and unpredictable, and spring weather does not always cooperate, which means lavender sometimes enters the pruning season looking uneven, winter-worn, or a bit leggy.
The good news is that with some patience and a light hand, you can tidy up your lavender without leaving it looking awkward or lopsided.
Knowing where to cut, when to start, and how much to remove makes a real difference in keeping that soft, rounded shape intact through summer.
1. Wait Until New Green Growth Shows

One of the most reassuring signs in an Oregon spring garden is spotting fresh green shoots pushing up through older lavender stems. That new growth is your signal that the plant is ready for pruning.
Cutting before those green shoots appear can leave you guessing where the plant is actually alive and healthy, which makes it easy to accidentally remove more than intended.
In Oregon, late spring can arrive gradually. Some years the weather warms quickly, and other years a cold snap hangs around well into May.
Waiting for visible green growth before picking up your shears removes a lot of that guesswork. You can see exactly where the plant has energy and where stems are responding to the season.
Fresh shoots also act as a natural guide for how high to hold your cut. Pruning just above areas where new leaves are forming keeps the cut in a zone where the plant can fill back in through the growing season.
Stems that show no green by late spring may be winter-damaged and worth removing carefully. Checking each stem individually before cutting helps you make smarter choices and keeps the overall shape looking intentional rather than patchy.
2. Keep Each Cut Above Leafy Stems

Lavender has a straightforward pruning preference that many gardeners learn the easy way: cuts belong above the leafy, green part of the stem.
Every time you position your shears, look for the lowest cluster of green leaves on that stem and make your cut somewhere above it.
That small habit keeps the plant in a zone where it can regrow and fill out naturally.
In Oregon gardens, this approach matters especially after a wet winter. Moisture and cool temperatures can leave some stems looking bare and grey near the base while still carrying green growth higher up.
Cutting above those green sections keeps the plant in a healthy growing zone rather than pushing it toward bare wood that may struggle to respond.
Staying above leafy growth also helps maintain the plant’s overall silhouette. When every cut lands in a zone with active leaves, the lavender tends to bounce back with a fuller, more even appearance.
Cuts that dip too low into bare sections can leave gaps that take a long time to fill in, if they fill in at all.
Working your way around the plant methodically, stem by stem, and checking for green before each cut keeps the shaping process steady and the results looking clean and intentional rather than choppy or uneven.
3. Avoid Cutting Into Old Bare Wood

Bare, brown, woody stems at the base of a lavender plant are not just an aesthetic quirk. They are a signal that this part of the plant is unlikely to push out new growth if cut.
Lavender, unlike some other shrubs, tends to have limited ability to regenerate from hard, leafless wood, and an aggressive cut into that zone can leave a plant looking sparse and unbalanced for a long time.
Oregon gardeners who have tried to rejuvenate an old lavender by cutting it hard to the base often find that the results are disappointing. The bare woody sections may simply sit dormant rather than sprouting fresh shoots.
The plant can end up looking more like a bundle of sticks than a thriving herb, especially going into summer when it should be at its best.
A safer approach is to work only within the green, leafy portion of the plant and leave the woody base largely undisturbed. If the lower stems are thick and bare, treat them as the plant’s structural foundation rather than material to be removed.
Shaping the upper, leafy growth into a soft mound above that woody base gives the lavender a tidy appearance without pushing it into territory where recovery is uncertain.
Patience with older plants tends to produce better results than dramatic cuts.
4. Shape Lavender Into A Soft Rounded Mound

Flat-topped lavender tends to look a little stiff and unnatural, especially in cottage gardens, herb borders, and the kind of relaxed landscape edges that suit Oregon’s outdoor aesthetic.
A soft, rounded mound shape sits more comfortably in the garden and tends to hold up better visually as the season progresses and flower stems begin to rise above the foliage.
To get that rounded look, imagine a gentle dome as you work. Start by trimming the top of the plant slightly shorter than the sides, then blend the sides downward so the whole plant curves rather than drops off sharply at the edges.
Working in small passes rather than making one dramatic cut gives you more control over the final shape and helps you catch any spots that look uneven before they become obvious.
In Oregon gardens where lavender grows in full sun with good drainage, a well-shaped mound can stay tidy for most of the summer with minimal additional attention.
The rounded form also tends to support better airflow around the plant, which matters in climates where spring moisture lingers.
Stepping back frequently while shaping to check the silhouette from a few feet away helps you see the overall form rather than getting too focused on individual stems.
Small adjustments made gradually usually produce a more satisfying result than trying to get the shape right in one pass.
5. Trim Winter-Worn Tips Before You Shape

Walking through an Oregon herb bed in late spring, it is easy to spot lavender tips that took a beating over winter. The ends may look dry, slightly discolored, or frayed compared to the fresher growth lower on the stem.
Removing those rougher tips before doing any real shaping helps you see the plant more clearly and makes the final pruning work easier and more accurate.
Think of it as a light cleanup pass before the actual shaping session. Go over the plant and snip away the worst-looking tips, just enough to get past the damaged section.
This step does not need to be precise or perfectly even. The goal is simply to clear away winter wear so you can assess the plant’s true shape and decide where the main pruning cuts should land.
Oregon winters vary quite a bit from year to year, and some seasons leave lavender looking noticeably rougher than others.
A mild winter might mean only a few tips need attention, while a cold or particularly wet season can leave a larger portion of the plant looking tired.
Either way, starting with a gentle tip cleanup before shaping gives the plant a fresher starting point and helps you avoid mistaking winter damage for the plant’s natural form.
Once the rough tips are gone, the underlying structure becomes much easier to read and work with.
6. Prune Before Buds Are Too Far Along

Lavender buds have a way of sneaking up on you in a busy spring garden. One week the plant looks like it is just waking up, and a few weeks later flower stems are already stretching upward with buds forming along their length.
Pruning too late in the season, once buds are well developed, means removing a portion of the flower display that would have bloomed through summer.
In Oregon, the window for late spring pruning tends to open once frost risk has eased and green growth is clearly visible. That window does not stay open indefinitely.
Warmer weather and longer days push lavender toward flowering fairly quickly, so keeping an eye on bud development helps you time the pruning before too much of the season’s bloom potential is already set.
Light shaping done before buds are far along tends to have less impact on flowering than a heavier cut made later.
If the buds are just beginning to form and are still quite small, a careful trim that removes only the upper tips may leave most of the flower stems intact.
Once buds are noticeably elongated or beginning to show color, it is usually better to hold off on pruning and let the plant bloom. Shaping can then happen after the main flush of flowers has finished, setting up the plant for a cleaner look heading into fall.
7. Go Lightly On Older Woody Lavender

Older lavender plants develop a character all their own, with thick woody bases, sprawling stems, and a shape that has shifted over several growing seasons.
Trying to force one of these plants back into the tight, compact form it had when it was young is rarely successful in a single pruning session, and the attempt can leave the plant looking worse rather than better.
Many Oregon gardeners who grow lavender in cottage gardens, dry borders, or foundation edges find that older plants need a gentler approach.
Rather than cutting hard to try to reshape the whole plant at once, focus on removing only the winter-worn or overly long sections while leaving the overall structure mostly intact.
Light shaping over several seasons tends to produce a more gradual and natural-looking improvement than one aggressive cut.
An older lavender that has been lightly maintained over time will generally hold its form better than one that has been neglected and then cut back hard in a single session.
If the plant has become quite open or sprawling, selective trimming of the longest stems can help tighten the silhouette a little without risking the bare-wood zones that may not recover.
Accepting that an older plant will have a slightly looser, more relaxed shape than a young one can also make the whole process feel less frustrating and more in tune with how lavender naturally grows over time.
8. Clear Clippings To Keep The Base Open

After a pruning session, the area around the base of a lavender plant can end up covered in a small pile of clipped stems and loose foliage.
Leaving that material sitting around the crown of the plant is worth avoiding, particularly in Oregon gardens where spring moisture can linger and airflow around the base of plants matters more than in drier climates.
Clearing away clippings promptly after pruning helps keep the crown area open and reduces the chance of moisture sitting against the stems for extended periods.
Lavender generally prefers a dry, well-drained environment, and even in a sunny Oregon garden bed, trapped clippings can hold moisture against the base in a way that the plant does not particularly enjoy.
A quick cleanup after shaping takes only a few minutes and keeps the area looking tidy at the same time.
Clippings from healthy lavender can be composted or simply set aside to dry.
Some gardeners in Oregon spread a thin layer of gravel around the base of their lavender plants to help with drainage and airflow, and clearing clippings before adding or refreshing that layer makes the whole process simpler.
Keeping the base of the plant open and uncluttered after pruning gives the lavender a better environment to grow through the rest of the season, especially as Oregon summers warm up and the plant shifts its energy toward flowering and new growth.