The First Steps To Take When New Jersey Hydrangeas Start Pushing New Growth
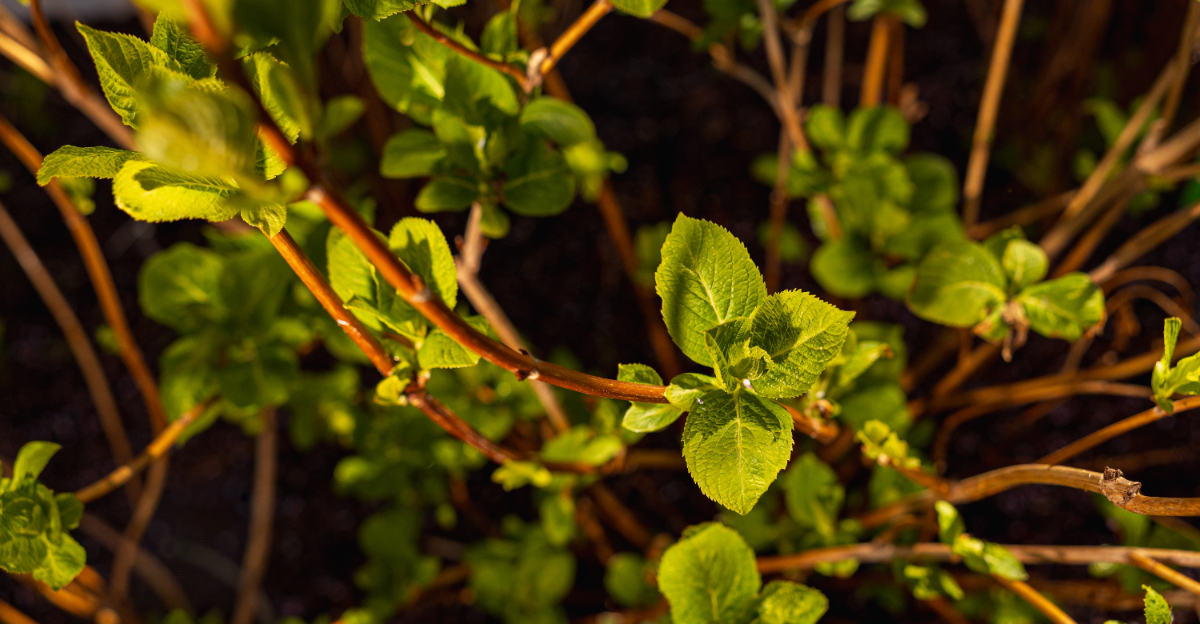
Nobody warns you how fast it happens. Your New Jersey hydrangeas go from bare and brown to visibly alive almost overnight, and suddenly the clock is ticking.
Those first green buds are not just a pretty sign of spring. They are a signal that your shrubs are already making decisions.
Right now, those stems are quietly choosing where to put their energy, which growth to invest in, and whether this summer delivers.
What you do in response to that signal matters more than anything you will do for these plants all year.
Get it right and you are looking at full, heavy blooms by midsummer. Get it wrong and you will spend the season wondering why your neighbor’s hydrangeas look so much better than yours.
1. Figure Out Which Hydrangea Variety You Have Before Touching Anything

Not all hydrangeas play by the same rules. The variety you have determines almost every decision you make from here on out.
Bigleaf hydrangeas, also called Hydrangea macrophylla, bloom on old wood. That means last year’s stems carry this season’s flowers.
Panicle and smooth hydrangeas bloom on new wood. You can prune them hard and they will still deliver a stunning show.
Oakleaf hydrangeas bloom on old wood and usually need only light pruning after flowering, if at all. They are forgiving, but they still prefer light pruning over aggressive cutting.
The easiest way to identify your shrub is to look at the leaf shape once new growth pushes out. Bigleaf varieties have large, rounded leaves with a glossy texture.
Panicle types have smaller, matte leaves and an upright, tree-like structure. Smooth hydrangeas stay low and rounded with soft, matte foliage.
If you are still unsure, take a photo and use a plant identification app. Most are free and surprisingly accurate.
Knowing your variety protects you from making a costly mistake. Cutting old wood on a bigleaf hydrangea in early spring can wipe out your entire bloom season with one wrong cut.
When New Jersey hydrangeas start pushing new growth, identification is step one. Everything else builds on this single piece of knowledge, so get it right before you grab any tool from the shed.
2. Remove Winter Mulch Gradually Once Nighttime Temperatures Stay Above Freezing

Pulling mulch too early is a rookie mistake that stings every time. A sudden cold snap after you have exposed the crown can set your shrubs back weeks.
The goal is patience. Wait until overnight lows in your area consistently stay above 32 degrees Fahrenheit before you start removing the insulating layer.
In most of New Jersey, that window opens somewhere between late March and mid-April. Check a local weather app for your specific zone before acting.
Start by pulling the mulch back a few inches at a time. Do not yank the whole pile away in one afternoon.
Gradual removal allows the soil temperature to adjust slowly. Roots that have been cold all winter need a gentle transition, not a sudden shock.
Leave a thin layer near the base for now. You can remove the rest once the forecast shows a solid stretch of frost-free nights ahead.
Straw and shredded leaves are the most common winter mulch materials in this region. Both decompose quickly once exposed to spring rain and warmth.
If you used burlap wrapping over the crown, remove it on a mild, overcast day. Bright sun on a freshly uncovered plant can temporarily slow new growth.
Slow and steady wins this race. Your hydrangeas will reward the extra caution with stronger early growth and a healthier root system all season long.
3. Inspect Every Stem For Winter Damage And Cut Back To The First Healthy Bud

Damaged wood does not lie. Once you know what to look for, spotting winter damage on hydrangea stems becomes almost second nature.
Scratch the bark of a stem lightly with your fingernail. Green underneath means the stem is alive and worth keeping.
Brown or tan underneath means that section is spent. Keep scratching downward until you find green tissue, then cut just above the first healthy bud.
Use clean, sharp bypass pruners for every cut. Dull blades crush the stem instead of slicing cleanly, which invites disease in through the wound.
Wipe your pruner blades with isopropyl solution between plants. This simple habit stops fungal spores from spreading from one shrub to another.
On bigleaf varieties, be conservative. Remove only the clearly damaged portions and leave any stem that shows signs of life intact.
On panicle and smooth types, you have more freedom. These shrubs can handle a harder cutback since they bloom on the current season’s new wood.
Look for crossing branches while you are at it. Removing stems that rub against each other improves airflow and reduces disease pressure later in the season.
Step back and look at the overall shape after each cut. You want an open, bowl-like structure that allows light and air to reach the center.
Healthy pruning now means fewer problems in July. The effort you put in during these early weeks pays off in fuller, more vibrant blooms all summer.
4. Protect Old Wood Varieties From Late Frost While New Growth Is Still Tender

Late frost in New Jersey is not a rare event. It is practically a spring tradition, arriving just when your hydrangeas look their most hopeful.
Bigleaf and oakleaf varieties are the most vulnerable. Their new growth and emerging flower buds are tender enough to be damaged by a single night below 28 degrees.
Watch the forecast closely from mid-March through early May. A surprise frost warning during that window means action time.
Lightweight frost cloth is your best friend here. Drape it loosely over the entire shrub before sunset on the evening a freeze is expected.
Avoid plastic sheeting if possible. It can trap moisture and cause leaf damage if it sits directly against the foliage.
Old bedsheets work in a pinch. The key is covering the plant before temperatures drop and removing the cover as soon as morning sun arrives.
If your shrubs are in containers, simply move them into a garage or shed overnight. Potted plants are far more vulnerable than those planted in the ground.
Mulching the base also helps protect roots from temperature swings. A three-inch layer of wood chips acts as a thermal buffer for the crown.
The new growth pushing through in spring is carrying this year’s flower buds. One late frost night can set back weeks of progress in a matter of hours.
Stay alert and keep that frost cloth handy. A little preparation now keeps your old wood varieties on track for a spectacular summer bloom.
5. Hold Off On Fertilizing Until New Growth Reaches A Few Inches

Grabbing the fertilizer bag the moment you see green buds is tempting. Resist that urge completely.
Feeding too early pushes soft, leafy growth that has no structural strength. That tender flush becomes a magnet for aphids and fungal issues.
Wait until the new stems are at least two to three inches long. At that point, the plant has proven it is actively growing and ready to use nutrients efficiently.
A balanced slow-release granular fertilizer works well for most hydrangeas. Look for something in the 10-10-10 range or a product specifically labeled for flowering shrubs.
Scatter the granules around the drip line of the plant. That is the outer edge of the canopy, where the feeder roots are most active.
Water the area thoroughly after applying. Granules sitting on dry soil do nothing useful until moisture carries them down to the root zone.
Avoid high-nitrogen formulas unless your soil is severely depleted. Too much nitrogen can produce lush green leaves at the expense of flowers.
If you want blooms over foliage, choose a formula with a slightly higher middle number. Phosphorus supports flower development and root strength.
One application in spring and one in midsummer is usually enough for established shrubs. Over-feeding is a surprisingly common mistake that can quietly set your plants back.
Patience here pays off in the most direct way possible. Strong, well-timed feeding leads to the kind of blooms that make neighbors stop and stare.
6. Adjust Your Watering As The Soil Warms And New Roots Become Active

Hydrangeas have a reputation for being thirsty plants, and that reputation is well earned. But early spring watering is a different game than midsummer watering.
When soil temperatures are still cool, roots absorb moisture slowly. Overwatering during this period leads to soggy conditions that encourage root rot.
Check the soil before you water. Stick your finger two inches into the ground near the base of the shrub.
If the soil feels moist, hold off for another day or two. If it feels dry, give the plant a slow, deep drink.
Deep watering encourages roots to grow downward. Shallow, frequent watering trains roots to stay near the surface, which makes plants more vulnerable during summer heat.
As temperatures climb through April and May, increase your watering frequency gradually. The plant’s demand rises in direct proportion to its growth rate.
Morning watering is always the better choice. Wet foliage that dries quickly in the morning sun is far less likely to develop fungal spots.
Drip irrigation or a soaker hose keeps water at the root zone where it belongs. Overhead sprinklers wet the leaves without delivering much benefit to the roots.
Sandy soils common in southern parts of the state drain fast and need more frequent attention. Heavy clay soils in northern counties hold water longer and need less.
Understanding your soil type changes everything about how you water. Getting this right from the start keeps your hydrangeas strong through the hottest weeks ahead.
7. Add A Fresh Layer Of Mulch Around The Base To Lock In Moisture

Fresh mulch in spring does more work than most gardeners give it credit for. It regulates soil temperature, holds in moisture, and quietly suppresses weeds all season long.
Apply a two-to-three-inch layer of shredded bark, wood chips, or shredded leaves around the base of each shrub. Keep it a few inches away from the main stems.
Mulch piled directly against the stem traps moisture against the bark. That creates conditions where rot and fungal issues thrive.
The goal is a ring of mulch that extends out to the drip line. Think of it as a protective blanket for the root zone, not a collar around the trunk.
Organic mulch breaks down over the growing season. As it decomposes, it adds nutrients and improves soil structure in a slow, natural way.
Avoid dyed mulch products if you can. The colorants are considered low-risk by most garden experts, but the wood base is sometimes lower quality and decomposes unevenly.
Pine bark nuggets work well in New Jersey’s climate. They break down at a moderate pace and resist washing away during heavy spring rains.
Refresh your mulch layer each spring rather than letting it build up year after year. Old compacted mulch can sometimes repel water rather than absorbing it.
A quick rake to loosen the old layer before adding new material makes a noticeable difference. Loose mulch allows water and air to move freely through to the soil below.
This one simple step saves water, reduces weeding time, and keeps roots stable. It is one of the highest-return tasks in any spring garden routine.
8. Watch For Early Pest And Disease Activity Before It Has A Chance To Spread

Early spring feels peaceful in the garden, but trouble is already moving in. Pests and pathogens wake up right alongside your hydrangeas.
Aphids are usually the first pest to appear. These tiny, soft-bodied insects cluster on tender new stems and feed on plant sap.
A strong blast of water from a garden hose knocks them off effectively. Repeat every few days until the population collapses.
Spider mites show up during warm, dry spring spells. Look for fine webbing on the undersides of leaves and a dusty, stippled appearance on the surface.
Powdery mildew is a fungal issue that thrives when nights are cool and days are warm. It appears as a white, chalky coating on leaf surfaces.
Improving airflow through light pruning reduces mildew pressure significantly. Crowded plants with poor circulation are always the first to show symptoms.
Cercospora leaf spot is another fungal condition common in this region. It shows up as small purple or tan spots that expand and merge over time.
Remove any affected leaves promptly and discard them away from the garden. Do not compost diseased material, as spores can survive and spread.
Neem oil spray works as a gentle preventive treatment for both fungal and insect issues. Apply it in the early morning or evening to avoid leaf scorch.
When New Jersey hydrangeas start pushing new growth, your eyes are the most important tool you own. Catching problems early keeps small issues from turning into full-season battles.