Do These 8 Things When Your Illinois Roses Start Budding
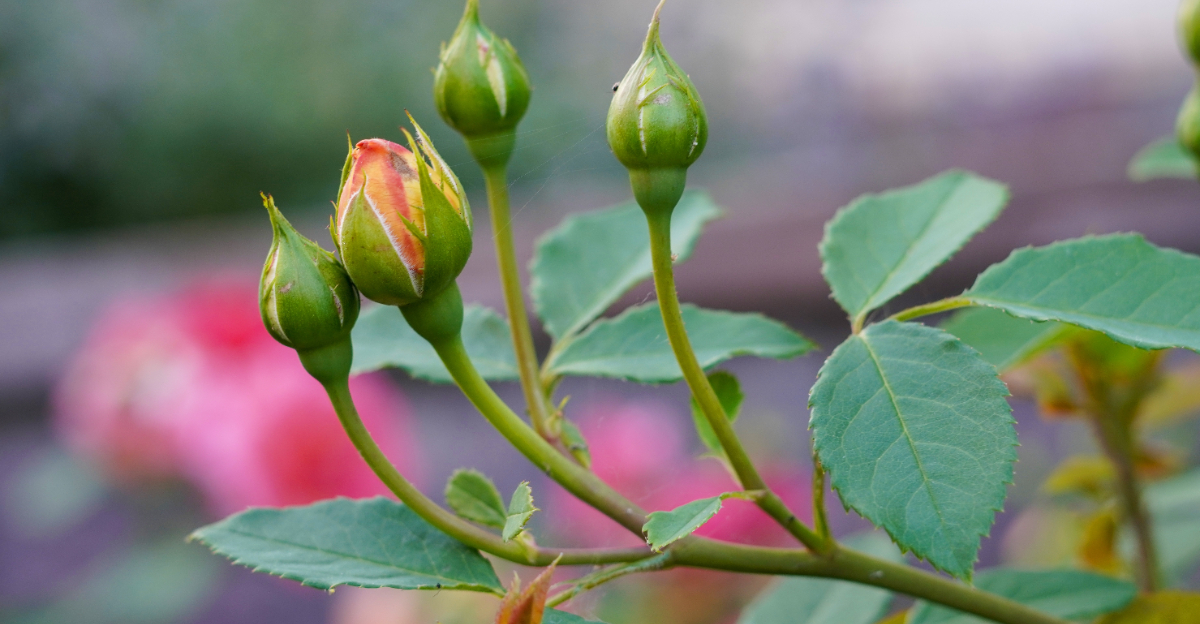
There is a moment every Illinois rose gardener knows, that first glimpse of a tight little bud pushing out from a cane that showed no signs of life just weeks ago.
It catches you off guard every time. But that bud is not just a sign that spring finally showed up. It is a signal that your roses are about to make demands, and how fast you respond will shape everything that follows.
Illinois summers do not ease you in. The heat builds, the humidity creeps up, and pests find your garden before you even notice they arrived.
Roses that get the right attention the moment budding starts tend to reward you with fuller blooms, stronger canes, and fewer problems down the line. The ones that get ignored at this stage often struggle to catch up.
Eight steps done now, can make the difference between a season you brag about and one you quietly forget.
1. Check Your Soil Before The First Bud Opens

Your roses are already talking to you through the soil. Before that first bud fully opens, grab a simple soil test kit and check your pH levels.
Illinois soil tends to run slightly alkaline, especially in the northern and central regions. Roses prefer a pH between 6.0 and 6.5, so knowing where you stand is everything.
If your pH is off, your roses cannot absorb nutrients properly, no matter how much you feed them. Think of pH balance like tuning a radio before the music starts.
A basic test kit from any garden center costs around five dollars and takes about ten minutes. You press a small probe into damp soil and read the color chart.
If your soil reads too alkaline, work in some sulfur or acidic compost before buds develop further. If it leans too acidic, a light dusting of garden lime will help correct it.
Healthy soil means healthier roots, and healthier roots mean bigger, bolder blooms all season long. Do not skip this step just because your roses looked fine last year.
Soil conditions shift over winter, especially after Illinois freezes and thaws repeatedly. What worked last fall may not be working now.
Testing takes almost no effort but pays off in spectacular color and stronger canes. Your roses will reward that small act of attention with months of beautiful growth.
2. Switch To A Bloom-Boosting Fertilizer

Not all fertilizers are created equal, and your roses know the difference. When buds start forming, your plants shift gears from growing leaves to producing flowers.
That shift requires more phosphorus and potassium, and less nitrogen than you used earlier in spring. Nitrogen pushes leafy green growth, which sounds good but actually delays blooming.
Look for a fertilizer labeled specifically for roses or flowering shrubs. A good ratio to look for is something like 5-10-5 or 4-8-4 on the package.
Granular formulas are easy to apply around the base of each bush. Water them in thoroughly after applying so nutrients reach the root zone quickly.
Liquid fertilizers work even faster and can be applied every two weeks during peak bud development. Both options work well, so choose based on how hands-on you like to be.
One thing to avoid is over-fertilizing. Too much of a good thing causes lush foliage but fewer flowers, and can even scorch tender new growth.
Always follow the package directions and err on the side of less when unsure. Your roses appreciate consistency far more than occasional heavy feeding sessions.
Starting a bloom-boosting routine right when buds appear gives each flower the fuel it needs. Many gardeners notice denser clusters and deeper color within just a few weeks of making the switch.
3. Water Deeply But Less Often

Shallow watering is one of the sneakiest ways to weaken your rose bushes over time. When you sprinkle a little water every day, roots stay near the surface instead of reaching deep into the ground.
Deep, infrequent watering trains roots to grow downward where moisture stays longer. This makes your plants far more resilient during dry Illinois summers.
Roses generally need about 1 inch of water per week, more during hot/dry spells. A slow trickle at the base for twenty to thirty minutes usually does the job.
Drip irrigation or a soaker hose is the gold standard for roses. These methods keep water off the foliage, which dramatically reduces fungal issues like black spot.
Overhead watering with a sprinkler is an approach many rose gardeners find creates more problems than it solves. Wet leaves in humid Illinois weather are basically a welcome mat for disease.
Morning is the best time to water, giving any accidental leaf splash time to dry before nightfall. Evening watering leaves moisture sitting on canes and petals for hours.
Check the soil moisture about two inches down before watering again. If it still feels damp, skip that session and check back the following morning.
Getting your watering rhythm right at bud stage sets your roses up for a strong, healthy season. Strong roots built now will carry your plants through even the hottest stretches of summer.
4. Inspect Buds For Aphids And Thrips Early

Few things are more frustrating than watching a perfect bud get wrecked before it even opens. Aphids and thrips are the two pests most likely to crash your rose party in spring.
Aphids are tiny, soft-bodied insects that cluster on new growth and buds, sucking out plant sap. They reproduce shockingly fast, so catching them early is the whole game.
Thrips are even smaller and harder to spot, hiding inside petals and causing streaked, distorted blooms. If your flowers open looking twisted or discolored, thrips are usually the culprit.
Check your buds every few days by turning them gently and looking at the undersides of leaves. A magnifying glass helps if your eyesight is not what it used to be.
For aphids, a strong spray of water from the hose can knock them off effectively. Insecticidal soap is another gentle option that handles infestations without harming beneficial insects.
Thrips are trickier and may require a targeted insecticide if populations get heavy. Use labeled products carefully, and target treatment only if damage is confirmed.
Encouraging ladybugs and lacewings in your garden also helps keep pest populations naturally in check. Planting companion flowers like marigolds nearby attracts these helpful predators.
Staying ahead of pests during bud stage protects every bloom before it has a chance to unfurl. A few minutes of inspection each week saves you weeks of frustration later.
5. Remove Any Remaining Winter Mulch

Winter mulch protected your rose roots through months of brutal Midwest cold. Now that buds are forming, that same mulch can actually start working against you.
Thick layers of straw or shredded leaves trap moisture near the crown of the plant. That lingering dampness invites fungal rot and crown disease right when your roses are most vulnerable.
Start pulling the mulch back gradually rather than all at once. A sudden temperature drop after a warm week can still happen in Illinois spring, so be strategic about timing.
Wait until nighttime temperatures consistently stay above freezing before removing mulch entirely. Early April is usually a safe window in central Illinois, though northern areas may need to wait longer.
As you pull mulch away, check the crown of each plant for any signs of damage or discoloration. Healthy crowns look green or creamy white, not brown or mushy.
Once mulch is cleared, rake the area lightly to improve airflow around the base. Good circulation discourages the fungal spores that love damp, still environments.
You do not need to throw that old mulch away. Compost it or use it in another garden bed where air circulation matters less.
Fresh mulch applied after cleanup keeps the soil evenly moist through spring and summer. A thin two-inch layer of wood chips or shredded bark is all your roses need going forward.
6. Prune Away Blind Shoots Promptly

Not every shoot on a rose bush has good intentions. Blind shoots look like they are growing strong but carry no flower buds, and they quietly steal energy from productive canes.
A blind shoot is a cane that grows vigorously but ends in a leaf cluster instead of a bud. They are common in hybrid teas and grandiflora roses, especially after a cold winter.
Left alone, these shoots pull nutrients away from the canes that are actually going to flower. Cutting them back encourages the plant to redirect that energy toward bud-bearing growth.
Use sharp, clean bypass pruners to cut the blind shoot back to about half its length. Make your cut just above an outward-facing leaf set with five leaflets.
Cutting to an outward-facing leaf encourages new growth to spread away from the center of the bush. This improves airflow and helps the plant develop a more open, productive shape.
Disinfect your pruners between cuts, especially if you notice any discoloration on the canes. Wiping blades with a diluted bleach solution or pruner disinfectant spray takes seconds and prevents spreading fungal or bacterial issues.
Some gardeners hesitate to prune during bud stage, worried they will slow things down. In reality, removing blind shoots speeds up flowering by concentrating the plant’s resources.
Think of pruning as editing, not cutting back. Every snip you make with purpose gives your roses a cleaner, more powerful path toward a season full of blooms.
7. Stake Or Support Climbing Varieties Now

Climbing roses are among the most dramatic plants you can grow, but they need a little help getting there. Once buds appear, canes start adding serious length and weight fast.
Unsupported climbing canes flop, tangle, and break under their own weight. Getting supports in place before that growth surge saves you from trying to wrangle a thorny mess later.
Check your trellis, fence, or arbor for any damage from winter before attaching new growth. A wobbly support structure will not hold up when canes fill out and blooms add weight.
Use soft garden ties or stretchy velcro tape to attach canes to the support. Avoid wire or anything that cuts into the bark, which creates wounds that invite disease.
Train canes horizontally whenever possible rather than straight up. Horizontal canes produce more lateral flowering shoots, which means dramatically more blooms per plant.
Spread canes out in a fan shape if your support allows for it. This technique, sometimes called pegging, has been used by rose growers for well over a century.
Check ties every few weeks as canes grow, since tight ties can strangle new growth quickly. Loose and supportive is the goal, not cinched and restrictive.
Getting climbing roses properly supported at bud stage is one of those tasks that feels small but delivers massive visual payoff. By midsummer, you will have a wall of color that draws attention from every corner of the yard.
8. Remove Old Blooms To Keep New Buds Coming

Once your roses start budding, removing spent blooms becomes one of your most powerful tools. This signals the plant to stop producing seeds and start growing new flowers instead.
Roses that are left to form rose hips after blooming put enormous energy into seed production. That energy is far better spent pushing out the next wave of buds.
The process is simple once you know where to cut. Snip the spent bloom stem back to just above the first set of five leaflets you encounter below the flower.
That five-leaflet junction is where new flowering growth is most likely to emerge. Cutting higher up often results in weak, spindly new shoots that do not produce well.
Repeat-blooming roses like hybrid teas and floribundas respond especially well to consistent bloom removal. These varieties can push out new flushes every four to six weeks when properly managed.
Once-blooming antique roses do not benefit from this practice the same way. For those, leaving hips to form is actually part of their natural beauty and fall appeal.
Keep a small basket or bucket nearby while you work so spent blooms do not end up on the ground. Fallen petals can harbor fungal spores that re-infect healthy canes.
Making bloom removal a weekly habit during bud season transforms a good rose garden into a great one. Your Illinois roses will keep blooming generously right up until the first frost.