7 Things Kentucky Gardeners Should Do When Tomato Leaves Start Curling
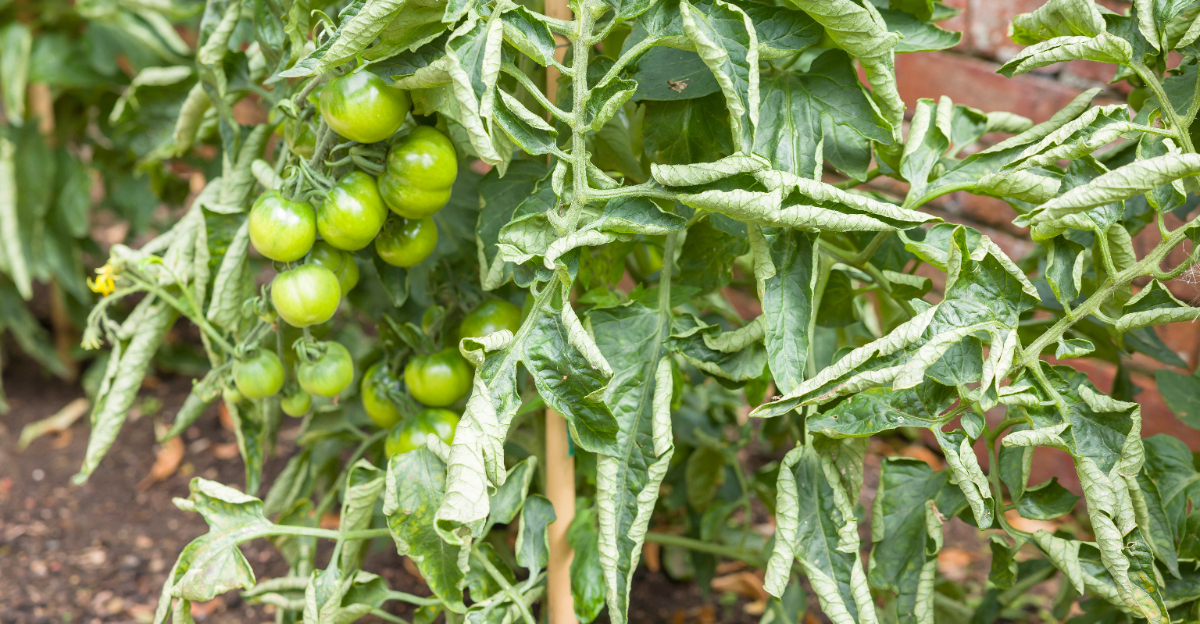
Something looks wrong with your tomato plants, but you can’t quite name it. The leaves are curling inward, tightly in some spots, loosely in others, and none of your usual checks have turned up an obvious answer.
Leaf curl is one of those symptoms that can point in a dozen different directions at once, too much water, too little, pests, disease, heat stress, or something going on underground.
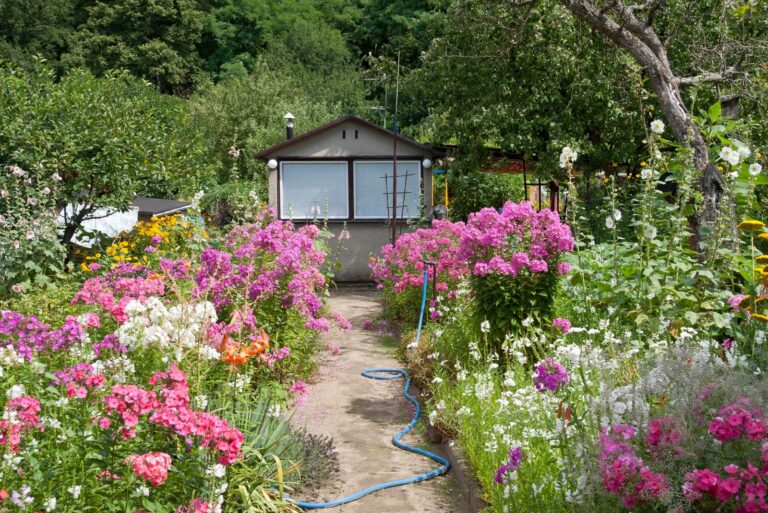
Kentucky gardens deal with a particular combination of summer humidity and unpredictable rainfall that makes tomatoes more vulnerable than most gardeners expect.
Getting to the bottom of it means working through the likely causes one by one, which is exactly what I will help you figure out.
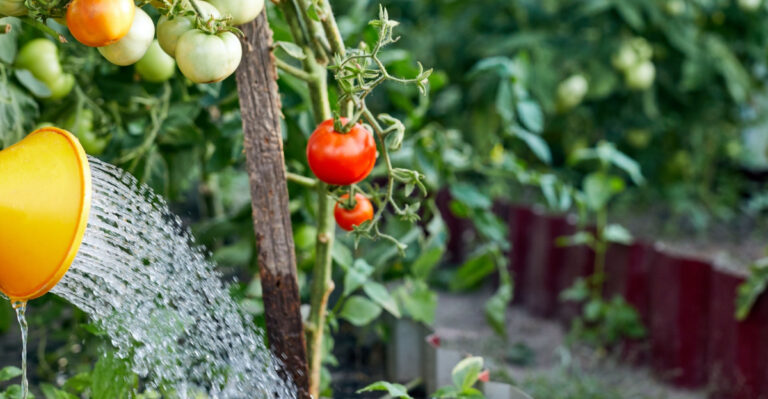
1. Check Your Watering Habits First

Your watering routine might be the sneaky culprit behind those curling tomato leaves. Too much water is just as harmful as too little, and both cause the same dramatic leaf response.
When roots sit in soggy soil, they struggle to pull in oxygen. The plant reacts by curling its leaves inward to slow down water loss.
On the flip side, underwatering causes the same curling effect. The plant tightens its leaves to conserve every drop of moisture it has left.
A simple finger test works wonders here. Push your finger two inches into the soil near the base of the plant and feel for moisture.
If it feels dry and powdery, water deeply and slowly. If it feels wet and muddy, hold off and let the soil breathe for a day or two.
Tomatoes thrive with about one to two inches of water per week. Consistency matters far more than volume when it comes to healthy roots.
Drip irrigation is a reliable option for tomato growers who want steady moisture without guessing. It delivers water directly to the root zone, skipping the leaves entirely.
Mulching around your plants also helps regulate soil moisture between watering sessions. A two-inch layer of straw or wood chips can help regulate moisture between watering sessions.
Keep a simple watering log if you tend to forget what day you last watered. Tracking this one habit can prevent many watering-related curling problems before they even start.
Once your watering schedule is dialed in, you may be surprised how quickly those curled leaves relax back to normal.
2. Take A Close Look At The Soil

Healthy soil is the foundation every tomato plant depends on, and poor soil quality shows up fast in the leaves. Curling can signal that something underground is seriously out of balance.
Compacted soil is a big problem in many Kentucky gardens, especially in clay-heavy regions. When soil packs down tight, roots cannot spread or breathe properly.
Grab a trowel and dig a small hole near your plant. Look at the soil structure and notice whether it crumbles easily or clumps together in hard chunks.
If it clumps like clay, your soil needs organic matter to loosen things up. Compost tends to be the most accessible fix in this situation.
Your Kentucky Garden Changes Every Week. Your Plan Should Too.
Gardening in Kentucky changes quickly throughout the season. Every Friday you’ll receive a simple weekly plan showing exactly what to plant, prune, fertilize, harvest, and protect so you never miss the right timing.
Work a few inches of compost into the top layer of soil around your plants. This improves drainage, adds nutrients, and creates a better environment for root growth.
Soil pH also plays a huge role in how well tomatoes absorb nutrients. The ideal pH range for tomatoes sits between 6.0 and 6.8.
When pH swings too high or too low, nutrients get locked out even if they are present in the soil. A cheap pH test kit from any garden center gives you answers in minutes.
If pH is off, lime raises it and sulfur lowers it. Adjustments take a few weeks to fully take effect, so acting early matters.
Raised beds with custom-blended soil mixes are a popular solution for gardeners tired of fighting native soil problems. Starting fresh gives your tomatoes a strong foundation from day one.
Good soil does not just feed your plants, it protects them from stress that leads to leaf curl.
3. Inspect For Pests On The Undersides Of Leaves

Flip those curled leaves over and take a good hard look. What you find on the underside might explain everything that has been going wrong.
Tiny pests like aphids, spider mites, and whiteflies love hiding on the undersides of leaves. They feed on plant sap and cause leaves to curl, yellow, and weaken over time.
Aphids are small, soft-bodied insects that cluster in groups and come in green, black, or white. They reproduce fast and can overwhelm a plant within days if left unchecked.
Spider mites are even tinier and harder to spot without a magnifying glass. Look for fine webbing on leaf surfaces as a telltale clue they have moved in.
Broad mites are another culprit that causes twisted, curled, and distorted new growth. These are microscopic and require a hand lens to identify properly.
A strong blast of water from your garden hose knocks off many soft-bodied pests quickly. Repeat this treatment every few days to keep populations from rebounding.
Neem oil spray is a natural and effective option that disrupts pest feeding and reproduction. Mix it with water and a drop of dish soap, then apply in the evening to avoid leaf burn.
Insecticidal soap works well against aphids and whiteflies without harming beneficial insects. Always follow the label directions and avoid spraying during the hottest part of the day.
Attracting and protecting beneficial insects creates a natural defense system against pest outbreaks. Catching pests early makes all the difference between a minor annoyance and a full-blown infestation.
4. Consider The Recent Weather In Your Area

Weather in the Bluegrass State can swing wildly, and tomatoes feel every bit of it. Sudden heat waves, cold snaps, and humidity shifts all trigger leaf curl as a stress response.
Physiological leaf roll is the term for curling caused purely by environmental conditions. It is the plant’s natural way of protecting itself from extreme temperatures.
During hot spells above 90 degrees, tomato leaves roll upward along the midrib. This reduces the surface area exposed to direct sun, cutting down on moisture loss.
This type of curling is not a disease or pest problem. t is actually a natural protective response, not a sign of disease.
However, extended heat stress without relief can weaken plants over time. Shade cloth stretched over a simple frame gives plants a midday break from intense sun.
Cool nights followed by hot days create a temperature whiplash that also stresses tomatoes. Leaves may curl and look distressed even when everything else seems fine.
Wind is another underrated weather factor that causes leaf curl. Strong gusts pull moisture from leaves faster than roots can replace it, triggering that same protective curl.
Windbreaks made from garden fabric, wooden stakes, or nearby shrubs reduce this problem significantly. Even a few feet of protection makes a measurable difference in plant health.
Check your local weather history over the past week before assuming a bigger problem exists. A stretch of unusual conditions often explains leaf curl without any other cause.
Once the weather stabilizes, most plants bounce back on their own with just a little extra care from you.
5. Look For Signs Of Disease

Not all leaf curl is innocent, and sometimes a plant is sending a genuine distress signal. Certain diseases cause curling alongside other visible symptoms that are hard to miss.
Tomato mosaic virus is one of the viruses that can affect home gardens in Kentucky. Infected leaves show a mottled pattern of light and dark green along with twisting and curling.
There is no cure for mosaic virus once a plant is infected. Removing the affected plant and sanitizing your tools prevents it from spreading to healthy neighbors.
Fusarium wilt and verticillium wilt are fungal diseases that attack the root system. As the roots break down, the plant cannot move water upward, causing leaves to curl and wilt.
Cut a stem near the base and look for brown discoloration inside the tissue. That dark ring is a classic sign of a vascular wilt disease at work.
Bacterial canker causes leaf curl along with dark streaks on stems and white spots on fruit. It spreads through contaminated tools, water, and infected transplants.
Always buy disease-resistant tomato varieties when possible. Labels marked with letters like V, F, or N indicate resistance to specific common diseases.
Rotating your crops each season is one of the best ways to break disease cycles in garden soil. Moving tomatoes to a fresh bed every year reduces the buildup of harmful pathogens.
Sanitize your pruning shears with rubbing alcohol between plants to avoid spreading anything invisible. A small habit like this helps protect the rest of your garden from the same problem.
Catching disease early gives you the best shot at saving the rest of your crop.
6. Review Your Fertilizing Routine

Fertilizer feels like a gift to your plants, but too much of a good thing can backfire fast. Over-fertilizing with nitrogen is one of the most overlooked causes of tomato leaf curl.
Nitrogen pushes rapid leafy growth, which sounds great until the plant cannot keep up. Leaves begin to curl tightly as the plant struggles to manage all that new tissue.
This condition is sometimes called nitrogen toxicity, and the leaves often look dark, thick, and waxy. The curl tends to affect newer growth at the top of the plant first.
Pull back on any high-nitrogen fertilizer and switch to a balanced formula with equal parts of all three main nutrients. A 10-10-10 blend works well for most tomatoes in the mid-growth stage.
Calcium deficiency also causes leaf curl and is surprisingly common in home gardens. Without enough calcium, cell walls can weaken and younger leaves may begin to curl or distort at the edges.
Crushed eggshells worked into the soil add a slow-release calcium boost over time. Calcium sprays applied directly to leaves offer a faster fix when deficiency is severe.
Magnesium deficiency shows up as yellowing between leaf veins alongside curling. Dissolve one tablespoon of Epsom salt in a gallon of water and apply it as a foliar spray.
Epsom salt should not be recommended unless a soil test confirms magnesium deficiency. Maryland Extension specifically advises against adding Epsom salts unless testing shows a magnesium deficiency.
Always read fertilizer labels carefully and follow the recommended application rates. More is not better when it comes to feeding tomatoes, and restraint pays off.
Soil testing every season gives you a precise picture of what your garden actually needs. Guessing at nutrients can waste money and sometimes cause the very problems you are trying to prevent.
7. Decide Whether The Plant Needs To Be Removed

Sometimes the hardest decision in the garden is also the most necessary one. Knowing when to pull a struggling tomato plant saves the rest of your crop from going down with it.
If a plant shows widespread disease, severe wilting, and no signs of recovery after two weeks, it is time to act. Holding on too long out of hope can cost you everything nearby.
Plants infected with viral diseases like mosaic or tomato spotted wilt virus will not recover. Removing them promptly stops the spread to healthy plants still producing well.
When you pull a sick plant, bag it in plastic before walking it through the garden. This prevents any pathogens or pests from dropping off onto your remaining healthy crops.
Diseased plant material is generally better kept out of the compost pile, since home setups may not get hot enough to neutralize pathogens. Trash it or burn it if local regulations allow.
After removal, avoid planting tomatoes or related crops like peppers and eggplant in that same spot for at least two seasons. Crop rotation breaks the cycle and gives soil time to recover.
Sterilize any stakes, cages, or tools that touched the infected plant before reusing them. A quick soak in a diluted bleach solution does the job effectively.
If only one or two branches show problems, selective pruning may save the plant without full removal. Cut well below the affected area and monitor the plant closely for the next week.
Making tough calls early is what separates a productive garden from a frustrating one. Your tomato crop is worth protecting, and acting early makes that much easier.