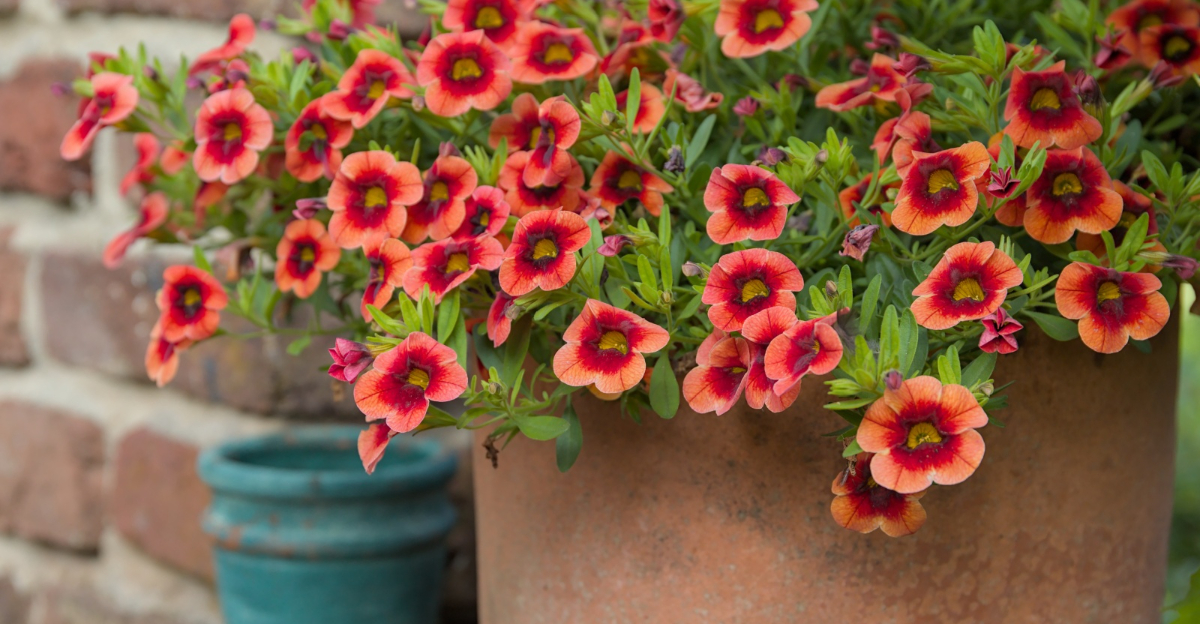
Get More Calibrachoa Blooms By Following 21 Simple Care Tips And Avoiding Common Mistakes
You buy a calibrachoa, set it in a sunny spot, water it faithfully, and then watch it slowly give up on you. The blooms thin out and the stems stretch.
The color fades into something pale and unconvincing. Does that sound like a plant that got the wrong memo? You followed the basic rules and you did your part.
But calibrachoa has a few secrets that most gardening guides skip right over, and they are not complicated. They are small, specific shifts that change everything about how this plant performs.
A tweak to your watering rhythm combined with a smarter pot choice can unlock growth you never saw coming. A single feeding trick can trigger blooms you did not know were possible.
Once you understand what this plant actually craves, your container transforms fast and stays stunning all season. These 21 tips are the ones you needed from the very start.
1. Full Sun, At Least 6 To 8 Hours Daily

Sunlight is the secret fuel behind those nonstop calibrachoa blooms. Without enough of it, your plant goes quiet and bloom production slows down fast.
Aim for at least six to eight hours of direct sun every single day. A south-facing porch or a sunny patio edge works beautifully for this.
Shaded spots might look appealing, but calibrachoa in low light grows leggy and produces far fewer blooms. Move containers to the sunniest spot you own and watch the difference happen within days.
2. Use Well-Draining Potting Mix

Soggy roots are a calibrachoa nightmare, plain and simple. Choosing the right potting mix from day one protects your plant from root problems all season.
Look for a lightweight mix made for containers or hanging baskets. These blends drain fast and still hold just enough moisture to keep roots happy.
Never use dense garden soil in pots. It compacts quickly and traps water around the roots, which can cause root rot and poor drainage over time.
3. Water Consistently And Keep Soil Evenly Moist

Calibrachoa does not like drama when it comes to water. Bone-dry soil one day and soaking wet the next stresses the plant and reduces blooms quickly.
Check the soil with your finger every day during warm weather. Water when the top inch feels dry, and water until it drains freely from the bottom holes.
Even moisture is the goal, not perfection. Consistent watering builds strong roots and keeps the flower show going from spring all the way through fall.
4. Feed With Liquid Fertilizer Every 1 To 2 Weeks

Heavy bloomers are heavy feeders, and calibrachoa fits that description perfectly. Regular fertilizing is what keeps those waves of color coming all season long.
A balanced liquid fertilizer, like a 20-20-20 formula, works great every one to two weeks. Mix it according to the label and apply it right after watering for best absorption.
Skipping feedings is one of the fastest ways to lose bloom power. Think of fertilizing as paying rent for all those gorgeous flowers your plant is producing.
5. Add Slow-Release Granules At Planting Time

Starting strong matters just as much as keeping up the momentum. Mixing slow-release granules into your potting mix at planting time gives calibrachoa a steady nutrient base from the start.
These granules break down gradually over several months, feeding roots without any effort from you. Pair them with your regular liquid fertilizer schedule for a powerful combo.
Think of slow-release granules as the foundation and liquid feeding as the boost. Together, they create the kind of steady nutrition that turns a decent plant into a spectacular one.
6. No Removing Needed, It Is Self-Cleaning

Here is a garden win you did not see coming. Calibrachoa drops its spent blooms on its own, so you never have to pinch off old flowers to keep things tidy.
This self-cleaning habit is one of the biggest reasons gardeners fall in love with this plant. Less maintenance means more time to enjoy the show instead of working through it.
That said, occasional light pruning for shape is different from removing, and calibrachoa handles both with ease. But strict removing? Completely off your to-do list, and that feels pretty great.
7. Trim Leggy Stems By One-Third Mid-Season

Even self-cleaning plants can get a little wild by midsummer. Long, stretched-out stems mean fewer blooms and a plant that looks more scraggly than stunning.
Cutting stems back by about one-third refreshes the whole plant and triggers a fresh flush of new growth. Use clean, sharp scissors and trim right above a leaf node for the best results.
It feels counterintuitive the first time, but the plant responds quickly with strong new growth.
Under good conditions, you can expect fresh compact growth and new blooms within two to three weeks.
8. Maintain Soil PH Between 5.5 And 6.0

Soil chemistry sounds complicated, but this one is actually pretty simple. Calibrachoa thrives in slightly acidic soil, ideally between a pH of 5.5 and 6.0.
Outside that range, the plant cannot absorb nutrients properly even if you fertilize regularly. Yellowing leaves and poor blooming are often pH problems in disguise.
Pick up an inexpensive soil pH test kit from any garden center. If the reading is off, you can adjust it with sulfur to lower it or lime to raise it. Small tweaks make a big difference.
9. Don’t Crowd Containers, Allow Airflow

Packing too many plants into one pot might look lush at first, but it creates problems fast. Crowded roots compete for nutrients and crowded foliage traps moisture that leads to disease.
Give each calibrachoa plant about eight to ten inches of breathing room in a shared container. Good airflow around leaves keeps fungal issues from taking hold during humid summer nights.
A slightly sparser planting fills in beautifully within a few weeks anyway. Patience at planting time pays off with a healthier, fuller display by midsummer.
10. Water At The Base, Not Over The Foliage

Wet leaves are an open invitation for fungal problems. Calibrachoa prefers its foliage dry and its roots well-watered, so aim your watering wand low and keep it there.
Overhead watering from sprinklers or a wide spray nozzle coats leaves with moisture that takes hours to dry. That damp environment encourages powdery mildew and other issues you do not want.
A simple drip-style watering or a gentle base-level pour is all it takes. This one small habit change protects your plant all season long with no extra effort.
11. Use Pots With Large Drainage Holes

Drainage holes are non-negotiable for calibrachoa success. Without them, excess water pools at the bottom of the pot and suffocates roots over time.
Choose containers with multiple holes or at least one large opening at the base. If you fall in love with a decorative pot that lacks drainage, use it as a cover pot with a plastic liner inside.
Checking drainage before you plant takes about ten seconds and saves you weeks of frustration. Healthy drainage equals healthy roots, and healthy roots equal the blooms you are chasing.
12. Pinch Growing Tips Early For Bushier Growth

Want a fuller, more spectacular plant from the very start? Pinch the growing tips when your calibrachoa is still young and you will be amazed at the results.
Removing just the top quarter inch of each stem forces the plant to branch outward instead of growing straight up. More branches mean more bloom sites, and more bloom sites mean more flowers.
Do this once or twice in the first few weeks after planting. It feels counterintuitive to remove new growth, but this one trick pays off in a big, beautiful way.
13. Check Weekly For Aphids And Thrips

Tiny bugs can do surprisingly large damage to calibrachoa plants. Aphids and thrips both feed on new growth and blooms, leaving behind distorted leaves and reduced flower counts.
Flip leaves over once a week and look for clusters of tiny insects or silvery streaking on the surface. Early detection is the key to keeping infestations from spreading to nearby plants.
A strong spray of water knocks aphids off quickly and effectively. For thrips, insecticidal soap or neem oil applied every few days handles the problem without harsh chemicals.
14. Mulch In-Ground Plants To Protect Roots And Retain Moisture

Calibrachoa planted directly in garden beds benefits enormously from a layer of mulch. A two-inch layer of shredded bark or compost locks in soil moisture and keeps roots cool.
Mulching also reduces how often you need to water during hot summer stretches. Less watering stress means the plant can focus all its energy on producing blooms instead of surviving.
Keep the mulch pulled slightly away from the base of each stem. Direct contact with stems can hold moisture against them and cause rot at the crown over time.
15. Check Hanging Baskets For Moisture Twice Daily In Summer

Hanging baskets are charming but thirsty. Wind and heat dry them out shockingly fast, sometimes within just a few hours on a hot summer afternoon.
Stick your finger into the basket soil in the morning and again in the evening during peak summer heat. If the top inch is dry, water it right then without waiting.
Repeated wilting puts the plant under stress that can lead to bud drop over time. Staying consistent with moisture prevents this. Staying on top of moisture twice a day keeps the cascade of blooms looking spectacular.
16. Replace Potting Mix Every Spring

Old potting mix loses its structure and nutrients after a full growing season. By the following spring, it is often compacted, depleted, and holding water poorly.
Starting fresh each year with new potting mix gives calibrachoa the best possible foundation. Dump the old mix into a garden bed where it can still do some good as a soil amendment.
Fresh mix also reduces the risk of carrying over pests or disease from the previous season. This simple annual reset costs just a few dollars and makes a noticeable difference in plant health.
17. Protect From Frost By Moving Containers Indoors

Calibrachoa blooms are tough through summer heat, but frost stops them cold. Even a light frost can damage tender stems and end the season earlier than necessary.
Watch the forecast in fall and bring containers inside whenever temperatures drop below 32 degrees Fahrenheit overnight. A garage, sunroom, or bright indoor spot works well as temporary shelter.
In mild climates, calibrachoa can sometimes push through winter with protection and come back strong in spring.
Moving pots inside is a small effort that can extend your bloom season by several extra weeks.
18. Pair With Petunias, Bacopa, Or Lobularia

Calibrachoa plays extremely well with others in a mixed container. Its trailing habit and nonstop color make it a natural partner for upright and mounding companions.
Petunias offer bold matching colors, bacopa adds delicate white cascades, and lobularia brings a sweet honey scent to the whole arrangement. All three share similar sun and water needs, making them easy to grow together.
The combination creates a layered, full look that fills containers from the center all the way to the edges. One pot with these four plants looks like a professional florist designed it.
19. Apply Chelated Iron For Yellowing Leaves

Yellow leaves on calibrachoa often signal iron deficiency, especially when the veins stay green. This condition, called chlorosis, is common in alkaline or high-pH soils.
Chelated iron is absorbed quickly and gets results faster than standard iron supplements. Mix it according to package directions and apply it as a soil drench or foliar spray.
Correcting iron deficiency can gradually restore leaf colour over two to four weeks, depending on the severity and the formulation used.
Pairing chelated iron treatment with a pH adjustment ensures the problem does not return throughout the season.
20. Re-Pot When Root-Bound

A root-bound calibrachoa is a stressed calibrachoa. When roots circle the bottom of a pot or push out through drainage holes, the plant has simply outgrown its space.
Move it up to a container that is two to three inches wider in diameter. Gently loosen the outer roots before placing it in fresh potting mix so they can spread outward.
Re-potting gives the root system room to expand, which directly supports more top growth and more blooms. A plant that once seemed stuck suddenly rebounds with new energy after this simple move.
21. Buy Fresh Plants Each Spring For Best Results

Calibrachoa is typically grown as an annual in most American climates, and honestly, starting fresh each spring is the smart move.
New plants arrive vigorous, disease-free, and packed with blooming potential. Trying to overwinter calibrachoa indoors can work, though results vary depending on your light setup and climate.
A fresh nursery plant is often the more reliable option. Garden centers stock the newest, best-performing varieties every spring, so you always get the latest improvements.
Budgeting for fresh calibrachoa blooms each year is one of the best small investments a container gardener can make. The payoff in color and performance is absolutely worth it.
22. Mistake 1: Using The Wrong Fertilizer Formula
You buy a quality fertilizer, feed on schedule, and still wonder why your blooms are thinning out. The formula is likely the issue.
High-nitrogen fertilizers push green leafy growth and quietly suppress flower production. Your plant looks healthy while barely performing.
Calibrachoa needs a balanced or slightly phosphorus-rich mix to keep blooms coming consistently. A 20-20-20 or 15-30-15 formula is what this plant responds to best.
Check the numbers on your label before you feed. The wrong ratio costs you an entire season of color.
23. Mistake 2: Ignoring Soil PH Until Something Goes Wrong

Yellow leaves and poor blooming are rarely just bad luck. In most cases, soil pH is the hidden problem. Calibrachoa needs a pH between 5.5 and 6.0 to absorb nutrients properly.
Once the soil tips alkaline, iron and other essential minerals become unavailable to the roots no matter how often you fertilize. You keep feeding a plant that cannot use what you are giving it.
Test your soil pH at planting time, not after symptoms appear. A simple inexpensive test kit catches this problem before it costs you weeks of growth.
24. Mistake 3: Moving The Pot Into Shade During Heat Waves

When your calibrachoa looks stressed in peak summer heat, shade feels like a logical solution. It is usually the wrong one.
Calibrachoa is a full-sun plant and reduced light causes it to stretch, produce fewer blooms, and lose its compact shape quickly.
Heat stress in this plant almost always traces back to inconsistent watering or a pot drying out too fast, not too much sun.
Moving it into shade solves nothing and adds a new problem on top of the original one. Keep it in full sun and fix the watering instead.
25. Mistake 4: Skipping The Mid-Season Trim Because The Plant Looks Fine

A calibrachoa that looks decent in early summer can quietly run out of energy by late July. Stems stretch, bloom density drops, and the center thins out.
Most gardeners accept this as normal when it is entirely preventable. Skipping the mid-season trim because things seem acceptable is one of the most common missed opportunities with this plant.
Cutting stems back by one third resets the whole plant, triggers fresh branching, and restores the dense colorful display you had at the start. Do not wait for decline. Trim before it happens and stay ahead of it.