How To Prune Spirea In Oregon Right Now For A Second Flush Of Color This Summer
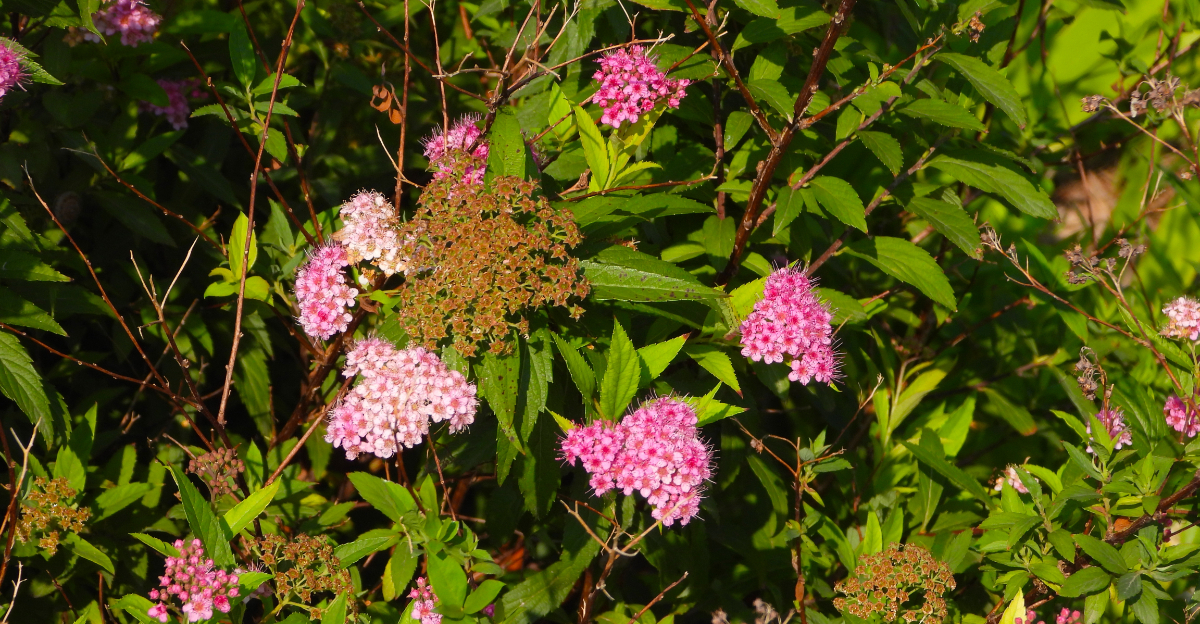
Spirea can give an Oregon garden a bright early show, then start looking a little tired once those first blooms fade. That is the moment many gardeners miss.
A simple pruning pass can help the shrub shift from finished-looking to ready for fresh color again. The key is knowing how much to remove without cutting away the shape that makes spirea so easy to love.
Trim too lightly, and the plant may not respond much. Cut too hard, and you may lose the soft, airy look.
Oregon’s mild growing season gives spirea a good chance to rebound when the timing is right. With a careful snip after flowering, this dependable shrub may reward you with cleaner growth and another wave of summer color.
1. Prune After The First Bloom Fades

Timing is everything when it comes to getting a second round of blooms from your spirea. The moment those flowers start turning brown and papery, that is your cue to grab your pruning shears and get to work.
Waiting too long gives the plant less time to push out new growth before the heat of late summer settles in.
In Oregon, that first bloom usually wraps up sometime between late May and early July, depending on where you live and which variety you planted.
Coastal areas tend to bloom a little later, while the Willamette Valley often sees earlier fading. Watch the plant closely rather than going by the calendar.
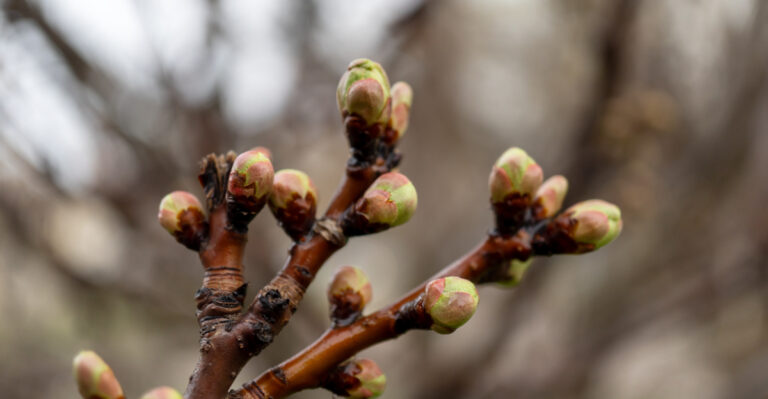
Right after bloom fade is the sweet spot for pruning because the plant still has plenty of energy stored up. It has not yet gone into that slow, quiet phase that comes in late summer.
Cutting it back now sends a clear signal to the roots to push fresh stems and new flower buds.
Do not wait for every single flower to drop before you start. As soon as the majority of blooms look spent and dull, go ahead and prune.
Early action means more recovery time, and more recovery time means a fuller, more colorful second flush. Keep your shears clean and sharp so every cut is smooth and clean.
2. Know Which Spirea You’re Cutting

Not all spirea shrubs behave the same way, and knowing which type you have makes a real difference in how you prune it.
There are two main groups to think about: spring-blooming types like Bridal Wreath, and summer-blooming types like Japanese spirea. Each one needs a slightly different approach.
Bridal Wreath spirea blooms on old wood, meaning it sets its flower buds during the previous growing season. If you cut it back hard right now, you could remove the buds it already formed for next year.
A light cleanup is fine, but save the heavy pruning for right after it finishes blooming in spring.
Japanese spirea, on the other hand, blooms on new wood. Varieties like Goldflame, Little Princess, and Anthony Waterer fall into this group.
These are the ones that respond beautifully to a mid-season trim and will reward you with a second round of color if you cut them back after the first bloom fades.
Take a quick look at your plant tag if you still have it, or snap a photo and search it online. Knowing your variety is the first step to pruning with confidence.
Getting this detail right means you will not accidentally set the plant back or miss out on that second bloom you are working toward this summer.
3. Deadhead, Don’t Shear Blindly

Grabbing the hedge trimmer and buzzing everything off might seem like the fastest fix, but it is not always the smartest move.
Deadheading, which means removing just the spent flower clusters, is a more targeted approach that keeps the plant looking natural while still encouraging new blooms.
When you shear blindly, you cut through a mix of old flowers, fresh leaves, and developing buds all at once.
The plant has to spend extra energy recovering from that shock before it can even think about blooming again.
Deadheading skips that setback by letting you remove only what is done and leave everything else intact.
Use a pair of small bypass pruners or even sharp garden scissors for this job. Look for the flower clusters that have turned brown, papery, or faded in color.
Snip just below each spent cluster, right above a set of healthy leaves. That small cut is all it takes to redirect the plant’s energy toward new growth.
Deadheading also keeps your shrub looking tidy between bloom cycles, which is a nice bonus. You are not left with a shrub full of brown, crinkly flower heads while you wait for new buds to form.
It is a simple habit that takes just a few minutes and pays off with a noticeably better-looking plant all summer long.
4. Cut Back Spent Flower Clusters

Once you have identified the spent flower clusters, it is time to make your cuts. This step goes a little deeper than basic deadheading and gives the plant a more noticeable reset.
You are not just snipping the flower head off. You are cutting the stem back to where a pair of strong, healthy leaves sits below it.
Find the first set of full, green leaves beneath the faded bloom. Make your cut just above that leaf node, at a slight angle.
The angled cut helps water run off and keeps the stem from sitting in moisture, which can lead to disease over time. A clean cut heals faster and looks better too.
Work your way around the entire shrub, cutting each spent cluster back to a healthy leaf node. It sounds tedious, but most mid-sized spirea shrubs can be done in under twenty minutes.
Put on some music or enjoy the fresh air while you work. The process is actually quite satisfying once you see the shape of the plant come back into focus.
After all the spent clusters are removed, step back and take a look at the overall shape. If some stems look longer or awkward, go ahead and trim them back a little more to even things out.
You want a rounded, balanced shape that allows sunlight and airflow to reach all parts of the shrub evenly.
5. Shape Lightly For Fresh Growth

After removing the spent flowers, a light shaping session can do wonders for both the look of the plant and its ability to push new growth. Think of it like a haircut.
You are not going short, just cleaning up the edges and encouraging the plant to fill in evenly.
Work around the outside of the shrub with your pruners and remove any stems that stick out awkwardly or break the rounded mound shape that most spirea varieties naturally form. Cut those stragglers back to a point where they meet a healthy side branch.
This keeps the plant looking intentional rather than wild. Light shaping also opens up the canopy just enough to let sunlight filter into the center of the plant.
Spirea tends to get dense and twiggy in the middle, which blocks light and slows new growth.
Removing a few of those longer, outward-reaching stems helps the whole shrub breathe a little better.
Do not go overboard with this step. You want to remove maybe ten to twenty percent of the overall growth at most.
Taking off too much at once stresses the plant and slows down the very recovery you are trying to encourage. Less really is more here.
A few well-placed cuts go a longer way than a heavy trim, and your spirea will thank you with a faster, fuller second bloom later in the season.
6. Remove Damaged Or Crossing Stems

Every shrub has a few stems that just do not pull their weight. Damaged, broken, or crossing stems are more than an eyesore.
They can actually get in the way of the plant’s health and slow down its ability to push new growth after pruning.
Crossing stems are the ones that rub against each other as the plant moves in the wind. Over time, that friction creates small wounds on the bark, and those wounds become entry points for pests and disease.
Removing the weaker of the two crossing stems is a simple fix that prevents bigger problems down the road.
Look for stems that are discolored, hollow, or feel soft when you press them. Those are signs of damage or decay, and they need to come out.
Cut them all the way back to the base of the plant or to the point where they meet a healthy stem. Do not leave stubs, as those tend to attract pests and slow healing.
While you are at it, look for any stems that are growing straight down toward the soil or back into the center of the plant. Those directions do not serve the shrub well and just add clutter.
Removing them improves airflow and gives the healthy, outward-reaching stems more room to grow.
This kind of cleanup might only take five extra minutes, but it sets the plant up for a much stronger recovery and a better second bloom overall.
7. Skip Heavy Pruning In Summer Heat

There is a big difference between a helpful trim and a hard cutback, and knowing when not to prune is just as important as knowing when to do it.
Once summer temperatures push into the upper eighties or above, heavy pruning becomes a risk rather than a reward.
Heat puts plants under stress. When a spirea is already working hard to stay hydrated and cool, adding a major pruning on top of that can push it into a tough spot.
The plant has to heal its cuts, push new growth, and manage heat all at the same time. That is a lot to ask, and the results are rarely as good as pruning done in cooler conditions.
In Oregon, the window between late June and mid-July is usually the best time to prune for a second bloom.
After that, if a heat wave rolls in, it is better to hold off and wait for temperatures to drop before making any more significant cuts.
A light deadhead is still okay, but save the shaping and deeper cuts for a cooler day.
Morning is the best time to prune during warm weather if you do choose to work on a warm day. Temperatures are lower, the plant is less stressed, and you are less likely to feel worn out yourself.
Pay attention to the forecast and plan your pruning sessions around cooler stretches whenever possible for the best results.
8. Water Before You Push New Growth

Pruning sends a message to the roots that it is time to grow. But roots need water to do that work.
If the soil around your spirea is dry when you prune, the plant may struggle to push the new growth you are hoping for. A good watering session before and after pruning makes a real difference.
Before you pick up your shears, give the shrub a deep soak. Let the water run slowly at the base for several minutes so it soaks down into the root zone rather than just wetting the surface.
Shallow watering only encourages shallow roots, and shallow roots are more vulnerable to heat and drought.
After pruning, water again to help the plant settle and start pushing energy toward new stems and buds. Keep the soil consistently moist but not waterlogged over the next two to three weeks.
That steady moisture is what fuels the regrowth that leads to a second bloom.
Mulching around the base of the shrub is a great way to help the soil hold onto that moisture longer.
A two to three inch layer of bark or compost mulch slows evaporation, keeps the roots cooler during warm spells, and adds a little organic matter to the soil as it breaks down.
Keep the mulch a few inches away from the main stems to prevent moisture buildup right at the base of the plant.
9. Feed Lightly, Or Not At All

A lot of gardeners reach for fertilizer right after pruning, thinking it will speed up regrowth. That instinct is understandable, but it can actually backfire if you apply too much or use the wrong kind.
Heavy feeding after a summer pruning can push out a flush of soft, weak growth that struggles in the heat.
If you want to feed your spirea after pruning, keep it very light. A small application of a balanced, slow-release granular fertilizer works well.
Look for something with roughly equal parts nitrogen, phosphorus, and potassium. Sprinkle it lightly around the drip line of the shrub, not right up against the stems.
Many experienced gardeners in Oregon skip the fertilizer entirely after a summer pruning and let the plant rely on the nutrients already in the soil. If you amended your beds in spring or added compost, there is a good chance your spirea has plenty to work with.
Over-feeding is a more common mistake than under-feeding when it comes to established shrubs.
One thing to avoid is any fertilizer that is high in nitrogen right now. Too much nitrogen encourages leafy, fast growth but delays flowering.
Since your goal is a second bloom, not just more leaves, a low-nitrogen or bloom-boosting formula is a smarter choice if you do decide to feed. Always water after applying any fertilizer to help it move into the soil where roots can actually use it.