Why Minnesota Gardeners Are Digging Up Iris This July
There’s a moment every July when Minnesota gardens seem to whisper the same secret. The iris blooms have faded, the leaves have gone a little tired-looking, and somewhere in the yard, a shovel is calling.
What looks like an odd summer chore is actually a quiet act of garden strategy. Iris rhizomes don’t mind a little upheaval right now, in fact, they’re built for it.
Once flowering wraps up, these plants slip into a dormant stretch, and that pause is exactly what makes midsummer division work. The soil stays warm, roots recover fast, and there’s still plenty of time before autumn chill sets in.
Ask any longtime Upper Midwest gardener, and they’ll tell you: this is the reset their iris beds need every few years. Overcrowded clumps, fading flower counts, or simply the itch for more plants, July hands you the perfect excuse.
1. The Reason Minnesota Gardeners Dig Up Iris In July

July feels like an odd time to dig up something that just looked gorgeous. But Minnesota gardeners know something that newer plant lovers are still figuring out.
Iris plants bloom in late spring and early summer. After those stunning flowers fade, the plant shifts its energy underground, focusing on root development and rhizome growth.
That post-bloom window is when division tends to do the most good. The rhizomes are plump, the soil is workable, and the plant is not stressed from producing flowers.
Waiting too long into fall is a common mistake. Iris need several weeks to establish new roots before the ground hardens, and July gives them that runway.
Cold winters in the Upper Midwest make timing even more critical. Rhizomes replanted in September often struggle to anchor themselves before frost arrives.
There is also a pest and disease angle worth knowing. Iris borers, one of the most damaging iris pests in the region, lay eggs in late summer. Dividing in July lets you inspect rhizomes and remove any borer damage before adult moths lay the next round of eggs.
Healthy, well-spaced iris also resist fungal rot better. Overcrowded clumps trap moisture and shade each other out, creating the damp conditions that rot loves.
So when neighbors see you digging up your iris in July, you are not making a mistake. You are working with the plant’s natural rhythm, giving it the best possible chance to thrive next spring.
2. Signs Your Iris Clumps Are Overcrowded

Fewer blooms than last year? That is your iris sending a clear distress signal.
Bearded iris are vigorous growers. Each season, rhizomes multiply and spread outward, creating a tight mass that competes for water, nutrients, and sunlight.
Once that competition gets intense enough, blooming drops off dramatically. The plant keeps growing, but it stops performing because resources are stretched too thin across too many rhizomes.
Another telltale sign is rhizomes poking above the soil surface at odd angles. Healthy iris rhizomes sit just at or slightly above ground level. When they start stacking and crossing each other, the clump has outgrown its space.
Look at the center of the clump too. Older central rhizomes often lose their vigor and leave a bare, woody core surrounded by younger growth on the edges. That hollow center is a classic sign the clump is past due for division.
Yellowing foliage that is not related to drought or pests can also point to overcrowding. Roots competing underground cannot absorb enough nutrients to keep all that foliage green and healthy.
Soft or mushy spots on rhizomes are a red flag for rot, which spreads faster in crowded conditions. Catching this early during a July dig saves the entire planting.
If your iris bed has not been divided in three to four years, assume it needs attention. Regular division keeps the plants young, vigorous, and ready to put on a spectacular show every spring.
3. Digging Up Iris Rhizomes Without Damaging Them

Grabbing a shovel and hacking straight down is the fastest way to ruin a good rhizome. A little technique goes a long way here.
Start by cutting back the foliage to about six inches tall. This reduces stress on the plant and makes the clump much easier to handle during the digging process.
Use a garden fork rather than a flat spade. A fork slides under the clump without slicing through rhizomes the way a spade edge can.
Push the fork in about eight to ten inches away from the visible edge of the clump. Angle it inward and gently lever upward to loosen the root mass from below.
Work around the entire clump before attempting to lift it. Loosening from multiple sides prevents you from snapping rhizomes that are still anchored on the opposite side.
Once the mass lifts free, set it on a tarp or old sheet. Shake off excess soil so you can see what you are working with before moving to the next step.
Some gardeners use a garden hose to rinse the clump lightly. This makes it easier to spot rot, borer damage, or weak sections that need to be removed.
Handle rhizomes gently but confidently. They are tougher than they look, but repeated drops or rough handling can bruise the tissue and invite disease.
Taking fifteen extra minutes during this step protects months of future growth. Careful digging now means stronger, healthier plants next May.
4. Dividing And Trimming Iris Rhizomes The Right Way

Once the clump is out of the ground, the real work begins. Separating rhizomes feels intimidating the first time, but the process is straightforward once you know what to look for.
Pull apart sections by hand where they separate naturally. Most rhizomes will break apart at connection points with gentle pressure.
For sections that resist, use a clean, sharp knife. Dull blades crush tissue instead of cutting cleanly, which slows healing and invites rot.
Each division you keep should have at least one healthy fan of leaves attached. That fan tells you the rhizome is actively growing and has a viable bud for next season.
Discard the oldest, woodiest rhizomes from the center of the clump. These rarely bloom again and take up space that younger sections need.
Trim the remaining leaf fans into a neat fan shape, cutting diagonally to about four to six inches tall. This reduces moisture loss and keeps the plant from flopping over before roots anchor.
Check each rhizome for soft spots, discoloration, or tunnels left by iris borers. Cut away any damaged tissue until you reach firm, white interior flesh.
Dust cut surfaces with powdered sulfur or let them air-dry for a few hours before replanting. This simple step helps prevent fungal infection from taking hold in fresh wounds.
Healthy divisions feel firm and look creamy white inside. Those are the ones worth replanting, and they will reward your effort with strong blooms next spring.
5. Replanting Iris For Strong Root Growth Before Fall

Replanting sounds simple, but the details matter more than most people expect. Get the depth wrong and your iris will sulk instead of thrive.
Choose a spot with at least six hours of direct sunlight daily. Iris planted in shade will grow foliage but produce few or no flowers.
Loosen the soil twelve inches deep and mix in compost if the bed is heavy clay. Good drainage is non-negotiable because sitting moisture rots rhizomes fast.
Set each rhizome horizontally near the soil surface, with the top of the rhizome barely covered or even slightly exposed. Planting too deep is a leading reason iris fail to bloom.
Angle the fan of leaves upward and away from the center of the planting. Space divisions twelve to eighteen inches apart so air circulates freely between plants.
Press the rhizome down firmly to eliminate air pockets beneath it. Roots need solid contact with soil to begin growing quickly.
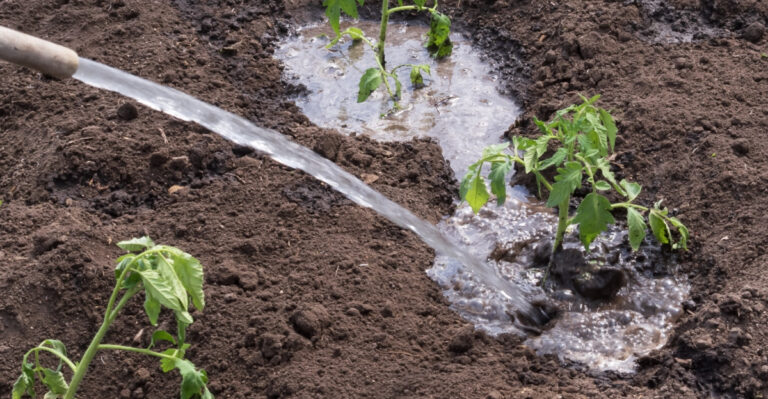
Water thoroughly right after planting, then hold back on irrigation for a few days. Iris prefer to dry out slightly between waterings during the establishment period.
Avoid heavy mulching directly over rhizomes. A thin layer around the sides is fine, but covering the top surface traps heat and moisture against the tissue.
Roots begin growing within one to two weeks in warm July soil. By the time fall arrives, well-planted divisions will be anchored and ready to survive a Minnesota winter with ease.
6. Common Mistakes To Avoid When Dividing Iris

Even experienced gardeners make these mistakes. Knowing them ahead of time saves a lot of frustration come next spring.
Planting too deep tops the list. Rhizomes need warmth and air circulation, and burying them causes rot before the season even begins.
Skipping the inspection step is another costly error. Replanting a borer-damaged or rotted rhizome spreads the problem to healthy sections nearby.
Using dull or dirty cutting tools transfers disease between divisions. Sanitize blades with a disinfectant between cuts, especially if you encounter any soft or discolored tissue.
Overwatering after replanting is tempting but harmful. Too much moisture in the first week encourages rot before roots have a chance to form.
Crowding divisions back together defeats the entire purpose. If you replant sections too close, you will be back out there with a shovel in two years doing the whole process again.
Forgetting to label varieties is a small mistake with big consequences. Once all those trimmed fans are in the ground, every variety looks identical until bloom time.
Composting all discarded rhizomes without checking them is risky. If borers are present, their eggs can survive a compost pile and spread back into the garden.
Replanting in the same tired, unamended soil limits recovery. Adding compost and checking drainage before putting divisions back in gives them a genuinely fresh start.
Avoiding these pitfalls puts you ahead of most iris growers. Thoughtful preparation now means stronger, more reliable blooms when Minnesota spring finally arrives.