The $100 Florida Tree Mistake That Starts With A Hole Dug Two Inches Too Deep
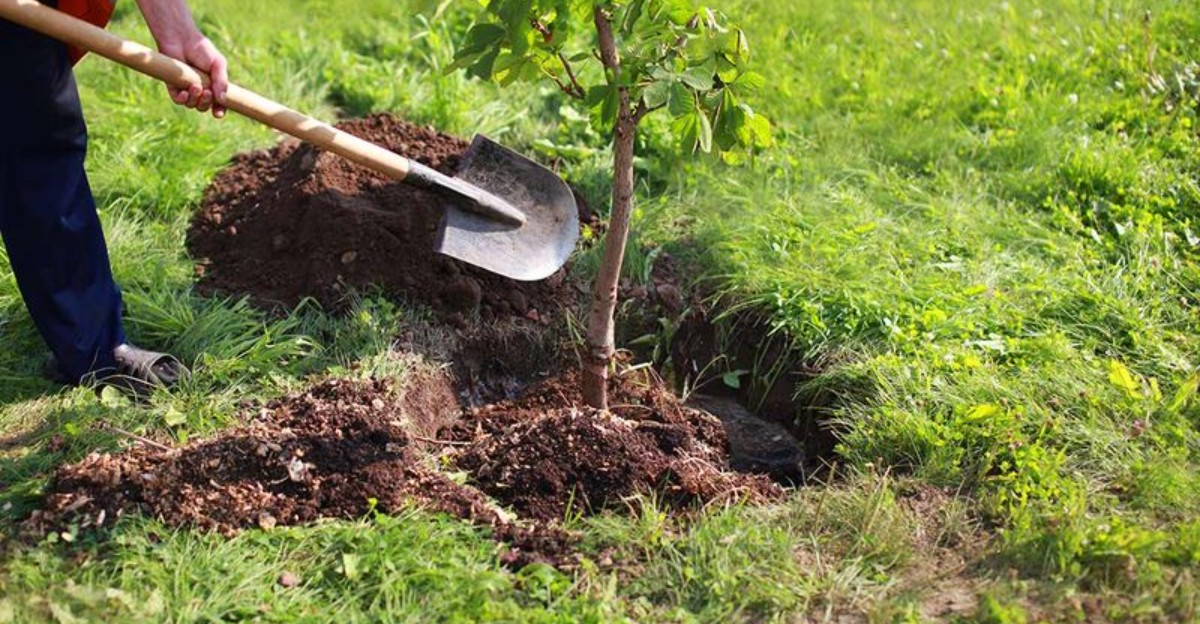
Two inches. That’s the entire gap between a tree that thrives for the next twenty years and one that costs a few hundred dollars and a full afternoon to replace before it ever gets the chance.
Planting depth sounds like the kind of detail only a professional would care about, but it decides more about a tree’s survival than soil quality, watering schedule, or even the species itself.
A hole dug too deep buries the root flare, the exact spot where roots are supposed to breathe and spread.
Bury it, and the tree spends years struggling to establish while looking completely fine on the surface, right up until it doesn’t.
Most of the trees that fail in Florida yards didn’t fail because of drought, disease, or bad luck. They failed because of a hole that looked close enough at the time.
1. Find The Root Flare Before The Shovel Goes In
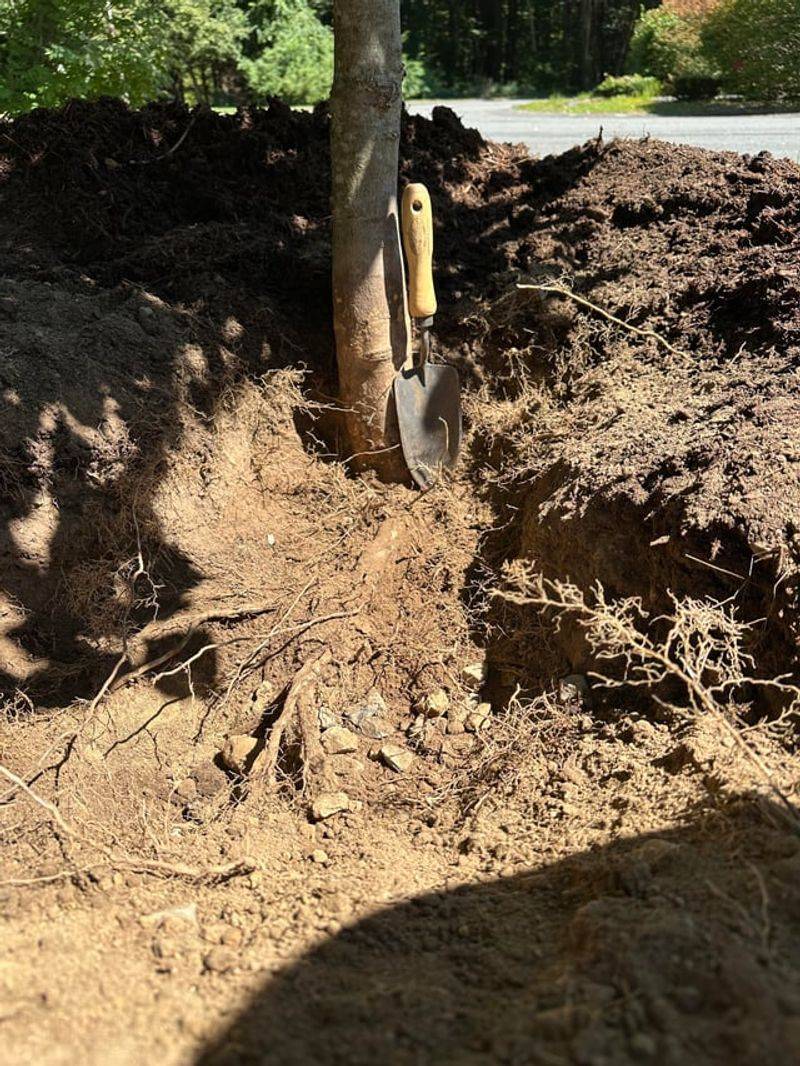
Every tree has a built-in depth gauge, and most people plant right past it. The root flare is the spot where the trunk stops being a straight column and widens out like the base of a wine glass.
Arborists also call it the trunk flare, root crown, or root collar. Whatever the name, it identifies the transition between the trunk and the major roots and gives you the reference point for setting the tree at the proper depth.
On a mature live oak, the flare is obvious and sculptural. On a young container tree from a Florida nursery, it can hide two or three inches under potting mix.
Before you dig anything, scrape the top of the root ball with your fingers or a hand trowel. Keep going gently until you feel the first big structural roots branching out from the trunk.
Measure from that point down to the bottom of the root ball. That measurement, not the height of the pot, tells you how deep your hole should be.
Skipping this step is where the money quietly disappears. A tree planted two inches low often struggles for years, and replacing it costs far more than the minute you saved.
Write the number down if you are planting several trees. Each root ball is a little different, and guessing tends to favor going too deep.
2. Dig Wide And Shallow Instead Of Deep And Tidy
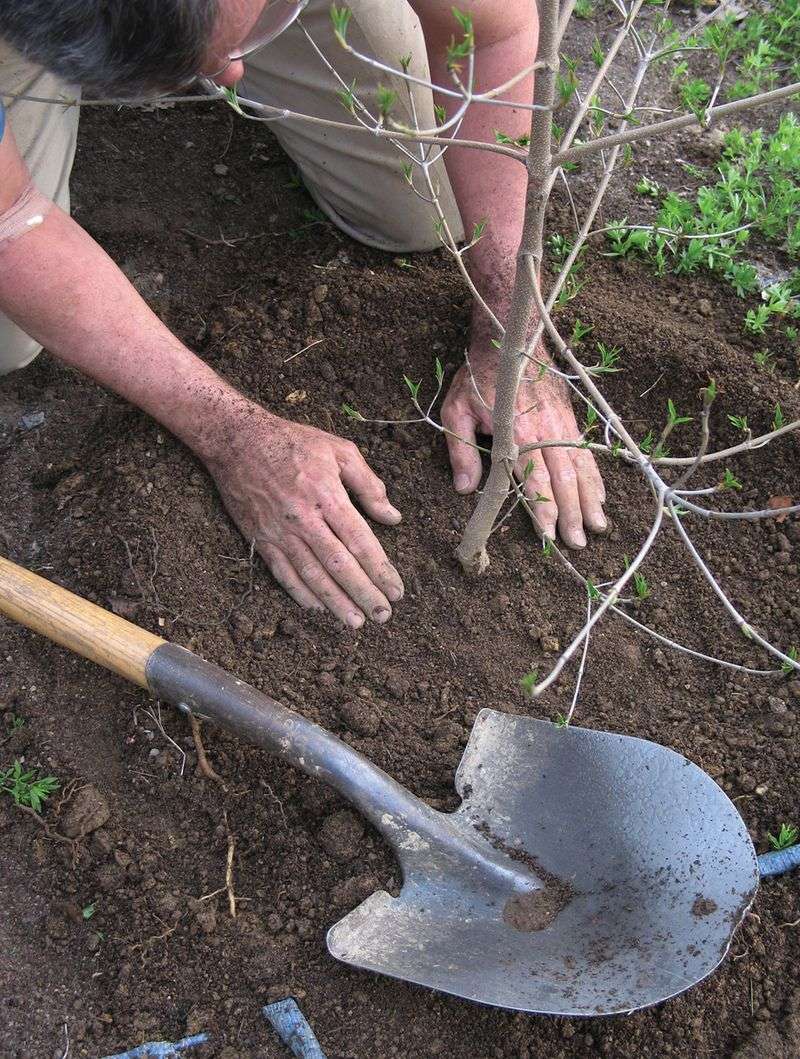
Neat, deep holes feel satisfying. Roots, unfortunately, do not care about tidy sides and vertical walls.
Most of a tree’s absorbing roots are concentrated relatively close to the soil surface, so the planting hole should give them room to spread outward rather than encouraging a deep, buried root ball. Give them a saucer, not a bucket.
The rule of thumb is simple: no deeper than the root ball measured from the flare, and two to three times wider than the root ball across. In compacted soil, improving the surrounding soil and drainage may matter as much as making the hole wider.
Avoid creating a deep hole that turns into a water-holding pocket.
Your Florida Garden Changes Every Week. Your Plan Should Too.
Gardening in Florida changes quickly throughout the season. Every Friday you’ll receive a simple weekly plan showing exactly what to plant, prune, fertilize, harvest, and protect so you never miss the right timing.
That extra width loosens soil where new roots actually travel. It also gives you room to backfill without packing hard chunks against the ball.
Here is the part that trips up weekend planters. If you overshoot the depth, do not just drop the tree in and hope.
Add soil back to the bottom and firm it down with your foot or the shovel handle until it stops sinking. Loose fill under a root ball settles after the first afternoon thunderstorm, and suddenly your perfectly placed tree sits low.
Check depth by laying the shovel handle across the hole as a straightedge. The flare should sit at or slightly above that line before you add a single scoop of backfill.
3. Set The Tree High Before Settling Pulls It Lower
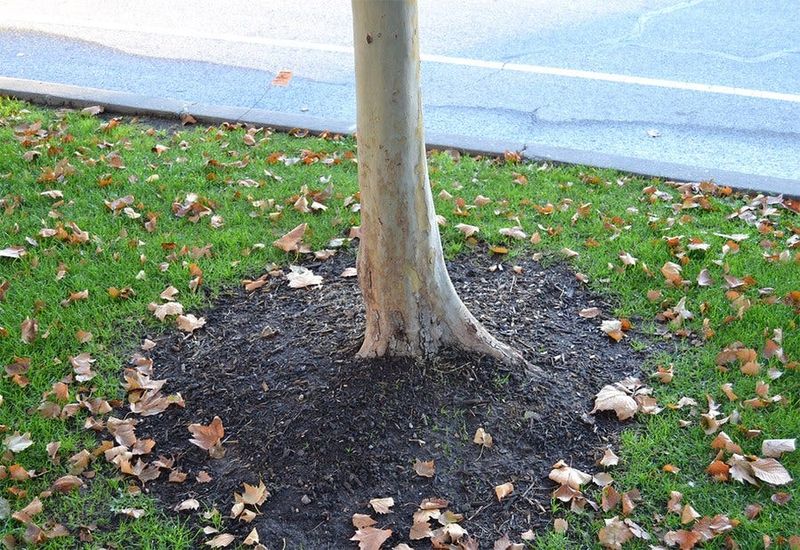
Soil sinks. Water, gravity, and time all conspire to lower whatever you just planted, so build that into your plan.
Landscape professionals aim to set the root flare slightly above the surrounding grade. Set the root flare slightly above the surrounding grade rather than trying to bury it exactly level with the soil surface.
Larger trees may need to sit a little higher to account for settling, but the flare should remain clearly visible after planting. Sandy Florida soils drain fast but still shift once irrigation starts running.
Planting a touch high is the friendlier mistake. A slightly raised flare sheds water away from the bark and keeps oxygen reaching the upper roots.
Planting low does the opposite, and the trouble builds slowly enough that most homeowners never connect the thin canopy to the hole they dug three years earlier.
Stand back and eyeball the tree from two sides before backfilling. You want a gentle slope of soil rising to meet the root ball edge, not a crater collecting runoff.
One handy trick: lay a broom handle across the undisturbed ground on both sides of the hole. If the top of the root ball touches or slightly lifts that handle, your depth is in good shape.
Then water slowly and recheck before you walk away.
4. Keep Backfill Off The Top Of The Root Ball
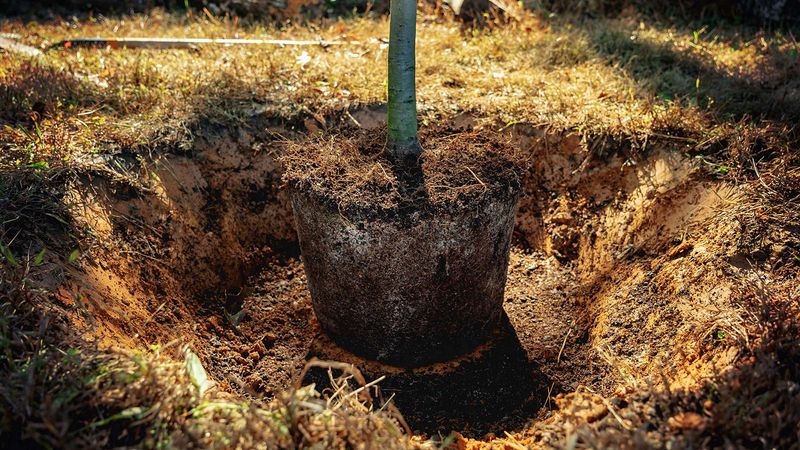
There is a strong urge to smooth everything over, sprinkling soil across the top of the root ball so the planting looks finished. Resist it.
Backfill belongs around the sides, filling the gap between the root ball and the hole wall. The top surface of the ball should stay open to the air.
Soil spread over that surface acts like a lid. Adding soil over the root ball changes the original planting depth and can keep the upper roots and trunk flare surrounded by conditions that are too wet.
The flare and the upper roots breathe. Cover them and you trap moisture right against the bark, which invites decay and softens tissue that was built for open air.
Florida’s summer rain pattern makes this worse. Afternoon downpours keep buried bark damp for days at a stretch.
Instead, firm the side backfill in layers and water it in to remove air pockets. Then leave the crown of the root ball bare, or dust it with the thinnest whisper of soil if the surface roots feel exposed.
A shallow berm around the outer edge helps direct irrigation water into the root zone without piling anything on top. Check the base again a month later, since foot traffic and rain can push soil inward.
5. Never Trust The Soil Line On A Nursery Tree
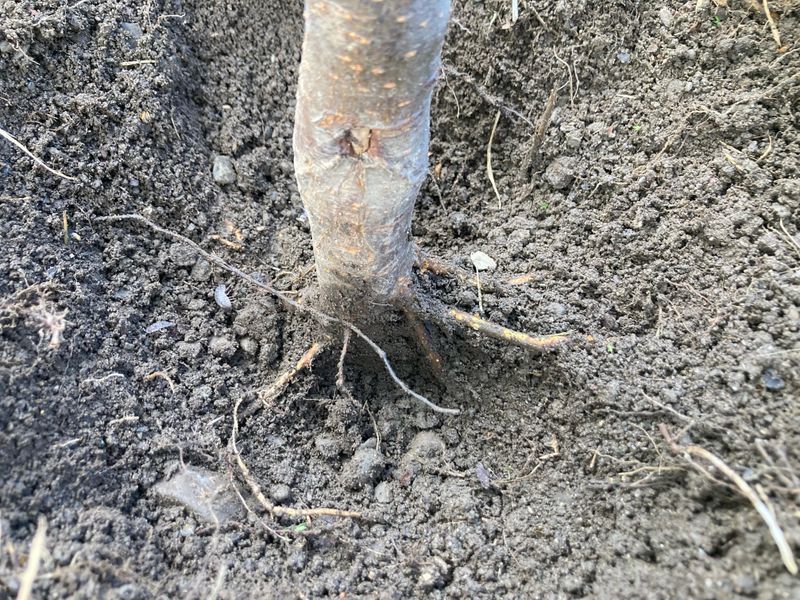
Here is the frustrating truth: the soil line in the pot is not a promise. Nursery trees frequently arrive with their flare buried two, three, even four inches under extra mix.
Sometimes it happens during potting. Sometimes the ball shifts and settles during a bumpy ride from the growing yard to the garden center to your truck bed.
Plant at the container line without checking and you have already made the expensive mistake before the shovel touched dirt. The tree looks fine on day one, which is exactly the problem.
So treat every root ball as a mystery worth solving. Set the pot on a flat surface, then brush and pick soil away from the trunk in small amounts.
You are hunting for the point where the trunk swells and the first thick roots angle outward. A wooden chopstick or a soft brush works better than a metal tool near tender bark.
Once you find it, that becomes your new measuring point. Everything above it is just extra soil that can be discarded.
Worth remembering: this single check separates trees that thrive in Florida yards from trees that limp along. It takes about three minutes and costs nothing but a little patience.
6. Cut Circling Roots Before They Tighten Around The Trunk
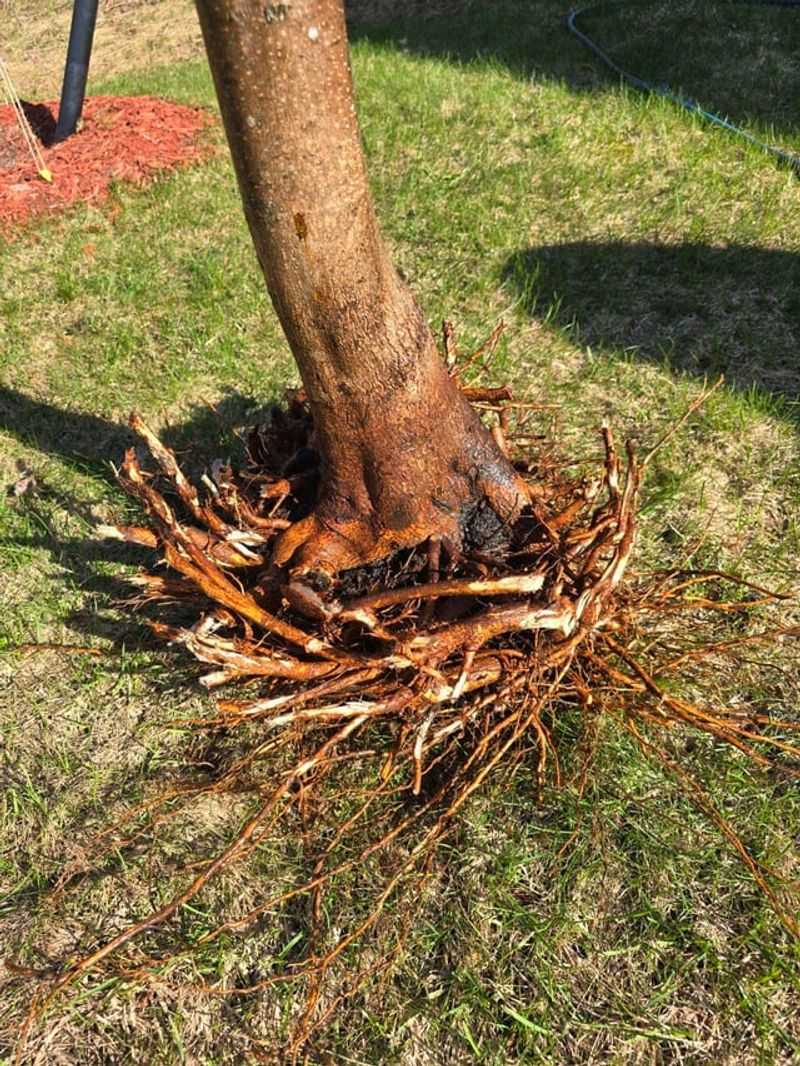
Roots in a pot have nowhere to go, so they loop. Around and around they travel, following the curve of the plastic until they form a tangled spiral.
Left alone, those circling roots can tighten against the trunk as everything thickens. Over the years they squeeze the pathways that move water and nutrients, a problem arborists call girdling.
The good news is that a sharp pair of pruners solves it early. Expose the flare, look for any root crossing or wrapping the trunk, then cut it cleanly rather than trying to straighten it.
Feeling nervous about removing healthy roots? Do not remove large amounts of healthy roots simply to make the root ball easier to plant.
Focus on correcting obvious circling or girdling roots while preserving as much healthy root tissue as possible.
Trading a few roots now for a sound trunk later is a bargain. Also slice down the outer sides of the root ball in three or four places to encourage new roots to head outward.
Do the cutting before the tree goes in the hole, while you can still see and reach everything. Keep the cuts crisp, since ragged tears heal more slowly.
Then plant promptly and water well to help new roots settle in.
7. Keep Mulch From Burying The Root Flare All Over Again
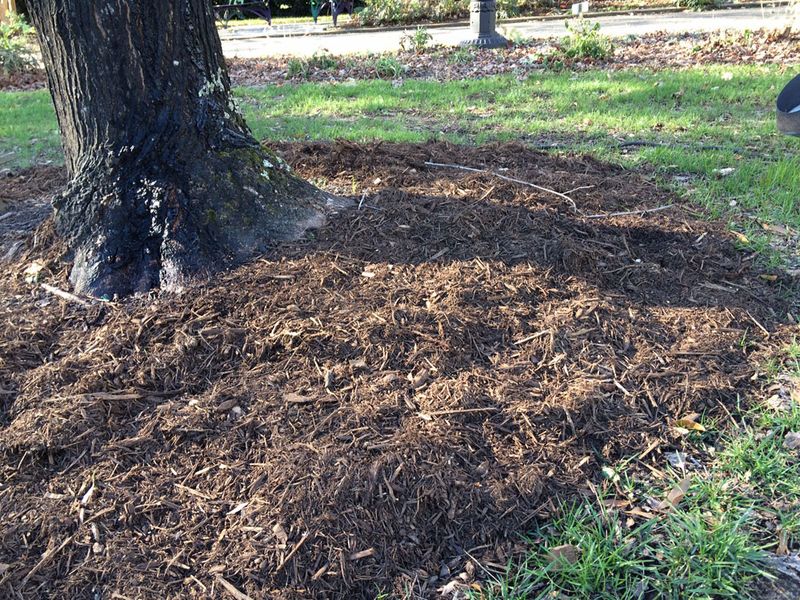
You can do the planting perfectly and then undo it with a wheelbarrow of mulch. It happens constantly across Florida neighborhoods every spring.
Mulch piled high against the bark is sometimes nicknamed a mulch volcano. It looks intentional and manicured, which is precisely why it spreads.
The trouble is that mulch holds moisture beautifully, and bark pressed against damp material for months softens and decays. Insects and fungi find the sheltered space very welcoming.
In effect, you have reburied the flare and recreated the two-inch problem you worked to avoid. The tree cannot tell the difference between soil and shredded bark sitting on its collar.
Shape mulch like a donut instead, with the hole in the middle. Spread it two to three inches deep and pull it back several inches from the trunk so the flare stays visible.
Widen the ring outward toward the drip line rather than upward toward the bark. That keeps roots cool, holds moisture where it helps, and blocks weeds and string trimmers.
Refresh mulch by fluffing what is there before adding more, since layers stack up fast. Every few months, run a hand around the base to confirm the flare is still breathing.
8. Treat A Fence-Post Trunk As A Planting-Depth Warning
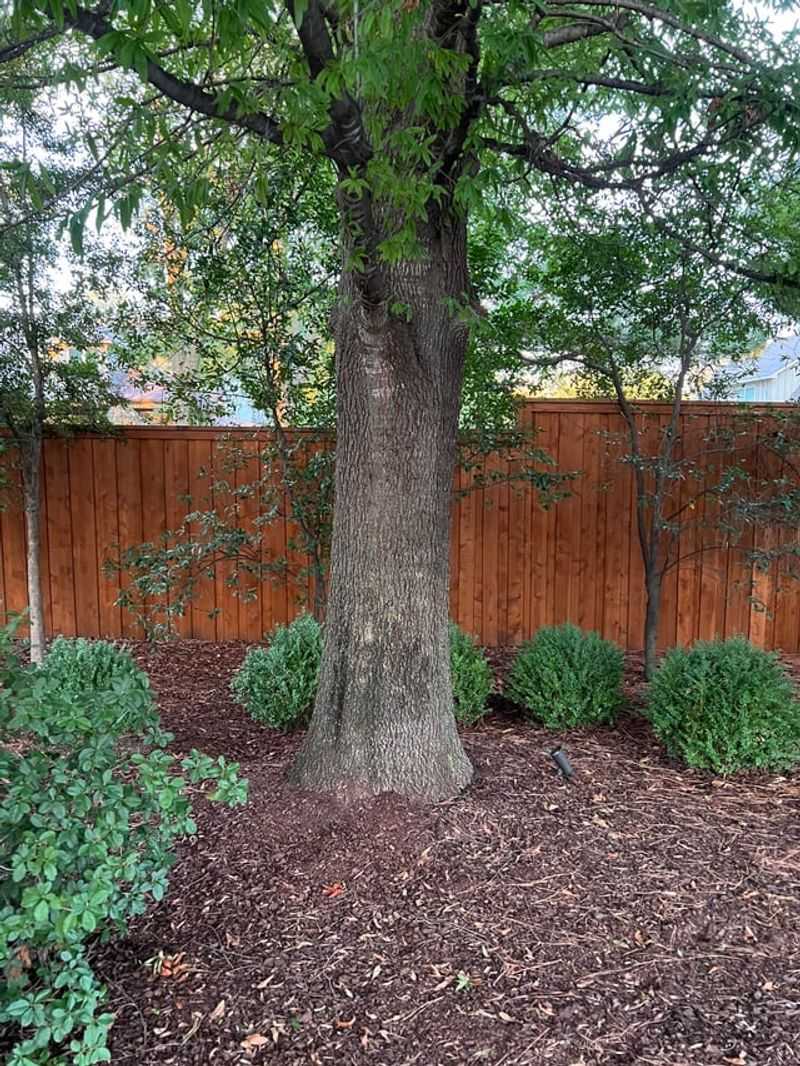
Walk any Florida subdivision and you will start noticing it: trunks that enter the ground like telephone poles, straight and featureless. That silhouette is a message.
A well-planted tree shows a visible taper at the bottom, widening where trunk becomes root. No flare means the transition zone is buried somewhere below.
Think of it as a free diagnostic tool you can use from the sidewalk. Once you train your eye, spotting the difference takes about two seconds.
Buried flares mean less oxygen reaching the upper roots and constant moisture against bark that prefers fresh air. An excessively buried root flare can contribute to poor root function and other long-term problems, although symptoms such as thin foliage or slow growth can have many other causes as well.
Check your own yard this weekend. Crouch down at each trunk and look for that gentle outward sweep at soil level.
If the trunk looks like a post sunk by a fence crew, you have found a candidate for further inspection. Probe carefully with a stick or your fingers to see how far down the flare sits.
Also watch for trunks that seem to enter a mound of soil and mulch rather than the natural grade. Landscape crews sometimes raise beds around existing trees, which creates the same buried condition years after planting.
9. Correct An Overdeep Tree Before The Problem Gets Harder To Fix
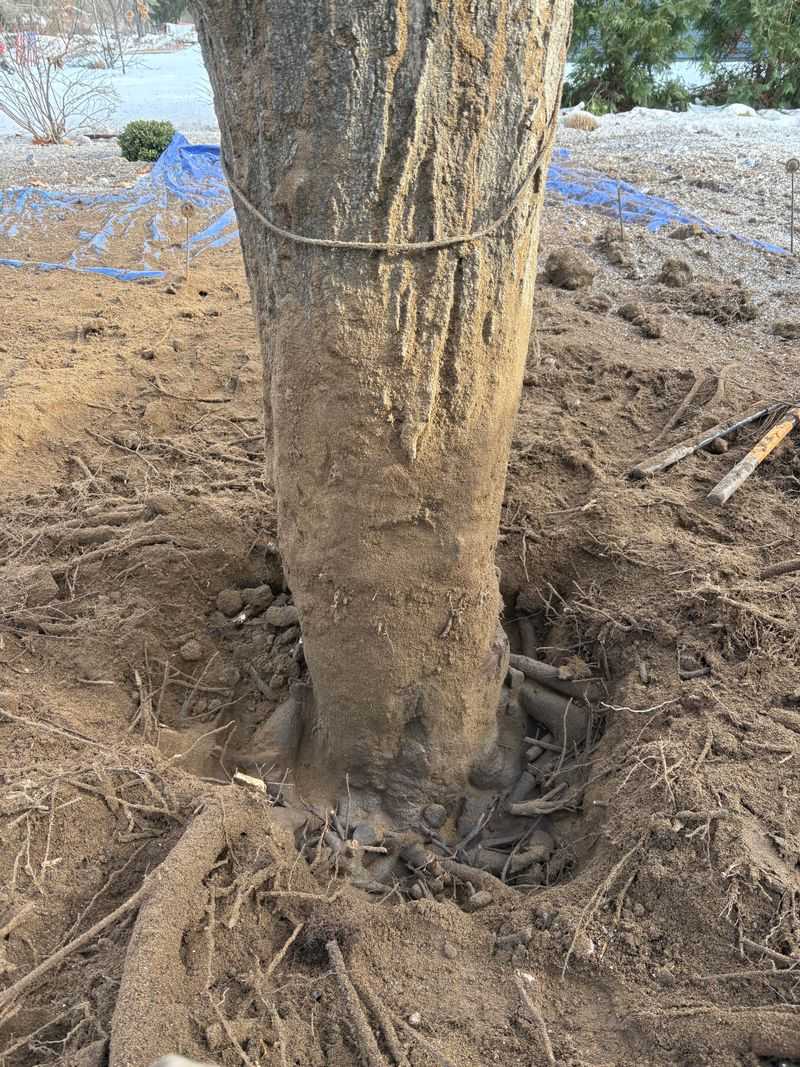
Discovered a tree sitting too low? Do not panic, and do not ignore it either, because timing changes everything about the fix.
If the tree was planted recently and the root ball is still intact, correcting the planting depth may be possible by carefully lifting and resetting the tree. The goal is to expose the root flare and place it at the proper grade without unnecessarily disturbing the roots.
Roots have not spread far yet, so disturbance stays minimal. Water thoroughly afterward and skip any heavy fertilizing while it re-establishes.
For an established tree, especially one that has been buried for years or has a large root system, correcting the problem is more complicated. Carefully removing excess soil from around the root flare may help, but major excavation is best evaluated by a qualified arborist.
Arborists call this a root collar excavation. Professionals often use an air spade, a tool that blasts soil away with compressed air while leaving bark and roots intact.
Work outward in a shallow bowl rather than a narrow pit so water drains away instead of pooling. An arborist can also evaluate whether drainage, compaction, or additional soil around the tree is contributing to the problem and determine the safest correction.