How Arizona Gardeners Harvest And Cure Fall-Planted Garlic So It Lasts 8 Months In The Pantry
Growing your own garlic in Arizona is one of those satisfying projects that pays off at the dinner table for months. Fall planting sets the crop up to mature in late spring or early summer, but getting the most out of those bulbs depends on knowing exactly when and how to pull them from the ground.
Miss the window by too much in either direction and your storage life shrinks fast. This guide walks you through reading the plant, handling the harvest, and curing and storing garlic so a good softneck variety has the best possible shot at lasting well into winter.
Read the leaves before the calendar
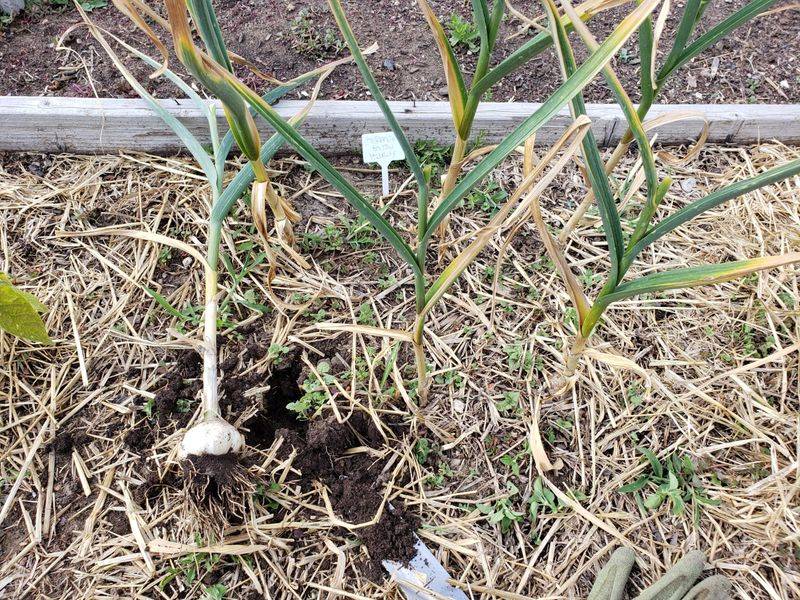
Garlic tells you when it is ready before any calendar date does. The signal to watch for is a combination of browning or yellowing on the lower leaves while several upper leaves remain healthy and green.
University of Arizona Cooperative Extension guidance confirms that harvesting too early limits bulb size, while waiting too long causes wrapper breakdown, separated cloves, and a shorter shelf life.
Each leaf on the garlic plant corresponds roughly to one wrapper layer around the bulb. When lower leaves die back, the outer wrappers begin to thin.
If you wait until nearly all the leaves are brown, you may find bulbs with only one or two fragile wrapper layers remaining, which makes them harder to cure properly and more vulnerable to rot in storage.
A useful late-season heuristic is that when roughly three or more lower leaves have browned and several upper leaves are still green, you are likely inside an approximate harvest window. Think of this as a prompt to start paying close attention, not a countdown that began with the very first yellowed leaf.
Variety, heat, irrigation history, and planting date all shift that window, sometimes by weeks.
Let Arizona conditions set the pace
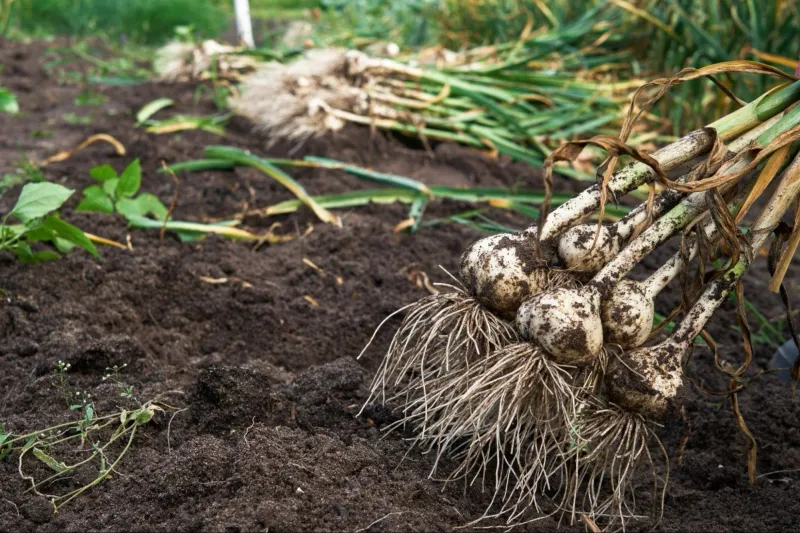
Fall planting is standard practice for Arizona garlic. University of Arizona guidance places planting in September or October, while the Maricopa County planting calendar puts it mainly in October and November, with a five- to seven-month window to harvest.
Those ranges are broad on purpose because so many variables shift the finish line.
Garlic needs a cool period after planting to trigger bulb formation, a process called vernalization. The University of Arizona notes that cloves generally require roughly four to six weeks below 40 degrees Fahrenheit, though how well that chilling requirement is met depends heavily on the cultivar and the specific location.
Phoenix and Tucson winters can provide enough cold nights for some varieties but may fall short for others bred for colder climates, which is one reason variety selection matters so much in the low desert.
Higher-elevation Arizona gardeners in places like Prescott or the White Mountains work with meaningfully different chilling hours and heat accumulation than Phoenix or Tucson residents do. Some University of Arizona garlic material was developed with central-highlands conditions in mind, so low-desert gardeners should treat calendar estimates from those resources as rough orientation rather than precise schedules.
Your Arizona Garden Changes Every Week. Your Plan Should Too.
Gardening in Arizona changes quickly throughout the season. Every Friday you’ll receive a simple weekly plan showing exactly what to plant, prune, fertilize, harvest, and protect so you never miss the right timing.
Use the seasonal window only as a cue to start watching your plants closely.
The plant’s condition, not the date on the calendar, should drive the decision.
Confirm maturity with a sample bulb
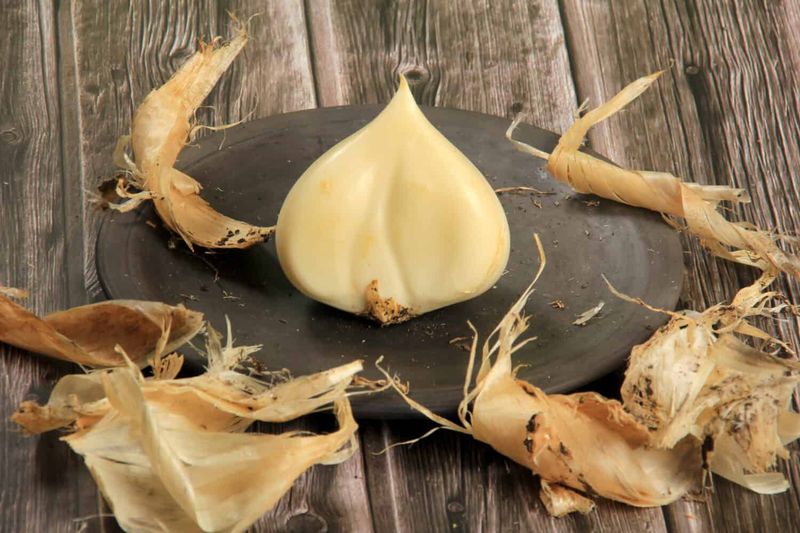
Before pulling the entire bed, dig one or two plants carefully and look at what you actually have. Loosen the soil around a bulb with a fork rather than yanking the plant, then brush away the dirt and check three things: the cloves should be plump and well defined, the bulb should feel firm, and you should still see several intact wrapper layers surrounding the head.
University of Arizona Central Highlands garlic guidance recommends this inspection step and specifically warns against leaving garlic in the ground until heads shatter and cloves begin to separate.
Green-leaf counts and browned-leaf percentages are overlapping rules of thumb, not exact thresholds. Some sources use five to six healthy green leaves remaining; others describe 40 to 60 percent browned foliage or at least three green leaves.
The University of Arizona Roots, Tubers and Bulbs fact sheet lists similar markers. If the sample bulb’s cloves are small or the wrappers have already thinned to one layer, give the crop more time and check again in a few days.
Monsoon rain adds a real complication. Prolonged soil moisture near harvest can lead to rot in the field and in the curing space.
If the forecast shows extended rain and your sample bulbs are sufficiently developed with firm cloves and a few wrapper layers intact, harvesting slightly early is a reasonable tradeoff.
You may get somewhat smaller bulbs, but you reduce the risk of losing them to field rot before you ever get them out of the ground.
Adjust irrigation as harvest approaches
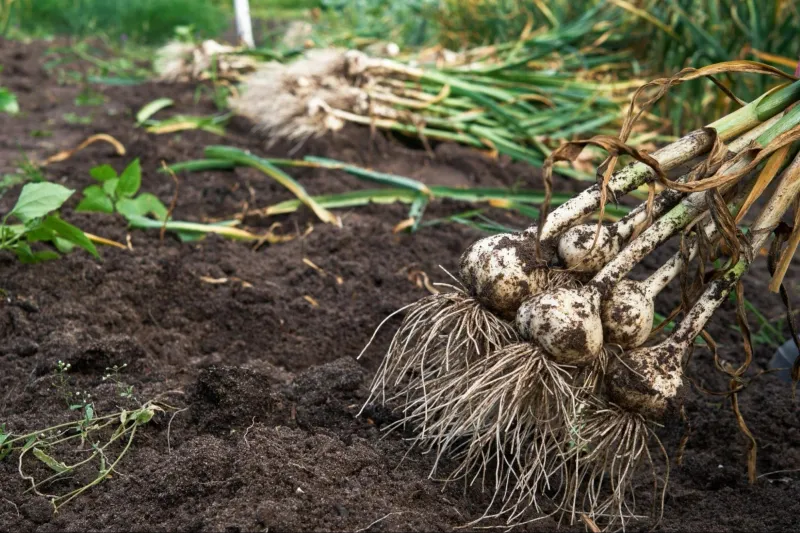
Reducing irrigation as garlic approaches maturity is sound practice. When foliage begins to yellow and die back, pulling back on water allows the soil to dry somewhat, which limits excess moisture around the bulb and supports better curing later.
University of Arizona garlic guidance advises stopping irrigation when leaves yellow, and that general principle is well supported.
The qualification for Arizona gardeners is important: this advice should follow plant condition and weather, not a fixed date. If temperatures are spiking above 105 degrees and the soil is bone dry for an extended stretch, that level of stress can reduce bulb quality just as surely as overwatering can.
The goal is to reduce moisture gradually as the plant signals maturity, not to impose a hard cutoff weeks in advance because a calendar says so.
Monsoon timing can complicate this further. An unexpected storm can saturate soil you had been carefully drying down, and there is little you can do about that except monitor your plants closely and be ready to harvest if the bulbs are sufficiently developed.
Excess moisture in the final days before harvest can work its way into the bulb neck and create problems during curing, so checking soil conditions after any significant rain is worthwhile.
Balance is the practical goal: reduce water as maturity signals appear, stay responsive to heat and weather, and let the plant guide the timing.
Lift bulbs without causing damage
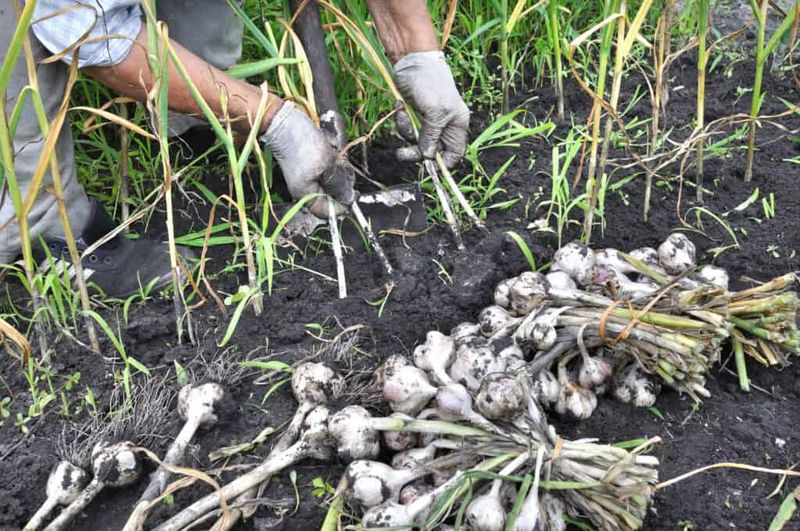
How you get the bulb out of the ground matters as much as when you do it. Use a garden fork or a spade to loosen the soil several inches away from and beneath each bulb before attempting to lift it.
Slide the tool under the root ball and lever the bulb upward rather than pulling against the neck or stem.
Pulling garlic by its foliage is one of the most common harvest mistakes. The leaves are not strongly attached to the bulb neck at maturity, and a hard tug can snap the neck or crack the bulb, creating an open wound that pathogens can enter during curing.
Cuts and bruises on the outer wrappers have the same effect. A damaged neck or broken skin shortens storage life significantly, sometimes reducing a bulb that might have lasted months to one that rots within weeks.
Once a bulb is out of the ground, handle it gently. Set bulbs down rather than tossing them into a pile, and keep the tops attached.
The stem and leaves will continue to dry during curing, and leaving them intact helps moisture move out of the neck gradually. The University of Arizona Roots, Tubers and Bulbs presentation fact sheet supports this careful lifting approach and notes that wounds and uncured neck tissue invite storage pathogens.
A few extra minutes at harvest can translate to months of additional pantry life.
Cure bulbs in shade until they are dry
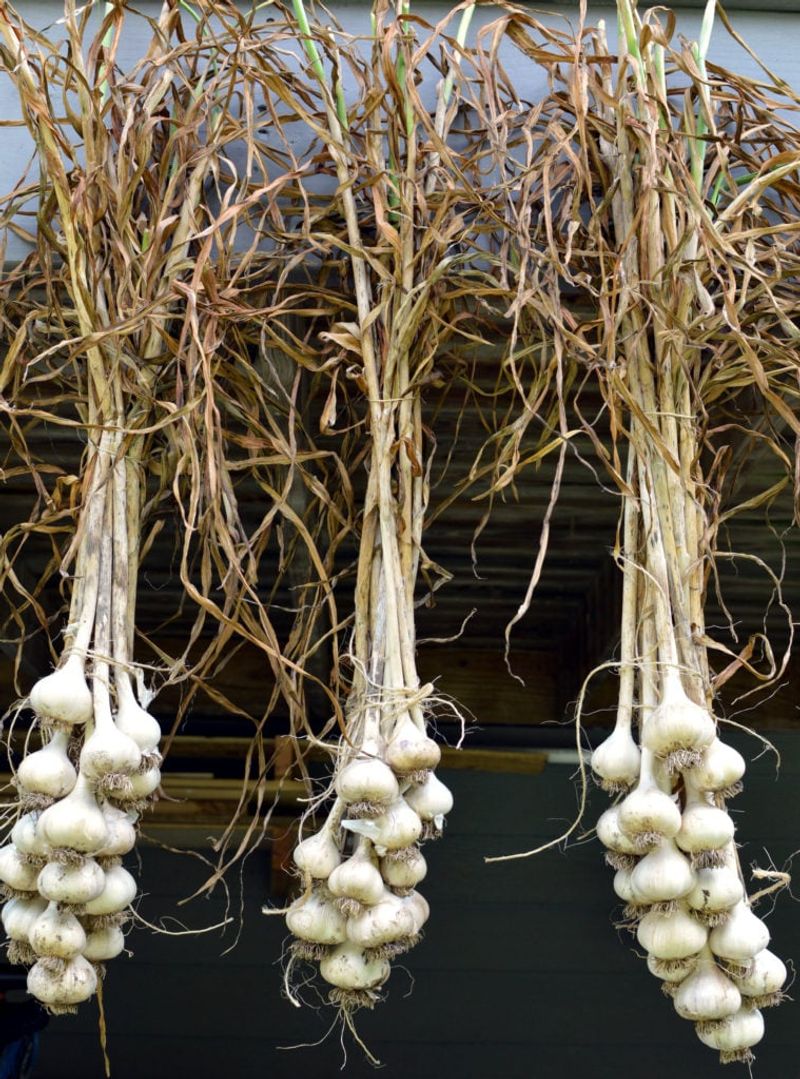
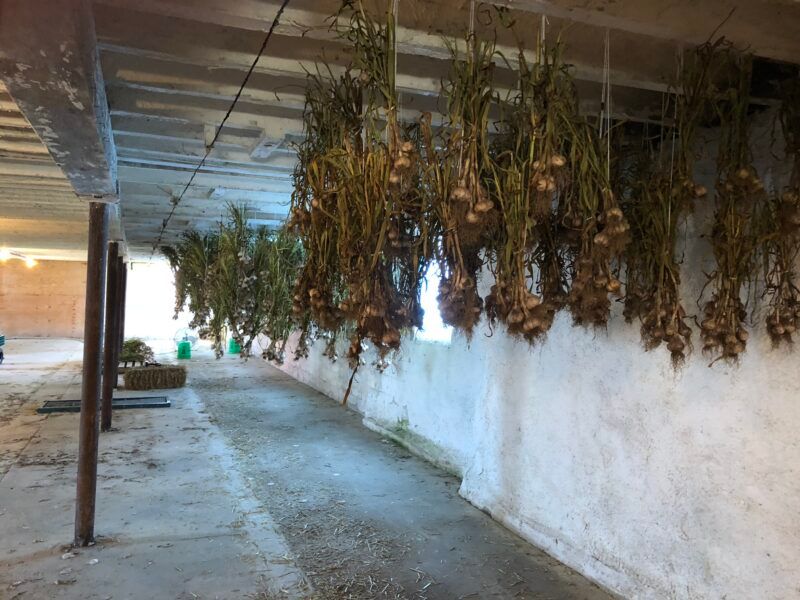
Curing converts a freshly dug bulb into one that can sit in your pantry for months. The process is simple in principle: hang or lay the bulbs in a location that is shaded, dry, and well ventilated, with the tops still attached, and leave them until the outer skins are papery, the neck just above the bulb is completely dry, and the roots have dried and stiffened.
Arizona’s heat creates a specific risk during this step. Direct sun in the Phoenix or Tucson area can push surface temperatures high enough to cook the outer layers unevenly, trapping moisture inside while the skin looks dry on the outside.
A covered patio, a shaded carport, a garage with the door open, or a shed with good cross-ventilation are all reasonable options.
Curing typically takes roughly two to three weeks, but temperature, humidity, airflow, bulb size, and variety all affect the timeline. Do not declare the garlic cured just because two weeks have passed.
Check the neck: if it still feels soft or pliable at the point where it meets the bulb, leave the garlic to cure longer. Roots should feel dry and papery rather than flexible.
When those conditions are met, the garlic is ready for trimming and storage.
Store properly cured bulbs in a cool, dry place
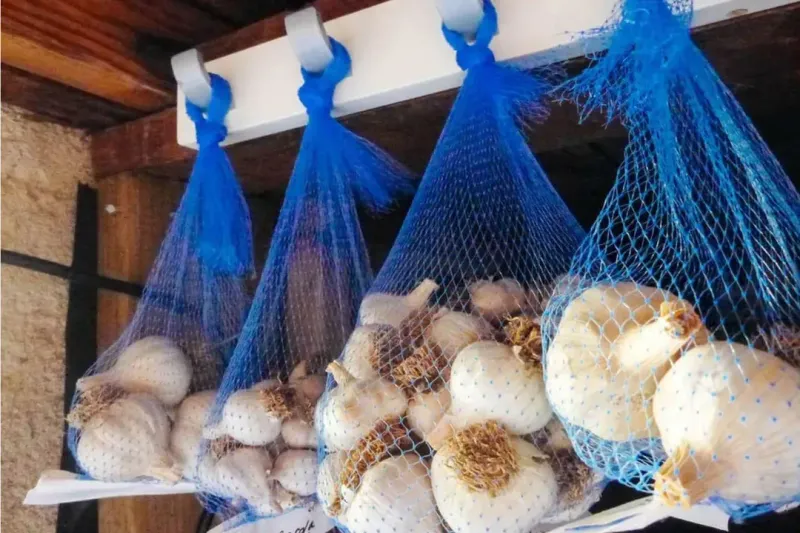
Once curing is complete, prepare the bulbs for long-term storage. Trim the roots close to the base of the bulb and cut the dried stem to about an inch above the neck, or leave longer stems if you plan to braid softneck varieties.
Brush away any loose soil gently with your hands or a soft brush; do not wash the bulbs.
Sort through every bulb before putting anything away. Any head that is soft, shows mold, has a cracked neck, carries a foul smell, or has visible damage from insects or disease should be set aside and used first, not stored with sound bulbs.
One compromised bulb in a mesh bag can spread rot to its neighbors.
Sound bulbs go into breathable containers: mesh bags, slatted wooden crates, open weave baskets, or hanging braids for softneck varieties. Airtight plastic bags trap humidity and accelerate sprouting and rot.
The coolest, driest, darkest, and best-ventilated indoor spot you can find is the right storage location. A consistent temperature below 60 degrees Fahrenheit is ideal, though many Arizona homes cannot maintain that during summer without air conditioning.
Refrigerating whole cured garlic is not automatically a better choice. Household refrigerator humidity can encourage sprouting and mold, and whole bulbs stored cold may perform differently than expected.
If you are saving bulbs as planting stock for next fall, keep them out of cold storage entirely, since chilling can interfere with subsequent bulbing.
Oregon State University Extension notes that softneck garlic can store up to nine months under suitable conditions, while hardneck types commonly reach three to six months, making variety selection a real factor in how long your pantry supply lasts.
Treat eight months as a best-case target
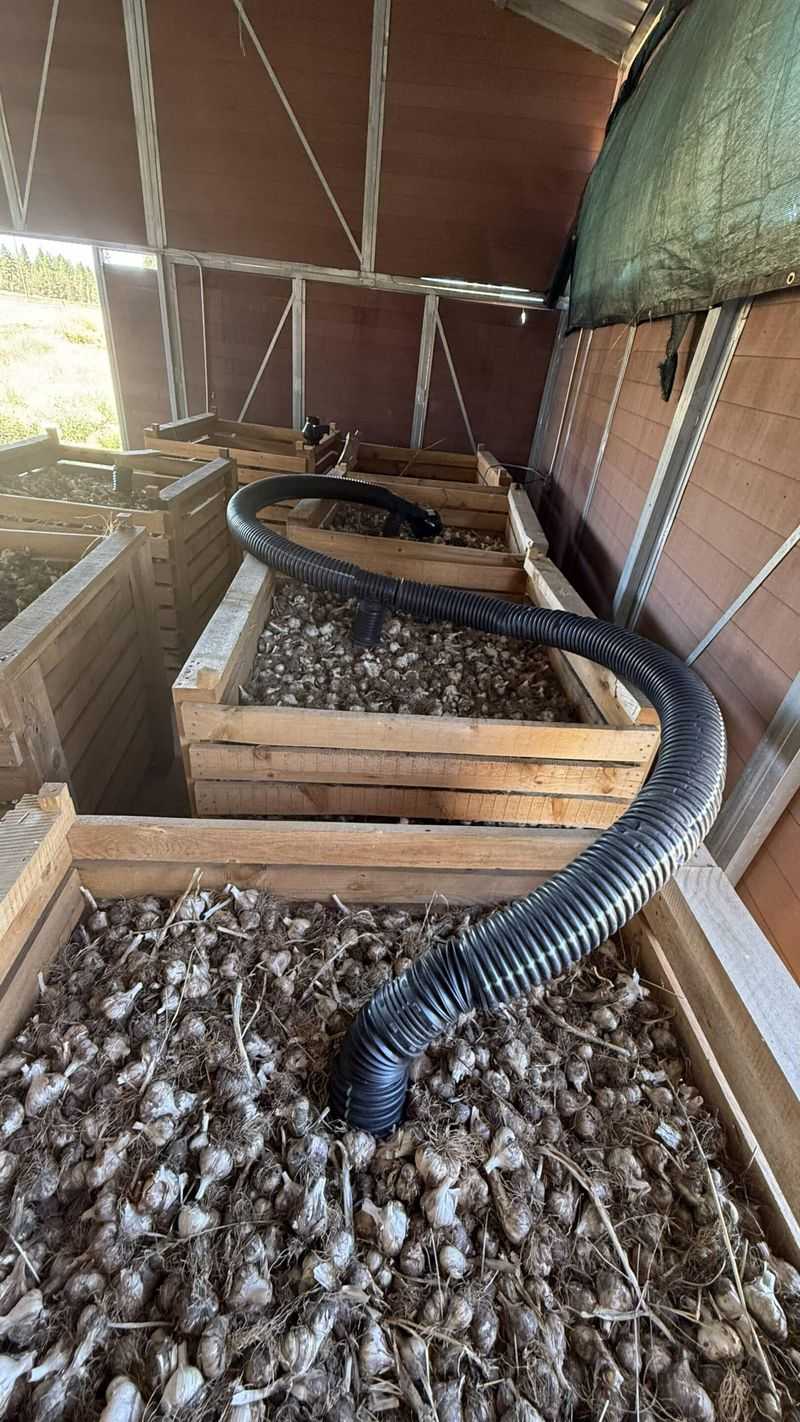
Eight months of pantry storage is possible, but it is not a promise that every Arizona gardener can count on. That outcome belongs to well-cured softneck varieties stored under consistently cool, dry, and well-ventilated conditions.
Hardneck garlic, which tends to produce larger and easier-to-peel cloves, typically runs out of pantry life at three to six months even under good conditions. A warm garage or shed during an Arizona summer can shorten either type’s storage life considerably compared to what controlled-temperature results suggest.
The practical sequence is straightforward: watch for several browned lower leaves alongside healthy green upper leaves, dig a sample bulb to confirm developed cloves and intact wrappers, harvest before the wrappers fail, cure in shade with good airflow until everything is dry, and store sound bulbs in the best environment your home can offer. Following those steps gives a suitable softneck its best realistic shot at a long pantry life.
The gardeners who get closest to eight months are usually the ones who paid attention at every stage, not just at harvest.