What Michigan Dahlias Need In October Before They Disappear For Winter
Michigan gardens in October smell like wet leaves, cold soil, and the faint sweetness of the last brave blooms. Mornings turn crisp, and the flower beds look a little thinner each week.
Those huge, showy heads you babied all summer still glow like little sunsets along the garden fence. Yet one hard frost can turn that bright color into a soggy, dark mess almost overnight.
Some gardeners compost everything and buy new plants each spring. That habit gets expensive fast, and it means saying goodbye to varieties you might struggle to find again.
A few smart moves this month can carry your favorites safely through a long, snowy Michigan winter. The work feels a bit like tucking a treasure away, then finding it waiting for you later.
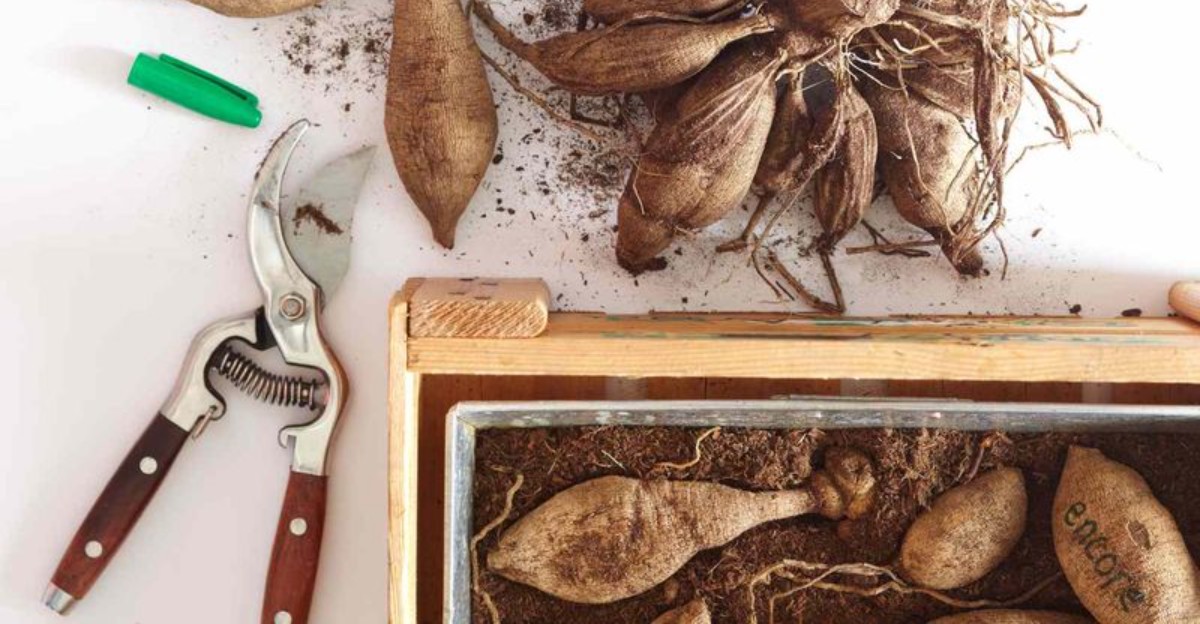
Grab your gloves and a sturdy trowel. These tubers have a surprising talent for looking exactly like forgotten potatoes.
Wait For Frost To Blacken The Leaves
Patience might be the hardest tool in your shed, especially when October nights in Michigan start nipping at your nose. Many gardeners rush to dig too early, but your plants still have important work left to do.
Those leafy stems keep sending sugar and energy down into the tubers hiding beneath the cool soil. That stored fuel is what helps each tuber survive months of darkness and sprout again next season.
In most parts of the state, the first light frost shows up between late September and mid October. Northern areas and the Upper Peninsula usually see it sooner, while lakeshore towns often stay milder longer.
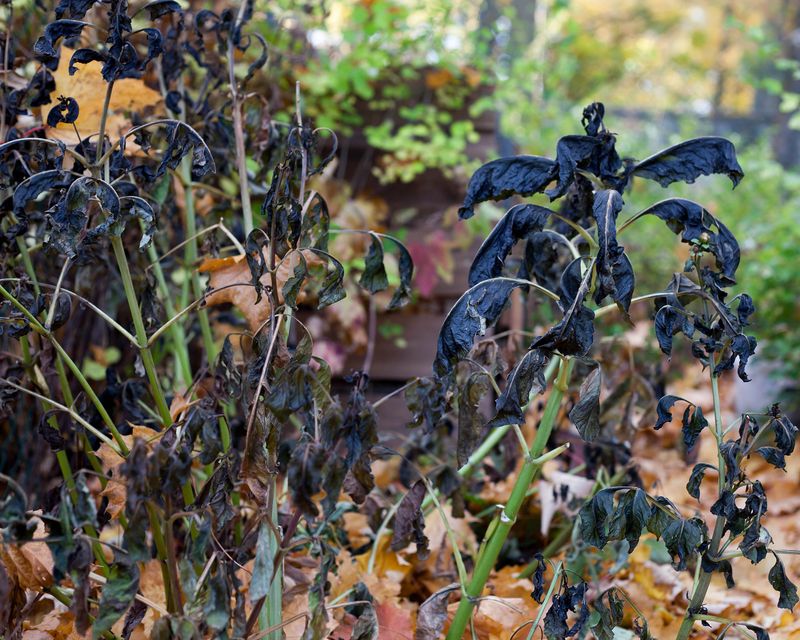
After that first chilly night, the leaves turn black, droopy, and a little slimy to the touch. It looks sad, but that blackened foliage is actually your signal that the growing season has wrapped up.
Frost also tells the tubers to slow down and prepare for rest, almost like flipping off a light switch. Tubers that get dug before this signal often store poorly and may shrivel by the middle of winter.
Keep an eye on your local forecast and jot down the date when temperatures dip near freezing. A simple note on your phone or calendar helps you plan the next steps without guessing later.
If a hard freeze of 28°F or colder seems likely, you can heap mulch over the crowns. That cozy blanket of leaves or straw protects the tubers while you wait for the right moment.
Cut The Stalks Down To A Short Stump
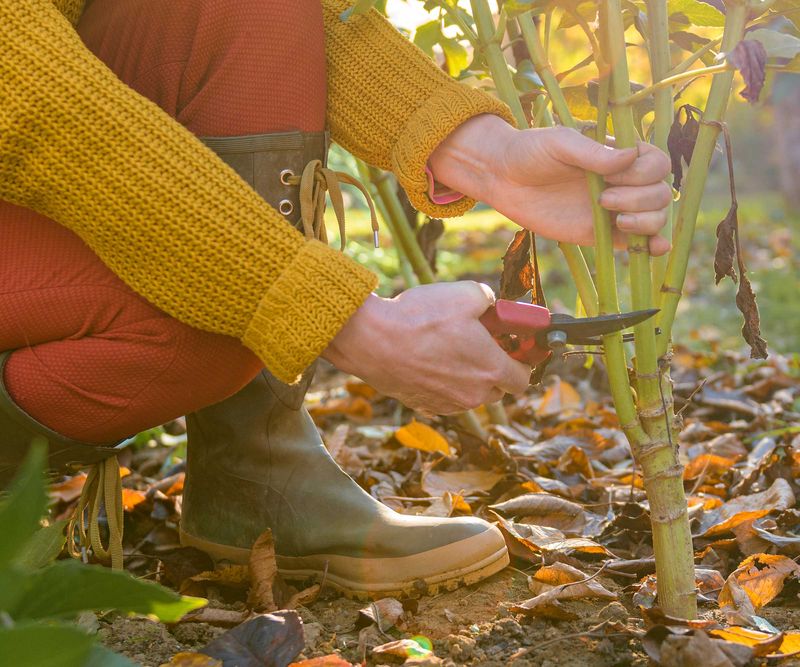
A hollow dahlia stem can channel rainwater into the crown. Trapped water can lead to rot, which is one big reason trimming matters in October.
Once frost has blackened the foliage, grab a pair of clean, sharp pruners or loppers from the garage. Cut each stalk down so roughly four to six inches remain sticking up above the dark soil.
Leaving a short stump gives you a handy handle to hold when lifting the clump out later. Just avoid yanking on it too hard, since the neck where stem meets tuber snaps quite easily.
Your Michigan Garden Changes Every Week. Your Plan Should Too.
Gardening in Michigan changes quickly throughout the season. Every Friday you’ll receive a simple weekly plan showing exactly what to plant, prune, fertilize, harvest, and protect so you never miss the right timing.
Some gardeners cover each cut stump with a small square of foil to keep the rain out. Others tip the stalk upside down after digging so any trapped water drains out before it goes into storage.
Michigan falls can be soggy, so a quick bit of foil may save you from mushy surprises. Both tricks are cheap, easy, and take only about a minute per plant on a cool afternoon.
Toss the old stems and leaves into the trash rather than the compost if you noticed mildew. Powdery spots and leaf problems can linger in plant scraps and show up again in your beds next summer.
Healthy, clean foliage is fine for the compost bin, where it will break down over the winter. Wipe your pruners with a disinfecting wipe between plants to keep any hidden germs from spreading around.
Let The Tubers Rest In The Ground After Cutting
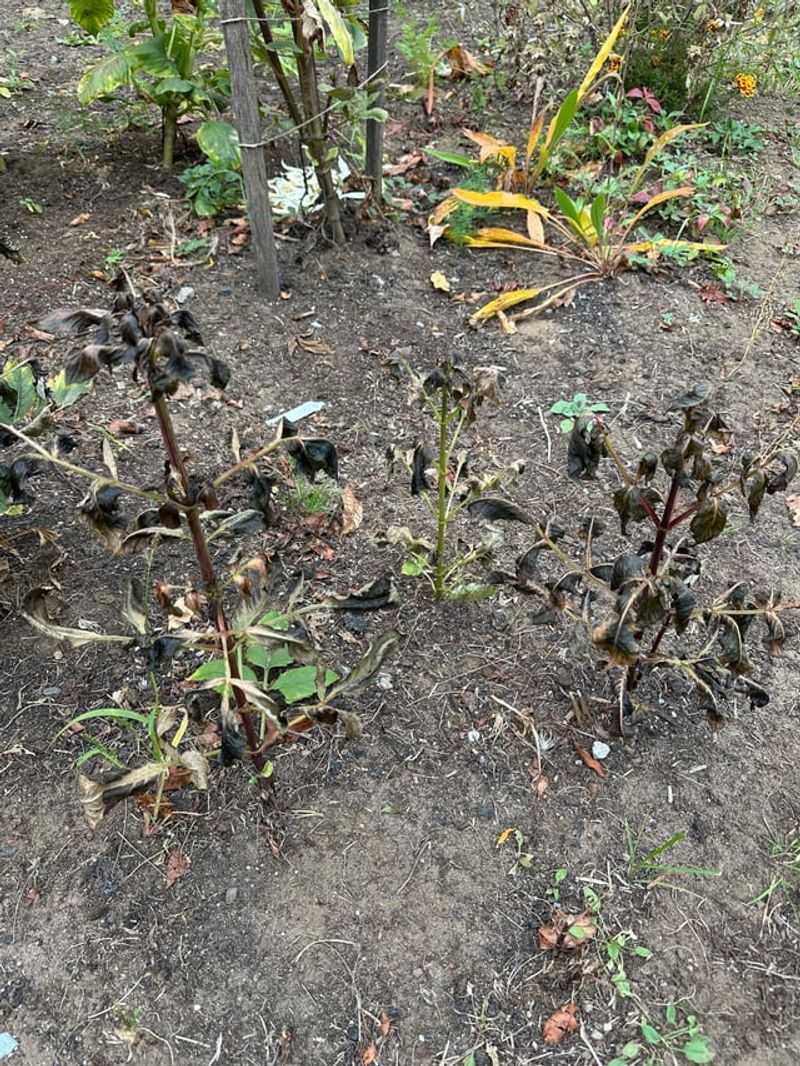
Think of the weeks after frost as a quiet waiting room for the treasures tucked under your soil. Nothing flashy happens up top, yet down below the tubers are busy getting ready for their long nap.
Waiting about one to two weeks after cutting the stalks lets the tuber skins thicken and toughen up. Tougher skins hold moisture better, which means fewer wrinkly, shriveled tubers when you check them in February.
Gardeners call this process curing, and it works a lot like letting a fresh potato rest before storing. The eyes near the crown also firm up, and those little bumps become next year’s new sprouts.
Michigan weather can be tricky, though, because a warm spell sometimes follows that first frosty morning. If the soil stays mild, the tubers simply relax and keep curing without any extra help from you.
The bigger worry is a sudden hard freeze that pushes cold deep into the ground around the crowns. Frozen tubers typically turn soft and mushy, so watch for forecasts that stay at or below 28°F for several hours.
When that kind of cold looms, skip the full waiting period and dig your clumps a little early. Slightly thinner skins are much easier to manage than tubers that froze solid in the cold dirt.
Soggy beds are another concern, since standing water around resting tubers invites rot to creep in quietly. If heavy rain keeps puddling, lift the clumps sooner and let them finish curing somewhere dry indoors.
Dig Wide Before Lifting The Clumps
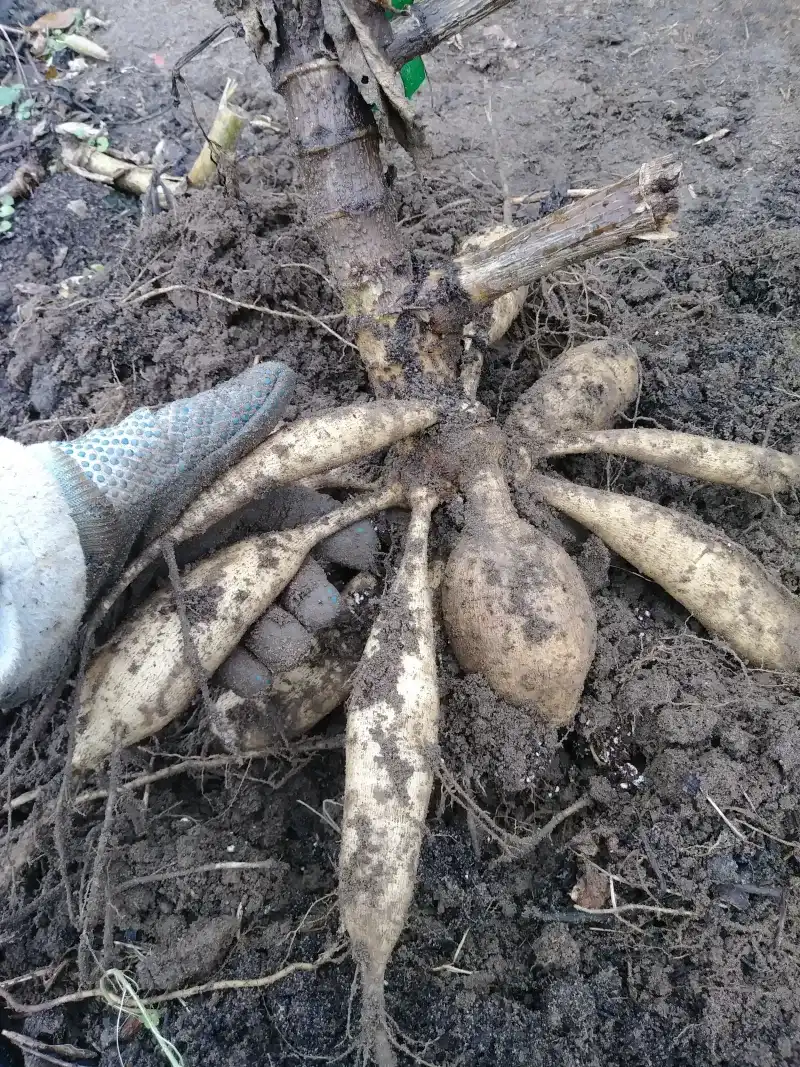
Digging up these clumps feels a bit like a treasure hunt, except the gold looks like knobby sweet potatoes. A single tuber planted in spring can multiply into a hefty bundle of five or more by October.
Pick a dry day for the job, since wet soil clings to the tubers and makes the clumps heavy. Dry soil crumbles away easily, and your knees will appreciate kneeling on firm ground instead of mud.
Grab a garden fork rather than a shovel, because a spade blade can easily cut into the tubers. Push the tines into the soil about a foot away from the stump, all the way around.
Rock the fork gently back and forth to loosen the earth, working in a slow circle around the plant. Tubers spread farther than most people expect, so starting wide helps you avoid accidental nicks and scrapes.
Once the soil feels loose, slide the fork under the clump and lift it slowly. Support the bottom with your hands instead of pulling on the stump, which can snap tender tuber necks.
A tuber with a broken neck rarely sprouts, because the growing eyes sit up near the old stem. Treat each clump like a carton of eggs, and you will save far more plants for next year.
Shake off loose dirt softly, and set the clumps on a tarp or old sheet nearby. Keeping them in one spot makes cleaning and sorting much smoother when you move on to the next step.
Rinse Off The Soil And Dry Them Gently
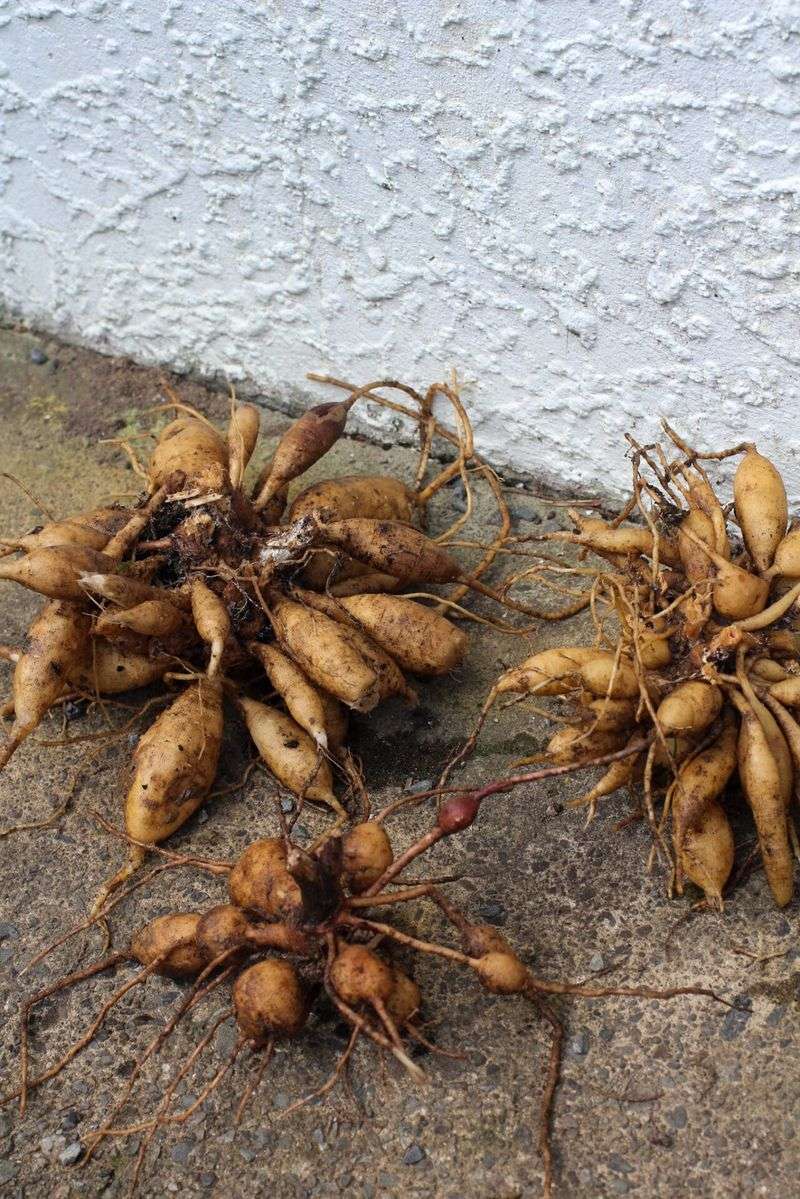
Picture a pile of muddy clumps on your driveway, each one hiding plump tubers under a crust of dirt. Cleaning them up lets you spot problems early and keeps hidden pests from riding along into storage.
A garden hose set to a gentle shower works well for washing away most of the clinging soil. Avoid a strong jet, because powerful sprays can peel delicate skin and bruise the soft flesh underneath.
While rinsing, look closely at each tuber for mushy spots, gray mold, or small holes from hungry critters. Trim away any damaged parts with clean scissors, or toss tubers that feel hollow, soft, or squishy.
Thin, stringy roots hanging off the tubers can be snipped off too, since they rarely help with storage. Leave the main tubers attached to the crown for now unless you plan to divide them this fall.
After washing, spread the clumps upside down on newspaper or a screen in a garage or basement. Turning them upside down lets water drain from the hollow stems, which helps prevent rot inside the crown.
Aim for a spot that stays cool, shady, and protected from frost while the outer skins dry. Most clumps need anywhere from one day to about a week, depending on humidity and air flow.
Skip drying them in direct sunshine or near a furnace, because quick heat can cause wrinkled, shrunken tubers. When the skins feel dry but still firm, like a fresh apple, they are ready for packing.
Label Every Clump Before You Forget
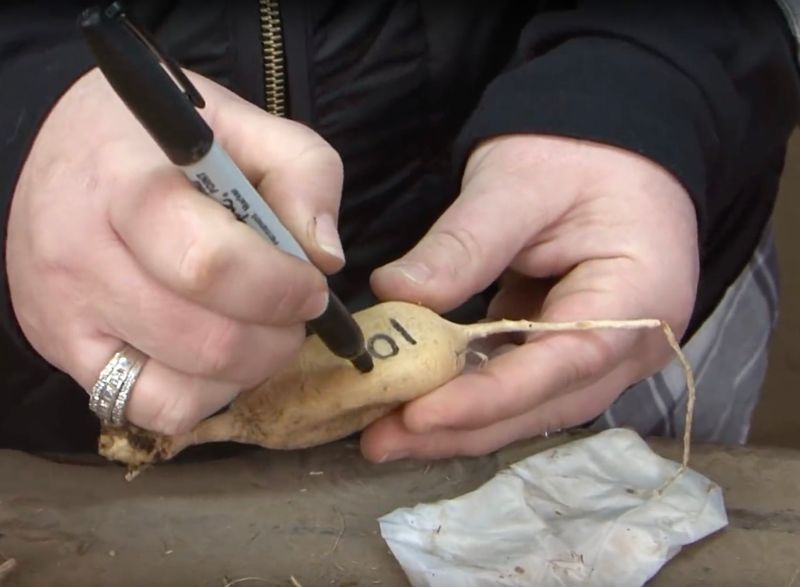
Every spring, someone stands in a basement holding two lumpy tubers and wondering which one was the giant pink. Without leaves or flowers, a red dinner plate variety and a tiny white pompon look surprisingly alike.
Labeling feels boring in October, but it saves a lot of head scratching when planting time comes around. A dozen variety names are easy to mix up over a long Michigan winter.
A permanent marker works nicely for writing the variety name right on a dry tuber skin. Some gardeners prefer laundry markers or wax pencils, which hold up better against moisture during storage.
Plastic plant tags tied to the stump with twine are another easy option for whole, undivided clumps. Write the name on both sides of the tag, just in case one side smudges or fades.
Adding a little extra info, like flower color, height, and bloom size, helps when planning next year’s beds. You might jot down notes like tall red cactus or short yellow ball right beside the name.
Snapping a quick photo of each plant in bloom during late summer makes matching names even easier later. If you missed that chance, a simple garden map from memory still beats leaving everything to luck.
Store labeled tubers of the same variety together in one bag or box to keep things tidy. Come spring, you will open each container knowing exactly which beauty is waiting inside for its big return.
Pack Them In Peat Or Wood Shavings
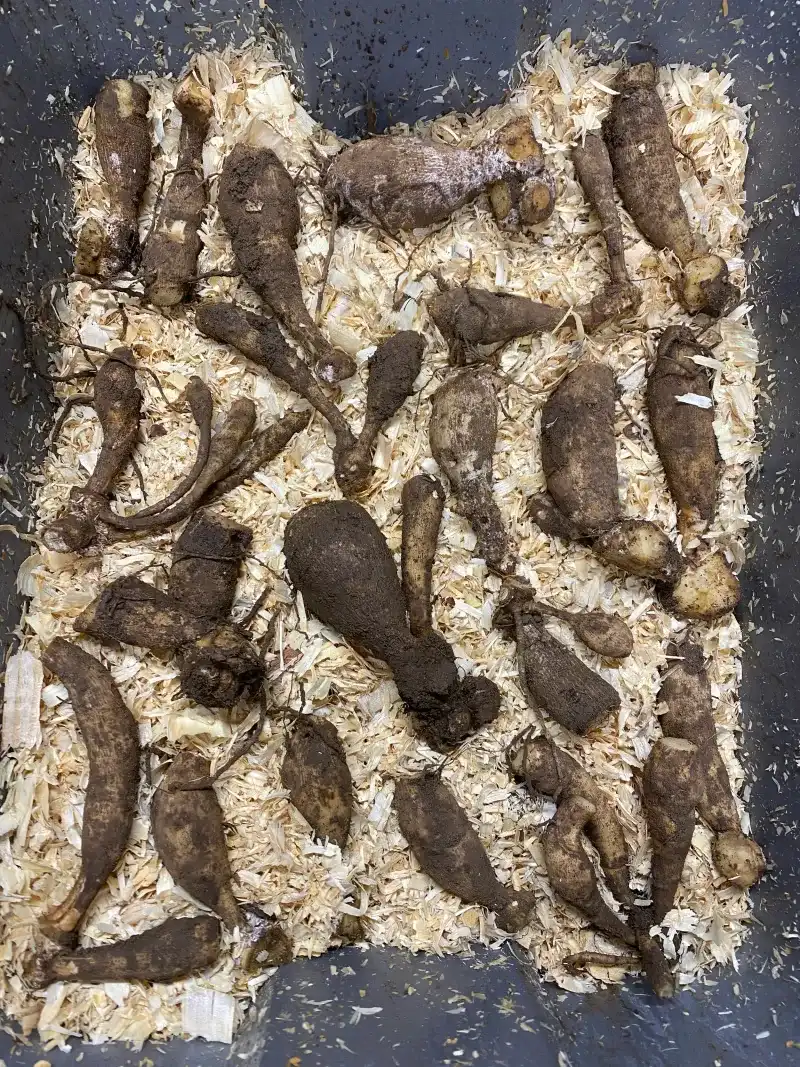
Tucking tubers into a box of fluffy shavings feels a lot like making a bed for sleepy houseguests. The goal is simple, keep them from drying out too much while also keeping extra moisture away.
Popular packing materials include peat moss, vermiculite, coconut coir, and untreated pine wood shavings from pet stores. Each one holds a touch of humidity around the tubers without letting them sit in soggy conditions.
Start with a plastic bin, cardboard box, or sturdy paper bag lined with a few inches of material. Lay the tubers in a single layer so they do not touch, then cover them with more filling.
Keeping tubers apart matters because one rotten tuber can spread trouble to its neighbors through the cold months. A little space acts like a buffer, giving you time to catch problems before they move along.
Some Michigan gardeners skip loose material and wrap each tuber snugly in plastic kitchen wrap instead. This method seals in moisture well and works nicely for small collections stored on a cool basement shelf.
If your packing material feels bone dry, mist it lightly until it feels barely damp. Damp but not wet is the sweet spot, similar to a wrung out sponge after washing dishes.
Poke a few small holes in plastic bins or leave lids slightly open so air can move around. Good airflow keeps mold from sneaking in and helps your packed tubers stay firm and healthy until spring.
Find A Cool Spot That Stays Above Freezing
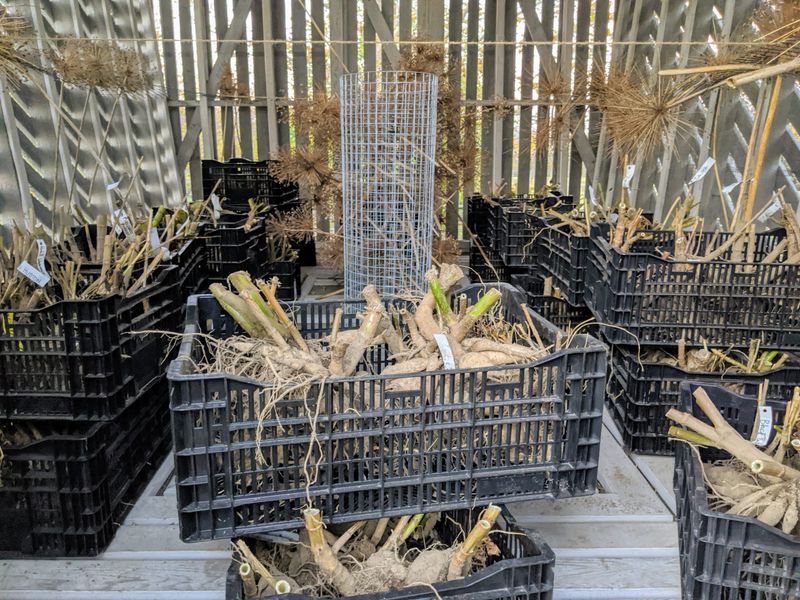
Most stored tubers are happiest between 40 and 50°F, which is chilly enough for a sweater indoors. That narrow range keeps them sleeping soundly without freezing solid or waking up too early in winter.
Unheated basements, root cellars, and insulated garages often make excellent winter homes across much of Michigan. Before choosing a spot, place a cheap thermometer there for a few days and check the readings.
Attached garages can dip below freezing during January cold snaps, especially in northern counties and the Upper Peninsula. Setting boxes against an inside wall or on a shelf away from the door adds helpful warmth.
Warm rooms cause a different problem, because tubers may sprout early or shrivel as the dry air pulls moisture. Keep boxes away from furnaces, water heaters, and sunny windows that could warm them up too much.
Raising containers off the floor on a pallet or shelf also protects them from cold, damp concrete. Mice sometimes see tubers as a winter snack, so a lid or wire mesh can help.
Once everything is settled, set a monthly reminder to peek inside your boxes and give each tuber a squeeze. Firm tubers are doing fine, while soft or moldy ones should be removed before trouble spreads.
Wrinkly tubers usually need a light mist of water, while damp, fuzzy ones need drier packing material. A few minutes of checking each month keeps your favorite blooms on track for a bright summer comeback.