Why Treating Black Spot Isn’t Working On Your Ohio Roses
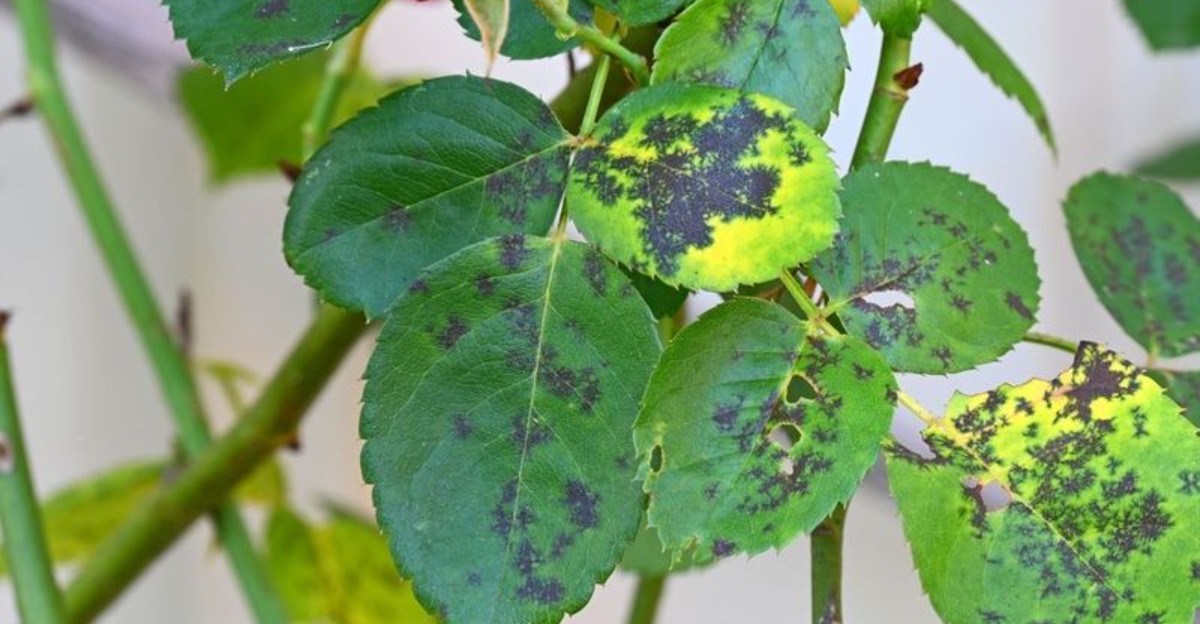
You sprayed. Then you sprayed again.
The black spots on your rose leaves shrugged it off and came back for round three.
Most Ohio gardeners blame the product and swap brands. That rarely fixes anything.
The spray isn’t the weak link here.
One routine habit in your garden hands this fungus a new start every week, and it sounds far too small to matter. Roses pay for it anyway.
Put the sprayer down for a minute. The answer sits in a spot you haven’t looked yet.
1. Fungicides Work As Prevention, Not A Cure
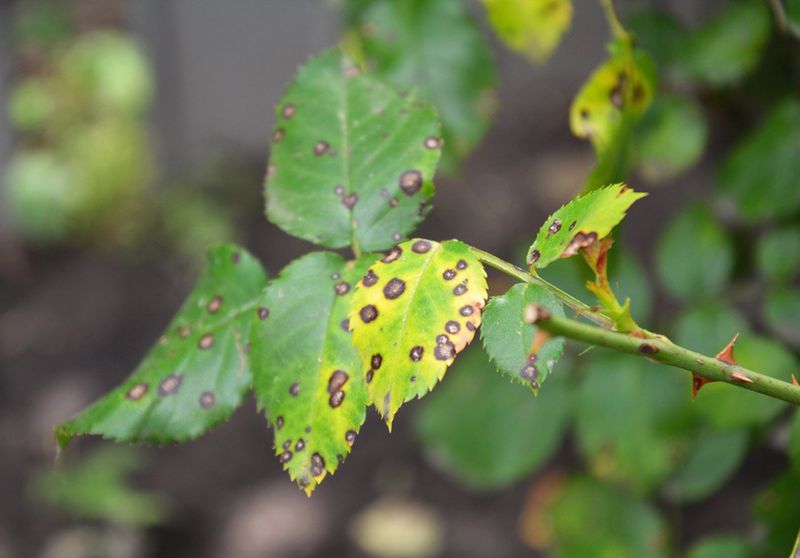
Picture a raincoat that you put on after you are already soaked. That is pretty much what happens when you spray a fungicide on leaves that already have black spots.
Most rose sprays are shields, not medicine. They coat healthy leaves so new fungus spores cannot get a foothold, but they cannot erase the spots already there.
Timing makes a huge difference. Start spraying in early spring at bud break, when the first tiny leaves open, and repeat every 7 to 14 days.
In a rainy Ohio May, lean toward the shorter end of that range, since rain washes protection away.
Common active ingredients include chlorothalonil, copper, mancozeb, sulfur, myclobutanil, and potassium bicarbonate. Each one works a little differently.
Read the label to see which one you have and follow its directions closely.
Here is a smart trick many gardeners skip. Rotate between products with different active ingredients through the season, because the fungus can slowly grow resistant to one chemical used over and over.
So if you waited until July, when the leaves were already spotted and yellow, the spray was not really failing. It simply arrived too late to do its job.
Next year, mark bud break on your calendar and get ahead of the trouble before it shows up.
2. Sprays Fail Without Good Sanitation
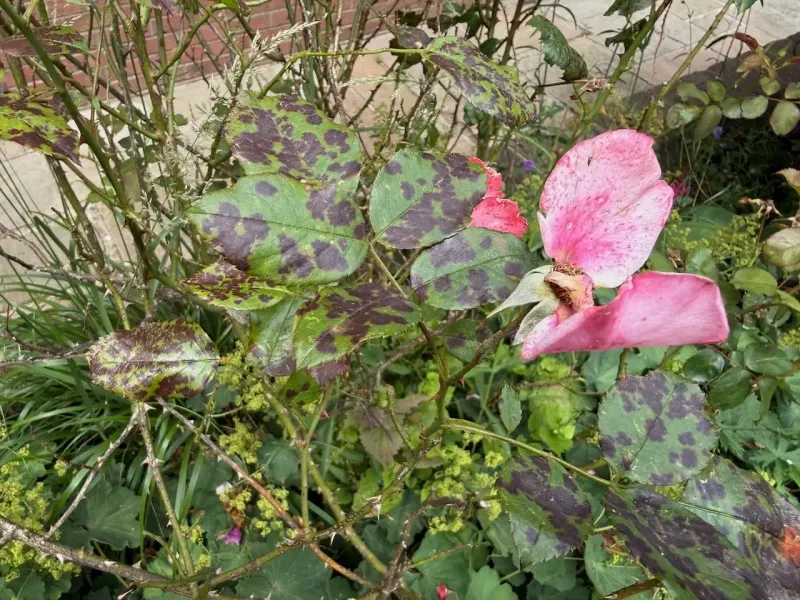
Imagine mopping a kitchen floor while the sink keeps overflowing. You can work hard all day, yet the mess keeps coming back because the source is still running.
Spraying roses without cleaning up the garden works the same way. Every spotted leaf lying on the ground is loaded with fungus, ready to start new infections whenever conditions are right.
Gardeners call this the fungal load. The more infected material sitting around your plants, the more spores are waiting to attack fresh leaves.
Even a perfect spray schedule struggles against that kind of pressure.
Sanitation simply means keeping the area clean. Pick up fallen leaves, snip off spotted foliage, and remove sick canes.
It sounds boring, but it is one of the most powerful tools you have.
Think of it as a team effort. Cleaning lowers the number of spores, and the spray protects the leaves from whatever spores remain.
Together, they do much more than either one could alone.
A quick weekly walk through your rose bed helps a lot. Carry a small bag, grab any yellow or blotchy leaves you see, and toss them in the trash.
Your Ohio Garden Changes Every Week. Your Plan Should Too.
Gardening in Ohio changes quickly throughout the season. Every Friday you’ll receive a simple weekly plan showing exactly what to plant, prune, fertilize, harvest, and protect so you never miss the right timing.
In just five minutes, you cut down the enemy army before it can grow, and your sprays finally get a fair chance to work.
3. The Fungus Survives Winter On Fallen Leaves And Canes
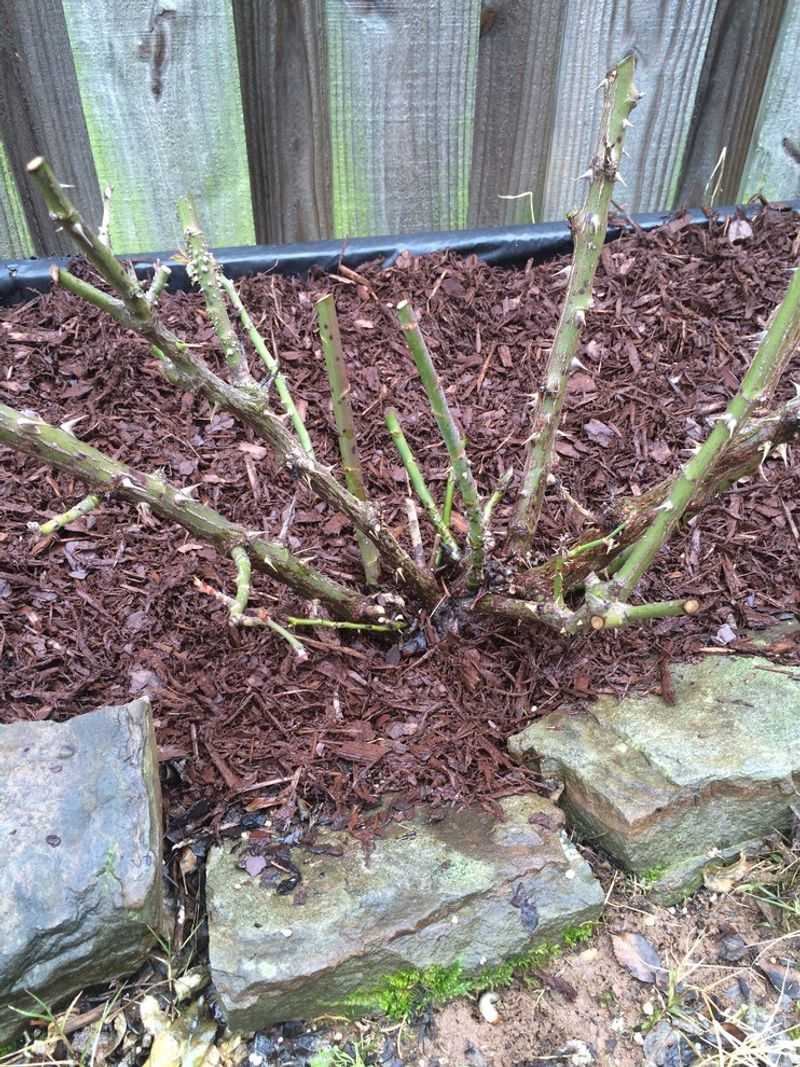
Ohio winters can be brutal, with icy winds and snow piled high on the fence. You might think a cold January would wipe out the fungus, but it is tougher than it looks.
The culprit has a fancy name, Diplocarpon rosae. It spends the winter tucked inside old fallen leaves and on infected rose canes, waiting patiently for warmer days.
Spores can also hide on stem lesions and bud scales. Lesions are the dark, sunken patches you may spot on canes.
Those little marks act like tiny storage rooms full of trouble for next year.
Here is a bit of good news. The spores do not usually last long in the soil itself, so the real danger is the plant debris left on top of it.
That makes your job much easier to target.
Fun fact: black spot was described by scientists back in the early 1800s, and rose lovers have battled it ever since. It has had plenty of time to perfect its winter survival plan.
So when you look out at a frosty garden full of brown leaves, see it for what it is. That pile is not harmless mulch.
It is a winter hotel for fungus, and clearing it out breaks the chain before spring even begins.
4. Splashing Water Restarts The Cycle Each Spring
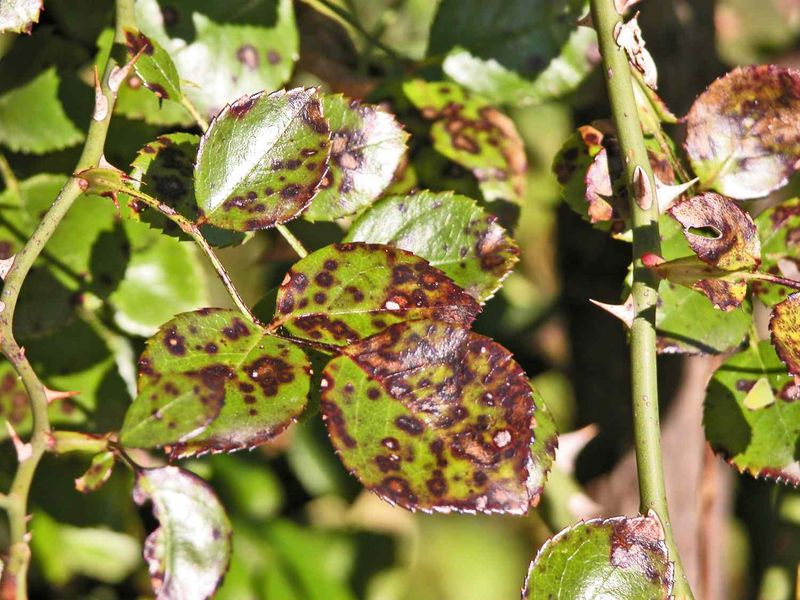
Plip, plop, splash. A gentle spring rain sounds peaceful, but for your roses, each drop can act like a tiny delivery truck for fungus.
Black spot spores do not fly far on the wind. Instead, they ride on splashing water, bouncing up from old leaves and infected canes onto the fresh new growth above.
That is how the whole cycle starts again each year. One rainy afternoon can carry spores from last fall’s debris straight onto brand new leaves.
The fungus has favorite conditions. It loves wet leaves, high humidity, and temperatures between 68 and 75 degrees Fahrenheit.
Sound familiar? That describes many late spring and early summer days across Ohio.
There is one more key detail. Leaves usually need to stay wet for about 6 to 7 hours in a row before infection takes hold.
A quick shower that dries fast may cause little harm, but a damp, cloudy day is perfect for the fungus.
Knowing this gives you an edge. Watch the weather, and when a warm, rainy stretch is coming, make sure your protective spray is fresh.
You can also add a layer of mulch to soften the splash. Every drop you stop from bouncing is one less chance for spots to appear.
5. Rake Up Spotted Leaves This Fall
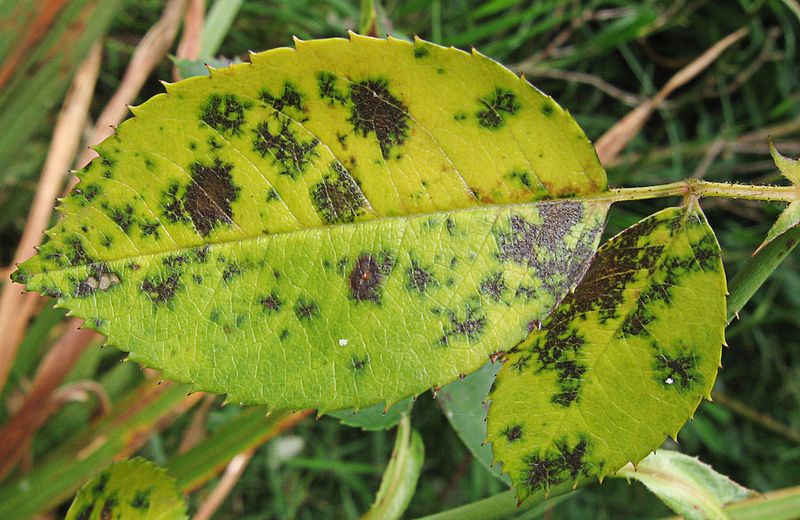
Crisp air, crunchy leaves, and a warm sweatshirt make fall the perfect time for one simple chore. Grab a rake, because your roses will thank you next June.
Gather every fallen leaf and bit of plant debris from under and around your rose bushes. Get into the corners and under the lower canes, where leaves love to collect and hide.
Now comes the part many people get wrong. Do not toss those leaves into your compost pile.
Home compost often does not get hot enough to destroy the spores, so you could end up spreading the problem all over your garden later.
Instead, bag them up and put them out with the trash. Some towns allow yard waste pickup, but check whether it is handled at high heat first.
A few extra cleanups help too. Rake again after the last leaves drop in late fall, and do a quick sweep in late winter before new growth begins.
When spring arrives, spread a fresh layer of mulch around the base of your roses. Two or three inches of shredded bark creates a barrier that keeps any leftover spores from splashing up.
Think of it as tucking your garden into a clean blanket, ready for a healthier season ahead.
6. Prune Out Infected Canes
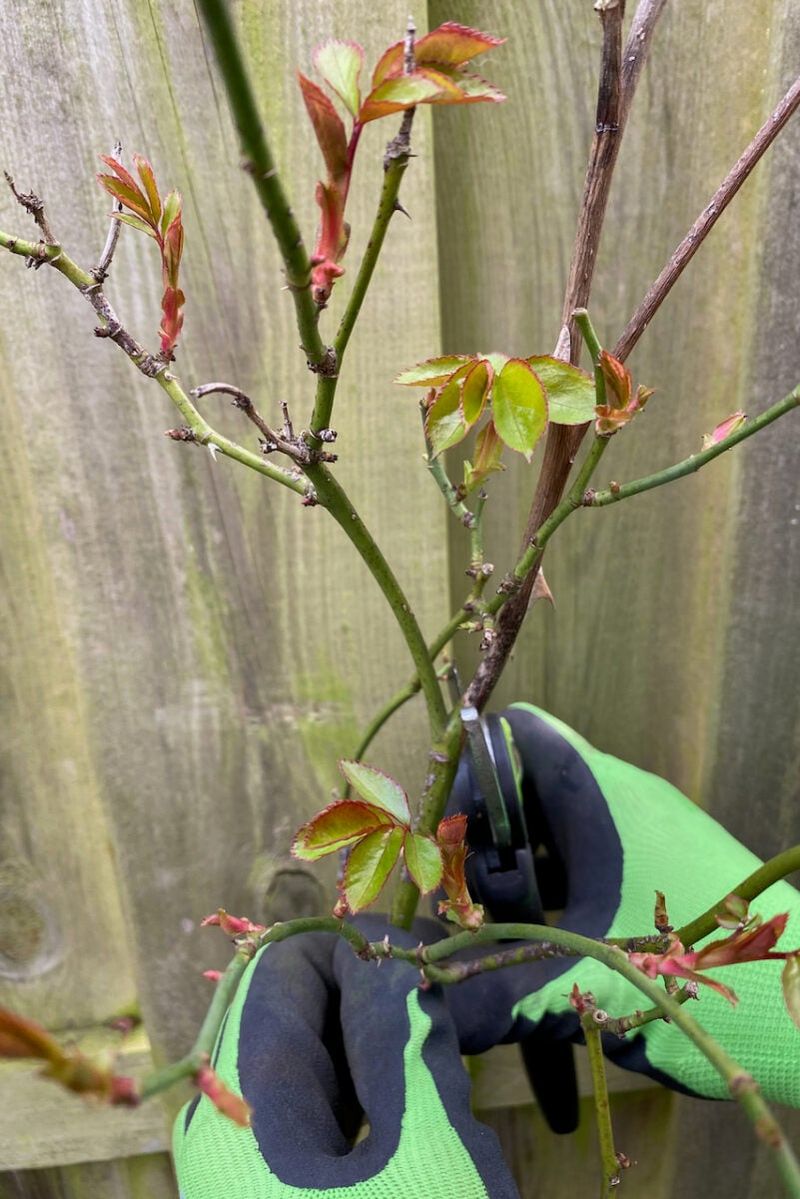
A good haircut can make anyone feel fresh, and roses are no different. Pruning out sick canes gives your plant a clean start and removes hidden fungus.
The best time is early spring, before new growth begins. Look for canes with dark purple or black patches, since those lesions often hold spores from last year.
Cut well below the trouble. Aim for at least 6 to 8 inches below any visible infection so you remove all the hidden fungal material, not just the part you can see.
Keep your tools clean as you go. Wipe your pruning shears with rubbing alcohol, a household cleaner, or a 10 percent bleach solution after each cut.
Otherwise, you could carry spores from one cane to the next without knowing it.
Pruning keeps going all season long. Whenever you notice spotted leaves or stems, snip them off and throw them away.
Small, steady efforts add up fast.
There is a bonus benefit too. While you are trimming, remove old, crossing, or crowded stems from the center of the bush.
Opening up the middle lets air move freely, which helps leaves dry faster after rain. Your rose ends up healthier, tidier, and much less inviting to the fungus.
7. Water The Soil, Not The Leaves
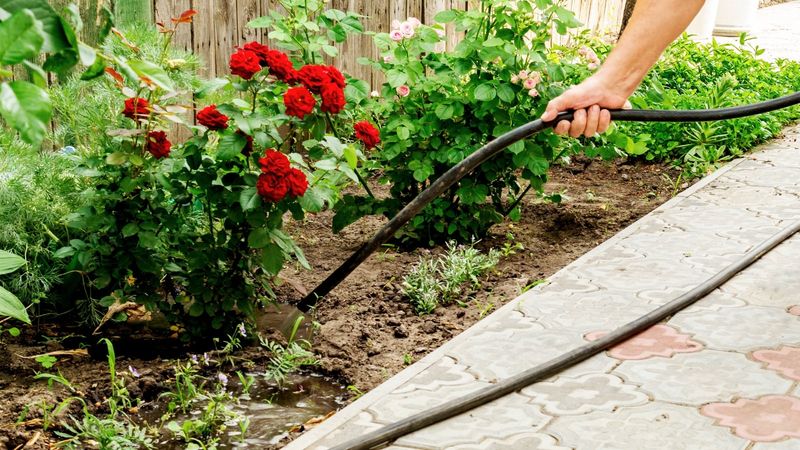
Garden sprinklers look cheerful, spinning and sparkling on a summer evening. Sadly, for roses, that shower is like rolling out a welcome mat for black spot.
Wet leaves are exactly what the fungus needs to sprout and spread. Every time a sprinkler soaks the foliage, you give spores the damp home they crave.
Roots are the ones doing the drinking anyway. Point your water at the base of the plant, right onto the soil, and the leaves can stay nice and dry.
Two tools make this easy. A soaker hose lets water seep slowly along its length, while drip irrigation sends small amounts straight to each plant.
Both save water and cut down on runoff too.
If you only have a hose, try holding it low near the ground. Water deeply a couple of times a week instead of a quick daily sprinkle.
Deep watering also helps roots grow strong.
Timing matters if leaves do get wet. Water early in the morning so the rising sun can dry the foliage quickly.
Evening watering leaves plants damp all night, which can easily reach that 6 to 7 hour danger window. A small change in your routine can make a big difference in how your roses look by August.
8. Give Roses Full Sun And Good Airflow

Ever notice how a wet towel dries faster on a sunny, breezy day? Rose leaves work the same way, and quick drying is your secret weapon against black spot.
Roses love sunshine. Aim for a spot that gets 6 to 8 hours of direct sun daily, with morning sun being the best of all, since it dries dew early.
Shady corners can be trouble. Leaves stay damp longer there, which gives fungus extra time to take hold.
If your roses sit under a big maple, moving them may help more than any spray.
Airflow matters just as much. Space your plants so their branches do not tangle together, and leave room between roses and walls or fences.
Crowded plants trap humid air like a stuffy room.
Pruning helps here as well. Thin out dense canes and inner branches to open the center of each bush.
Light and wind can then reach every leaf.
Ohio summers bring plenty of sticky, humid days, so every bit of breeze counts. When planting new roses, take a moment to watch your yard through a full day.
Note where the sun lands and where the air moves. Choosing the right spot from the start saves you a lot of headaches later.
9. Switch To A Resistant Variety

Sometimes the smartest move is not working harder, but choosing smarter. If one rose keeps getting spotted year after year, it might be time for a fresh face.
Not all roses are equally sensitive. Some older hybrid teas seem to catch black spot if you just look at them, while others shrug it off with barely a mark.
Rose breeders have worked for decades to create tougher plants. Today, many varieties offer strong disease resistance along with beautiful blooms.
Popular choices include many roses in the Knock Out series, along with Carefree Beauty, Simplicity, Bonica, and Julia Child. Julia Child even has buttery yellow flowers that suit its famous namesake, the beloved cooking legend.
Keep in mind that resistance can vary by region. The fungus comes in different strains, so a rose that thrives in Texas may act differently in Cleveland or Columbus.
For local advice, check with Ohio State University Extension or a nearby rose society. Local rose lovers often know which plants hold up best in your area.
Swapping a troubled bush for a tougher one can mean fewer sprays, less worry, and more time actually enjoying your garden. Resistant roses still enjoy good care, but they forgive your mistakes much more easily.