How New York Plant Owners Can Make Their ZZ Plants Grow Fuller
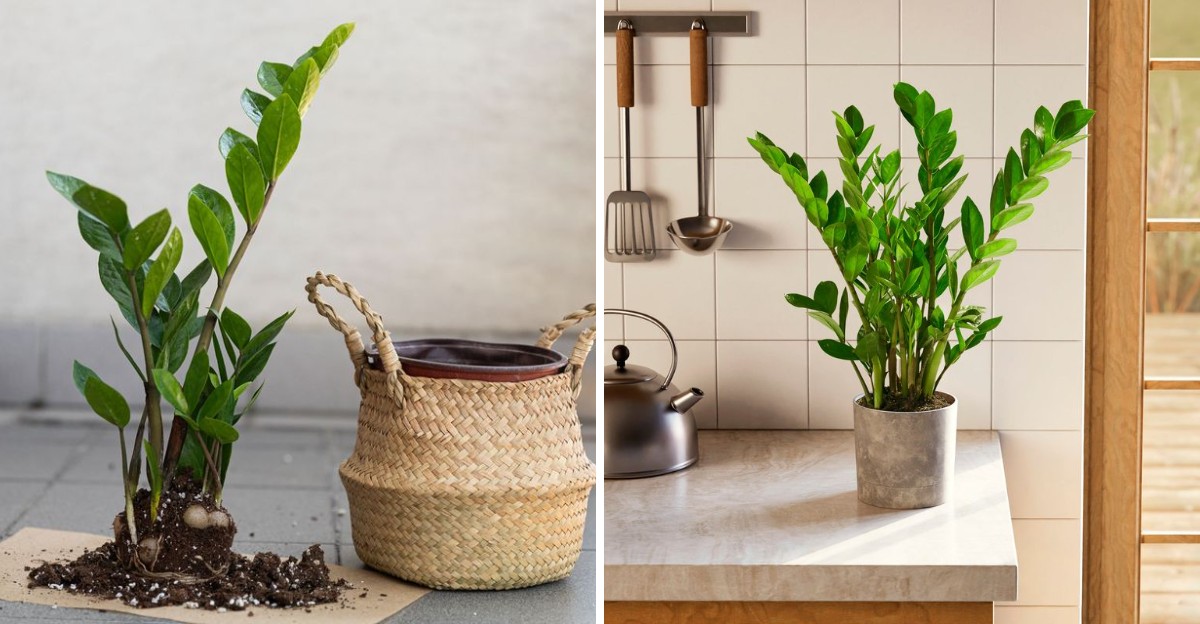
Your ZZ plant looks glossy and proud, yet a little skinny on top. Tall, leggy, and a bit lonely is not the look anyone signed up for.
Plenty of New York apartments hold a plant just like it, stretching toward a dim window beside a clanking radiator. Gray winter days and tight spaces don’t make things easier.
These tough plants handle city life better than most houseplants, though. With a little help, a sparse ZZ can fill out into a lush, bushy showpiece your guests will notice.
The secret mixes smart light, careful watering, and a few clever tricks with stems and roots. Nothing here requires a green thumb, fancy gear, or a ton of free time.
Some steps take a single afternoon, while others reward your patience months later. Either way, that lanky plant in the corner has far more potential than it lets on.
1. Bright, Indirect Light Fuels New Stems
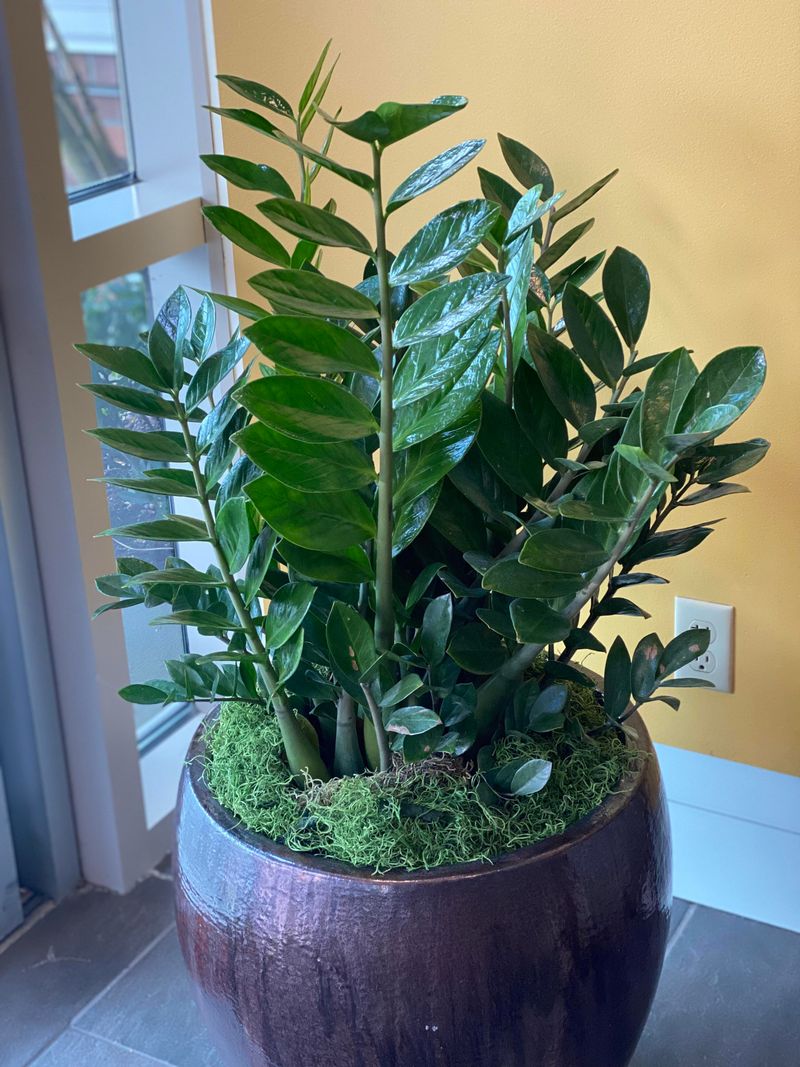
Light acts like food for your ZZ plant’s growth engine. More gentle brightness usually means more fresh stems pushing up from the soil.
ZZ plants earned a reputation for surviving dim corners and office cubicles. Survival is not the same as thriving, though, and dim spots create slow, thin growth.
Aim for six to eight hours of filtered light each day. An east-facing window works beautifully, giving soft morning sun without much heat.
North-facing windows also help, especially in bright rooms with pale walls. South or west windows can work if a sheer curtain softens the strong afternoon rays.
Harsh direct sun can scorch leaves and leave pale, crispy patches. Watch for yellowing or bleached spots, which signal your plant needs a shadier seat.
Many New York apartments face tall buildings that block much of the sky. In those cases, a small LED grow light can fill the gap nicely.
Place the grow light about one or two feet above the plant. Run it for ten to twelve hours daily, using a simple timer to stay consistent.
Winter days in the city feel short and gloomy for plants too. Moving your ZZ closer to the window from November through February can keep growth steady.
Keep leaves clean so they can soak up every bit of light. Wipe them gently with a damp cloth every few weeks to remove city dust.
Bright, cozy light sets the stage for everything else on this list. Without it, other tips lose much of their power.
2. Water Only When The Soil Dries Out
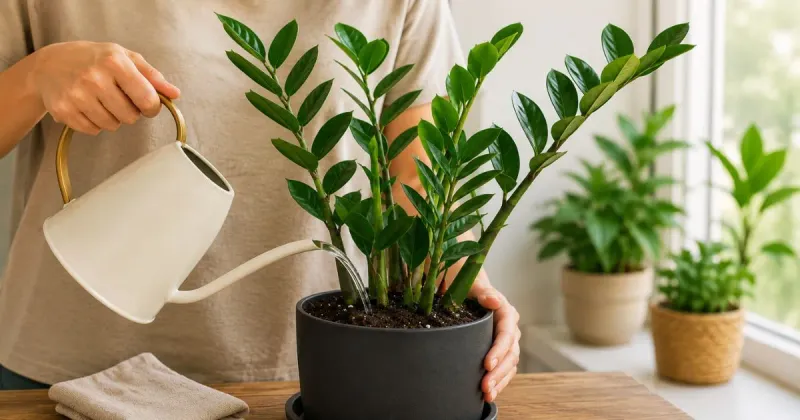
Think of the ZZ plant as a camel with leaves. Its chunky underground rhizomes store water, so the plant handles dry spells with ease.
Overwatering causes far more trouble than forgetting a drink. Soggy soil leads to rot, and rotting rhizomes cannot support new growth.
Before watering, push your finger two to three inches into the soil. Dry soil at that depth means it is time to water.
Moisture meters offer another easy way to check. Wait until the reading sits in the dry range before you pour anything.
Your New York Garden Changes Every Week. Your Plan Should Too.
Gardening in New York changes quickly throughout the season. Every Friday you’ll receive a simple weekly plan showing exactly what to plant, prune, fertilize, harvest, and protect so you never miss the right timing.
Most ZZ plants need water every two to three weeks in warm months. During winter, stretching to once a month often works well.
Steam heat in older buildings can dry soil faster than expected. Check more often if your plant sits near a clanking radiator.
Water deeply when the time comes, until it flows out the drainage holes. A thorough soak reaches every root, encouraging strong, even growth.
Empty the saucer after about fifteen minutes. Standing water around the pot’s base can slowly suffocate the roots.
Wrinkled or drooping leaves can mean your plant feels thirsty. Mushy yellow stems, on the other hand, usually point to too much water.
Pots without drainage holes create risky conditions for ZZ plants. Choose containers with holes, or use a plastic nursery pot inside a decorative one.
Healthy roots build healthy rhizomes, and those rhizomes send up new stems. Smart watering quietly fuels a fuller plant.
3. Feed Lightly In Spring And Summer
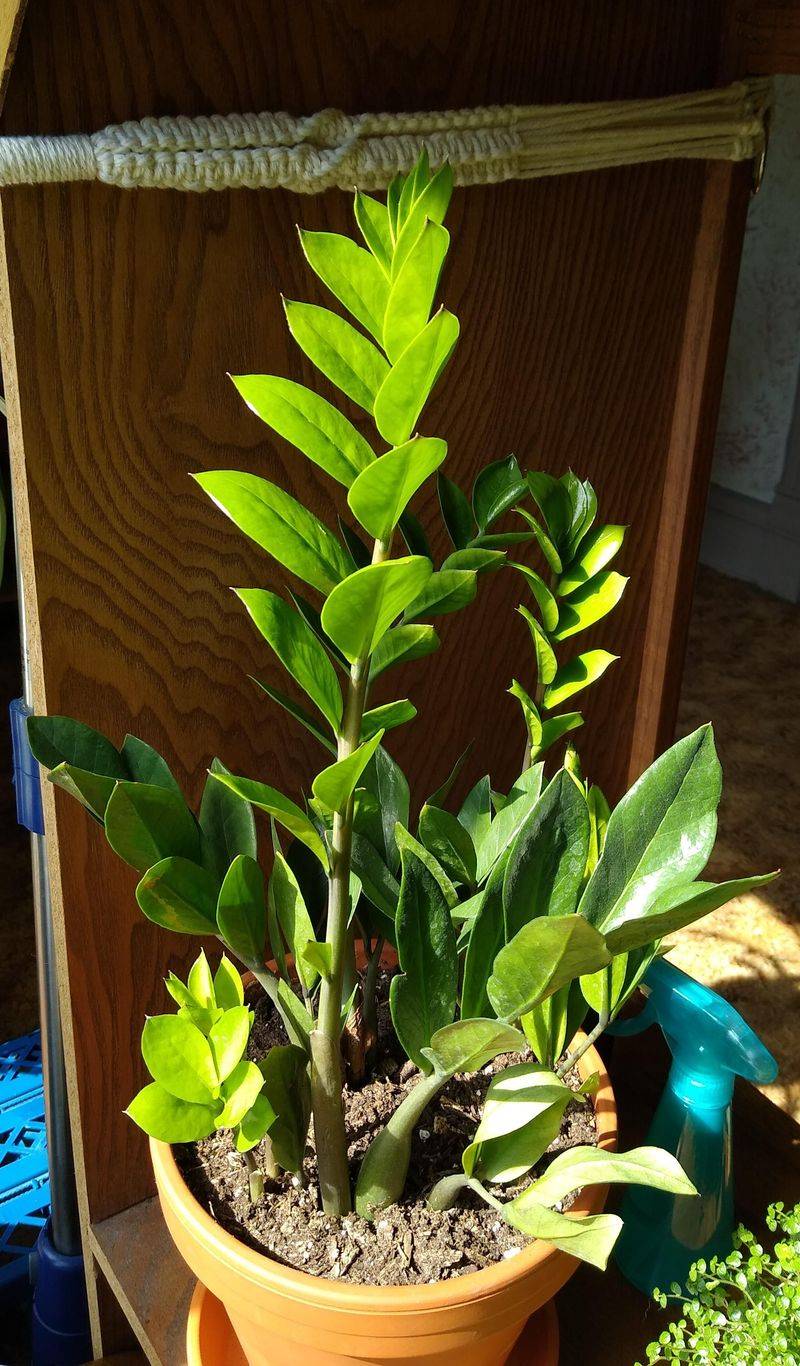
Here is a happy secret for busy plant parents. ZZ plants are light eaters and grow fine without constant feeding.
A little boost during the growing season can still help. Spring and summer bring longer days, and your plant wants extra fuel then.
Choose a balanced, water-soluble fertilizer, such as a 10-10-10 formula. Dilute it to half the strength listed on the label.
Feed only once or twice during the whole growing season. Some growers prefer a tiny monthly dose at quarter strength instead.
More fertilizer does not mean faster growth for this plant. Too much can burn roots and leave brown, crispy leaf tips.
Always water the soil lightly before adding fertilizer. Moist soil helps protect delicate roots from salt buildup.
Fall and winter call for a break from feeding. Growth slows when daylight shrinks, so extra nutrients just sit unused.
White crusty spots on the soil surface can mean salts are piling up. Flush the pot with plain water every few months to rinse them away.
Slow-release pellets offer an easy option for forgetful folks. Sprinkle a small amount in spring, and they feed gently for months.
Fun fact: ZZ plants come from eastern Africa, where soils can be fairly lean. Their roots evolved to make the most of modest nutrients.
Gentle feeding gives new shoots the energy to break through the soil. Your reward comes as fresh, glossy stems by midsummer.
4. Repot Into A Slightly Larger Container
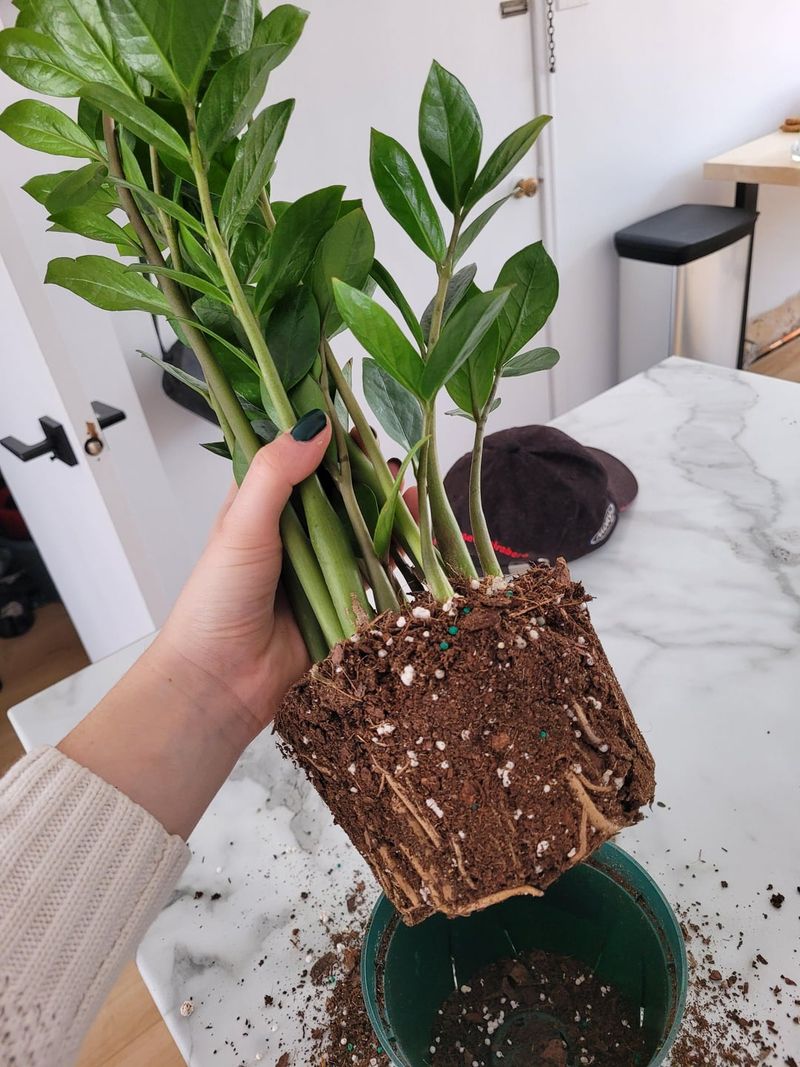
Cracked plastic pots tell a dramatic story. Some ZZ plants grow such strong rhizomes that they bulge or split their containers.
Repotting gives roots fresh room and fresh soil. The best timing falls in spring or early summer, when growth picks up speed.
Look for roots poking from drainage holes or pushing above the soil. A pot that bulges or tips over easily also signals a needed move.
Choose a pot only one size larger, about one or two inches wider. ZZ plants like a snug fit, which encourages new shoots instead of extra roots.
Oversized pots hold too much wet soil around the roots. Soggy conditions raise the risk of rot and slow your plant down.
Use a fast-draining mix for best results. Combine regular potting soil with perlite or cactus mix for good airflow.
Gently squeeze the old pot to loosen the root ball. Tease apart circling roots with your fingers before setting the plant in its new home.
Keep the rhizomes at the same depth as before. Burying them deeper can trap moisture and invite trouble.
Small kitchens can turn messy during repotting. Spread newspaper on the floor, or work in the bathtub for easy cleanup.
Wait about a week before watering heavily after repotting. Tiny root injuries heal better in slightly dry soil.
Fresh space and new soil often spark a flush of growth. Many owners spot new shoots within a couple of months.
5. Divide Crowded Rhizomes To Create Two Plants
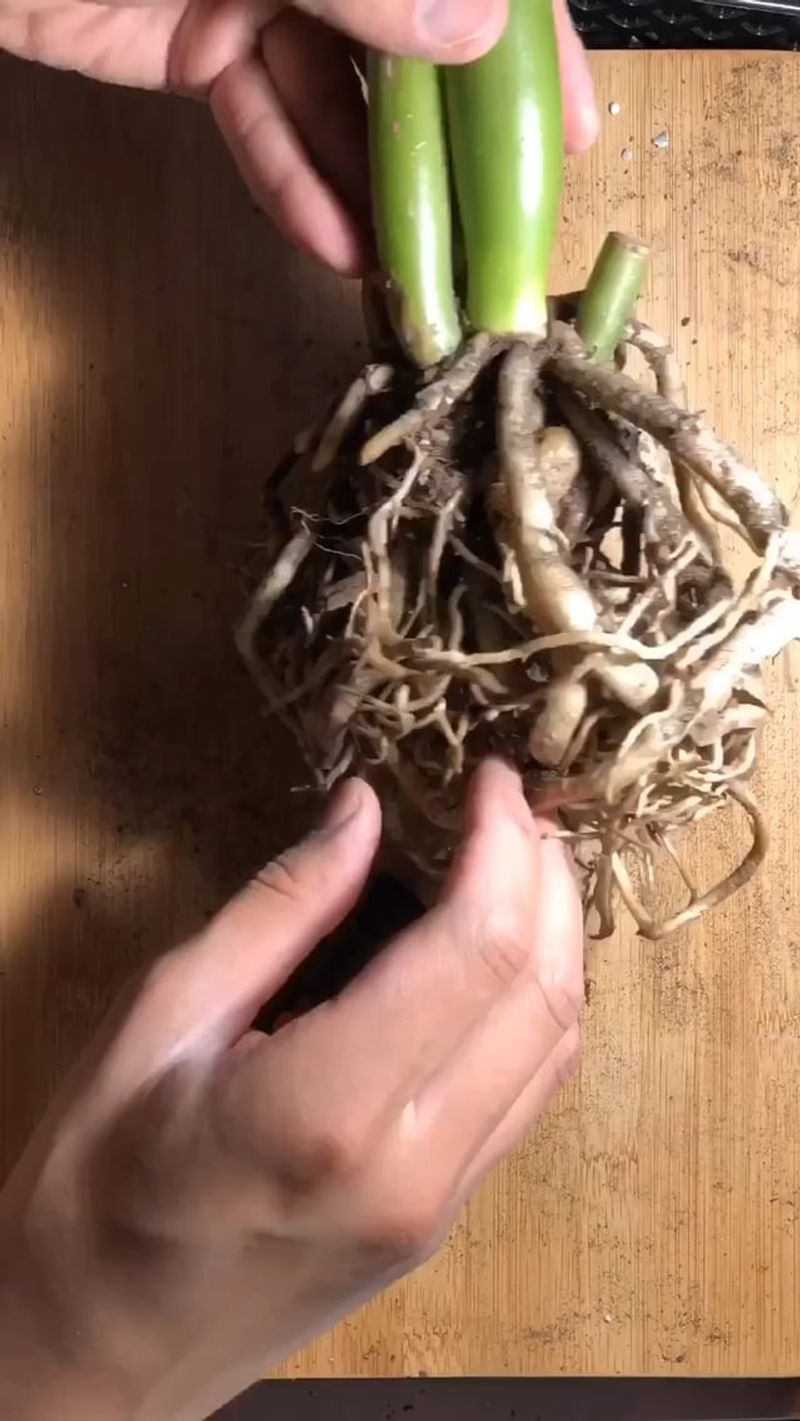
Dig under a mature ZZ plant and you will find something surprising. Fat, potato-like rhizomes crowd together beneath the soil like hidden treasure.
Division separates those rhizomes into smaller plants. Each piece can then grow freely without competing for space.
Spring or early summer works best for dividing. Pair this task with repotting so your plant only faces one shake-up.
Slide the plant out of its pot and brush away loose soil. Look for natural gaps where clumps of stems already seem separate.
Pull sections apart gently with your hands whenever possible. For tight clumps, use a clean, sharp knife to cut through connecting rhizomes.
Each new section needs healthy roots, at least one rhizome, and two or three stems. Smaller pieces grow, but they take longer to look full.
Pot each division in a snug container with well-draining mix. Think of it like New York City roommates finally getting their own apartments.
Hold off on watering for several days after dividing. Cut surfaces need time to seal, which helps prevent rot.
Divided plants sometimes pause growth for a few weeks. Stay calm, because roots are settling in quietly below the surface.
Wear gloves during this job, since ZZ sap can irritate sensitive skin. Wash your hands afterward and keep curious pets away.
Freshly divided plants often push out new stems faster than crowded ones. You also gain a second plant to keep or gift.
6. Plant Stem Cuttings Back Into The Same Pot
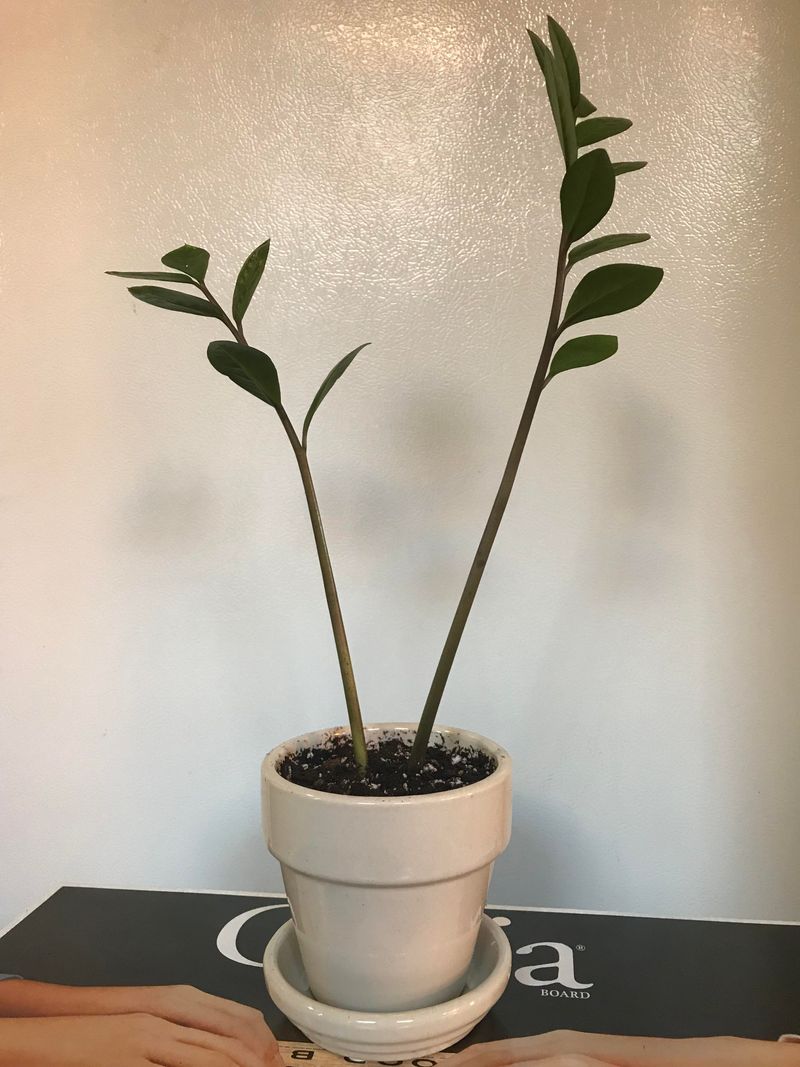
Got a bald spot in your pot? Stem cuttings can patch it up while making good use of plant pieces.
Pick healthy, mature stems with deep green leaves. Cut them near the base using clean, sharp shears.
Let the cut ends dry for a day or two. A dry, sealed end resists rot once it meets water or soil.
Water rooting works well and lets you watch progress. Place stems in a jar so only the bottom inch sits underwater.
Change the water every week to keep it fresh. Clear glass jars make it fun to spot tiny white roots forming.
Soil rooting offers another path for impatient fingers. Dip the dry end in rooting hormone, then press it into lightly moist mix.
Roots usually appear within one to three months. Small rhizomes follow, forming little bumps at the base of each stem.
Once roots reach about two inches, tuck several cuttings into thin areas of the original pot. Grouping them creates an instantly bushier look.
Many indoor gardeners love this trick for leggy plants. Instead of buying a new plant, you simply reuse what you already own.
Bright, warm spots speed up rooting noticeably. A warm spot near, but not right on top of, a radiator can help during chilly months.
Old steam radiators run hot, so keep cuttings a safe distance away.
Stem cuttings carry their leaves, so the pot looks fuller right away. Over time, new rhizomes add even more stems.
7. Add Leaf Cuttings For Slow, Steady Fill-In
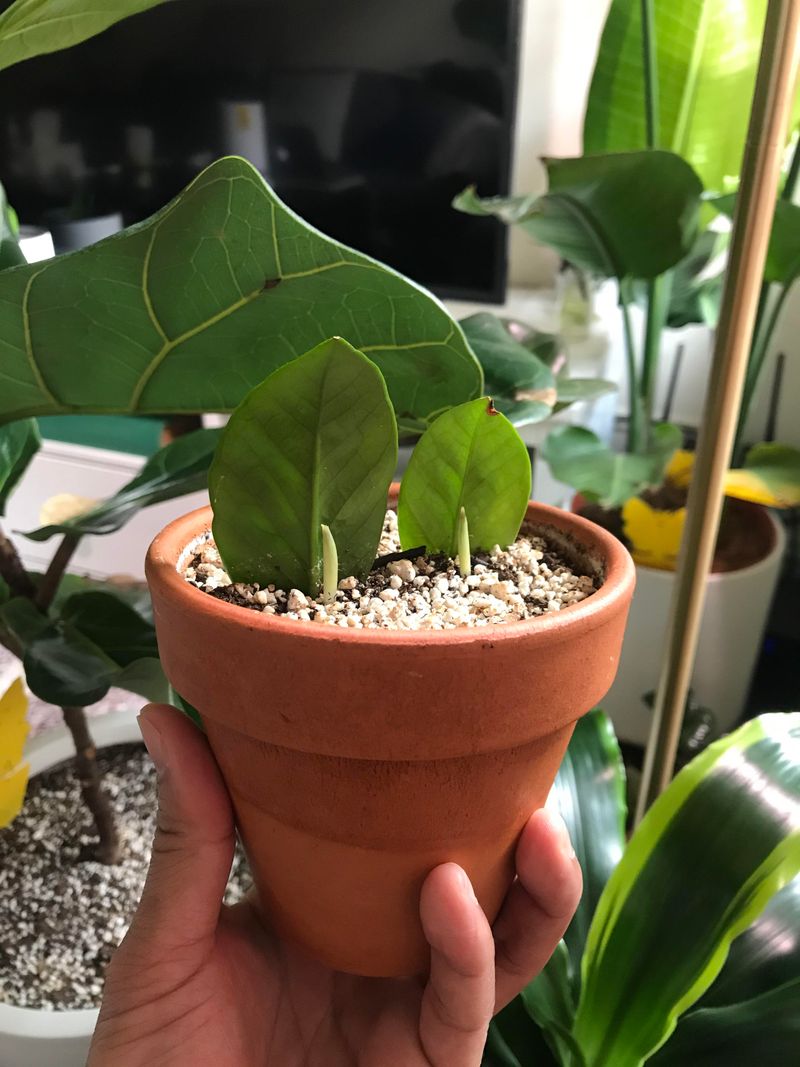
A single ZZ leaf can grow an entire new plant. Gardeners often call this one of nature’s quietest magic tricks.
Leaf cuttings work slower than other methods, but they produce plenty of babies. Patient plant owners can turn one stem into a dozen starts.
Snip healthy leaves where they meet the stem. Keep a tiny bit of the leaf stalk attached to each one.
Set the leaves in a shaded, dry spot for two to five days. Callused bases resist rot much better than fresh cuts.
Push each leaf about half an inch deep into well-draining mix. Standing them upright helps roots form at the right spot.
Keep the soil lightly moist, but avoid soggy conditions. A spray bottle gives you gentle control over moisture.
Roots and tiny rhizomes often take six to eight weeks to form. Visible shoots may need several more months to appear.
Planting leaves around the edges of your main pot adds future fullness. Each one slowly sends up stems that fill gaps.
Covering cuttings with a clear plastic dome boosts humidity. Dry winter air in homes makes this extra helpful.
Gently tug a leaf after two months to check progress. Light resistance means roots are holding on.
Fun fact: the leaf’s fleshy base stores energy for root growth. That stored fuel explains how one leaf can start a new plant.
Slow progress pays off with a dense, layered look later.
8. Rotate The Pot For Even Growth
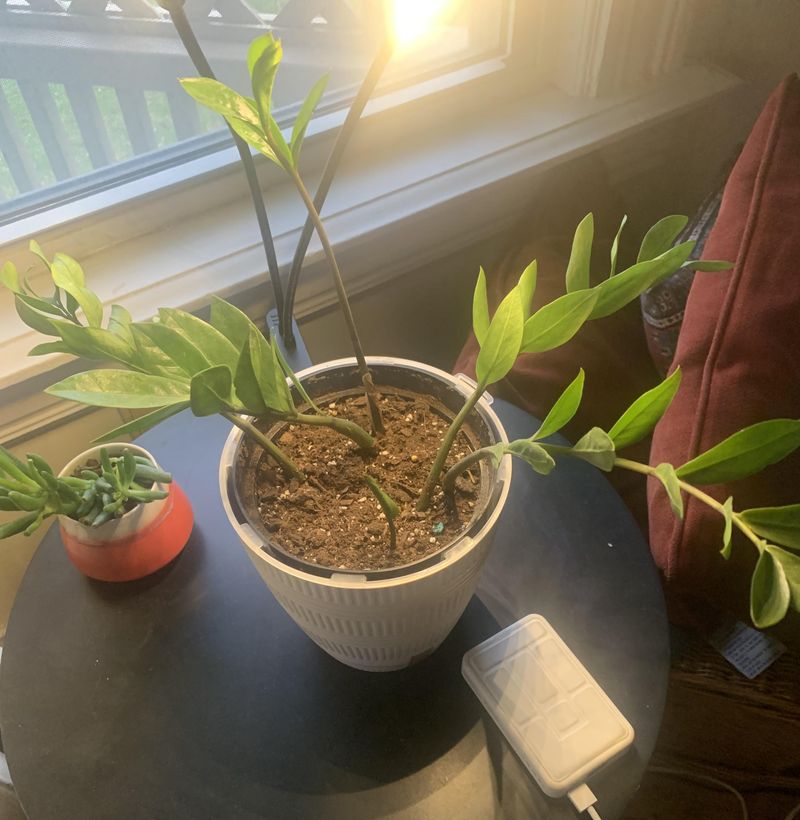
Ever notice your ZZ leaning like it wants to peek outside? Plants naturally stretch toward their light source.
Over time, that stretching creates a lopsided shape. One side grows thick and leafy while the other looks thin.
Fixing the problem takes just a few seconds. Give the pot a quarter turn each time you water.
Small turns keep every side getting a fair share of light. Stems then grow straighter and more evenly spaced.
A balanced plant looks fuller from every angle. Guests see a rounded shape instead of a crooked one.
Many New York apartments have only one good window. Rotation becomes extra important when light comes from a single direction.
Mark the pot with a small sticker to track turns. Moving the sticker side clockwise each time builds an easy habit.
Heavy pots can feel tricky to rotate. A rolling plant caddy makes turning large ZZ plants simple and safe.
Avoid moving your plant to totally new spots too often. Big changes in light can stress it and slow growth.
Leaning stems that already bend may not fully straighten. Regular rotation still helps new stems grow upright and balanced.
Pairing rotation with a grow light can work wonders. Overhead light reduces leaning and supports even growth from all sides.
Simple habits like this often make the biggest visual difference. Your plant will reward you with a fuller, more symmetrical look.
9. Trim Yellow Stems At The Base
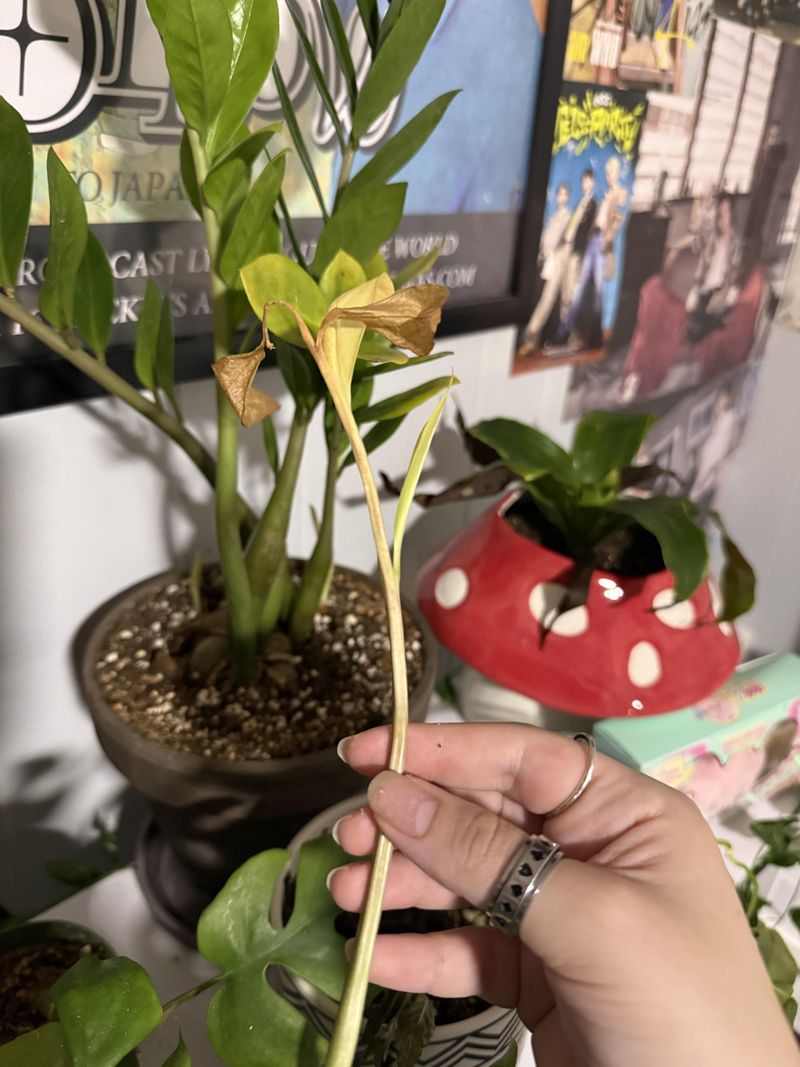
Yellow stems do your plant no favors. They pull energy that could support fresh, healthy growth.
Some yellowing comes from natural aging. Older stems fade over time as the plant puts energy into new ones.
Widespread yellowing often points to overwatering. Mushy stems near the soil can signal root problems that need attention.
Grab clean, sharp shears before you start trimming. Wipe the blades with rubbing alcohol to avoid spreading germs.
Cut each yellow stem as close to the soil as possible. Short stubs left behind can rot and attract pests.
Brown, crispy, or damaged stems deserve the same treatment. Removing them keeps the whole plant looking tidy.
Healthy energy then flows toward new shoots. Many owners notice fresh growth soon after a good cleanup.
Wear gloves, since ZZ sap can bother sensitive skin. Toss trimmings where pets and kids cannot reach them.
Healthy green stems you trim can become cuttings. Save them for propagation instead of tossing them out.
For New York plant lovers, a quick monthly check works well. Look over each stem while you water and rotate the pot.
Avoid cutting too many stems at one time. Removing more than a third of the plant can cause stress.
Regular trimming keeps your ZZ looking polished and bright. Clean, healthy stems also make the plant appear naturally fuller.
Small cleanups now prevent bigger problems later.
10. Be Patient, Because ZZ Plants Grow Slowly
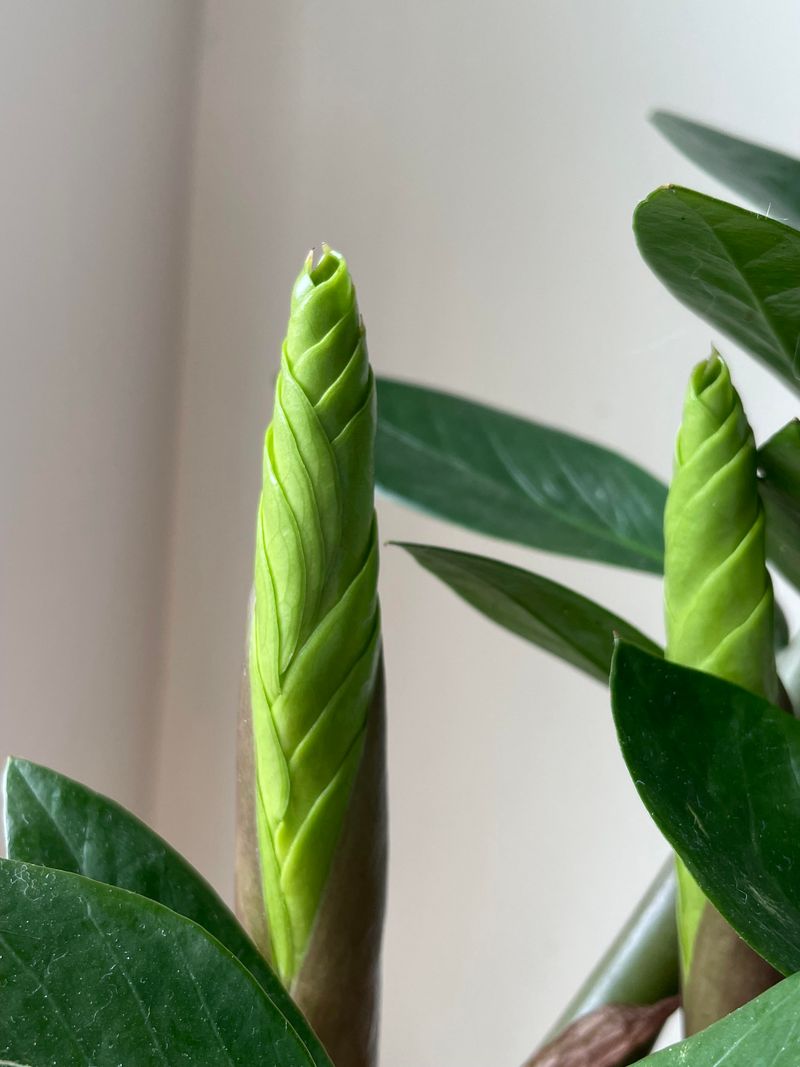
Picture a tortoise in a race against a hare. Your ZZ plant is the tortoise, steady and unhurried.
Most ZZ plants grow at a slow to moderate pace. Even with great care, they rarely shoot up like pothos or monsteras.
New stems often appear in bursts rather than steady streams. Your plant may rest for weeks, then push out several shoots at once.
Quiet periods are normal, so try not to worry. Roots and rhizomes often grow underground before stems appear above.
Fresh shoots start as pale, curled spears. Within a few weeks, they unfurl into glossy leaves that harden over time.
Taking photos every month helps you see real progress. Changes that seem tiny day to day look impressive side by side.
Resist the urge to fuss with extra water or fertilizer. Overdoing care often slows growth instead of speeding it up.
Fun fact: ZZ stands for Zamioculcas zamiifolia, a long name for a calm plant. Many people simply call it the eternity plant.
A full, bushy ZZ can take one or two years to develop. Combining the earlier tips shortens that timeline noticeably.
New York life moves fast, but your plant follows its own clock. Enjoying its steady rhythm can feel surprisingly relaxing.
Consistent light, smart watering, and gentle care build lasting results. Before long, your once skinny plant can become the leafy star of the room.