No Yard? No Problem. Vegetables You Can Grow Anywhere In Virginia
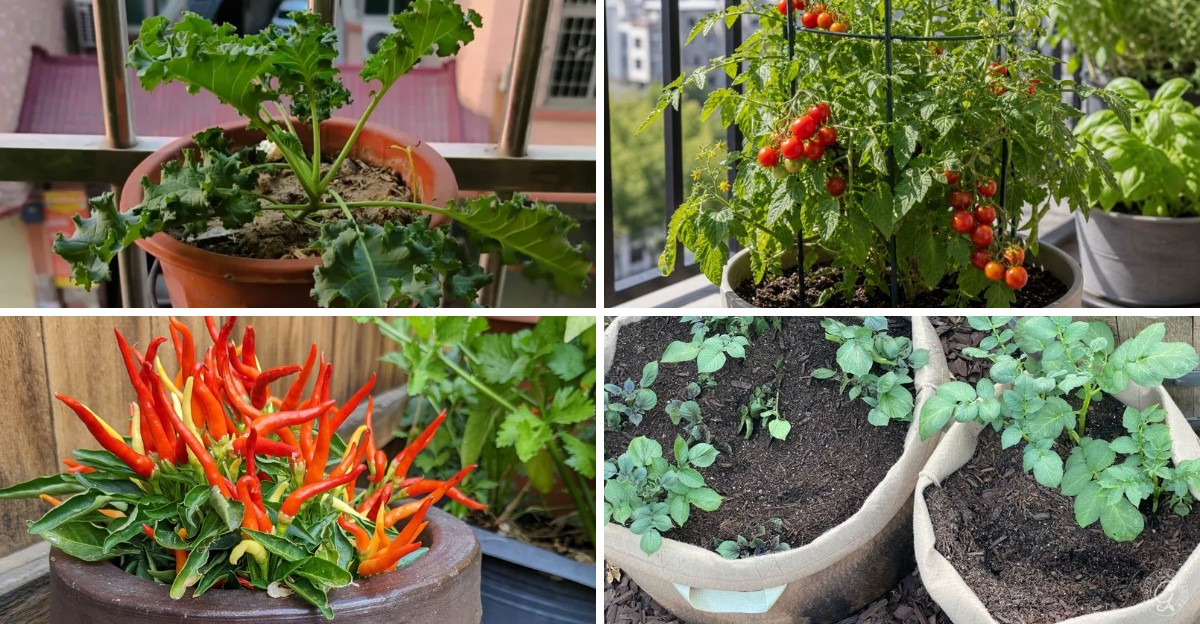
Fresh cherry tomatoes aren’t just for people with big backyards. A sunny window or small porch can become a tiny farm.
Plenty of Virginia city dwellers are filling pots with greens and peppers. Most started with just a container and potting mix.
Some crops are ready to eat in just a few days. One doesn’t even need sunlight at all.
Others keep feeding you for months with almost no effort. Many grow right through winter on a bright windowsill.
Rent or own, fresh flavors are closer than you think. All it takes is a little space and a few smart picks.
1. Lettuce Thrives In A Simple Window Box
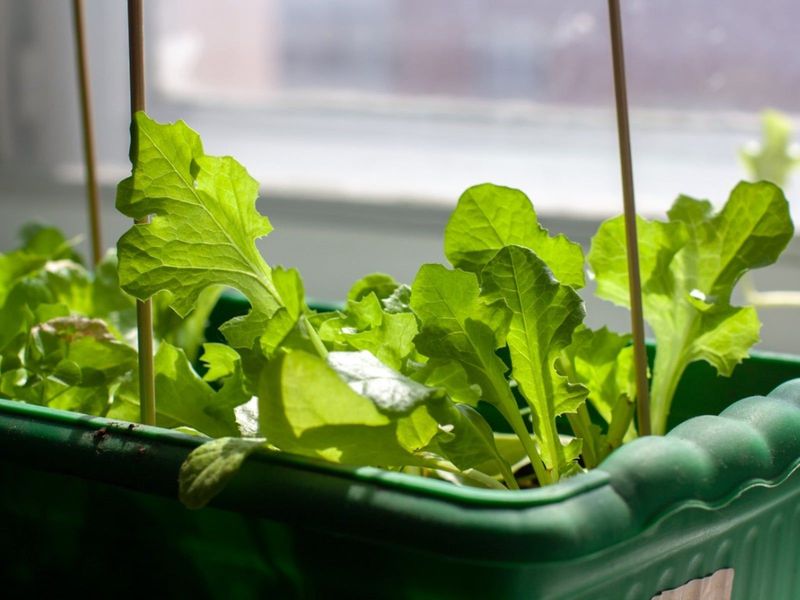
Few things feel fancier than snipping salad greens right outside your window. Leaf lettuce turns a plain window box into a tiny, tasty salad bar.
You only need a container about six inches deep to grow it well. Wide, shallow planters work even better because they hold more plants side by side.
Drainage matters a lot with lettuce. Pick a box with holes in the bottom so extra water can drain out easily.
Fill it with fresh potting mix instead of heavy garden soil. Potting mix stays light and fluffy, which helps tender roots spread out fast.
Lettuce wants about four to six hours of sunlight each day. Sound like a lot?
It actually needs less than most vegetables, so shadier spots can still work.
Keep the soil evenly moist, like a sponge that has been wrung out. Dry soil can make the leaves taste bitter and tough.
Here is a handy trick called cut-and-come-again harvesting. Snip the outer leaves about an inch above the soil and leave the center to keep growing.
One planting can feed you for weeks this way. Many growers sow a few new seeds every two weeks for a steady supply.
In Virginia, lettuce loves the cool weather of spring and fall. Summer heat can make it bolt, which means it sends up a flower stalk and turns bitter.
Move your box to a shadier window when July arrives. Your greens will stay crisp a little longer that way.
2. Cherry Tomatoes Love A Sunny Balcony
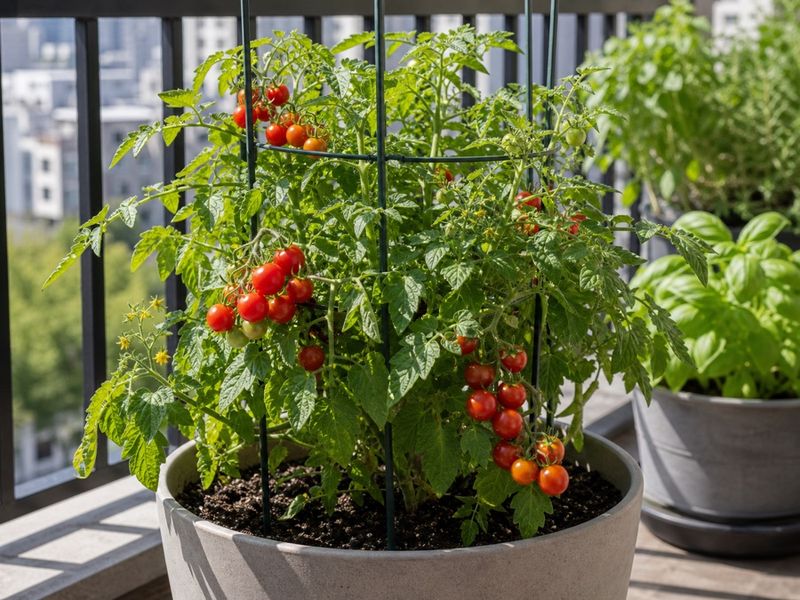
Ask any balcony gardener about their proudest moment, and cherry tomatoes often come up. Those little red and golden gems taste like candy straight off the vine.
Sunshine is the secret ingredient here. Cherry tomatoes need six to eight hours of direct light every day to produce well.
Watch your balcony for a day before buying plants. South or west-facing spots usually get the strongest sun.
Give each plant its own five-gallon container. Smaller pots dry out too fast and leave roots cramped and stressed.
Watering is where many beginners slip up. Uneven watering can cause the fruit to crack open, which is no fun after weeks of waiting.
Try to water at the same time each day during hot weather. A finger pushed into the soil tells you plenty, since dry soil an inch down means it needs a drink.
Your Virginia Garden Changes Every Week. Your Plan Should Too.
Gardening in Virginia changes quickly throughout the season. Every Friday you’ll receive a simple weekly plan showing exactly what to plant, prune, fertilize, harvest, and protect so you never miss the right timing.
Variety choice makes a big difference too. Sungold and Sweet Million are popular picks known for sweet flavor and heavy harvests.
Set up stakes or cages when you first plant. Adding them later can damage roots and stems that have already spread out.
Summers bring plenty of heat and humidity, which tomatoes enjoy. Still, a breezy balcony helps keep leaf diseases away by drying foliage quickly.
Fun fact: tomatoes are technically fruits, not vegetables. A court case in 1893 labeled them vegetables for tax purposes, though.
Pick your tomatoes when they are fully colored and slightly soft. Eating them warm from the sun is a real treat.
3. Green Onions Regrow From Kitchen Scraps
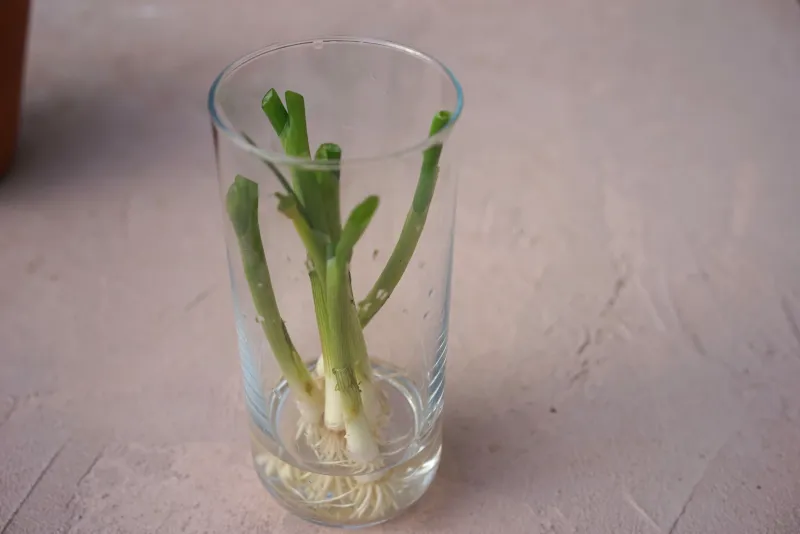
Believe it or not, your next bunch of green onions might already be in your trash can. Those little white root ends can sprout fresh shoots again and again.
Getting started is wonderfully easy. Cut the white bottoms about one to two inches above the roots when cooking.
Place the scraps root side down in a small jar or glass. Add just enough water to cover the roots, leaving the tops above the surface.
Set the jar on a bright windowsill. Kitchen windows work great since you will see the jar every day.
Change the water every one to three days. Fresh water keeps things clean and stops a slimy film from forming.
Within just a few days, tiny green tips will poke up. Kids especially love checking on the progress each morning.
After a week or so, you can snip the new greens for cooking. Leave about an inch behind so the onion keeps regrowing.
Water alone will not feed them forever, though. After a few rounds, the shoots get thinner and weaker.
For a longer run, plant the rooted scraps in a small pot of soil. They will grow thicker and last for months that way.
Many home cooks keep a jar going all year long. It saves a quick trip to the store when a recipe calls for a fresh garnish.
Toss the greens on eggs, soups, tacos, or baked potatoes. Free food never tasted so good.
4. Microgreens Grow On A Countertop In Days
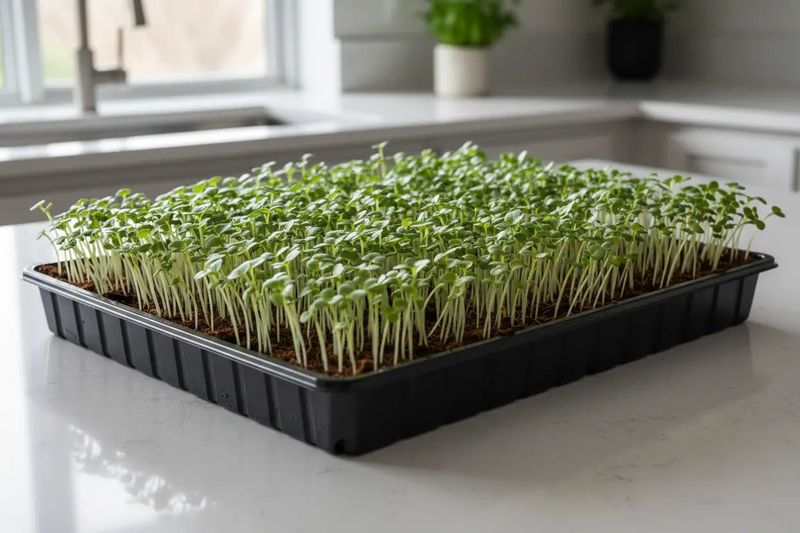
Impatient gardeners, this one is for you. Microgreens can go from seed to salad in as little as five days.
So what exactly are they? Microgreens are baby plants harvested when they are just a couple of inches tall.
Many varieties are ready in five to fourteen days. Radish, broccoli, and kale microgreens grow especially fast.
Radish shoots bring a spicy kick, almost like a tiny bite of horseradish. Broccoli greens taste mild and fresh, which makes them great for picky eaters.
All you need is a shallow tray, some potting mix, and seeds. Sprinkle the seeds thickly across the surface and press them down gently.
Mist them with water once or twice a day. The soil should stay damp but not soaking wet.
Temperature matters for quick growth. Aim for a cozy range between 65 and 75 degrees Fahrenheit.
Most kitchens already sit right in that zone. That makes microgreens one of the easiest crops for any apartment.
Harvest when the first set of leaves, called cotyledons, opens up. Flavor and nutrition are at their peak right then.
Some studies found microgreens can hold more nutrients than the grown-up plants. Pretty impressive for something that fits on a cutting board.
Use clean scissors and cut just above the soil line. Rinse them gently and pile them on sandwiches, wraps, or scrambled eggs.
Start a new tray every week for a nonstop supply. Your countertop will look like a mini green meadow.
5. Potatoes Grow Happily In Fabric Bags
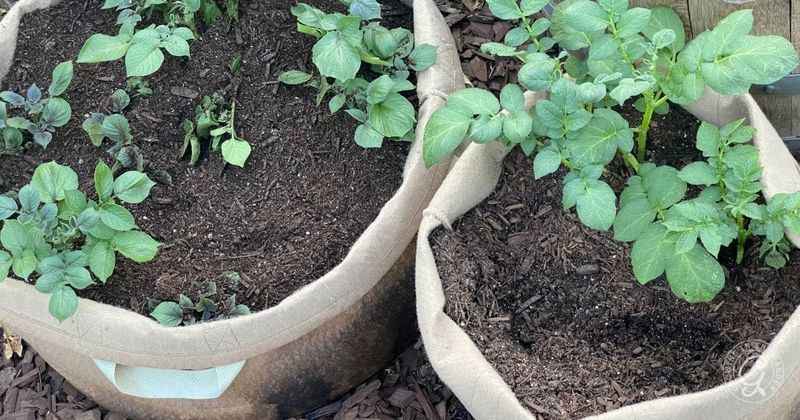
Digging for potatoes feels a bit like a treasure hunt. With a fabric grow bag, you can enjoy that thrill on a tiny patio.
Fabric bags breathe, which keeps roots healthy and cool. They also drain well, so potatoes are less likely to rot.
Choose a bag at least twelve to fourteen inches deep. Deeper bags give tubers more room to form.
Start with about four inches of soil in the bottom. Set your seed potatoes on top with the sprouting eyes facing up.
Cover them with a few more inches of soil. Soon, green sprouts will push through the surface.
Here comes the clever part, called hilling. Each time sprouts grow a few inches, add more soil around them, leaving the top leaves showing.
Hilling encourages the plant to form extra potatoes along the buried stem. More soil usually means a bigger harvest.
Potato plants need about six hours of direct sunlight. Keep the soil moist, but avoid letting it turn soggy.
Early varieties like Swift or Charlotte do very well in bags. They mature faster, which suits gardeners racing the summer heat.
Plant in early spring, around March in much of the state. You can often harvest by early summer.
When the leaves turn yellow and flop over, it is harvest time. Simply tip the bag onto a tarp and sort through the soil.
No shovel, no sore back, and no lost potatoes. Kids will love joining this hunt.
6. Peppers Do Great In Containers
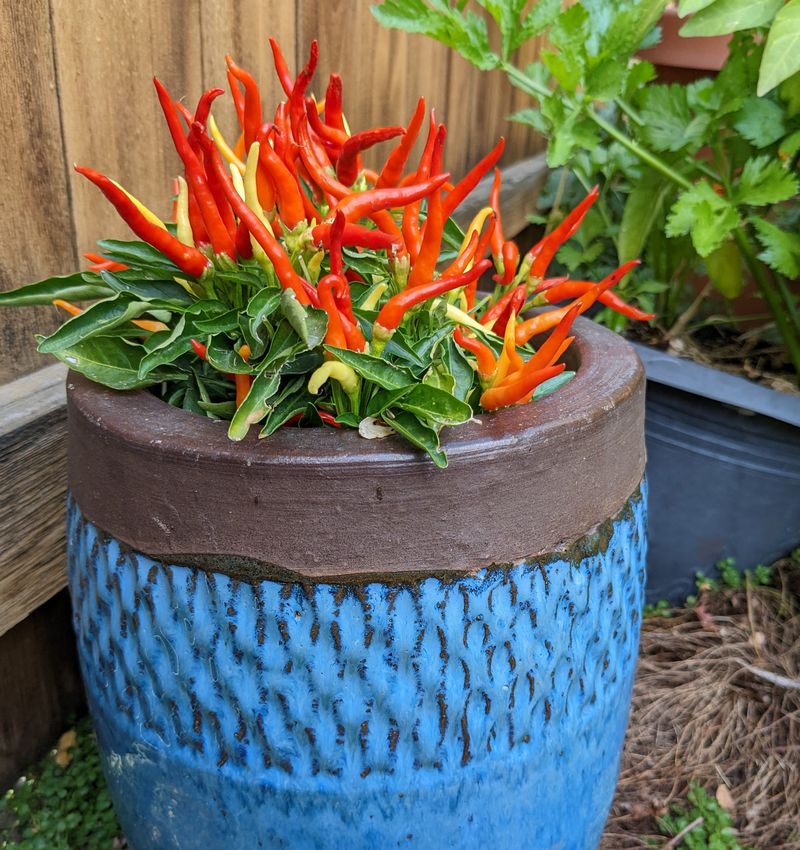
Peppers might be the most cheerful plants on any porch. Their glossy fruits come in red, yellow, orange, purple, and green.
Better yet, they adapt well to life in pots. Most varieties grow happily in a five-gallon container.
Bell peppers appreciate a little extra space. Consider a slightly larger pot if you want big, chunky fruits.
Drainage holes are a must for healthy roots. Soggy soil can lead to rot and weak plants.
Compact types make container growing even easier. Mini Bells and Shishito peppers stay small but produce plenty of fruit.
Shishitos are a fun snack when blistered in a hot pan. Roughly one in ten packs surprising heat, so each bite is a little gamble.
Jalapeños are another strong choice for pots. One plant can give you dozens of peppers in a single season.
Peppers soak up sunshine like tiny solar panels. Give them as much direct light as your space allows.
Taller, heavy plants may lean as fruit forms. A simple bamboo stake keeps stems upright and prevents snapping.
Virginia’s long, warm summers suit peppers nicely. Wait until nights stay above 55 degrees before moving them outdoors.
Here is a helpful tip for color lovers. Green bell peppers turn red, yellow, or orange if you leave them on the plant longer.
Riper peppers taste sweeter too. A little patience pays off with richer flavor.
7. Kale Keeps Producing In A Pot
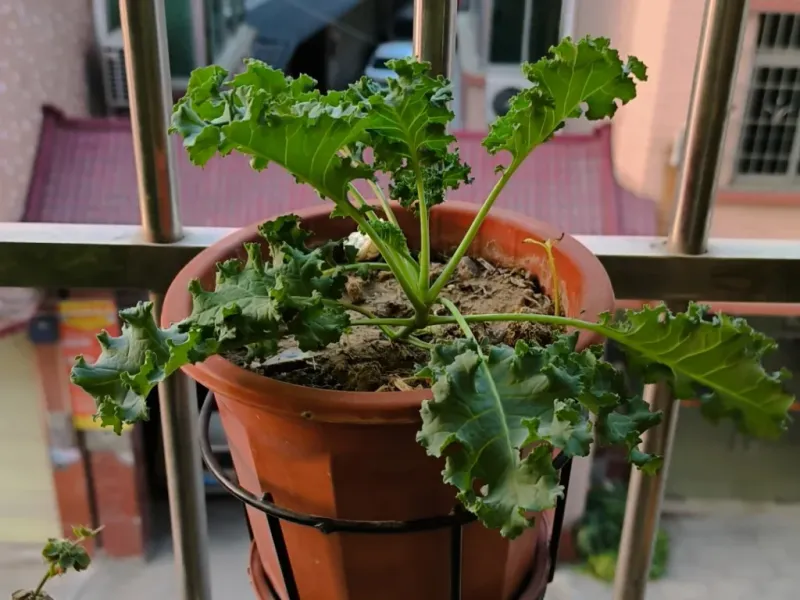
Kale is the friend who shows up and just keeps giving. One potted plant can feed you for months.
A three to five-gallon pot works well for a single plant. Fabric pots are especially handy because they are light and easy to move.
Fill the pot with rich potting mix blended with compost. Kale is a hungry plant and grows best with plenty of nutrients.
Keep the soil evenly moist for steady growth. Dry spells can make the leaves tough and bitter.
Harvesting is simple with the cut-and-come-again method. Pick the lower, outer leaves first and let the center keep growing.
Over time, your plant may look like a little palm tree. Many gardeners find that funny shape oddly charming.
Kale handles cold better than most crops. A light frost actually turns some of its starches into sugar, making leaves sweeter.
That makes it a favorite for fall gardens in Virginia. Many plants keep producing well into winter.
During a hard freeze, slide your pot next to a wall or onto a covered porch. Mobility is a real bonus with container growing.
Summer heat can slow kale down a bit. Afternoon shade helps keep it happy in July and August.
Try curly, Lacinato, or Red Russian types for variety. Lacinato, sometimes called dinosaur kale, has bumpy, dark leaves kids find fun.
Toss leaves into smoothies, soups, or bake them into crunchy chips.
8. Herbs Fit On Any Sunny Windowsill
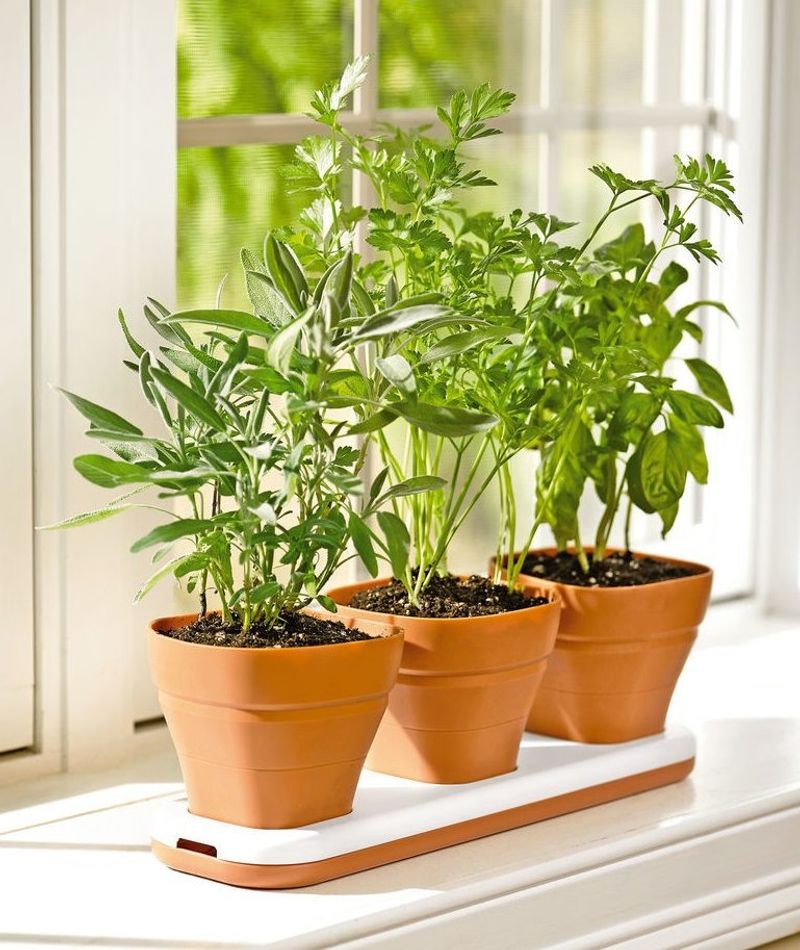
Imagine brushing your hand against a basil plant and filling the kitchen with its sweet smell. A windowsill herb garden brings that joy every day.
Herbs need very little room to thrive. A few small pots can fit on even the narrowest ledge.
Basil, mint, and rosemary are popular picks for indoor growing. Each one adds bold flavor with just a few snipped leaves.
Basil loves warmth and bright light. Pinch off the top leaves often to keep it bushy instead of tall and spindly.
Mint grows fast and spreads eagerly. Give it its own pot so it does not crowd out neighbors.
Rosemary likes its soil a little drier than the others. Let the top inch dry out before watering again.
Every pot should have drainage holes. Water sitting at the bottom can harm roots quickly.
Pick your sunniest window for this little garden. South-facing windows usually give herbs the light they crave.
Turn the pots every few days so plants grow evenly. Otherwise, they lean toward the glass like curious kids.
Fresh herbs at the store can cost a few dollars per tiny pack. Growing your own saves money and cuts down on plastic waste.
Here is a fun bit of history. Ancient Greeks wore rosemary wreaths because they believed it helped memory.
Many cooks keep herbs going all year indoors. Fresh flavor is just an arm’s reach away.
9. Mushroom Kits Need No Sunlight At All
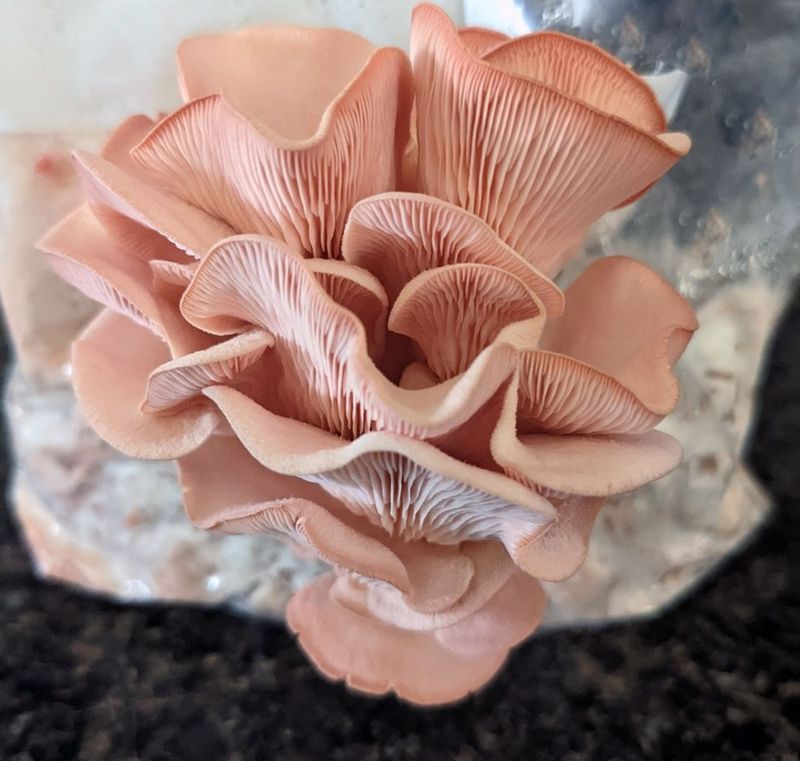
Got a dark corner with no window? Mushrooms might be the perfect crop for that forgotten spot.
Unlike plants, mushrooms do not use sunlight to make food. They feed on materials like sawdust, straw, or grain instead.
Mushroom kits make the process almost effortless. The box usually comes ready to grow, packed with mushroom roots called mycelium.
Your main jobs are fresh air and moisture. Most kits just need a daily misting with a spray bottle.
Many kits produce mushrooms in five to fourteen days. Watching them double in size overnight feels a bit like magic.
Oyster mushrooms are a great choice for beginners. They fruit quickly and handle a range of indoor conditions.
Brands like North Spore offer reliable kits for home growers. Look for options with clear instructions and good reviews.
Harvest oyster mushrooms when the caps are flat but before edges curl upward. Twist the whole cluster gently from the base.
Many kits will give you a second or even third flush. Soak the block and keep misting to encourage another round.
Here is a fun fact. Mushrooms are more closely related to animals than to plants.
Humid summers can help kits stay moist naturally. In dry winter air, a plastic tent over the kit keeps humidity up.
Sauté your harvest in butter with garlic. Homegrown oyster mushrooms taste rich and nutty.
Grow Lights Keep Harvests Coming All Winter
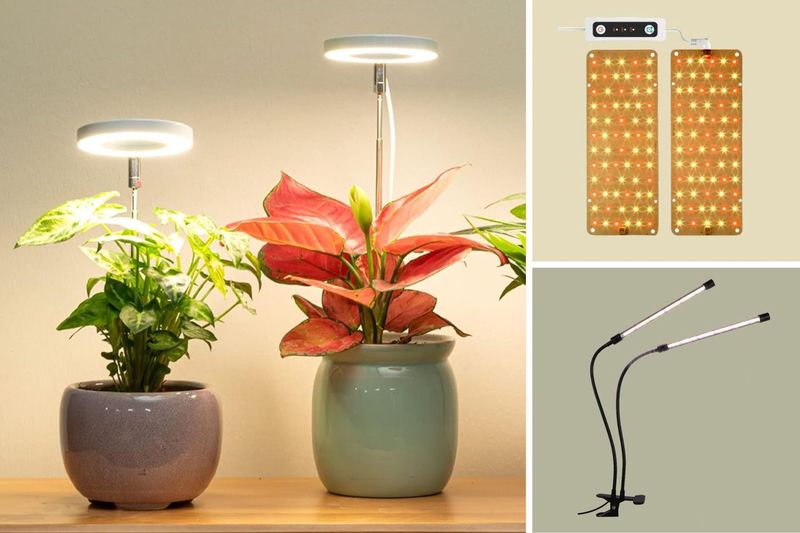
Winter does not have to mean an empty garden. With a few grow lights, your living room can stay green while snow falls outside.
Short days are the big challenge in colder months. Plants simply do not get enough natural light through winter windows.
Grow lights fill that gap with steady, bright light. Modern LED options use little electricity and stay cool to the touch.
Aim for twelve to fourteen hours of light each day. A cheap outlet timer handles the switching so you do not forget.
Position lights about six to twelve inches above your plants. Raise them as the plants grow taller.
Too far away, and seedlings stretch and turn floppy. Too close, and leaves may look pale or scorched.
Leafy greens and herbs are the easiest crops under lights. Lettuce, kale, basil, and microgreens all respond quickly.
A simple wire shelf can hold several trays stacked up high. Hang a light under each shelf to create a mini indoor farm.
Winters across Virginia bring chilly nights and gray skies. Fresh salads from your own shelf can brighten those dreary weeks.
Many growers also use lights to start spring seedlings early. Tomatoes and peppers get a head start before outdoor planting.
Here is a cozy bonus. The soft glow can lift your mood on dark evenings too.
Start small with one light and a few pots. Before long, you may be harvesting every week of the year.