7 Advanced Overwintering Techniques for Pushing Zone Limits in New York
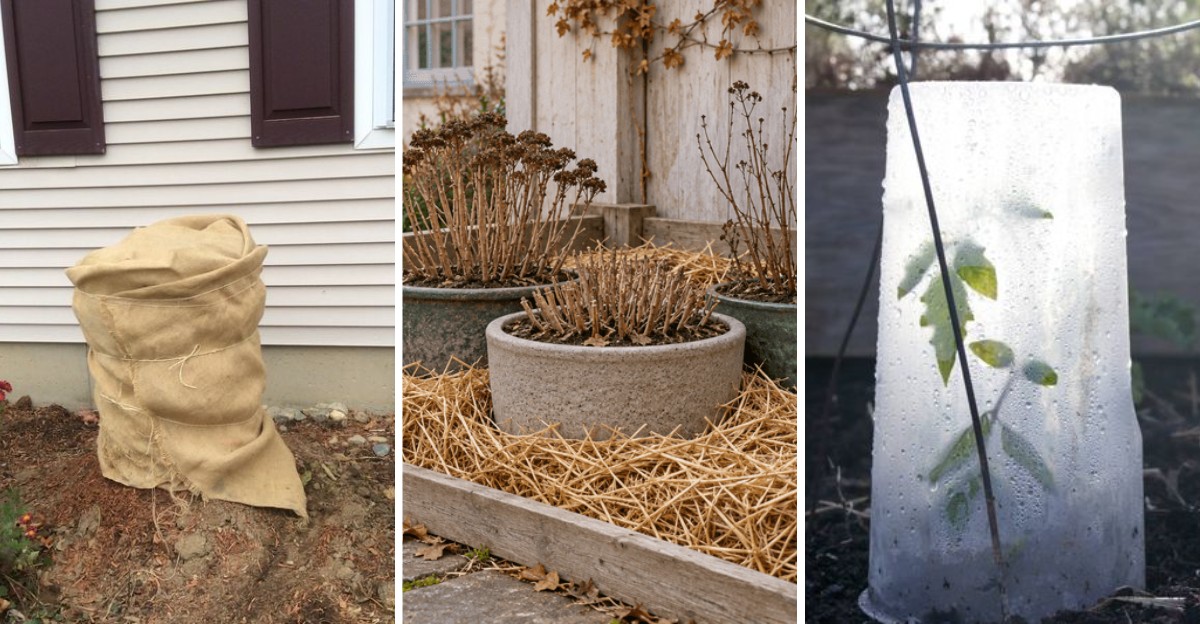
Generations of Italian families in Brooklyn and Queens have tucked fig trees under old rugs and buckets each November. Those odd bundles look like garden scarecrows, yet many of those Mediterranean trees still bear sweet fruit by August.
New York stretches from zone 4a in the Adirondacks to zone 7b along the coast near the city. That spread means a plant thriving in a Queens yard might struggle badly just a few hours north.
Take it from someone who lost a prized rosemary to one February wind that roared across an open patio. Looking back, I should have given that poor herb a little shelter instead of trusting a mild December.
So what separates gardeners who cheat winter from those who replant every spring across New York? The answers are cheaper and sneakier than you might expect, and a few involve a shovel.
1. Burlap Screens Around Boxwoods And Rhododendrons
Winter wind can brown a boxwood faster than any bug, and the culprit is usually moisture loss rather than cold. Evergreen leaves keep releasing water while frozen roots cannot replace it, so the foliage slowly scorches.
A simple burlap screen breaks that drying wind and also blocks harsh late-winter sun bouncing off snow. In my own yard, wrapped rhododendrons look fresh in March while unwrapped ones look singed and tired.
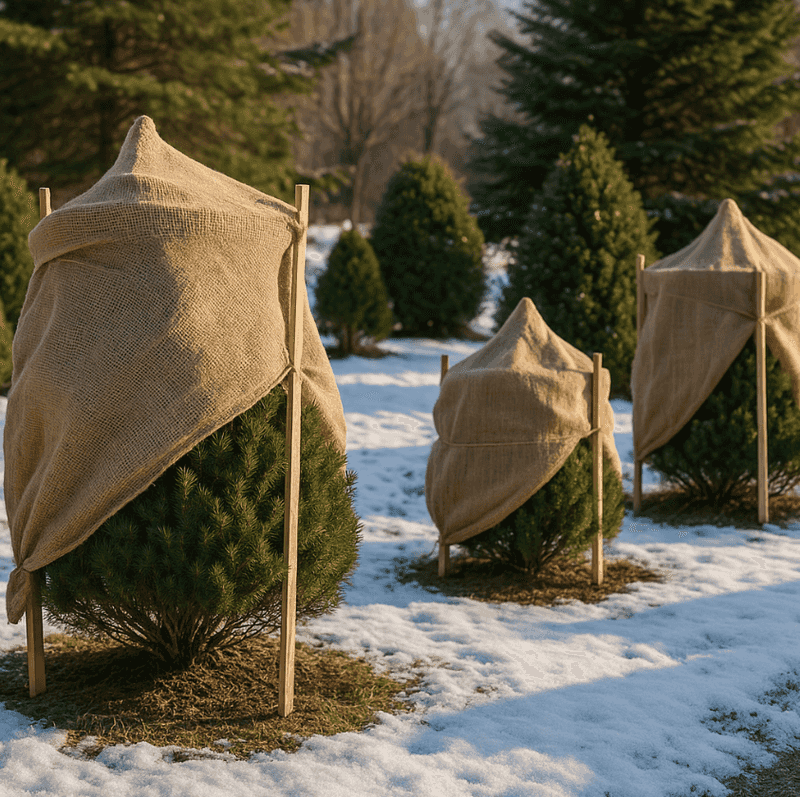
Start by pounding wooden stakes into the soil around the shrub before the ground freezes hard in late fall. Leave several inches between the stakes and the branches so the fabric stays off the leaves.
Wet, frozen burlap pressed against foliage can cause the very damage you are trying to prevent. Natural jute breathes well, and two layers stapled firmly to the stakes usually handle strong gusts without trouble.
Leave a small gap near the bottom so air can move and trapped heat does not build up inside. Many gardeners skip a lid, but a loose top helps shed heavy snow from fragile branches.
Timing matters here, and most areas see good results wrapping from late October through mid-November. Deciduous shrubs should keep their screens off until their leaves have dropped on their own schedule.
Spring removal works best gradually once prolonged hard freezes have passed and buds begin to swell. For what it is worth, that slow unveiling feels a little like opening a present you wrapped months ago.
2. Potted Plants Huddled Against A North Wall
Roots in a pot face winter with almost no blanket, which makes them far tenderer than the same roots in the ground. A shrub rated for your zone can still struggle once it lives in a container on the patio.
Funny thing is, the goal is not keeping those roots warm at all, but keeping them steadily cold. Repeated freezing and thawing does more harm than one long chill, so steady temperatures matter most.
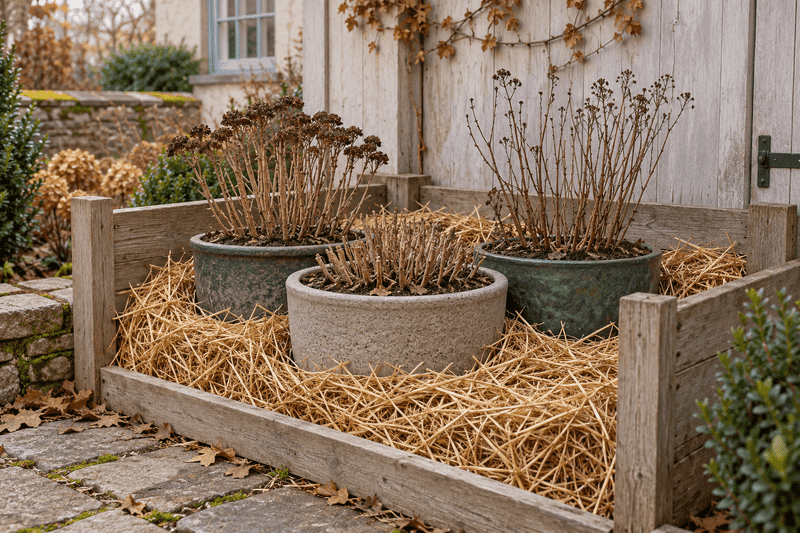
One easy trick involves sinking the whole pot into a garden bed right up to its rim. Once the soil starts freezing, pile shredded leaves over the top for an extra fluffy layer of protection.
If digging sounds like too much work, cluster your pots tightly together against the north or east side of a building. That spot dodges the wild swings that happen when bright afternoon sun warms a frozen pot.
Stuff the gaps between containers with straw, hay, or shredded leaves, then surround the group with straw bales. Raising each pot on small feet helps drainage holes stay open instead of sealing shut with ice.
Fragile terracotta often cracks outdoors, so an unheated garage or shed holding roughly 25 to 40 degrees works better. Water thoroughly before the soil freezes, then ease off so dormant roots do not sit soggy.
When choosing plants for outdoor containers, many experts suggest picking varieties rated two zones hardier than your own. Don’t make my mistake of trusting a label without considering how exposed that little pot really is.
3. A South Facing Cold Frame Full Of Winter Greens
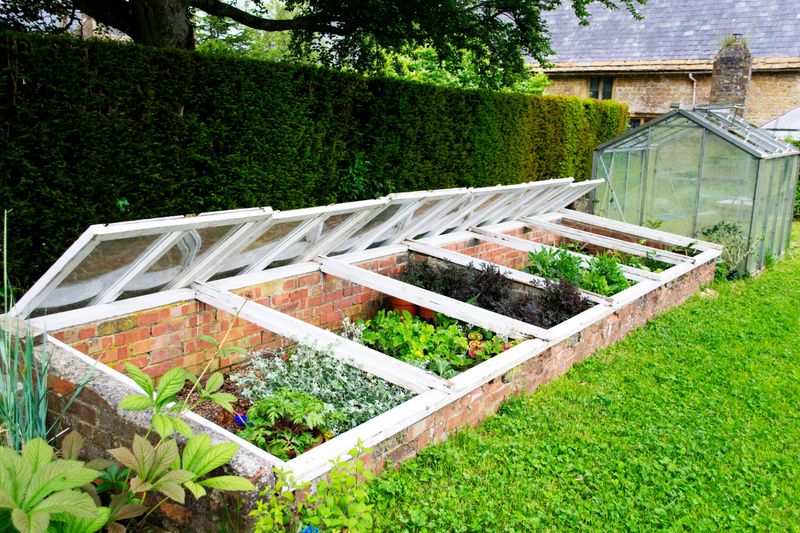
Lifting a cold frame lid on a frosty morning and finding crisp spinach inside never stops feeling like a small miracle. That humble box acts as a miniature greenhouse powered by nothing except the winter sun.
Inside, temperatures commonly run 10 to 20 degrees warmer than the outside air on a clear day. Heat collects through the clear top, and the walls block wind that would otherwise chill tender leaves quickly.
Building one can be simple, using a wooden box or low brick wall topped with an old window. Slope the lid toward the south so it catches as much low winter light as possible each afternoon.
Here comes the part beginners often forget, because a sealed frame can overheat fast on bright winter days. Prop the lid open when the sun shines, then close it before evening to hold the stored warmth.
Lining the walls with straw or bubble wrap adds insulation during the coldest stretches of January and February. Wipe the clear panels now and then so dirt and grime do not steal precious light from plants.
Lettuce, kale, and spinach handle frame life beautifully, and dormant geraniums or fuchsias can rest there too. Come spring, the same box becomes a handy place for hardening off seedlings started indoors.
Watch moisture closely, since damp, stale air invites fungal problems and soggy roots under that glass. If you ask me, a little fresh air on mild afternoons solves most cold frame troubles before they start.
4. Plastic Cloches And Water Walls Over Young Tomatoes
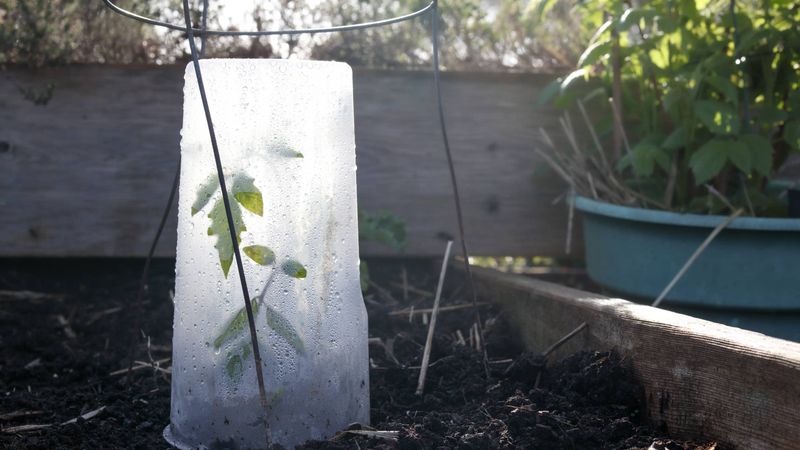
The word cloche comes from French for bell, and the old glass versions really did look like dainty dinner bells. French market gardeners once lined whole fields with them to coax early vegetables from chilly soil.
Modern cloches are usually clear plastic domes you set over one plant at a time on cold nights. They trap daytime warmth and moisture, and many sources say they raise nighttime temperatures by several degrees.
That small boost can carry a seedling through a light frost that would otherwise blacken its tender leaves. Let’s just say a cut milk jug with the cap removed has rescued plenty of my transplants.
Watch out on sunny days, because a closed cloche can cook a plant faster than you might expect. Lift it off or crack the vent whenever the afternoon warms, then replace it before the evening chill.
Water walls take the idea further, using a ring of plastic tubes filled with water around the plant. The water soaks up heat during the day and slowly releases it after dark, softening cold snaps.
Gardeners often set them out a week early so the soil underneath warms before tomatoes or peppers go in. They also stretch fall harvests a bit longer when the first frosty nights arrive in autumn.
Neither tool works miracles during a deep freeze, so think of them as helpers for borderline weather. For tender transplants facing a surprise May frost, though, they often make the difference between success and disappointment.
5. Fig Trees Wrapped And Buried For The Winter
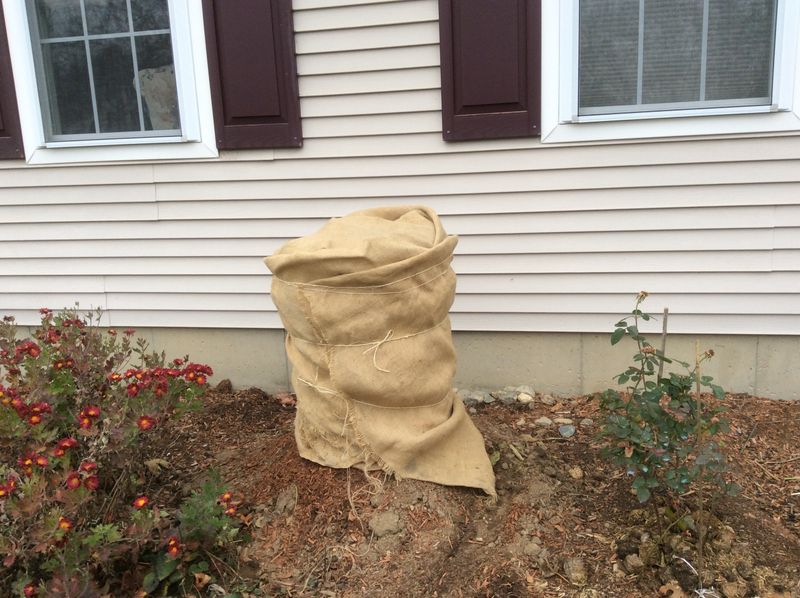
Few winter sights in city backyards are as charming as a fig tree bundled up like a mummy beside the fence. That quirky tradition traveled across the ocean with immigrant families who refused to give up homegrown figs.
Common figs are only marginally hardy here, and their branches often suffer when temperatures drop well below zero. Wrapping or burying the whole tree shields both stems and roots from bitter cold and drying winds.
The classic method begins after leaves fall, usually around Thanksgiving for many gardeners in New York. Prune away crossing branches, then gather the rest into a tight upright bundle tied with jute twine.
Wrap that bundle in burlap, then build a chicken wire cage around it and stuff it with shredded leaves. Top everything with a tarp or roofing felt so rain and melting snow cannot soak the insulation.
Bolder growers dig a trench about 14 to 16 inches deep and gently bend the tree down into it. They cover the branches with soil and loose mulch, which provides excellent protection in colder inland areas.
Unwrapping happens gradually in spring, often somewhere between late March and Mother’s Day depending on your location. Removing layers too early can expose tender buds to a sneaky late freeze that sets the tree back.
Varieties like Brown Turkey and Celeste have earned reputations for handling these conditions better than most. My garden taught me that a little patience in November pays off with sticky fingers in late summer.
6. Frost Cloth Draped Over Garden Hoops
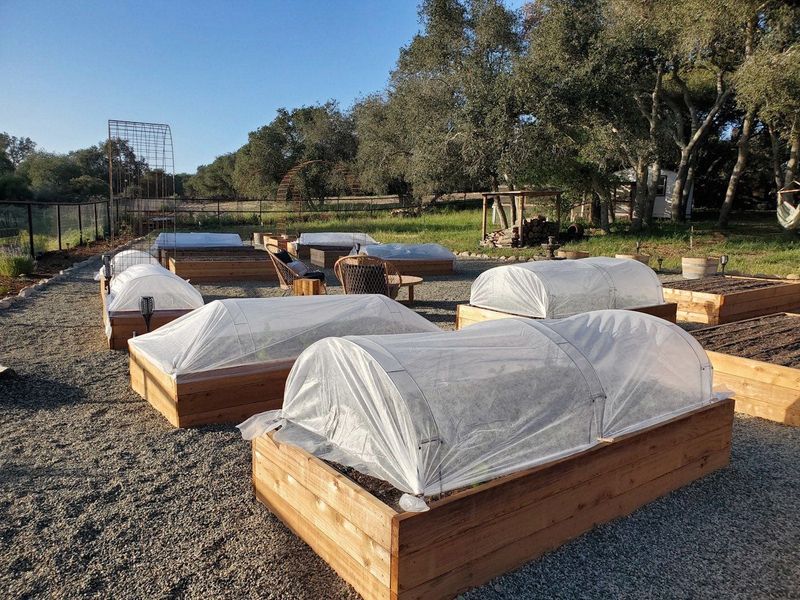
A sheet of white fabric fluttering over a garden bed may look plain, yet it quietly holds back frost. Row covers and frost cloths are some of the lightest and most flexible protection tools a gardener can own.
Most are made from spun-bonded fabric that lets rain, air, and sunlight pass through to the plants underneath. That breathability means you can leave covers in place for days without suffocating the crops below.
Fabric weight makes a big difference, and heavier cloth offers more warmth than the thin summer versions. Some manufacturers rate heavy frost blankets for several degrees of protection, so check the label before buying.
Here’s what caught my attention after years of use, because hoops matter almost as much as the fabric. Draping cloth directly on wet leaves lets it freeze to the foliage and damage tender plant tissue.
Bend wire or plastic pipe into arches over the bed, then stretch the cloth across them like a tent. Bury the edges or weigh them with stones and sandbags so winter gusts cannot peel the cover away.
These covers shine for late kale, carrots, and young perennials that need a buffer during sudden cold snaps. Gardeners in the colder northern areas often double the layers for extra warmth through harsh nights.
Store the fabric dry in spring, since many brands include UV inhibitors and can last several seasons. For what it is worth, my oldest cover still works despite a few patched holes from curious squirrels.
7. Dahlia Tubers Stored In A Cool Root Pit

Long before refrigerators hummed in kitchens, farm families stored their harvest underground and ate carrots in February. That same old-fashioned wisdom can keep tender dahlia tubers and canna roots safe until planting time returns.
Soil stays surprisingly steady just below the frost line, which makes a backyard pit a natural storage closet. Dig roughly three to four feet down, keeping the bottom safely beneath the depth where your ground freezes.
Line the hole with hardware cloth first, because hungry voles and mice adore a buffet of plump tubers. Set your dormant roots inside, then pile loose dry leaves or straw high above the opening.
Finish the mound with a tarp or sturdy board to shed rain and melting snow through winter. Some gardeners bury a metal garbage can instead, which keeps water out while the earth provides the insulation.
No yard space for digging is fine, since an unheated basement corner can mimic a root cellar nicely. Aim for temperatures between about 40 and 50 degrees, cool but safely above freezing.
Pack tubers in boxes of slightly moist sand, peat, or sawdust so they do not shrivel over the months. Check them occasionally, removing any soft or moldy pieces before trouble spreads to healthy neighbors.
Begonias, cannas, and root crops pulled in fall all appreciate this cool, dark resting spot. In my own experience, opening that box in April and spotting tiny pink sprouts feels like greeting old friends again.