10 Easy Steps To Collect Seeds From Coneflowers Before The Season Ends In Virginia
Those crunchy brown cones nodding in your garden are tiny treasure chests. Most gardeners walk right past them without a second glance or a single snip.
Across Virginia, coneflowers spend late fall clutching hundreds of seeds. Saving them costs nothing, takes very little time, and fills next year’s beds with fresh blooms.
You also get to play backyard scientist for an afternoon, sorting tiny seeds at the kitchen table while goldfinches swoop in for a snack outside.
Timing matters, though. Cold snaps, soggy weather, and hungry birds can all beat you to the harvest if you wait even a week too long.
Knowing when to snip, how to dry, and which seeds are worth keeping turns a fading flower bed into a free seed bank. A paper bag and a pair of pruners are all you need to start.
Wait Until The Cones Turn Dark Brown
Patience is the secret ingredient here, even when the garden looks a little tired. Coneflowers need time to finish ripening before their seeds are ready for you.
Start by watching the petals closely each week. Once they wilt, droop, or drop off entirely, the real show begins in the center.
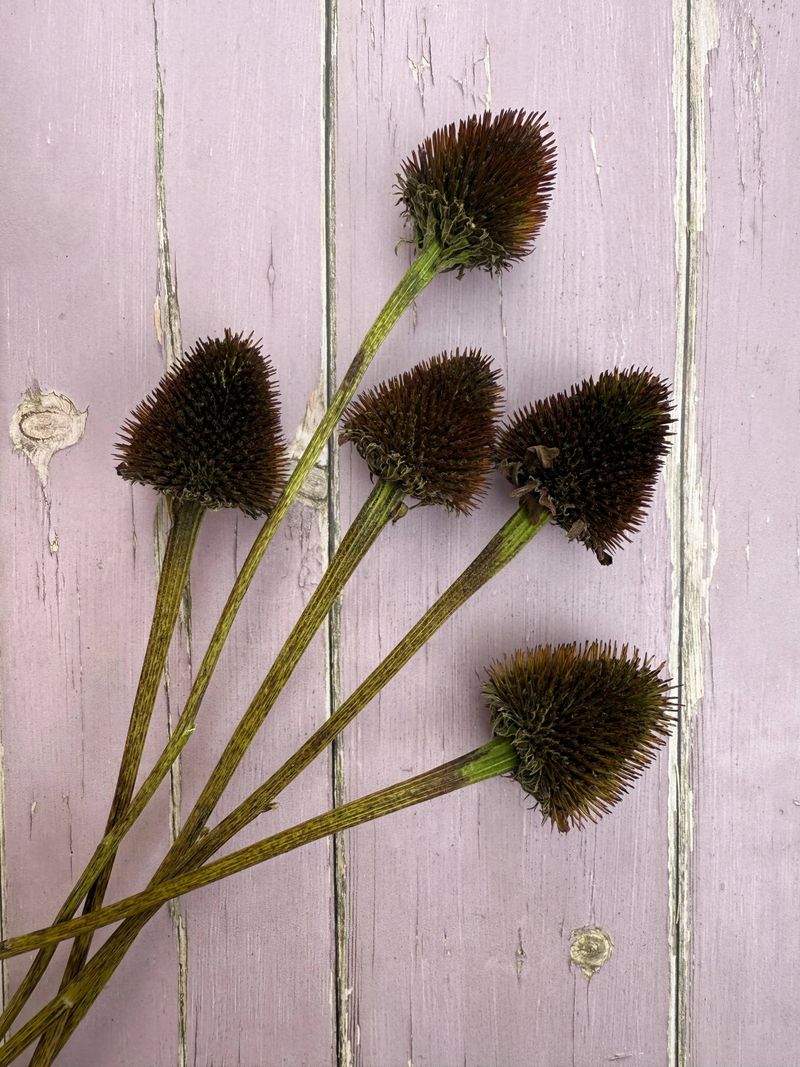
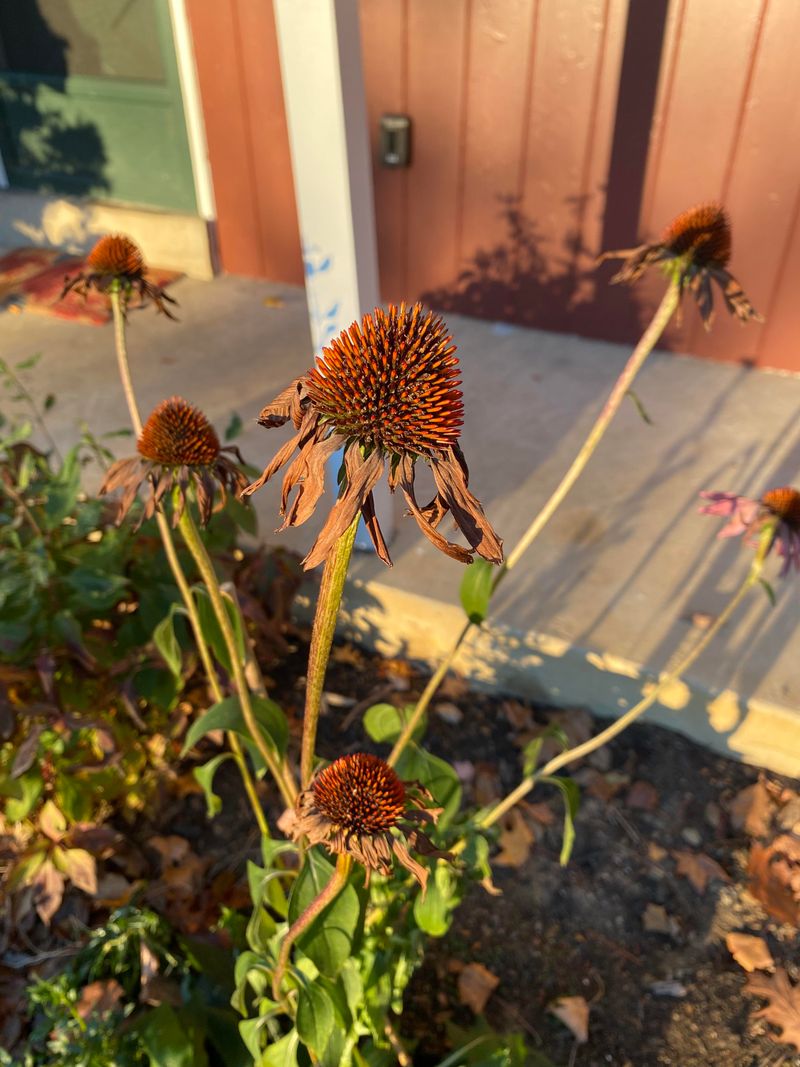
The spiky cone will slowly shift from orange or green to a deep, dark brown. Some heads even turn nearly black, which is a perfectly good sign.
Give the cone a gentle squeeze with your fingers. A ripe head feels crisp, dry, and prickly, almost like a tiny hedgehog.
Green or soft cones are not ready yet. Seeds inside them are still immature and likely will not sprout next spring.
In most of Virginia, cones start ripening in late summer and keep coming through fall. Check early, since the first ripe heads can show up by September.
Try tapping a cone over your palm as a quick test. If a few seeds fall out easily, you have found your moment.
Keep a simple garden notebook if you can. Writing down the date your cones ripen helps you plan better timing next year.
Cones on the same plant may ripen at different speeds. Check every few days and pick the ready ones first, leaving the rest to finish.
Rushing the harvest is the most common mistake beginners make. A little waiting pays off with plump, healthy seeds that are eager to grow.
Pick A Dry, Sunny Day
Mother Nature gets a vote on harvest day, so check the forecast first. Moisture is the biggest enemy of stored seeds.
Wet seed heads tend to grow mold once you bag them up. That fuzzy gray mess can ruin a whole season’s collection.
Aim for a stretch of clear weather with no rain for a day or two. Sunshine helps dry out any hidden dampness tucked inside the cones.
Late morning or early afternoon usually works best. By then, the morning dew has burned off and the plants feel dry.
Virginia falls can be surprisingly humid, especially in the Tidewater region. Harvesting earlier in the fall can help you dodge long damp spells.
Your Virginia Garden Changes Every Week. Your Plan Should Too.
Gardening in Virginia changes quickly throughout the season. Every Friday you’ll receive a simple weekly plan showing exactly what to plant, prune, fertilize, harvest, and protect so you never miss the right timing.
Run your hand over the seed heads before cutting. If they feel cool or slightly sticky, wait another hour or two.
Foggy mornings are common along rivers and valleys. Even without rain, fog leaves a thin film of water on everything it touches.
Here is a handy trick from experienced gardeners. Pick your harvest day right after a few dry, breezy days in a row.
Wind helps pull moisture out of the cones naturally. Breezy weather plus sunshine creates near perfect conditions for seed collecting.
Treat it like planning a picnic. A little weather watching keeps your seeds safe, sound, and ready for a great spring start.
Snip Seed Heads With A Few Inches Of Stem
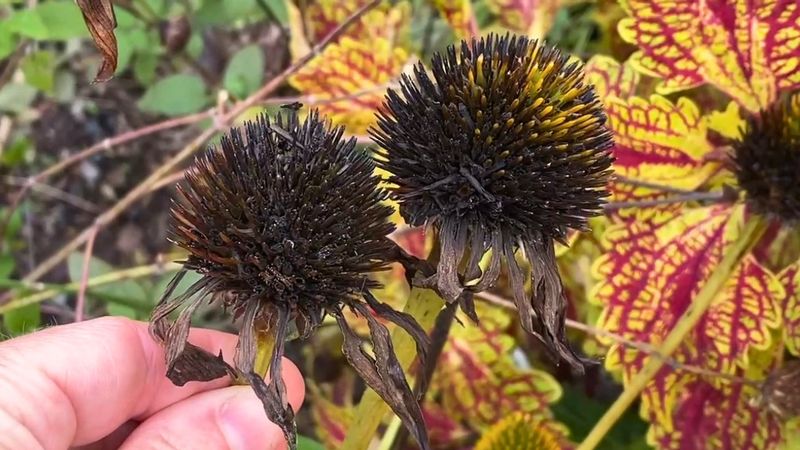
A good pair of pruners makes this step feel quick and satisfying. Bypass pruners work like scissors and give the cleanest cut.
Dull blades can crush stems instead of slicing them. Wipe your tools clean and sharpen them before heading outside.
Measure down about four to six inches below each cone. Snip there, leaving a handy little stem attached to the seed head.
Why keep the stem at all? It gives you something to hold without getting poked by the prickly cone.
A longer stem also makes hanging and bundling much easier. You can tie several together with twine if you prefer air drying.
Short on space? Leaving just an inch or two of stem works fine too, especially for bag drying.
Wear light gloves if your skin feels sensitive. Coneflower spikes are stiff and can feel scratchy after handling a few dozen heads.
Carry a basket or open box as you work. Dropping cut heads into a container keeps loose seeds from scattering on the ground.
Hold each cone upright while you cut. Tilting it downward can shake out seeds before you even reach the bag.
Fun fact for curious minds: the name Echinacea comes from the Greek word for hedgehog. One prickly touch and you will understand why.
Let Them Dry In A Paper Bag
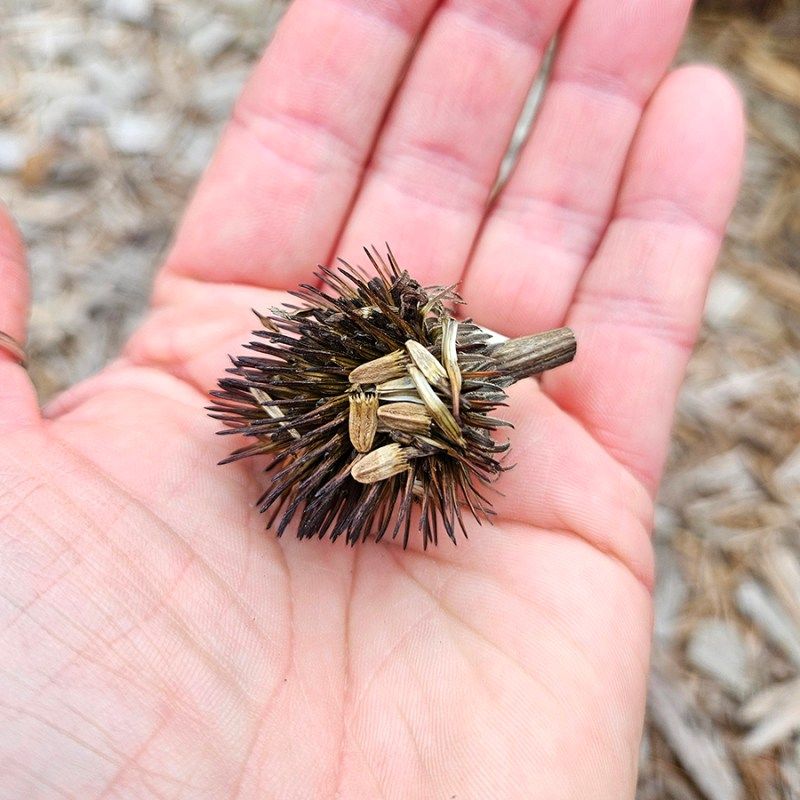
Brown paper lunch bags might be the most underrated garden tool around. They breathe, catch falling seeds, and cost only pennies.
Drop your cut seed heads into the bag cone side down. Loose seeds will gather neatly at the bottom as the heads dry.
Resist the urge to stuff the bag full. Crowded seed heads trap moisture and can turn musty quickly.
Five to eight heads per lunch bag is a comfortable amount. Larger grocery bags can hold more if you spread them out.
Plastic bags are a poor choice for drying. They hold in humidity and invite mold to move right in.
Fold the top over loosely or clip it shut. Write the plant name and date on the outside with a marker.
Set the bags somewhere cool and dry with steady air. A garage shelf, closet, or spare room usually does the job nicely.
Plan on waiting a few weeks, or even longer. Many Virginia gardeners let their bags sit until midwinter without any trouble.
Extra drying time actually helps you later. Seeds slip out much more easily once the cones are thoroughly crisp.
No bags handy? Spread the heads on a tray or old window screen instead, and give them a gentle shake now and then.
Rub The Cones To Release The Seeds
Now comes the fun part, and it feels a bit like opening a crunchy present. Grab a white plate or shallow bowl to catch everything.
Hold a dry cone over the plate and roll your thumb across the top. Seeds should loosen and tumble out with steady pressure.
Wearing gloves helps a lot here. Those spiky cones can feel like tiny cactus pads against bare skin.
Stubborn cones may need a little extra muscle. Try scraping the center with a butter knife or a sturdy spoon.
Another easy method involves a jar with a lid. Toss in several dried heads, close it tight, and shake hard for a minute.
Kids love helping with the shaking trick. It turns seed saving into a noisy, giggly family project.
Seeds hide down near the base of the brown spikes. Breaking the cone apart can reveal plenty tucked deep inside.
Work indoors on a calm table if possible. Even a small breeze can blow lightweight seeds and chaff across the room.
Each cone can hold dozens of seeds or even a few hundred. One handful of cones may give you more than you can plant.
Take your time and enjoy the process. A slow, steady rub gets more seeds out than a rushed, frantic one.
Tell Real Seeds From Chaff By Their Pointed Shape
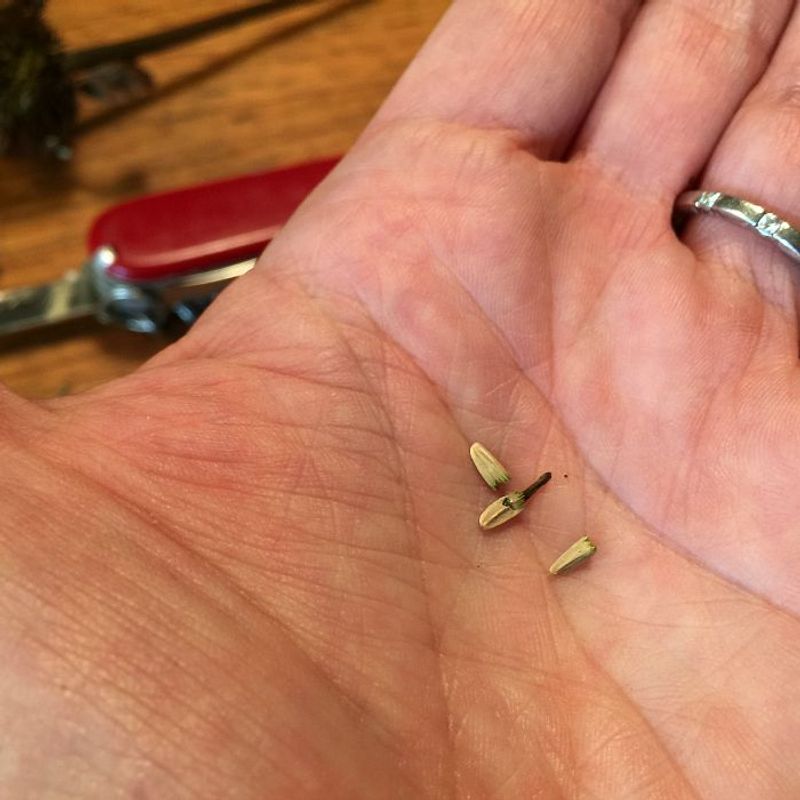
Picture a pile of crumbs and treasure mixed together on your plate. Sorting them out takes a sharp eye, but it gets easy fast.
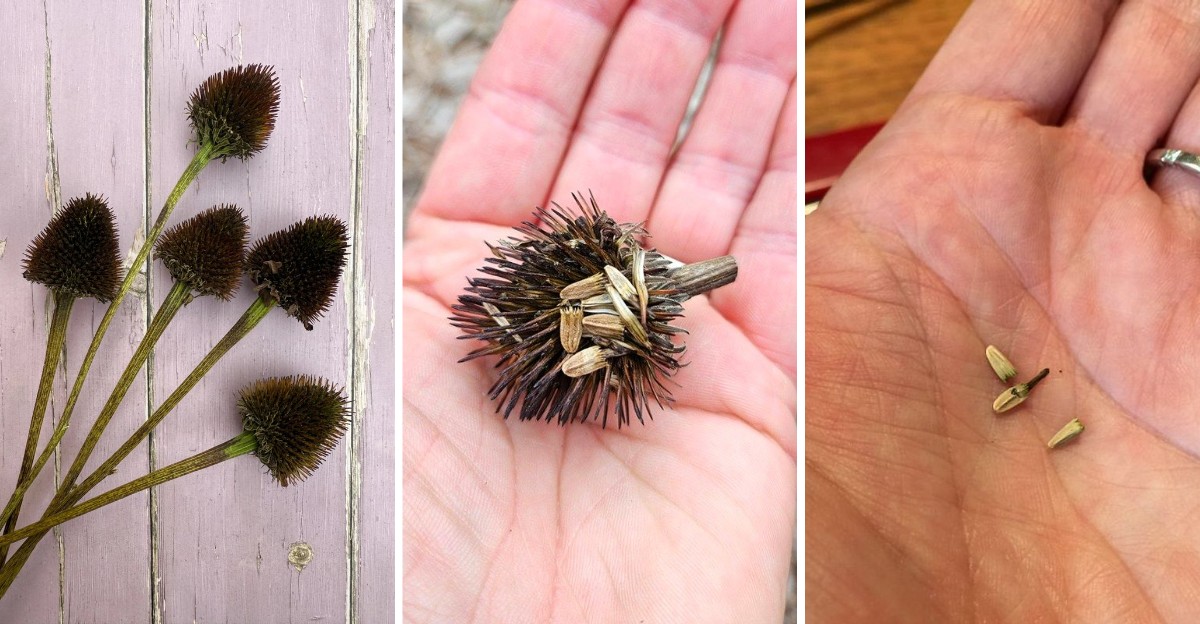
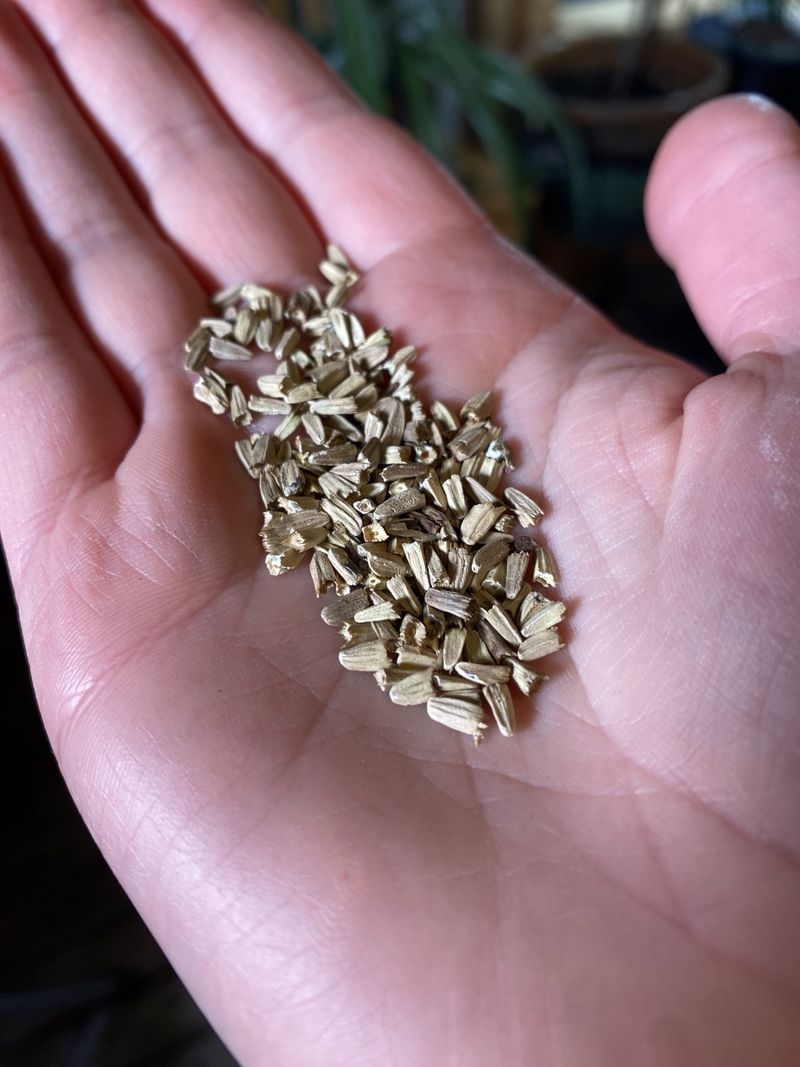
Real coneflower seeds are small, tan, and shaped like little pointed wedges. Many look like tiny cones or half ovals.
Look closely and you might spot a thin ridge down the middle. That ridge is a helpful clue you are holding a true seed.
Good seeds usually come in shades of tan, gray, or creamy white. They feel firm when you pinch them gently.
Chaff is the leftover junk from the cone. It tends to be dark brown or nearly black, with long needle-like spikes.
Spread everything out in a thin layer under good light. A magnifying glass makes the job even more interesting for young helpers.
Gently blowing across the plate can help too. Lighter chaff often drifts away while heavier seeds stay behind.
Flat, shriveled, or papery seeds likely will not sprout. Toss those out so your stored collection stays strong.
Perfection is not required here. A little chaff mixed in with your seeds will not harm them in storage or in the soil.
Think of yourself as a seed detective. Every sorted seed is a future flower waiting for its chance to bloom.
Store Seeds Cool And Dry In Paper Envelopes
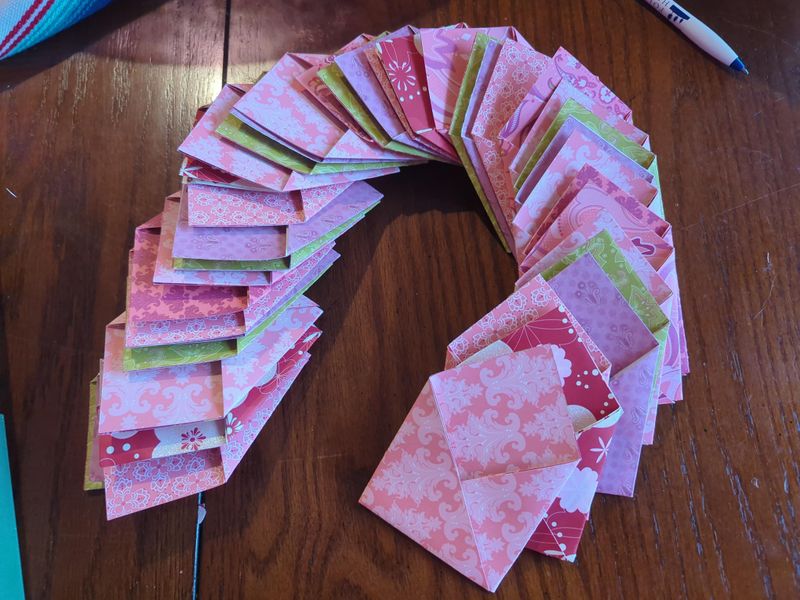
Grandma’s old recipe box might be the perfect home for your new seed stash. Cool, dry, and dark is what seeds like best.
Small paper envelopes are a smart choice for storage. They let leftover moisture escape instead of trapping it inside.
Before sealing, make sure seeds feel completely crisp. Leaving them on a plate for an extra day or two helps.
Label every envelope right away with a few key details. Write the variety, flower color, and the year you harvested.
Memory can play tricks by springtime. Clear labels save you from guessing which purple seeds came from which plant.
Tuck your envelopes into a box or tin. Then place them in a cool closet, basement shelf, or spare drawer.
Some gardeners keep seeds in the refrigerator. A sealed jar with a small silica packet keeps fridge humidity away.
Avoid warm spots like sunny windowsills or attics. Summer heat in attic can quickly weaken stored seeds.
Stored well, coneflower seeds can stay good for a couple of years. Fresher seeds tend to sprout more quickly and reliably, though.
Extra envelopes make wonderful little gifts too. Friends and neighbors will love a homemade packet of native wildflower seeds.
Sow Some Right Away In Fall
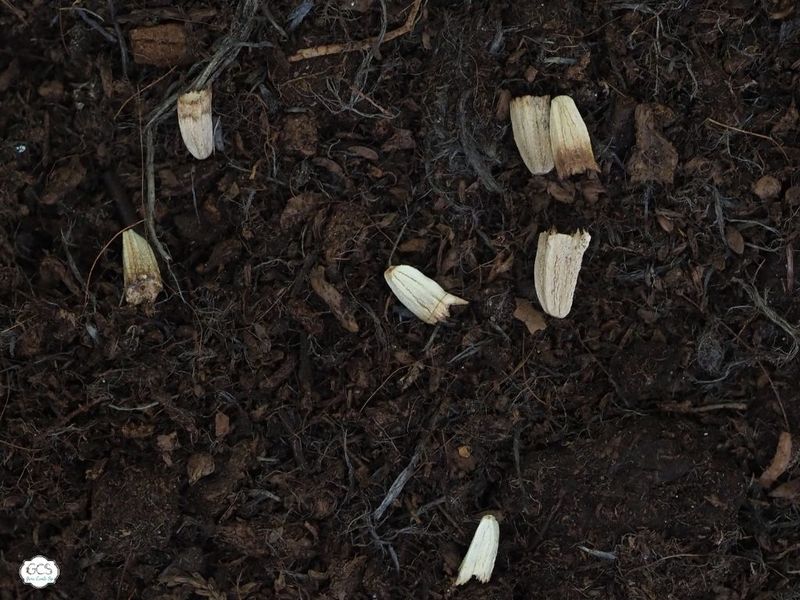
Winter does a lot of the hard work for you with this step. Coneflower seeds sprout better after a cold spell, and winter is happy to provide one.
Gardeners call that chilly rest period cold stratification. It tells the seed that winter has passed and spring is near.
Sowing outdoors in fall lets nature handle the whole process. Freezing nights and thawing days wake the seeds up on their own.
Choose a sunny spot with soil that drains well. Coneflowers dislike soggy feet, especially during wet winter months.
Rake the soil lightly to loosen the top layer. Then scatter seeds and cover them about one eighth to one quarter inch deep.
Press the soil gently with your hand afterward. Good contact between seed and soil helps them settle in for winter.
Water lightly to keep the area slightly moist. Too much water can wash seeds away or cause them to rot.
Try to plant before the ground freezes solid. Across most of Virginia, late October through November fits that window nicely.
Mark the spot with a small stake or label. Spring weeds and baby coneflowers can look alike at first.
Hold back some seeds in storage as backup. If fall sowing struggles, you will have extras to try again next year.
Leave Plenty Of Heads For Goldfinches
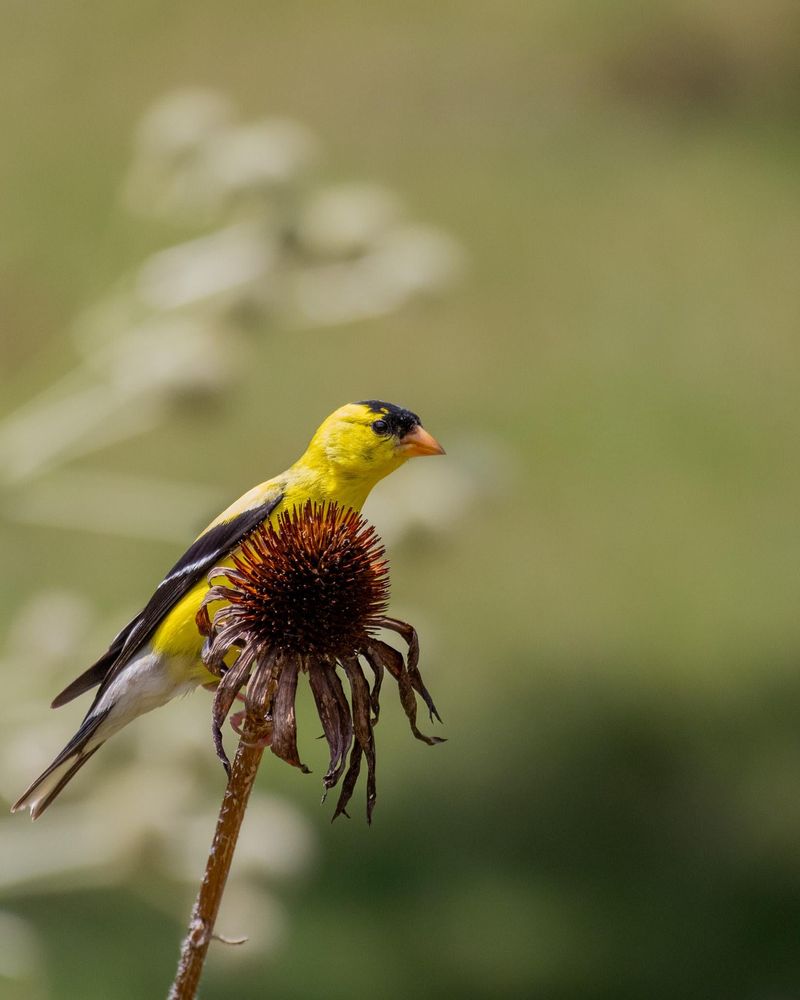
Flashes of yellow darting through your garden are a sure sign you did something right. American goldfinches adore coneflower seeds.
Watching them cling to a swaying cone is pure joy. They pluck seeds one at a time with quick, clever beaks.
Sharing your harvest gives local birds a natural snack. Fall and winter food can get scarce once flowers fade.
Try saving only about a third of your seed heads. Leave the rest standing tall for feathered visitors to enjoy.
Goldfinches are not the only guests who stop by. Chickadees, juncos, and sparrows may also peck around the plants.
Standing stems offer more than food, too. Some helpful insects spend winter tucked inside hollow plant stalks.
Fallen seeds may sprout on their own next spring. You might find surprise seedlings popping up around the parent plant.
Place a bench or chair near your coneflower patch. Morning coffee becomes way more exciting with a live bird show.
Many gardeners wait until late winter to cut back old stems. Tidying in early spring keeps food available through the cold months.
Your garden becomes a small wildlife haven this way. Birds get dinner, you get seeds, and everybody wins.
Expect Hybrids To Surprise You
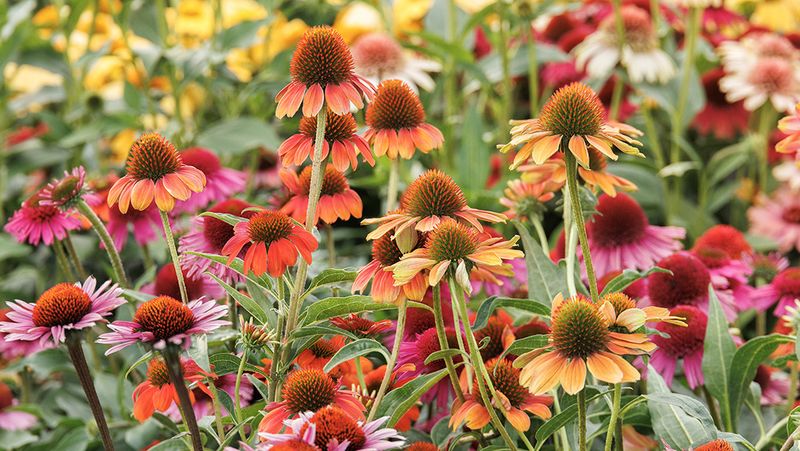
Planting hybrid seeds is a bit like opening a mystery box. You might get something lovely, or something totally unexpected.
Fancy coneflowers like Tomato Soup and Cheyenne Spirit are often hybrids. Breeders cross different plants to create those bold colors.
Seeds from hybrids rarely match their parent plants. A bright orange bloom might give you pale pink or muddy colored babies.
Some hybrids produce very few seeds at all. Many are sterile, so their cones may hold nothing worth saving.
Curious gardeners can still experiment for fun. Just plant those seeds with low expectations and an open mind.
Want reliable results instead? Stick with open-pollinated types like the classic purple coneflower, Echinacea purpurea.
Just keep in mind that bees mix pollen freely, so purple coneflowers growing near hybrids may give you surprise colors too.
Check old plant tags or store receipts if you are unsure. Named varieties with trademark symbols are usually hybrids.
Native coneflowers also tend to support pollinators best. Bees and butterflies across Virginia know exactly what to do with them.
Surprises can still be part of the fun. Who knows, your garden might grow a one-of-a-kind bloom worth bragging about.