How To Get Monstera To Climb: A Complete Guide
One of the most popular and beautiful climbers commonly grown indoors is the magnificent Monstera.
There are many Monstera plants, and it’s really hard to decide on the prettiest one. But if you aren’t looking for vining plants and you want to train Monstera to climb, there are some ways to do so.
It may seem challenging to train plants to climb, but if you have the right desire and some pro tips, it can be a lot of fun.
So, how to get Monstera to climb? The answer is pretty simple; just provide it with good support!
Let’s see what will help your Monstera climb and grow better than ever!
How To Get Monstera To Climb
Monsteras are epiphytes in their natural habitat, which means they cling to trees and climb.
Many other common houseplants, including pothos, grow the same way in the wild. Still, we typically grow them inside as trailing plants.
However, the Swiss cheese plant is much larger and heavier, so it would be too difficult to grow it as a hanging or trailing plant in most circumstances.
The indoor split-leaf Philodendron thrives with a support that actually serves as the tree – mimicking the natural environment.
However, this does not imply that a pole is essential. Without one, your Monstera deliciosa will still develop successfully. The primary goal of adding support is to help the plant grow upwards.
Now, let’s see how to get your Monstera to climb!
Encourage Growth
Before you even think of providing support for your Monstera to climb, you need to be sure that your plant is healthy and that you are encouraging it to grow.
If you adjust each aspect of plant care, I assure you your Monstera will climb and thrive more than ever.
Light
Despite the fact that this Monstera plant can thrive in low light, I advise using bright indirect light to help it develop more quickly and healthily.
Low light may prevent your deliciosa’s leaves from developing fenestrations.
For optimal results, place the plant near an east-facing window. Your Monstera will benefit from the morning sun and receive enough light during the day, while at the same time the direct sunlight won’t reach it.
You can put your Swiss cheese plant near a west or south-facing window, but you’ll also need to put up a sheer curtain to create partial shade.
Too much sunlight may burn the Monstera leaves and cause the soil to dry out faster.
Temperature
Although these houseplants can tolerate lower temperatures, you should never allow it to fall below 45°F to prevent any harm to your plant’s appearance.
The need for moisture increases with heat, so keeping the plant away from heat sources is crucial.
Given that the Philodendron Monstera is an indoor plant, placing it in the ideal location will promote its growth and encourage it to climb.
Humidity
Monstera plants enjoy moist air, just like other tropical plants.
You can use a humidifier, create a microclimate by grouping your houseplants together, or use pebble trays with water underneath the Monstera pot to do this.
Keep your Monstera deliciosa away from drafty regions that suffer from temperature fluctuations.
Air conditioners and heating vents could harm your Monstera with hot or cold air, so make sure not to place your plant near them.
Dry air may cause the leaves to curl and the aerial roots to dry out, which would stunt the growth of the Monstera.
This is important because your Monstera needs robust aerial roots to attach to the pole.
In the case of low humidity, you may notice the plant drooping.
Soil
Another crucial aspect of caring for this plant and helping it climb is selecting the proper potting soil mixture. The ideal potting mix contains peat for water retention, which will help you avoid underwatering your Monstera.
To really aid with your plants’ growth, you can also add peat moss and perlite.
Additionally, pick soil that drains effectively. A pot with drainage holes is a must as it will improve soil drainage and help you avoid dealing with an overwatered Monstera.
The required pH range of Monstera soil is 5.5–6.5. (alkaline pH).
Fertilizing
Although Monsteras don’t strictly require frequent feedings with a balanced fertilizer made for houseplants, they do benefit from them.
During the Monstera growing season, which is from spring through fall, fertilize it once or twice a month. Your Monstera plant needs a break after growing all summer, so avoid fertilizing it during the winter months.
You should resume fertilizing in the spring when you notice your Monstera displaying new growth.
Lack of nutrients will cause monstera plants to grow slowly and fail to produce new leaves and climb as intended.
In fact, this may be the cause of your Monstera leaves not splitting or ascending.
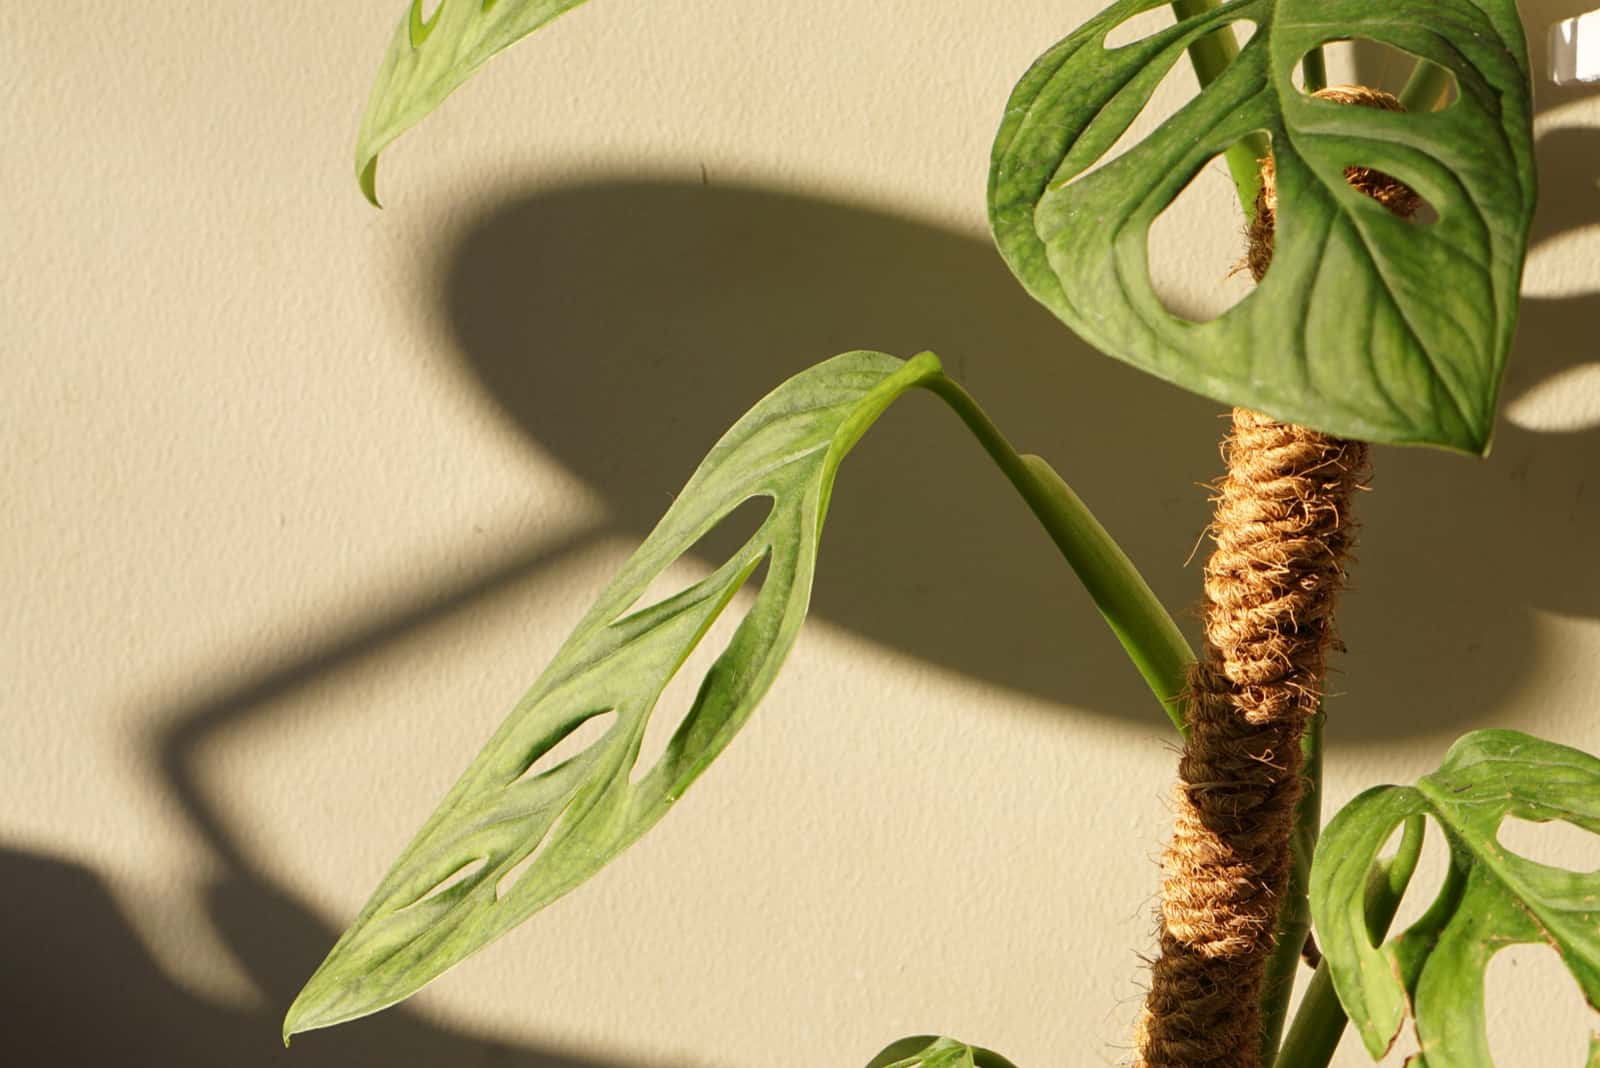
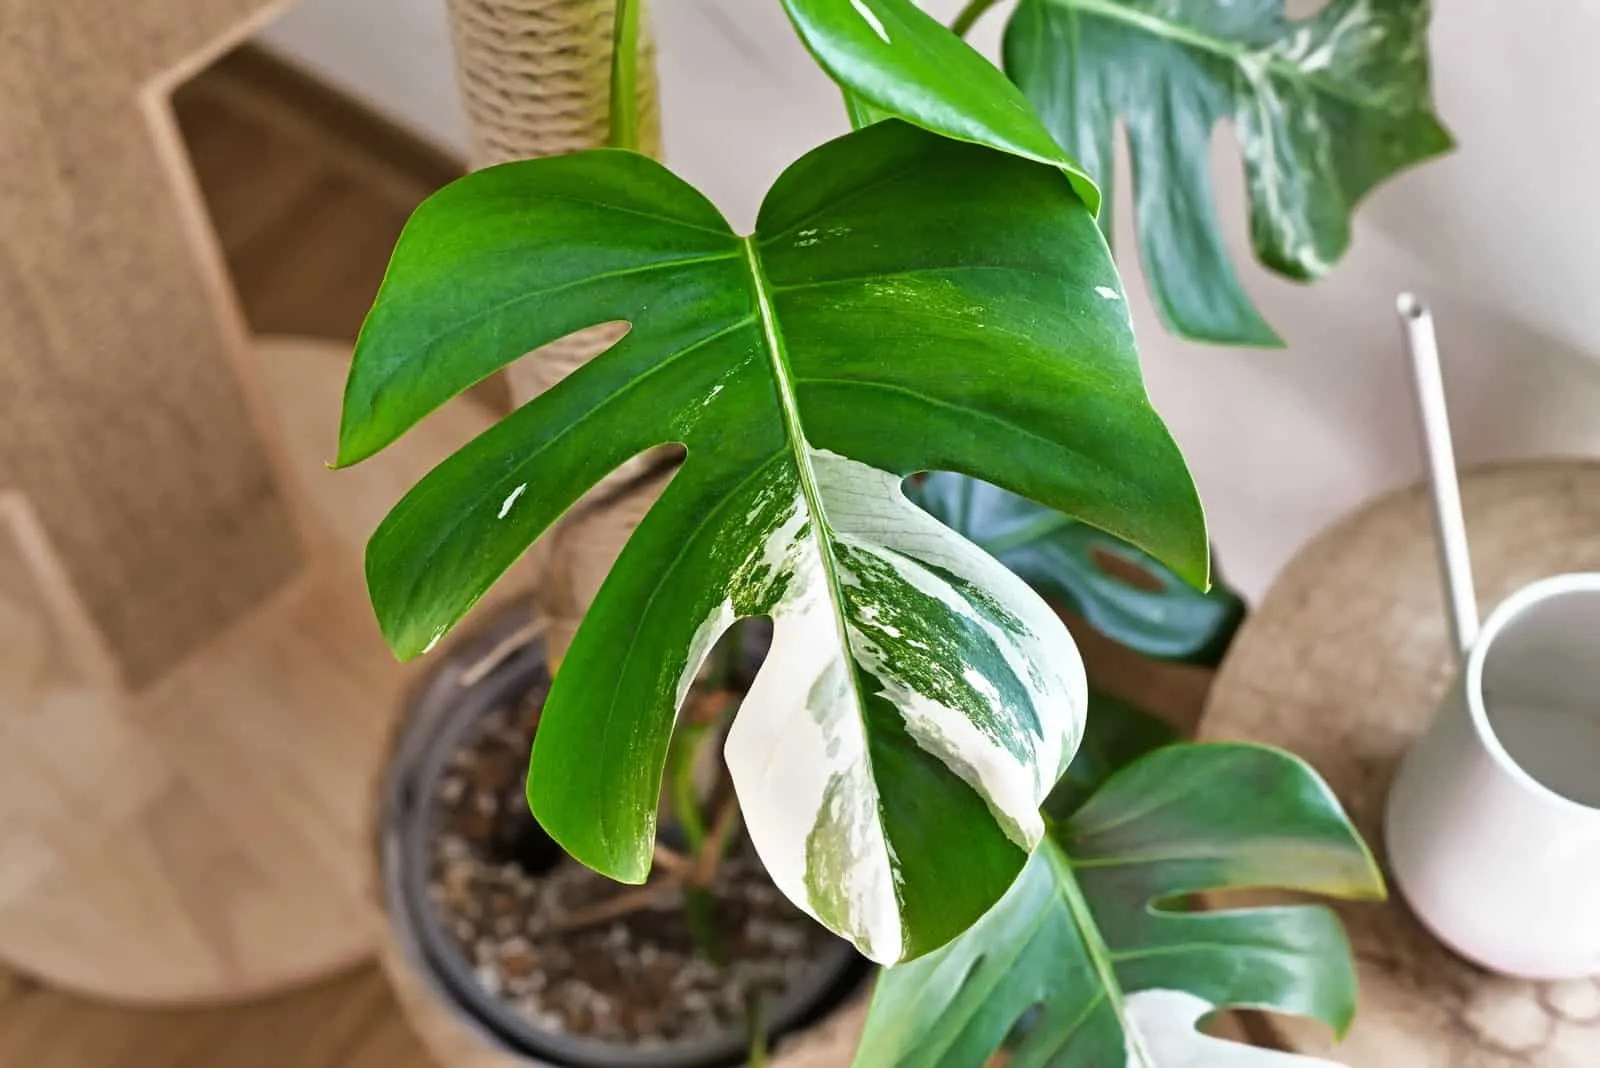
Attach The Monstera Deliciosa To The Moss Pole
Now that you have a healthy and thriving Monstera, the first thing you can use to help it climb is a moss pole.
This is actually the most popular type of climbing support, so let’s find out everything about the moss pole.
How To Make A Moss Pole
To make a moss pole, you’ll need to prepare sphagnum moss, some PVC pipe, string, twine, a bowl of water, and pruning shears.
Here are the steps for making a moss pole:
• Wet sphagnum moss: Pay attention to the quantity – the longer the pole, the more sphagnum moss you’ll need. Submerge it in water and let it soak for about 20 minutes.
• After soaking, squeeze out any extra water.
• Attach the sphagnum moss to the PVC pipe: Slowly attach the sphagnum moss to the pole with a long piece of string. Please don’t attach any sphagnum moss to the bottom of the pole as it will be buried in the soil.
You can also use hardware mesh, just cut it to make a cylindrical shape and put the sphagnum moss inside the mesh. Add a few stitches (plastic-covered wire) to close the mesh.
How To Secure Monsteras To A Moss Pole
Search for the heaviest Monstera stems because you’ll need to attach them first, then select the aerial roots.
It’s best to affix any large horizontally-growing stems to the stake to stop them from spreading further. Due to their lack of flexibility, the larger stems of your Monstera may require some more training time.
Start lightly tying the Monstera stem to the pole with garden ties or any similar product. The stem should be gradually pulled in the direction of your pole.
Check the stems from time to time, and when they begin to develop in that direction you can shorten the garden ties.
Although it requires effort, you can eventually direct the stems in the desired direction.
How To Extend A Moss Pole
For extending a pole made of sphagnum moss and hardware mesh, you’ll need more pre-soaked sphagnum moss, mesh, zip ties, and snipping tools.
Remove a little bit of the moss then cut the mesh cylindrically. You’ll need to overlap it in the same way your previous mesh is overlapped.
Now, tuck in the extension and find a few spots where you can tie the mesh.
It’s time to stuff the mesh! Add a little moss, stitch the mesh, and repeat until you have filled the entire mesh.
Here is a video if you are a more visual type:
How To Keep A Moss Pole Moist
You should keep the moss pole moist as your Monstera climbs up.
The simplest method for maintaining moss pole moisture and ensuring healthy plant development is to mist it occasionally.
When your Monstera deliciosa becomes thirsty, the sphagnum moss releases the water it has been holding in.
Mist the pole
If you live in a dry climate, you should spray your pole at least twice per week. A decent hygrometer can help you figure out exactly when.
Use a plastic bottle
You can also use the dripping water bottle technique, which only requires a plastic bottle, a needle, and some wire or tape.
It would be best if you first got your pole ready using the steps above, then take a plastic bottle and poke a few holes in it before placing it around the pole and adding water.
Use the wicking cord
Put the wicking cord in the pole after tying a knot in it (you want it to touch the bottom). Guide the rope down one side of the tube while holding it in place with your finger. Secure the rope to the pole with zip ties after cutting it to around 10 inches longer than the pipe.
The pole should be wrapped in the wicking cord and the bottom should also be tied. When watered, the string will spread the moisture to the moss and prevent it from drying.
Pay attention to the weather
Ideally you would keep your Monstera adansonii in indirect light so that it can still photosynthesize, but away from direct sun as it may burn the leaves and dry out the moss.
If the humidity is too low, the moss will dry out quickly. Consider getting a humidifier to reduce water evaporation and boost the amount of moisture in the air.
Keep your Monstera supported by a pole away from windy areas because they may also speed up moss drying.
Attach Monstera Plants To A Trellis
Another excellent support for your Monstera is a trellis. Although there are many alternatives to moss poles, a trellis should be at the top of your list.
How To Attach A Monstera To A Trellis
Use soft plant ties to fasten the thickest stems to the trellis. Cut up tights can also be used as a plant tie. The knot needs to be secure enough to retain the Monstera vine against the trellis, while remaining flexible enough to allow the vine to expand.
If you are worried about the plant ties ruining the aesthetics of your plant, you can use green ties or other colors similar to moss.
Attach the stems to the trellis at various points, positioning them 4 to 8 inches apart (this also depends on the stem height and weight).
When the aerial roots take the role of giving the vines an anchor to the trellis, feel free to remove the ties if you think they’re unsightly.
Prune any horizontal vines that sprout from the primary vines. This way, the main stem will be able to climb the trellis while encouraging the plant to create more vertical stems.
Mini Trellis For Mini Monstera
Although the Mini Monstera isn’t technically a Monstera, but rather a plant from the Rhaphidophora genus, it’s possible to support it by trellis or totem because it has the climbing habit of a ‘normal’ Monstera.
Here are the best DIY trellises for Mini Monstera plants:.
Tomato cages
Tomato cages are perfect trellis for a potted plant because they come in various sizes and hues. The method below explains how to utilize a tomato cage as a trellis:
Bend the stake ends of the tomato cage and make sure the ends meet in the middle. You can use a wire to fasten them.
Place the cage over your Monstera.
Plastic fences
A plastic fence is an excellent option for creating a trellis for tropical climbing plants. I’m sure plastic fencing is available at a gardening supply or hardware store nearby.
You can use the same technique you used for hardware mesh; cut the fencing wide enough to fit the Monstera pot and place it in there. Secure it with bamboo stakes or sticks.
Bamboo stakes
Another great technique for making trellises is by using bamboo stakes.
Select three bamboo stakes, connect their ends, and place them in the pot in the form of a tipi.
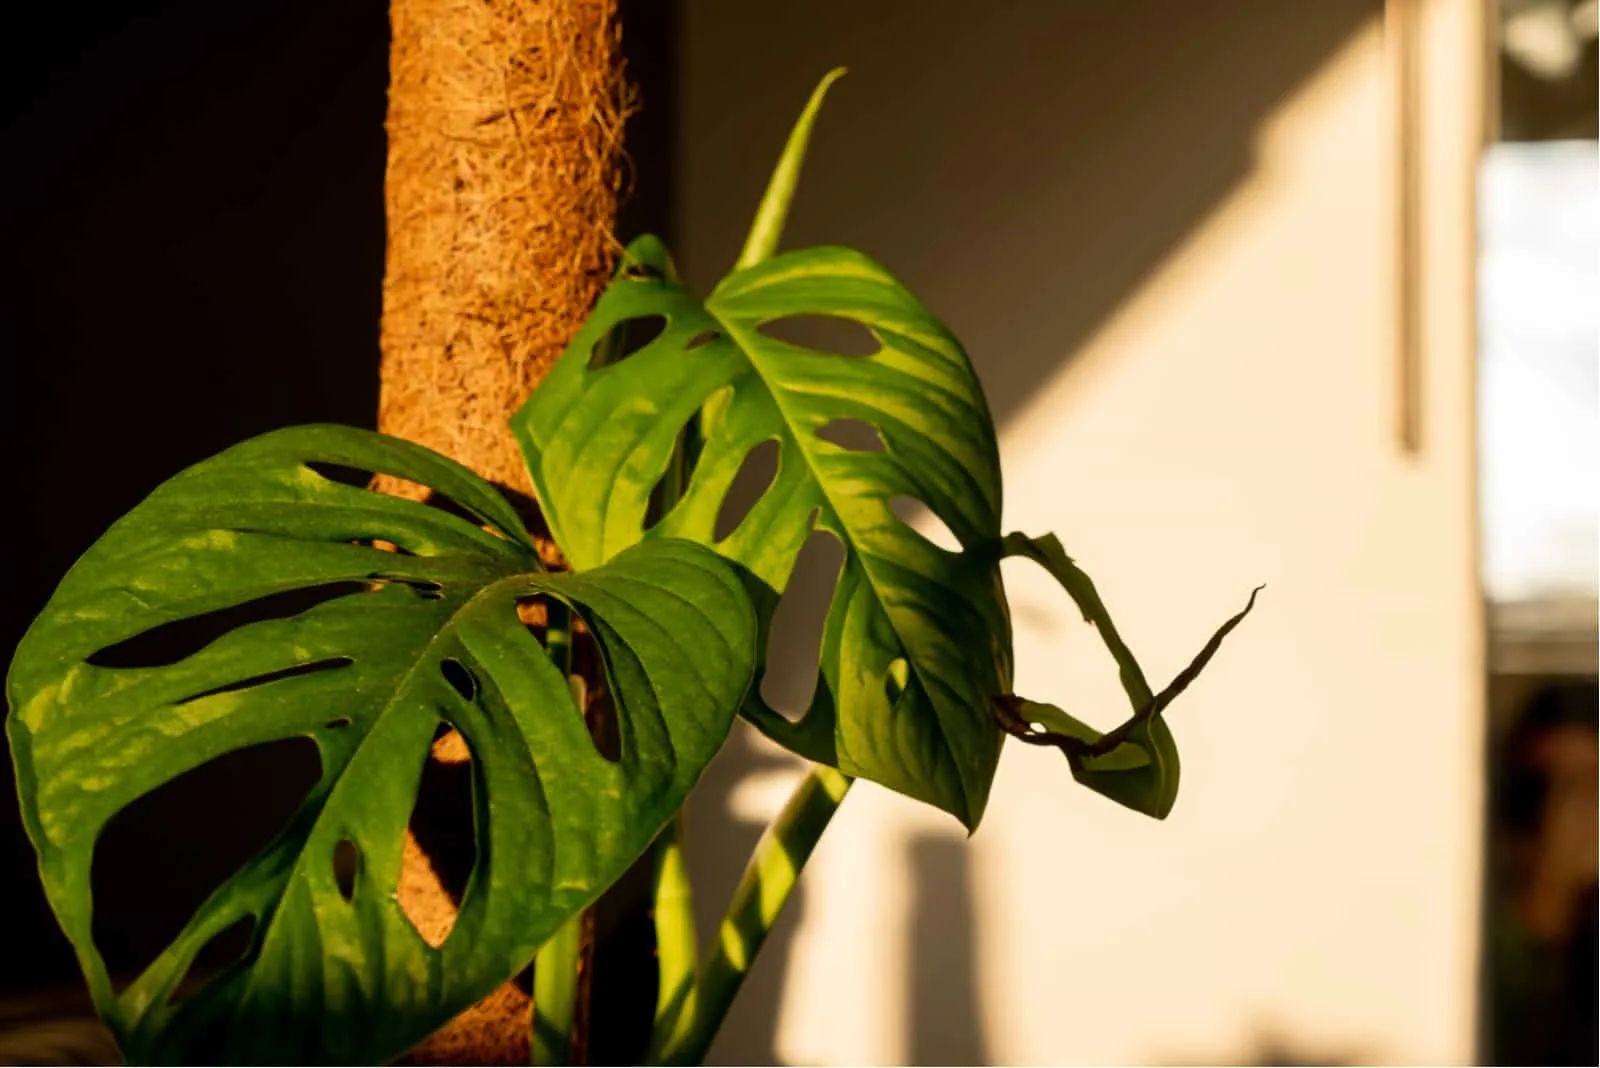
Coco Coir Pole
You can use coco coir as a support pole as it shares a lot of characteristics with dry sphagnum moss.
Although less so than sphagnum, coconut fiber still retains water and is resistant to decomposition.
Where it excels most, in my opinion, is in its accessibility and durability, and this is perhaps why it’s quickly becoming the standard material for moss poles.
Climbing Wall
Don’t let the name fool you – a climbing wall is just like a ‘normal’ wall, but used for a different purpose in this case.
How does this work? Your Monstera actually attaches itself to the wall as it climbs up it and spreads its vines along.
The great thing is that your Monstera can easily be trained to climb up the wall, and what’s even better is that this kind of growth looks spectacular.
Remember that a climbing wall is a more long-term solution than a moss pole as the plant may reach 10 feet tall and develop larger leaves.
When To Give Your Monstera A Pole
I mentioned that your Monstera adansonii would grow just fine without support, but that your plant may greatly benefit from it, so why not give it a chance?
Aerial Roots Growing
When aerial roots start to grow, your Monstera is mature enough and needs support quickly.
As your Swiss cheese plant matures, it develops aerial roots that grow over the edge of the container.
Many gardeners frequently trim aerial roots because they seem unsightly, but these roots are actually the indicators of healthy Monstera growth.
These roots serve as anchors to help the stem of your Monstera fix itself to the support structure and help the plant to climb.
If you support your Monstera by pole, the aerials roots will also draw moisture from the air and the pole, which helps the Monstera stay hydrated.
New Growth Occurs Horizontally
Horizontal Monstera growth isn’t a cause for concern.
However, as it requires less space and develops more like a tree, gardeners typically prefer to train their plants to achieve vertical growth.
I recommend staking your Monstera if you notice it growing outwards.
Arching Stems
As your Swiss cheese plant matures, it will produce larger and heavier foliage. The stems can’t support leaves that are too heavy, so they start bending.
This is dangerous because once the stems of your Monstera bend, the entire plant is likely to fall over (blame gravity).
The Monstera will keep growing in a downward, “vine-like” direction. Additionally, heavier Philodendron Monstera leaves have the potential to break stems and demolish plants.
If you ensure adequate support, your Monstera will climb and grow upwards.
How To Repot A Monstera With A Pole

For a few good reasons, repotting your Monstera is the ideal time to provide it with support and encourage it to climb.
To begin with, make sure the area of the pot where the pole will go doesn’t have any existing roots. When adding the support, you need to avoid injuring the Monstera roots.
However, it might be challenging to do so in a larger pot.
It may be pretty difficult for you to report your Monstera, considering their size, weight, and strong roots.
When choosing a pot for a Monstera, make sure it’s plastic (you can set it inside a more aesthetic pot later).
Plastic pots are lightweight, so moving and picking them up is much simpler. These pots can flex and bend, which makes it easier to remove a strong-willed root ball, unlike with pots made of terracotta or ceramics.
It’s easy to add a moss pole when replanting a Monstera, but if your plant is particularly large you might want to call your friend to come over for a drink – sorry, repotting!
Always choose a new pot that’s about one size larger than the old one. Too-large a pot is never a good choice for growing Monsteras.
The best time to repot your Swiss cheese plant is in spring, which is the beginning of the growing season. Remember that your plant has had a rest during the winter, and now it needs a fresh start.
Step-By-Step Guide For Repotting A Monstera
Here are the 4 steps for repotting a Monstera deliciosa with a moss pole:
1. You should first select the side of your Monstera that you want to support. Typically, the support is placed on the side of Monstera that isn’t becoming too heavy or uneven.
2. Prepare the pole and some well-draining potting soil for indoor plants.
3. Add enough soil to fill the bottom of the new pot.
4. Remove your split-leaf Philodendron from its current container and look for any diseased or damaged roots. You can also look for any roots you could use for propagation to get new plants.
5. If the root system is healthy, it’s time to place your Monstera in the new pot.
6. You should decide about the growth pattern for future development at this point.
7. If your Monstera grows horizontally, you can rotate the root ball to be more vertically oriented.
8. Once you are pleased with the position, begin filling both sides of the pot where you won’t add the pole with dirt. After you are finished, place the pole in the pot deep enough that the potting soil can hold it and help it stay firm.
It would be great if you had some help with this.
9. The soil around the moss pole should be completely filled in for stability. Give it a good soak, let it drain, and add more water if needed.
There you go – your Monstera is successfully repotted!
Now you can use the tips I showed you above for plant support.
Common Issues
Let’s look at the two most common issues you may encounter when helping your Monstera climb.
Pole Is Unstable
Remember that the pole needs to be stable, and placing it in the center of the pot is a great way to achieve stability.
If the pole is too close to the edge of the pot, it could quickly lose balance and your beautiful Monstera deliciosa would fall over.
Pole is Too Short
If the pole is too short, it will initially offer some support but you will eventually encounter the same problems you had before adding a pole.
The Monstera will begin to spread to the side and its aerial roots won’t have anywhere to develop.
When it comes to the size of the pole, the sky’s the limit, or ceiling to be more precise.
However, it doesn’t make sense to purchase (or create) a 5 feet tall pole while your Swiss cheese plant is still a baby.
It’s better to start with a shorter pole for young Monsteras and extend it later using the tips in this article.
Wrapping Up
Monsteras are climbing plants in their natural habitat, so if you add something to climb on you’ll get a Monstera just as pretty as the original one – only smaller.
Now you know how to get Monstera to climb, and I’m sure you found the method you’ll use.
Always take good care of your Swiss cheese plant, and it will reward you.
Good luck, and until next time!
Like this post? Share or pin it for later!