Grow Your Potatoes In Bags Of Soil And Get The Biggest Number Of Tubers Ever
There are certainly many innovative ways to grow your own veggies, which is a great thing since nothing tastes better than home grown crops.
When it comes to potatoes, one of the brilliant methods that ensures high yields in a small space is growing them in bags.
This method has become very popular because it doesn’t require any special equipment and you don’t have to be a master gardener to do it.
In this article, I’ll show you the entire process and explain why do potatoes grown in bags of soil have so many tubers.
Let’s get started!
Why Do Potatoes Do Well In Bags?
Before I describe to you how to grow potatoes in bags, I should tell you why this method works in the first place.
If you cultivate potatoes on large planting sites, it may be harder to ensure all suitable conditions, which can lead to issues later. Tilling, hilling, and watering become challenging and take a lot of time.
On the other hand, bags are inexpensive and allow us to get a high potato yield in a small space.
It’s easier to control the environment, and all you need to do is add water occasionally and fertilize in the middle of the growing season. This makes this method more suitable for novice gardeners.
Finally, harvesting bag-grown potatoes is easier because all you need to do is cut one side of the bag and take your veggies out!
Now, let’s see the complete guide to growing potatoes in bags!
Prepare The Soil Mix
The journey starts with preparing a suitable soil mix. You need to be careful with this one because the soil provides the proper nutrition essential for healthy potato development.
The most important factor to consider when it comes to potato soil is drainage and aeration. Remember, these veggies can’t withstand waterlogged soil, so you need to amend the soil with free-draining ingredients.
The porous texture will ensure unrestricted growth and prevent your potatoes from rotting.
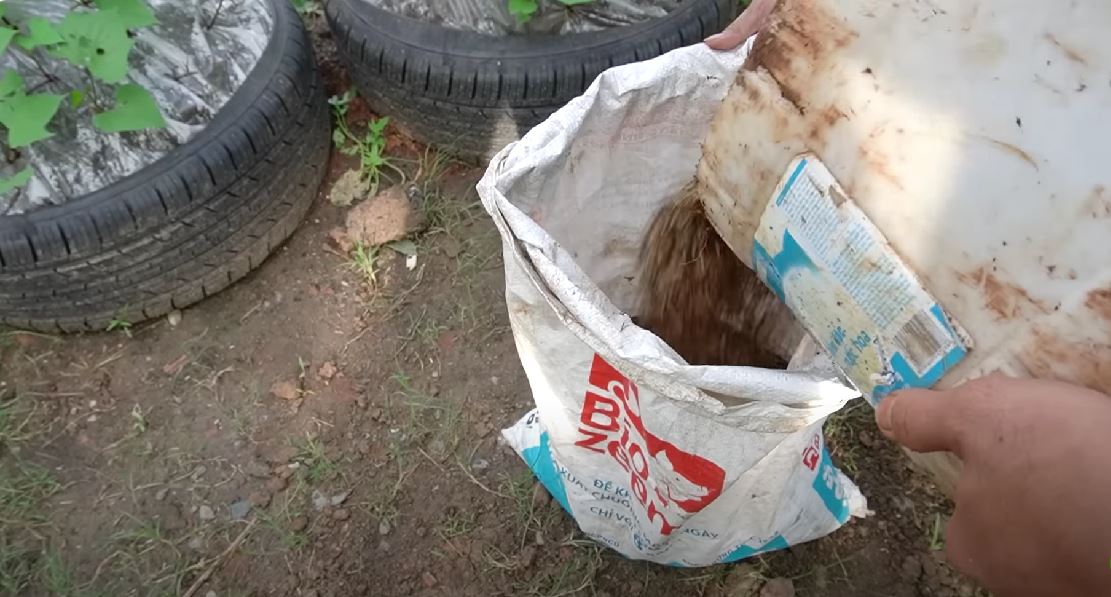
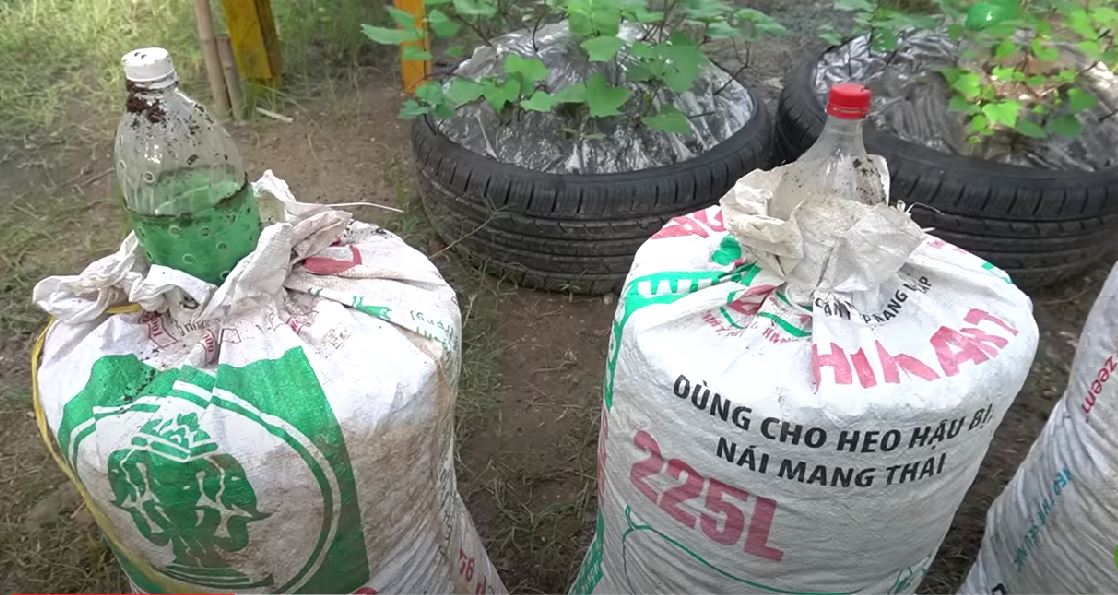
If you decide on growing potatoes in bags, the best combination of materials is soil + ash + rice husk + coir.
Mix all ingredients well and fill the bags halfway with the mixture.
The next step is to put a bottle in the soil so that we can add fertilizer later. You’ll need two bottles, each 2 liters.
Take the first bottle and remove the upper part (one-third). Now take the second bottle, remove the bottom part, and then insert the lower part of the first bottle.
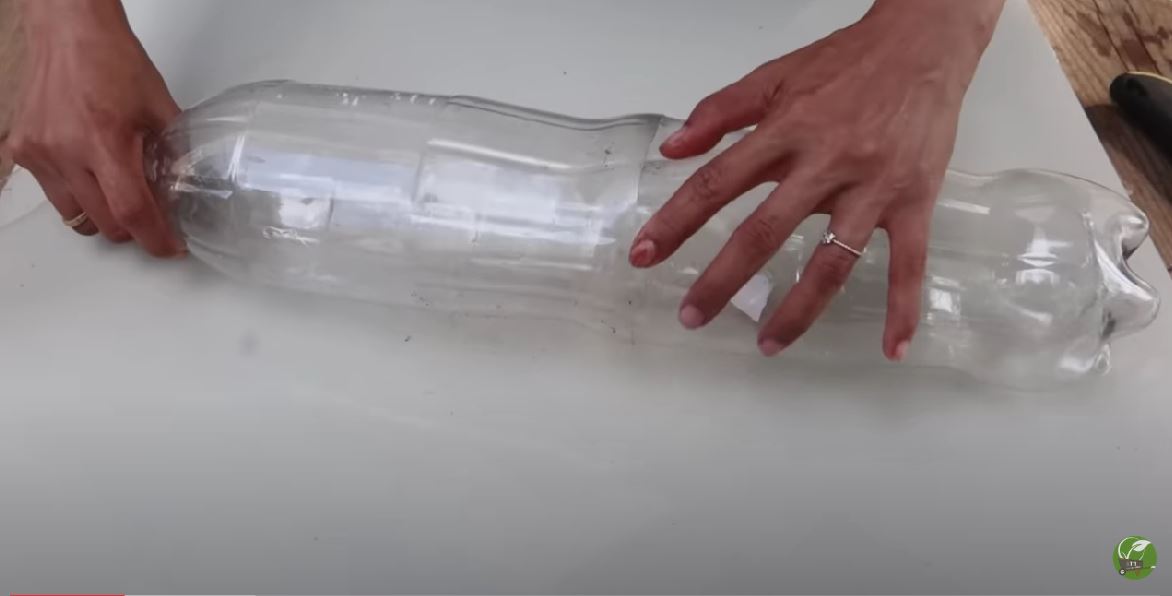
Drill holes all over the connected bottles and put the bottles in bags with the cap facing up. Add more soil and leave the upper third of the bottle uncovered. Secure the bag to the bottle using a thin rope or similar material.
Preparing And Planting Seed Potatoes
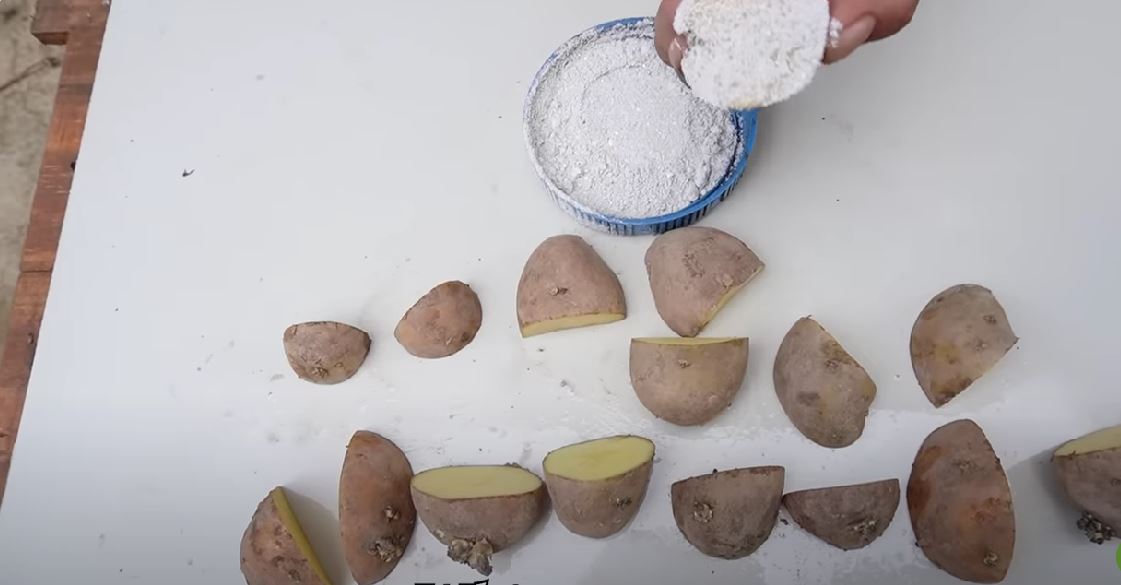
It’s time to prepare your seed potatoes by cutting them into pieces, making sure each piece has a few eyes.
Now take some white cement and dip each cut end into it.
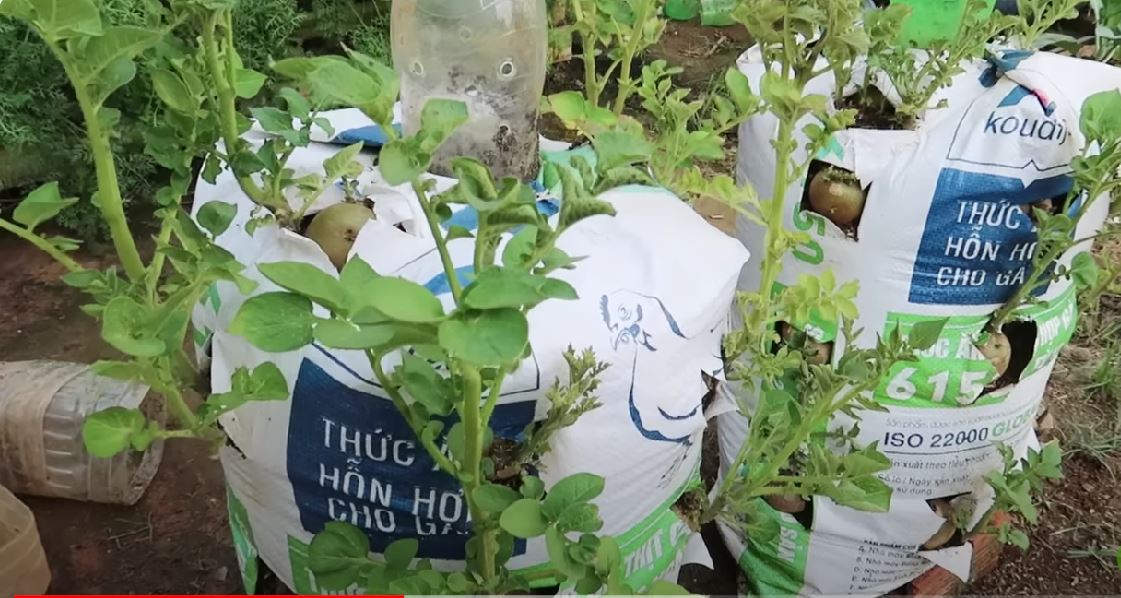
Planting time has finally come! Take a sharp pair of scissors and cut small holes in your bags, making sure there are a couple of inches between each hole.
Insert the cut ends of your potatoes in the holes (one cut end per hole).
You should notice new growth from the holes in approximately 10 days. It typically takes a month until potatoes reach close to full size.
Let’s see how to boost the growth of your bag-grown potatoes!
Fertilize Your Potatoes
Your potatoes need more nutrients at this point so you’ll need to add fertilizer. You should prepare some kitchen waste and organic powdered fertilizer.
Cut the kitchen waste into small pieces, add fertilizer over it, and mix everything together using your hands.
Take another 2-liter bottle, remove the upper and lower parts, drill holes, and put it on top of the bag.
Add the mixture of kitchen waste and fertilizer and pour water over it. That’s it; the soil will gradually absorb the well-needed nutrients and encourage your potatoes to mature.
Now you only need to be patient because it takes 3 months for the potatoes to be ready for harvest. In the meantime, inspect your veggies carefully for pests or diseases. This is what you should do no matter which method you use for growing potatoes.
Harvest
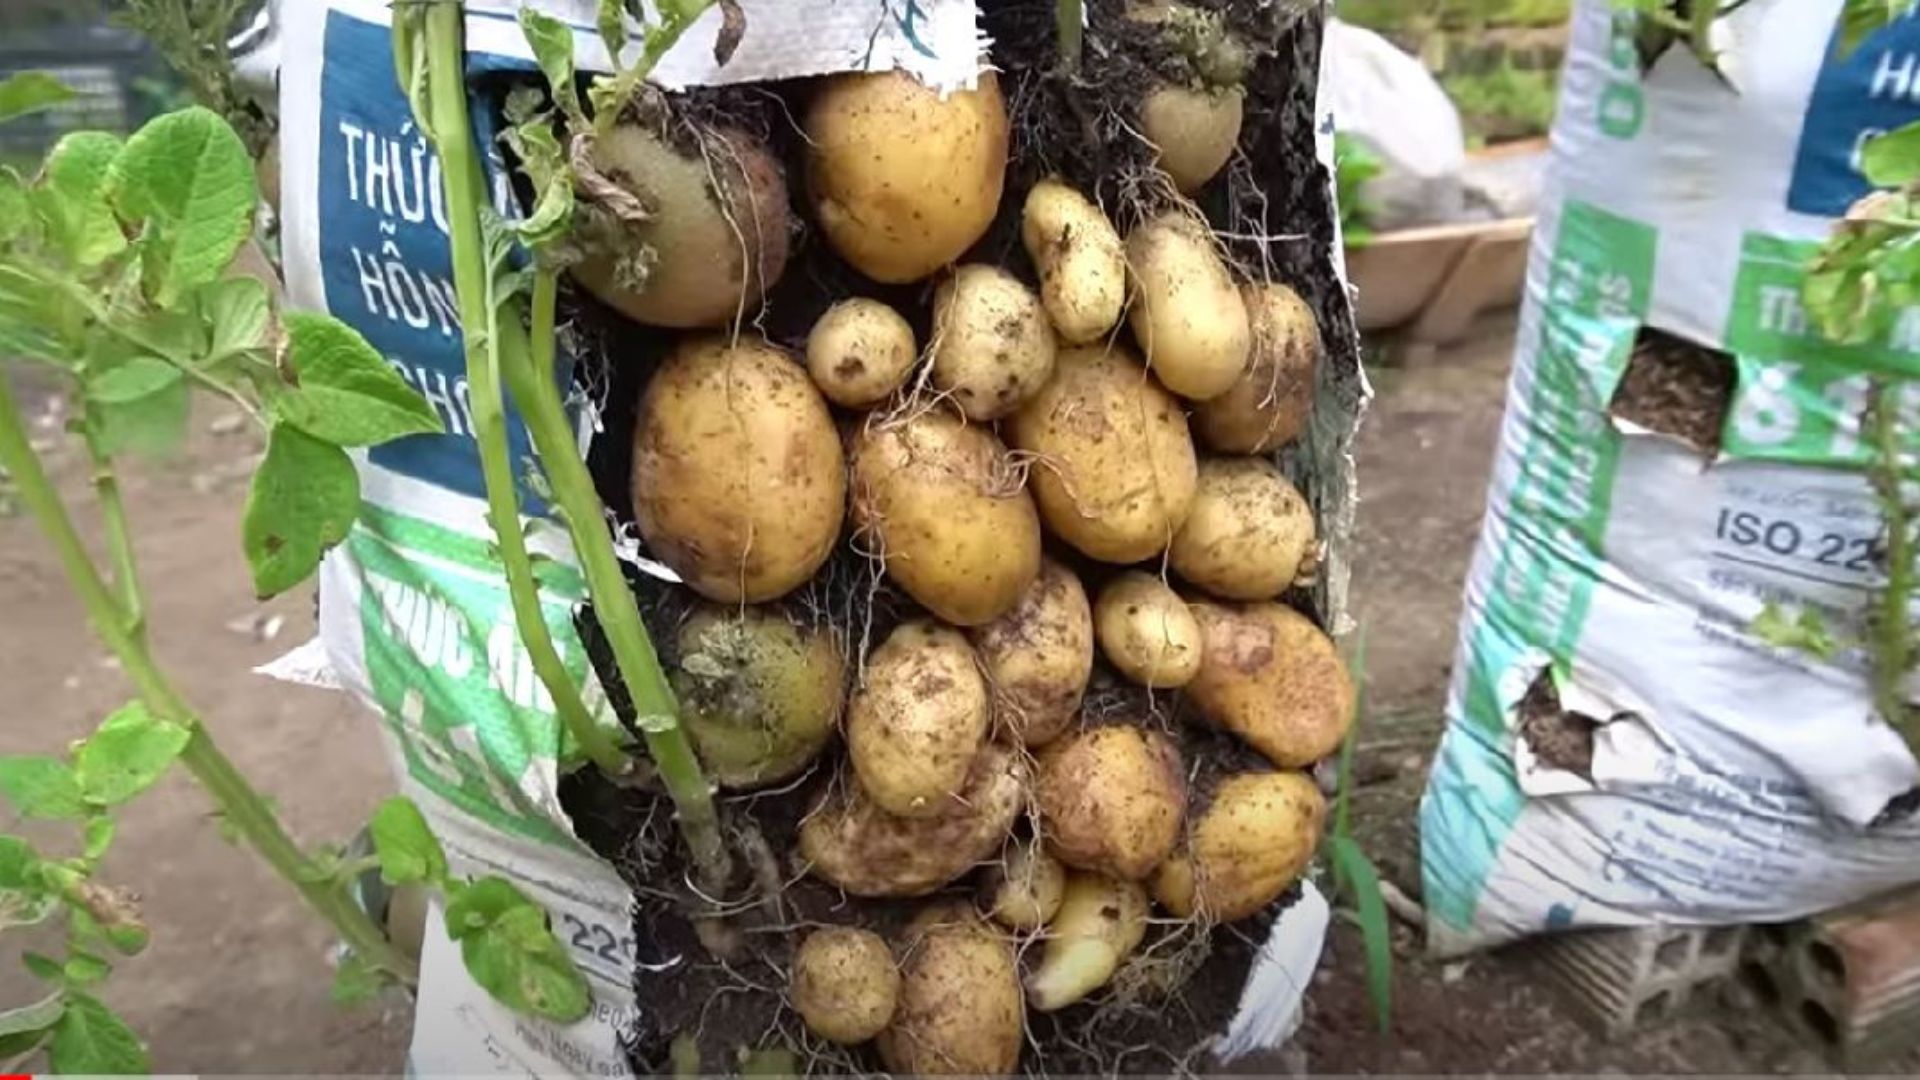
Now comes the best part, harvesting your bag-grown potatoes!
You only need a pair of scissors and a large bowl to put your potatoes in.
Simply cut your bag on one side until you expose the soil entirely. Start loosening the soil and take out your potatoes using your hands.
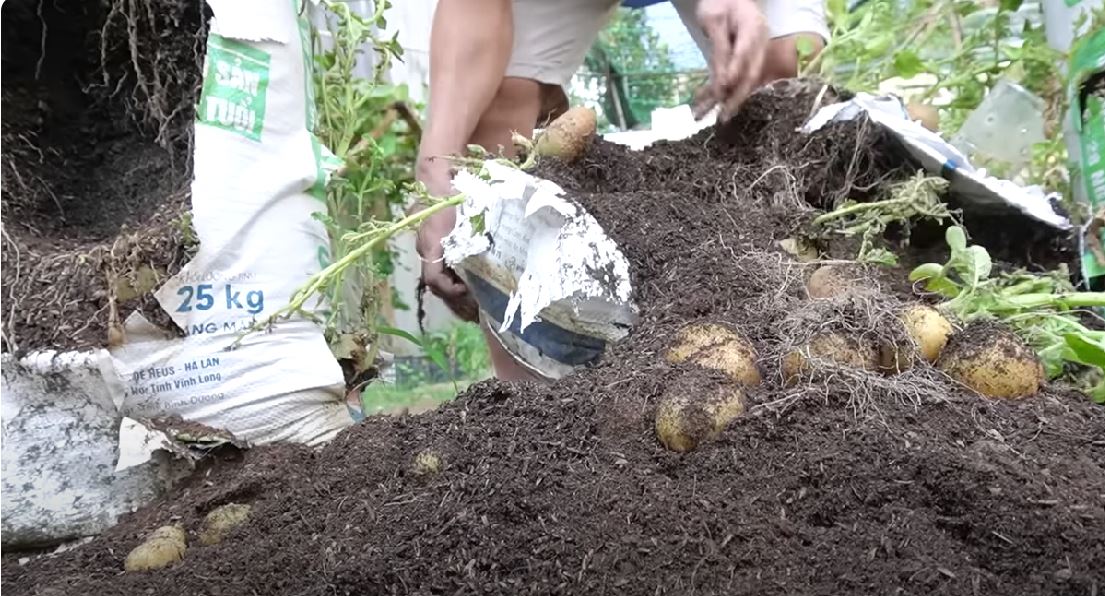
Get rid of the excess soil and remove all your potatoes from the stems. Put them in a large bowl, wash them thoroughly, and leave them to dry out well in bright indirect light.
In this video, you can find more detailed information about growing potatoes in bags:
I guess you know the next step! All you need to do now is enjoy the heavenly taste of your homegrown potatoes!