25 June Tomato Growing Tips For A Faster, Fuller Harvest And Mistakes To Avoid
June is the month that separates thriving tomato plants from struggling ones. The heat is building, the fruit is setting, and every decision you make right now carries real weight.
Skip the right step, and you could be staring at cracked fruit, stunted plants, or a harvest that never quite delivers. Get it right, and you’re looking at vines loaded with ripe, juicy tomatoes weeks ahead of schedule.
Most of the difference comes down to a handful of simple habits. Watering timing, pruning technique, fertilizer choices, none of it is complicated, but all of it matters.
These 25 tips will help you work smarter through the season and get more out of every plant you grow. Some will surprise you. A few might even change how you garden for good.
Choose Early-Maturing Tomato Varieties

Not all tomatoes are created equal when it comes to speed. Early Girl matures in 50 to 62 days, while Celebrity clocks in around 70 to 75 days with impressive disease resistance.
Choosing fast-maturing varieties is one of the smartest June tomato growing tips you can act on right now. You get fruit sooner and avoid late-season blight that hits slower growers hard.
Heirloom varieties are beautiful, but most of them take 80 days or more to reach the table. If a faster harvest is the goal, stick with modern hybrids bred specifically for speed and disease resistance.
Check the seed packet or plant tag for the “days to maturity” number. Anything under 75 days is a solid choice for a faster, fuller harvest this season.
Get Your Seeds Started 6 To 8 Weeks Before The Last Frost

Timing is everything when you start from seed. Getting your seeds going 6 to 8 weeks before the last frost gives roots a serious head start before outdoor conditions are ready.
A heat mat set to around 75 degrees Fahrenheit speeds up germination noticeably. Most tomato seeds sprout within 5 to 10 days under those warm conditions.
A good grow light makes just as much difference as a heat mat. Seedlings started on a bright windowsill often stretch toward the light and come out leggy, a dedicated grow light keeps them compact and strong from day one.
Skipping this window means your plants hit the garden too young and too small. Starting on schedule puts you weeks ahead of gardeners who sow directly outdoors.
Pick Stocky Seedlings At The Nursery

That tall, leggy seedling at the nursery might look impressive, but it is actually a warning sign. Stretched stems mean the plant was reaching desperately for light and is already stressed.
A stocky seedling with a thick stem and dark green leaves is built tough. It will adapt to your garden faster and start producing fruit much sooner than a weak transplant.
Blooming seedlings are another one to skip. A plant already pushing flowers in a small pot is putting energy into reproduction before its roots are ready to support it.
Run your fingers gently along the stem before buying. Firm and sturdy wins every time over floppy and fragile.
Warm The Soil Before Transplanting

Cold soil slows everything down for tomatoes, and warm soil is like rocket fuel for root growth. Laying black plastic mulch over your beds a week or two before transplanting can raise soil temperature by 5 to 9 degrees.
That extra warmth encourages roots to spread quickly and helps plants settle in without transplant shock. Tomatoes planted into pre-warmed soil often outpace those planted into cold ground by weeks.
If black plastic is not available, red or infrared-transmitting plastic mulch is a solid alternative that warms soil similarly and keeps weeds in check. Either way, the goal is the same: give your roots a warm welcome from day one.
Leave the plastic in place through the season for added weed suppression. It is one of the easiest performance upgrades in the garden.
Plant In A Sunny Spot

Tomatoes are sun-hungry plants that need at least 6 to 8 hours of direct light each day. Without it your plants will grow slowly, flower poorly, and produce far less fruit than they should.
Scout your yard at different times of day before choosing a planting spot. Shadows from fences, trees, or buildings shift throughout the season and can steal more sun than you expect.
Container growers have an advantage here. A pot on wheels means you can follow the sun around your patio and keep your plants in the best light all season long.
South-facing beds typically get the most consistent light in North American gardens. Giving your plants that premium sun real estate pays off in a noticeably bigger harvest.
Bury The Stem Deep When Transplanting

Tomatoes have a superpower most vegetables lack: they can grow roots all along their buried stems. Planting your transplant deep, up to two-thirds of the stem underground, creates a much bigger root system fast.
More roots mean better water and nutrient uptake, which directly translates to stronger growth and heavier fruit production. This trick works especially well with leggy seedlings that need a second chance.
Trenching is another option for very tall transplants. Instead of digging straight down, dig a shallow horizontal trench and lay the stem on its side, bending only the top few inches upward. The buried stem roots just as effectively.
Strip off any leaves that would end up underground before planting. Your tomato will reward that extra effort with noticeably thicker, more vigorous growth above the soil line.
Give Your Plants Room To Breathe

Crowding tomatoes is one of the most common mistakes home gardeners make. When plants are jammed together, air cannot circulate properly and fungal diseases spread like wildfire through the foliage.
Indeterminate varieties need at least 3 feet between plants, while determinate types can get by with 2 feet. That breathing room makes a real difference in plant health through the hot, humid months.
Raised bed gardeners often underestimate how much space tomatoes actually need. A 4×4 bed might feel generous in spring, but by July two indeterminate plants will fill every inch of it.
Proper spacing also means more sunlight reaches the lower leaves, improving photosynthesis across the whole plant. Give your tomatoes room to breathe and they will grow like they own the place.
Add Organic Mulch Around The Base

A 2 to 3 inch layer of straw, shredded leaves, or wood chips around your tomato base does more work than most gardeners realize. Organic mulch holds soil moisture in during heat waves and keeps roots cooler on scorching summer afternoons.
It also breaks down slowly, feeding beneficial soil microbes that support healthy plant growth. As a bonus, thick mulch suppresses weeds that would otherwise compete for water and nutrients.
Keep mulch a few inches away from the main stem to prevent rot. This simple habit can cut your watering frequency nearly in half during dry spells.
Water Deeply And Less Often

Daily shallow watering trains tomato roots to stay near the surface, making plants vulnerable to drought stress. Deep, infrequent watering encourages roots to chase moisture deeper into the soil where it stays longer.
Aim to soak the soil to at least 6 inches deep during each watering session. Stick your finger or a screwdriver into the ground to check how far the moisture has actually reached.
Deep-rooted plants handle summer heat and dry spells far better than shallow-rooted ones. Switching to this approach is one of the fastest ways to build more resilient, productive tomato plants.
Water At The Base

Wet foliage is an open invitation for fungal diseases like early blight and Septoria leaf spot. Both of those problems spread rapidly in moist conditions and can strip a plant of leaves within weeks.
Watering at the base keeps the leaves dry while delivering moisture directly to the root zone where it belongs. This one habit alone can dramatically reduce disease pressure through the summer months.
If you must use a sprinkler, run it in the morning so leaves dry before evening. Consistently dry foliage is one of the best defenses you have against common tomato diseases.
Use Drip Irrigation

Drip irrigation might sound like a fancy upgrade, but basic systems are surprisingly affordable and easy to set up. A simple soaker hose or drip line delivers water slowly and steadily right to the root zone.
Consistent moisture is the secret weapon behind crack-free, evenly sized tomatoes. Uneven watering is actually one of the leading causes of blossom end rot and split fruit in home gardens.
Pair a drip system with a basic timer and your watering becomes nearly automatic. That kind of reliability frees up your time and keeps your plants happier than hand watering ever could.
Keep Watering Consistent

Blossom end rot shows up as a dark, sunken patch on the bottom of your tomatoes, and inconsistent moisture is almost always the culprit. Calcium cannot move into developing fruit properly when the soil swings between too dry and too wet.
Cracked fruit tells the same story from a different angle. A dry spell followed by sudden heavy watering causes the inside of the tomato to expand faster than the skin can handle.
Both problems are largely preventable with a steady, predictable watering schedule. Mulching heavily between sessions helps buffer those moisture swings on the days you cannot get to the garden.
Change Your Fertilizer Once Flowers Appear

Nitrogen is fantastic for building lush green foliage early in the season, but too much of it after flowering sends the wrong message to your plant. Excess nitrogen tells the tomato to keep growing leaves instead of putting energy into fruit.
Once you spot those first yellow flowers, switch to a fertilizer with a lower first number, like a 5-10-10 formula. The higher phosphorus and potassium support flower development and fruit set instead of leafy growth.
This swap is one of the most impactful June tomato growing tips for boosting actual yield. Fewer leaves, more tomatoes: that is the goal from this point forward.
Add Calcium To Your Soil Before Problems Start

Calcium deficiency is one of the sneakiest problems in the tomato garden. It does not show up until fruit is already forming, and by then the damage is done.
A soil test before planting is the smartest first step. It tells you exactly what your soil is missing before your tomatoes pay the price.
Consistent watering matters just as much as soil prep. Calcium travels through the plant via water, so erratic moisture means erratic delivery straight to your developing fruit.
Lime, bone meal, and crushed eggshells are all solid organic sources of calcium worth adding at planting time. Work them into the soil a few weeks early so they have time to break down before your plants need them.
Pinch Off Suckers

Suckers are those sneaky little shoots that sprout in the V-shaped crotch between the main stem and a side branch. Left alone on indeterminate varieties, they grow into full branches and compete with existing fruit for the plant’s energy.
Pinching them off while they are small, under an inch long, keeps the plant focused on ripening the tomatoes already on the vine. A clean pinch with your fingers works perfectly for young suckers.
Do not remove suckers on determinate varieties, which set all their fruit at once. Knowing which type you are growing is the first step to pruning correctly.
Strip The Lower Leaves And Let Your Plants Breathe

The leaves closest to the ground are the first to get splashed with soil during rain or watering, and soil carries fungal spores. Removing the bottom 12 inches of foliage creates a buffer zone that dramatically slows disease spread.
Better airflow through the lower canopy also keeps things drier, and dry conditions are the enemy of most fungal pathogens. This quick pruning step takes only minutes but protects your plants for weeks.
Use clean scissors or pruners and make smooth cuts to avoid tearing the stem. Healthy plants stripped of their lower leaves tend to look tidier and perform noticeably better through the season.
Stake Or Cage Plants Early

Waiting until your tomato plant is flopping over to add support is like putting on a seatbelt after the crash. Installing cages or stakes when plants are still small prevents stem damage and sets up a structure the plant grows into naturally.
Heavy-gauge wire cages work best for indeterminate varieties that can reach 6 feet or taller. Wooden stakes driven 12 inches into the ground give excellent support for single-stem trained plants.
Early support also makes tying and training much easier as the season progresses. A well-supported plant stays upright, gets better light, and produces cleaner, easier-to-harvest fruit.
Choose Disease-Resistant Varieties

Those letters after a tomato variety name are not random. V stands for Verticillium wilt resistance, F for Fusarium wilt, N for nematodes, and T for Tobacco mosaic virus.
Varieties carrying multiple resistance codes are bred to handle the soil-borne and foliar diseases that quietly devastate unprotected plants season after season. The more letters, the broader the protection.
Look for these codes on the plant tag or seed packet before you buy. Spending an extra 30 seconds reading a label can save you an entire season of frustration.
Catch Problems Early Before They Spread

Catching problems early is the difference between a minor setback and a total loss. Early blight starts as small brown spots with yellow halos, usually on the lowest, oldest leaves first.
Hornworms, aphids, and flea beetles can do surprising damage before you even notice them. Getting into the habit of checking plants two or three times a week lets you catch infestations while they are still manageable.
Flip leaves over during your checks, since many pests hide on the undersides. Early action almost always means a simpler, less chemical-intensive solution than waiting until damage is severe.
Remove Any Rotten Or Damaged Fruit

A single rotting tomato left on the plant becomes a breeding ground for mold, bacteria, and insects. Those problems spread to neighboring fruit and foliage faster than most gardeners expect.
Pull off any cracked, diseased, or overripe fruit as soon as you spot it during your regular garden checks. Drop it into a bag and toss it in the trash rather than the compost pile to avoid spreading pathogens.
Keeping the plant clean of damaged fruit also redirects energy toward healthy developing tomatoes. This one simple habit keeps your harvest cleaner and your plants healthier deep into the season.
Harvest At The Breaker Stage

The breaker stage is that moment when a tomato shifts from solid green to showing the first blush of color, whether pink, orange, or yellow. At this point, the fruit has already reached full size and has stopped taking nutrients from the plant.
Picking at the breaker stage removes weight from the vine and frees up the plant’s resources for the remaining green tomatoes. Those breaker-stage fruits will finish ripening beautifully off the vine at room temperature.
This strategy can meaningfully increase your total harvest by keeping the plant productive longer. Fewer heavy fruits on the vine means more energy going into the next wave of tomatoes.
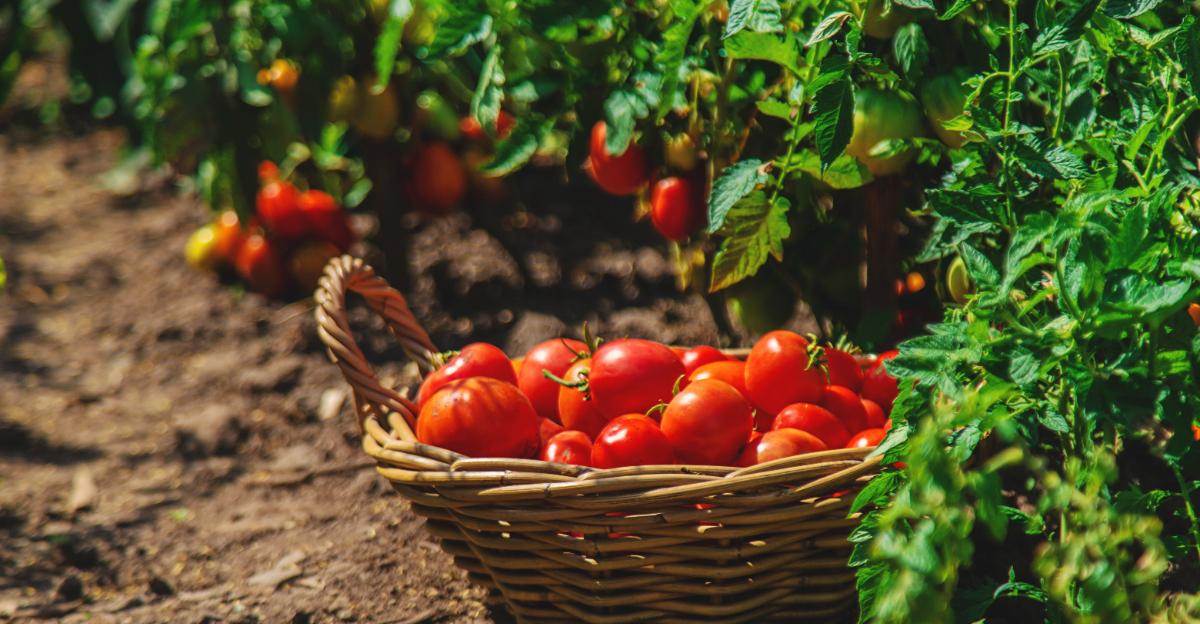
Pick Ripe Tomatoes Daily

Hot weather accelerates the ripening process and shortens the window between perfect and overripe. A tomato that looks ideal in the morning can be splitting and soft by evening when temperatures are above 90 degrees.
Daily harvesting during heat waves keeps rot from taking hold and signals the plant to keep producing. Leaving ripe fruit on the vine too long also attracts insects and birds that damage nearby healthy tomatoes.
Grab a basket and do a quick sweep of your garden every morning during peak summer heat. That 5-minute habit protects your harvest and keeps the whole plant more productive.
Harvest In The Afternoon For The Best Flavor

Tomatoes build up sugars throughout the day as they photosynthesize in the sun. Picking them in the afternoon, after several hours of warmth, means you are harvesting fruit at its peak sugar concentration.
Morning-picked tomatoes tend to taste slightly less sweet because overnight temperatures cause some sugar to convert back into starch. That flavor difference is subtle but noticeable once you start paying attention.
Afternoon harvesting is a small habit with a genuinely tasty payoff. If you want your homegrown tomatoes to taste as good as they possibly can, timing your picks matters more than most people realize.
Top Indeterminate Plants In Late Summer

Topping means cutting off the main growing tip of an indeterminate plant, and it is one of the best late-season moves you can make. By stopping upward growth, you redirect all of the plant’s remaining energy toward ripening existing fruit before frost arrives.
Do this about 30 days before your expected first frost date for the biggest impact. Remove the top few inches of the main stem just above a leaf set using clean, sharp pruners.
Any new flowers that form after topping will not have time to produce harvestable fruit anyway. Topping focuses the plant on finishing strong rather than chasing growth it cannot complete.
Ripen Tomatoes On The Counter, Not In The Fridge

Refrigerating tomatoes is one of the most common and most damaging mistakes home growers make. Cold temperatures break down the cell walls and destroy the enzymes responsible for that rich, complex tomato flavor.
Breaker-stage tomatoes placed on a countertop at room temperature will ripen fully within 3 to 5 days. Keep them stem-side down and out of direct sunlight for the most even, flavorful results.
These June tomato growing tips come full circle right here at harvest time. The care you put in all season long deserves a finale of genuinely delicious, room-temperature-ripened tomatoes that taste exactly the way summer should.