Best Philodendron Birkin Propagation Methods + Pro Tips
Philodendrons are by far the most common houseplants, but some species are more common than others.
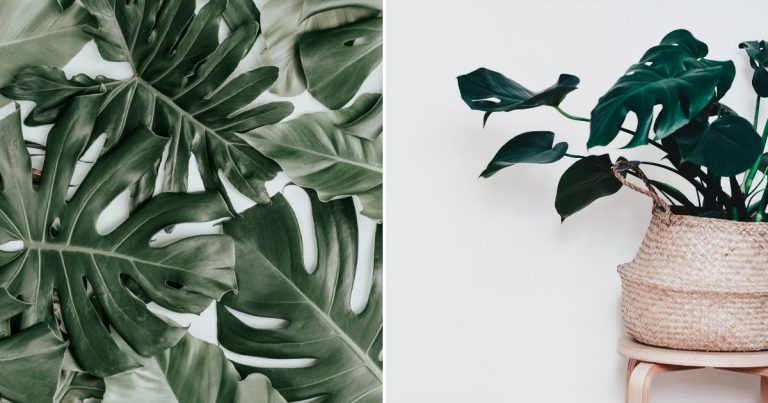
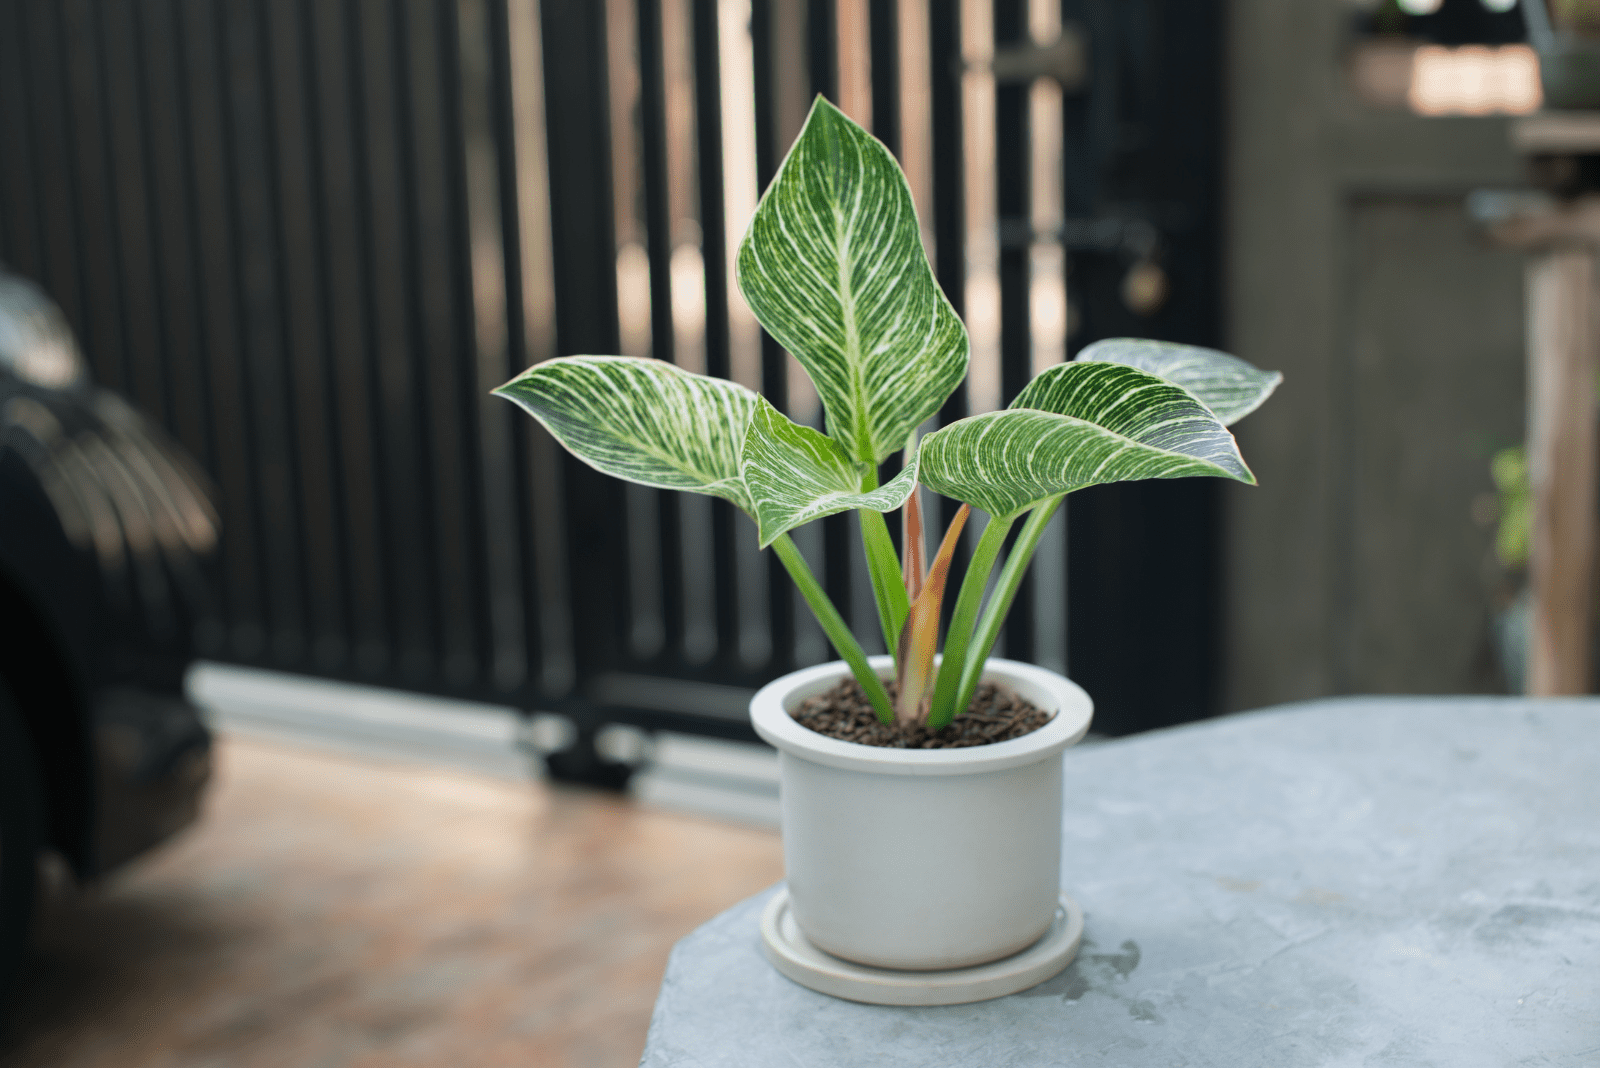
One such species is the stunning Philodendron birkin. It’s not found in nature, and was developed by a rare mutation of its parent plant, the Philodendron Rojo Congo. It’s characterized by its breathtaking dark green leaves with white pinstripes.
This species has become increasingly popular, so it’s no wonder growers around the world want to know all about Philodendron birkin propagation.
I have covered three methods in this article so that you can get new birkins quickly and easily!
Let’s begin!
Philodendron Birkin Propagation Methods
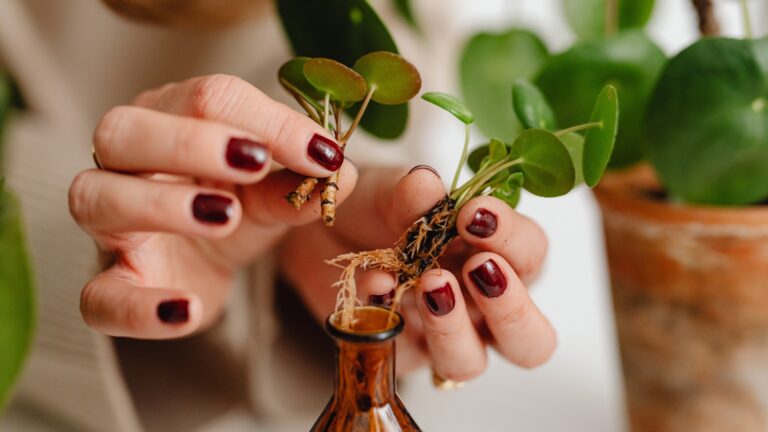
Photo from: @bellezaplantas
You can propagate Philodendron birkin using three methods: stem cuttings, division, and air-layering.
Let’s look at step by step guides for each method!
What To Prepare
Before I show you how to get new birkins, you need to know what you need for successful propagation.
Healthy And Mature Philodendron Birkin
Of course, you need a mature Philodendron birkin. Bear in mind that the plant and all the parts you use to make new plants must be healthy.
The next thing to prepare are cutting tools. It’s up to you which tool you will use; I use scissors or shears.
Sharp And Clean Cutting Tools
The first thing is to choose a sharp tool. This is because every part of the Philodendron birkin is delicate and the tools may easily cause damage if not sharp enough. When tools aren’t sharp enough, you are pulling instead of cutting.
The second thing essential for the cutting tool is sterilization. Even though your Philodendron is healthy, you never know if there are any hidden diseases it may have, or if there’s something on the tools that can transmit to the plant.
So, always sterilize your tools with rubbing alcohol or bleach before use.
New Potting Mix
Now it’s time to discuss the perfect soil for new roots. Pay attention to the materials that the potting mix consists of.
The soil must have good drainage to avoid waterlogging. It must also be porous but retain water well. Use regular potting soil and add perlite, pumice, vermiculite, or orchid bark to achieve this.
Plastic Cover/Wrap And Toothpicks
Be careful with the humidity level depending on the method you intend to use. New roots need a humid environment to grow well.
A plastic cover or wrap will aid you in this.
Peat Moss
If you decide to use the air layering method, you’ll need peat moss as it retains water well and perfectly suits the parts you use for propagation.
Now you have all you need, so it’s time to get some new Philodendron birkin plants!
The first method I’ll show you is with stem cuttings.
How To Propagate Using Stem Cuttings
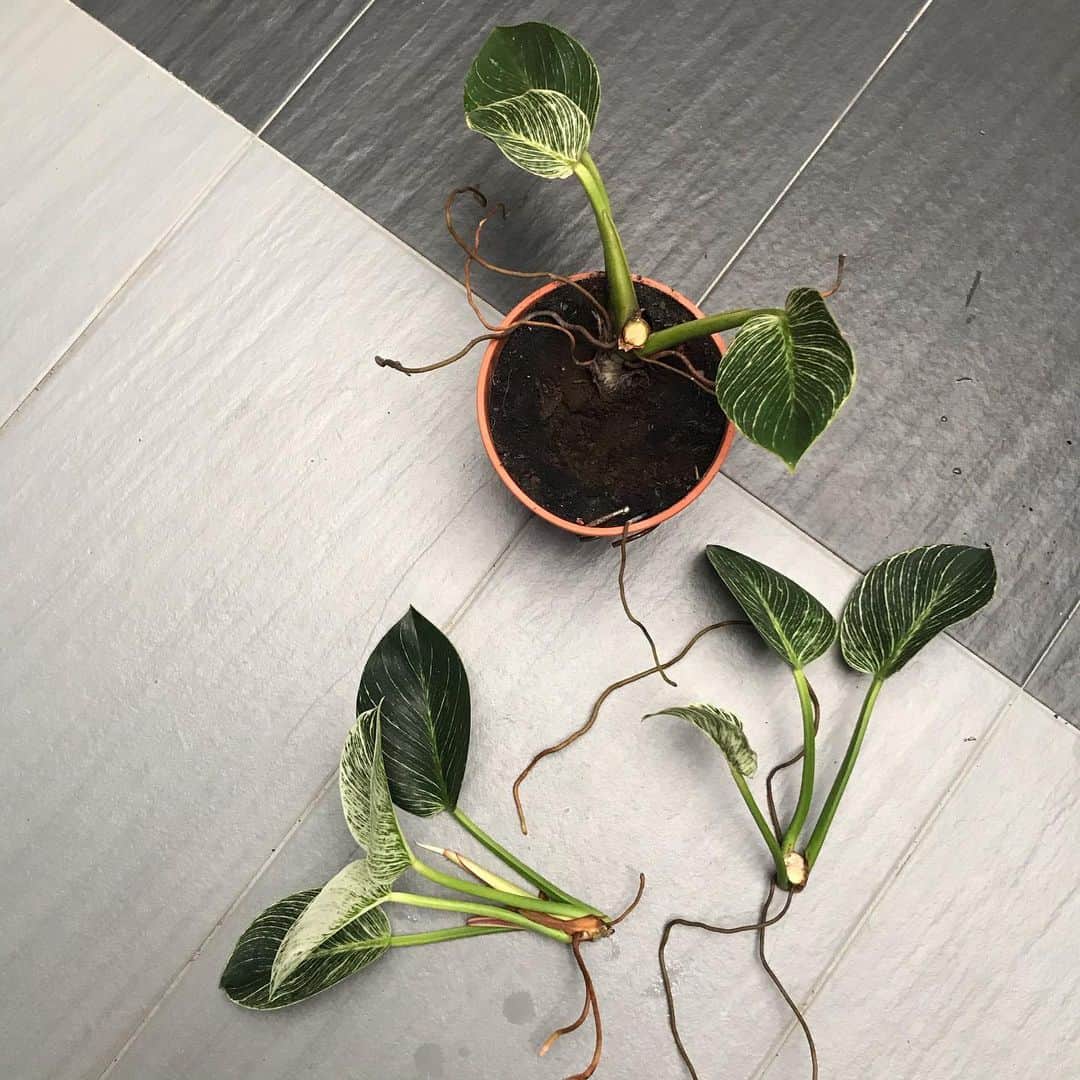
Photo from: @mardhatinajwa
Before I show you the process of rooting the cuttings, you need to know how to take them.
There are a few things the cuttings need for success. The first thing is that the cutting must be healthy. The second thing is that it must have at least one node.
If you are a beginner and you don’t know where the node is placed, search for the section on the Philodendron birkin’s stem where new roots will emerge.
A Healthy and mature plant should have a couple of aerial roots. It would be great if the cutting had at least one aerial root. If it doesn’t, the process still has a good chance of success.
Cut The Stem
In order to make a new plant, you’ll need to ensure you take a perfect cutting, here’s how:
• Remember that the cut should be diagonal as your goal is to make more surface area.
• The bottom part of the Philodendron birkin cutting will be submerged in water, so you’ll need to cut off the leaves at the bottom of the cutting.
Why is this important? When the leaves are placed in water for an extended period, they will most likely rot as they aren’t used to the water.
Root The Stem Cutting In Water
Some gardeners claim that rooting cuttings in water isn’t essential, but I always do it for my plants. It has proven to be a great method as I can see if the cutting has developed healthy roots.
Using a transparent container like a jar or clear vase is perfect for this purpose.
Here are the steps for rooting stem cuttings in water:
1. Fill a jar or any other type of transparent container with water. The size of the container depends on the number of cuttings you want to use. You can use as many cuttings as you want as long as they are healthy and have nodes.
The water temperature shouldn’t be too cold so as to avoid shock, but it also shouldn’t be too hot as it could burn the cuttings. Also pay attention to the water type; lukewarm filtered water or rainwater are both great options.
2. Now put the Philodendron birkin cutting in water. Make sure the nodes are also submerged because new roots will sprout from there.
Find A Perfect Spot
1. The cutting needs a lot of bright indirect light to develop roots.
If the cutting receives too much direct sunlight, it won’t root successfully. Also, the light level shouldn’t be too low because enough light is essential for photosynthesis.
You can use light monitors to check on light levels, and you can use grow lights if the light level is too low. All these devices are available on Amazon.
2. Remember that you should change the water regularly to prevent harmful bacteria that cause new roots to rot. Stagnating water also smells awful, especially if there are rotten parts in it.
Plant The Rooted Cuttings In Soil
If you skipped rooting in water and planted the cuttings directly in the soil, you’ll know they have developed roots when they become firm and don’t come out when slightly pulled.
You can always add rooting hormone if you want to speed things up.
When planting the cuttings from water, you’ll need to be extremely careful as new Philodendron birkin roots are sensitive and can easily be damaged.
Plant them in the center of the soil a few inches deep.
That’s it! New growth should occur in a matter of weeks, after which you can resume usual birkin plant care.
How To Propagate Philodendron Birkin Plant By Divison
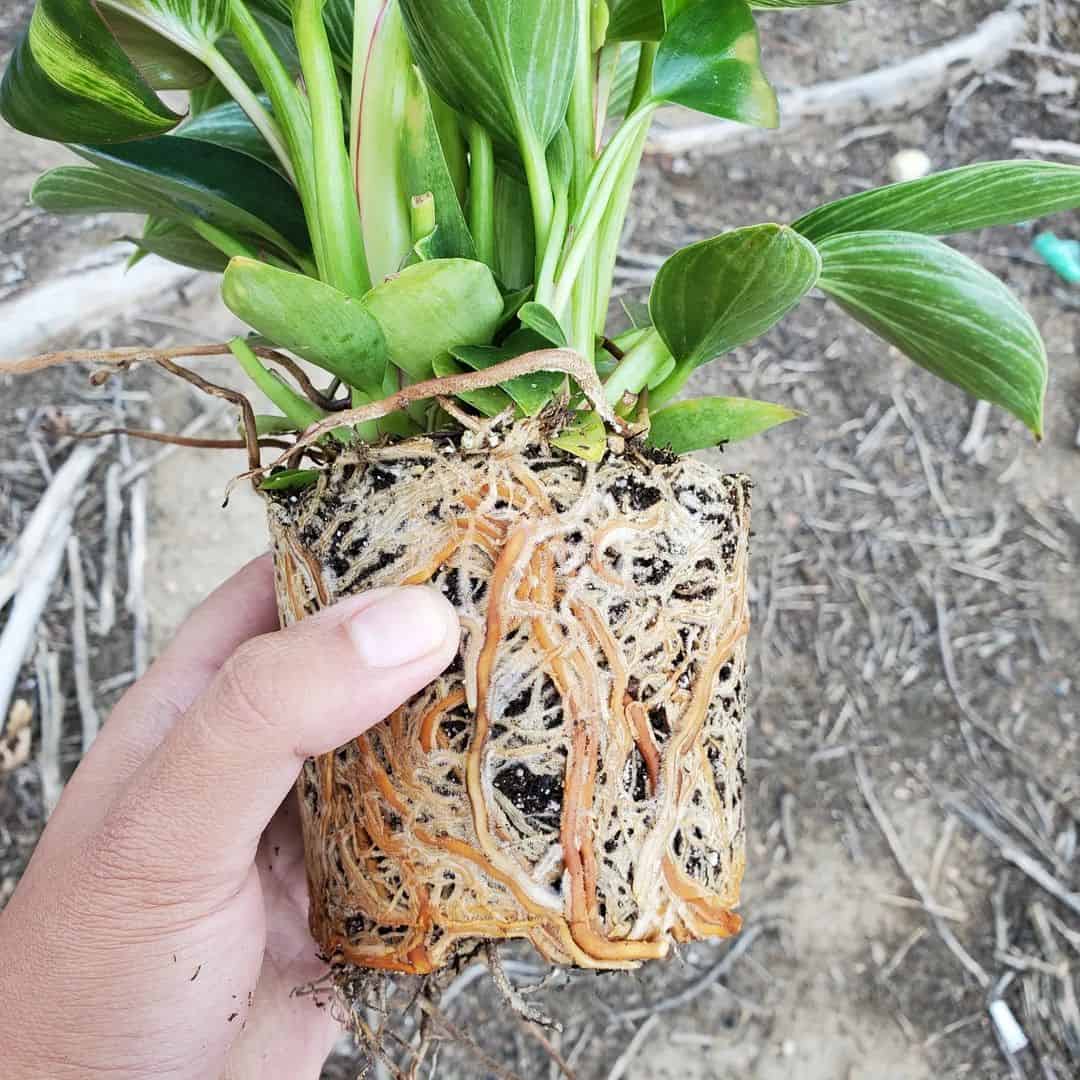
Photo from: @yourlocalplantita_
This Philodendron plant can also be propagated by division, but for this method to be successful, you’ll need a section of the mother plant that has many offshoots.
If you can only find one offshoot, consider using other methods.
After selecting the section you want to use, you need to remove the Philodendron birkin from its pot.
Here’s how:
• When removing this Rojo Congo cultivar from its pot, don’t pull it as it may damage the entire plant. Lean the pot to one side and let the plant slide out itself.
You can tap it a little bit to help it.
• Your next goal is to remove the extra soil around the birkin’s roots. You can do this by lifting your Philodendron and loosening the soil by gently shaking the plant.
You can also use your fingers for this, but very carefully as the roots are easily damaged.
Divide Each Section
Sometimes the roots may be difficult to untangle, so you’ll need to cut off the odd root, but it shouldn’t be too difficult if you are very careful when separating the sections with your hands.
New growth will occur only if each divided section has a sizable portion of the root system. Make sure the tools you use are sharp and sanitized.
Choose The Rooting Medium
The mother plant should go back into the original pot, but the separated offshoots need something in order to grow.
You can use water if the Philodendron birkin offshoots aren’t mature.
On the other hand, if the offshoots have enough roots they’ll grow perfectly if planted directly in the soil.
If you are unsure whether the roots are mature enough, placing them in water will be just fine.
New leaves should develop soon, so continue with usual plant care.
How To Propagate Using The Air Layering Method
The air layering method has a high success rate, but if you are a beginner you may find it a little difficult.
If it seems too complicated, you can always use one of the above mentioned methods.
Here are the steps:.
1. The first thing you need to do is select a healthy stem. The stem should also be strong because you don’t want it to break when you wrap it with peat/sphagnum moss.
2. Cut the stem vertically at the base. Make a vertical cut a few inches long in the Philodendron birkin stem with a clean tool. It should enter the stem around halfway.
3. Now it’s time to open the cut. The easiest way to keep the cut open is by putting a toothpick in the middle.
4. Wet the sphagnum/peat moss and wrap it around the selected part. Remember that the sphagnum moss should be moist all the time, but not soaking wet.
5. It’s time to secure the sphagnum moss around the stem. I use a plastic bottle cut in half.
6. You should see new roots sprouting after a couple of weeks. Feel free to cut the stem once you notice the roots peeking out of the moss. Plant the cutting in soil.
Whenever handling plant roots, be extremely careful as they are very easy to break.
Common Problems When Propagating

Here’s what can go wrong when propagating this Rojo Congo cultivar.
The Cutting Doesn’t Develop Roots
If you’ve done everything correctly and the new roots haven’t sprouted yet, don’t panic! Things like new plants don’t happen overnight.
If you doubt the outcome, check one more time if every condition is right. If you rooted the cuttings in water, check if the water is fresh and if there are any rotten parts on the cutting.
If the water is clean and all parts of the cuttings seem fine, there are some other things to check.
I mentioned that the cutting needs a humid environment to develop roots, so check if the humidity level is suitable.
Also check the temperature because the cutting needs warmth for healthy development. Placing a heating pad below the cutting has shown great results for promoting growth.
A rooting hormone may also help you to speed up root development. I repeat, if everything seems fine with the cutting, be patient!
The Cutting Is Becoming Mushy
The worst-case scenario for cuttings is turning black or brown and becoming mushy.
If your cutting is in water and becomes mushy, it has most likely started rotting. Harmful bacteria usually inhabit stagnant water, which is likely what has happened to your cutting.
It’s essential to keep the water fresh during the root development period. The cutting has a really low chance of recovering, but you can try removing the rotten parts with sanitized tools and hope for a positive outcome.
The Cutting Is Turning Yellow
If your Philodendron birkin cutting is turning yellow, it might be pretty tricky to figure out exactly what went wrong.
You should first check the amount of light your cutting receives. The most common cause of yellowing is direct sunlight.
Direct sunlight can result in yellow leaves on mature plants. The same applies to the cutting, which doesn’t have leaves yet but is likely to turn yellow if it receives too much direct sun.
Another possible reason is low light. When the cutting doesn’t receive enough light, it will certainly turn yellow.
The most common cause of yellow leaves in general is root rot caused by overwatering.
So, if you’ve planted the cutting in the soil and it has turned yellow, it’s most likely due to waterlogged soil that attracted fungi and resulted in root rot.
That’s why checking the soil moisture content before watering is so essential. Excess water in the soil causes many problems, so insert your finger or use a moisture meter to check the soil and only water it if it feels dry.
Philodendron Birkin Care Guide
It’s not rocket science to keep your Philodendron birkin happy, although some problems can occur.
That’s why it’s important to know about the right conditions your birkin needs to thrive.
Let’s learn some care tips for this fabulous plant!
Light Conditions
Your Philodendron birkin will perform best if provided with bright indirect sunlight. The easiest way to give it enough sunlight is by placing it next to a window.
However, you’ll need to keep the plant out of direct sunlight unless you want the beautiful dark green leaves to turn yellow and scorch. Place sheer curtains on the windows to prevent direct sun from reaching your Philodendron.
Also keep it away from low light, which may stunt growth as plants need light for energy and photosynthesis. Use a grow light if you live in colder climates where there isn’t enough light.
Pay attention to the seasons; provide more shade during summer and more light during winter.
Humidity Conditions
This Philodendron plant has waxy leaves, which means that it’s easier to maintain it when it comes to humidity. It can tolerate various humidity levels, but you can’t expect the growth rate to be the same at all levels.
For example, humidity of less than 40% may cause the leaves to develop brown tips and edges, so the best idea would be to ensure humidity levels of 70%.
Remember that tropical plants live in relatively humid environments, so mimicking such conditions is best for their growth.
If you can’t ensure enough humidity, consider increasing humidity using a humidifier. You can also boost humidity by grouping your plants. If you grow pothos or succulents, place them next to your Philodendron.
Temperature Conditions
The Philodendron birkin thrives in temperatures ranging from 60 to 85 degrees Fahrenheit.
Drafts are the primary factor that lead to temperature issues indoors. Drafts that are hot or cold can both be problematic.
Fireplaces, radiators, and heating vents create hot drafts that can cause the birkin plant’s leaves to turn brown.
Air conditioners, drafty windows, or cooling vents can also cause stunted growth.
Soil
Three essential things to pay attention to when choosing the perfect soil for a Philodendron birkin are aeration, drainage, and water retention.
Therefore, you’ll need a potting mix made of porous materials like orchid bark. You’ll also need materials that promote drainage, such as perlite or pumice. Finally, you need materials that retain water well, such as peat or vermiculite.
You can either purchase a ready potting mix or make your own by adding the above mentioned materials to potting soil.
Watering
Indoor plants such as Philodendrons don’t like soggy soil, but aren’t fans of dry soil either. So, before you water your Philodendron birkin, make sure one inch of the soil is dry.
Use your finger, a stick, or a moisture meter to determine the moisture content in the soil.
Pay attention to seasons – water more during the growing season (spring and summer) and wait longer between waterings during winter (dormancy).
As far as the watering technique is concerned, I highly recommend bottom watering for your Philodendron birkin. This will allow the soil to absorb water slowly and safely. This is also the best way to avoid overwatering.
Always ensure the pot has many drainage holes as the extra water needs to come out. If there is water in the tray underneath the pot, please empty it as the roots of this aroid are prone to root rot.
Fertilizing
If you want to preserve the beauty of the stunning variegated leaves, I recommend fertilizing your Philodendron birkin once or twice a month during the growing season.
You can use standard fertilizer for indoor plants, just make sure it has an NPK ratio of 20 20 20 and that you dilute it to half strength.
Pay attention to the instructions on the label for how to apply this type of fertilizer. You can always use organic food for your birkin plant, such as worm castings.
Repotting
The Philodendron birkin is known for its fast growth rate, so you won’t be surprised to learn it will benefit from frequent repotting.
I actually repot my birkin every year with new soil so it gets more nutrients and space for roots.
I have a few tips that can help you with repotting. First, always use a fresh potting mix. You can find the perfect potting mix for this variety in the ‘soil’ section above.
When taking your birkin out of its pot, please don’t pull it; let the plant slide out by leaning the pot to one side and tapping on it gently.
Check the roots once you loosen the soil – discolored roots indicate pathogens in the soil.
I recommend using a pot that’s 1 to 2 inches larger than the previous one.
Common Issues
The most common issue with Philodendron birkin plants is reverting, which refers to the loss of variegations.
The plant loses its white pinstripes and the leaves become entirely green.
Yellow leaves are also an issue. Check if the plant has too much/not enough water in the soil, as well as the light level because direct sunlight also causes this problem.
A sure sign of underwatering is curly leaves, so if you notice any you should give your birkin a good soak.
If your precious Philodendron is drooping, check if it has Erwinia blight disease. Luckily, it can be cured if spotted in time.
Spider mites can infest and damage these plants. You may also notice scales, thrips, and aphids on the undersides of the leaves.
Use neem oil or a dish washing liquid + water mixture to get rid of these pests.
FAQs
How do you make a Philodendron Birkin more variegated?
The first thing you can do to make your Philodendron birkin more variegated is propagating using the last variegated leaf. Also ensure bright indirect light to promote growth and variegation. You can also add fertilizer. Pay attention to the NPK ratio; choose one lower in nitrogen.
What is the root of a Philodendron Birkin?
The roots of the Philodendron birkin are underground structures that are firm and grayish-white in color. This color and shape refer to a healthy root system. If there are some mushy and brown/black roots, something is wrong with your Philodendron plant.
Wrapping Up
The Philodendron birkin is a rare and amazing Philodendron variety. This variegated version of the most common houseplant is low-maintenance and can easily be propagated.
The most common Philodendron birkin propagation methods are stem cutting, division, and air layering.
If you follow the steps above, each method will give you a positive outcome (in this case, a new birkin plant).
If you ensure it gets everything it needs, your new Philodendron birkin will thrive and reward you with the most beautiful variegations!
Until next time!
Like this post? Share or pin it for later!