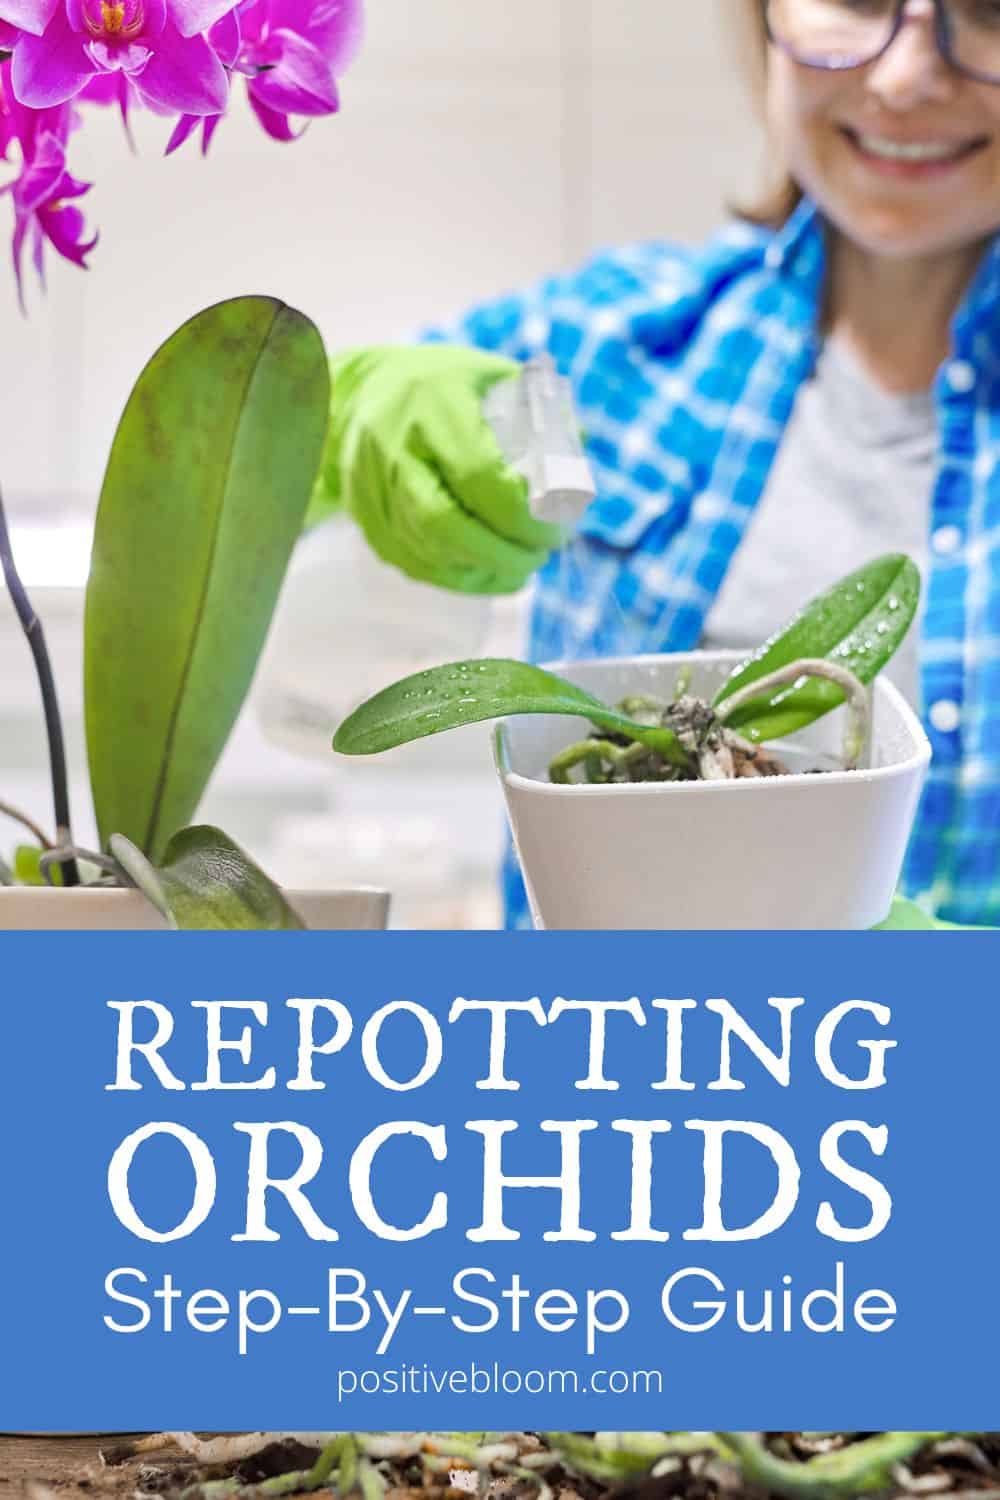
Step-By-Step Guide To Repotting Orchids (Best Tips)
Plant care isn’t hard in general; you just need to ensure the best conditions for your plants. However, you also need to do one more thing – repotting.
Orchids are pretty delicate plants, but that hasn’t stopped them from being very common houseplants. Why? Just look at them! Their breathtaking blossoms make any room look prettier.
Orchids do need repotting, which is why it’s important to learn more about this part of plant care.
To help you out, I’ve made a complete guide to repotting orchids. It’s actually a really fun activity.
Let’s get started!
Repotting Orchids: Why & When
Repotting orchids is much more than just guessing, in that you need to know the signs of when it’s time to do so.
Plants eventually overgrow their containers, and it’s not a good idea to wait until your orchid starts showing signs of dying before repotting it.
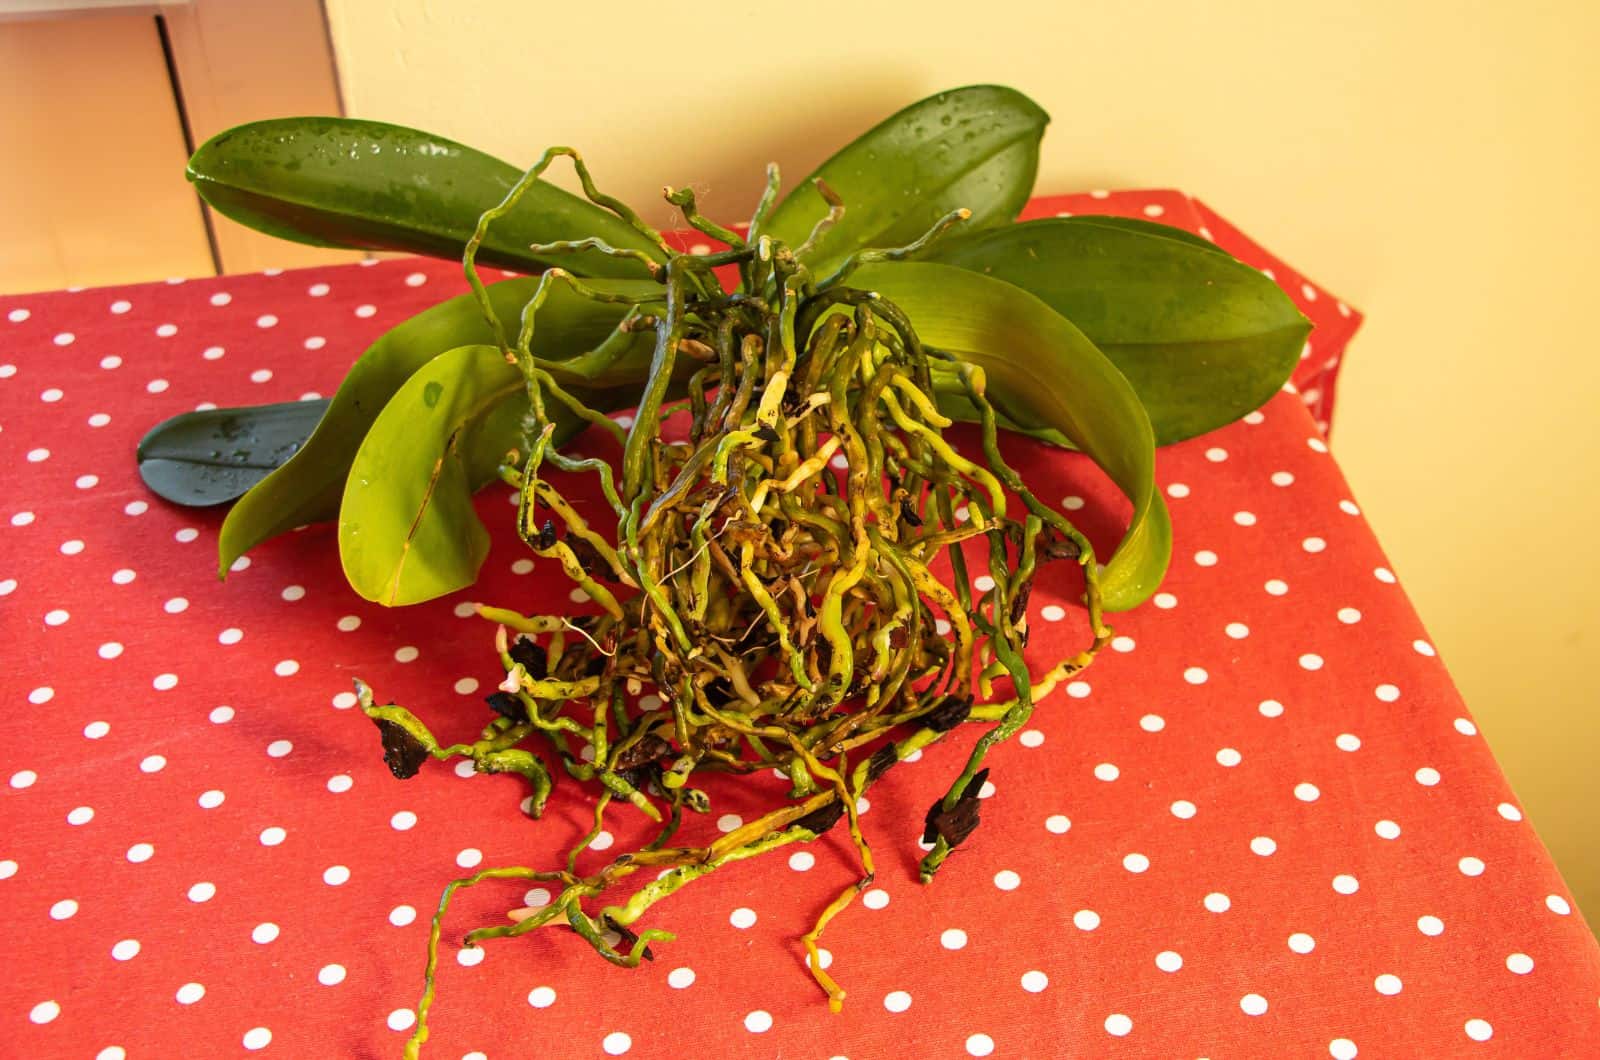
So, how to tell when an orchid is ready for repotting? The tell-tale sign is white roots poking out of the pot, which indicates that your orchid needs more space for growing.
Another sign you may notice is root rot, which is one of the main reasons for a dying orchid.
This occurs when the potting medium loses its ability to drain well, i.e., it retains too much water and attracts fungus. Ideal soil for orchid plants is porous, and when the materials start breaking into small particles, the air spaces will be closed.
Best Time To Repot
Another essential factor for repotting is the time of year, and this depends on the type of orchid you’re growing.
For example, some orchids, such as cattleyas (sympodial orchids), develop pseudobulbs. The best time to place them in a new soil and pot is when they finish flowering and before they produce any new roots.
Other orchid types aren’t very picky about the timing. Still, I highly recommend not touching the root system during the blooming time.
What To Prepare
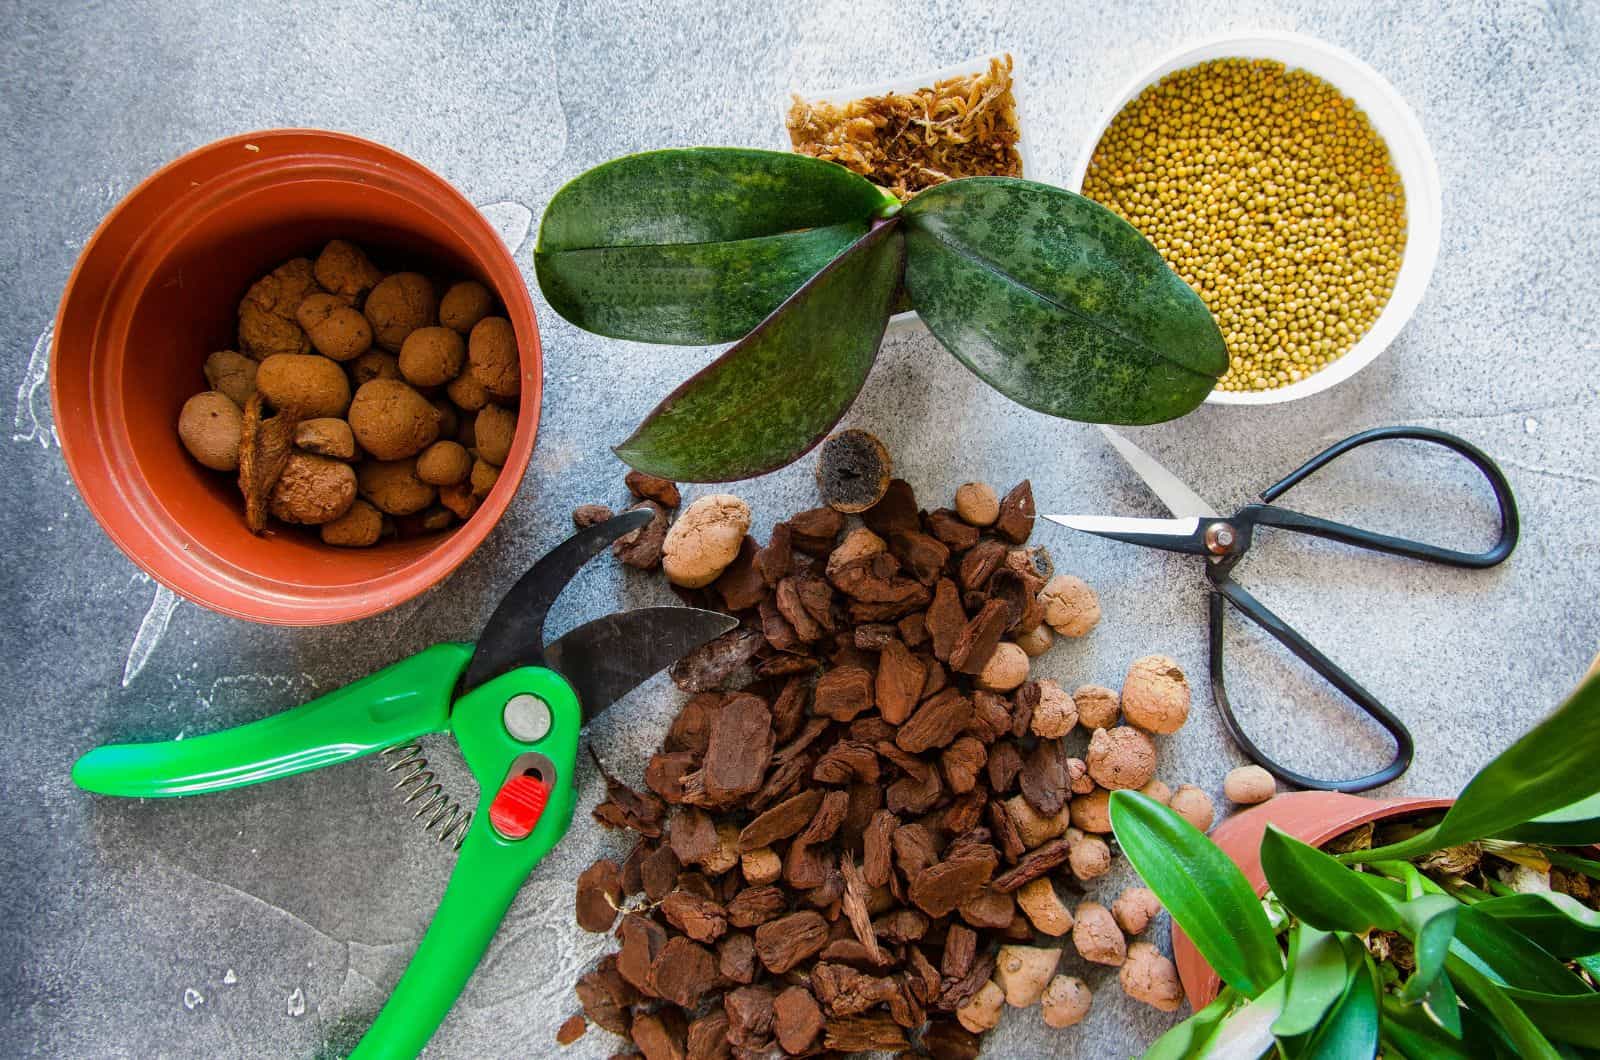
The time for potting has come, so we’ll now discuss what you will need before you begin.
Tools, the pot, and an adequate potting medium are all essential for this activity.
Let’s get into more detail!
Tools
I’m sure that the idea of soil all over your kitchen doesn’t sound very attractive, so I recommend placing newspapers down before repotting.
Orchids will need soaking before repotting, so you must also prepare a larger bucket or bowl of water.
You’ll also need some cutting tools, such as shears or secateurs, and a sterilizing solution. Before cutting, dip your tools in bleach or 70% isopropyl alcohol.
You’ll also need to sterilize the pot. All this sanitation is because orchids are susceptible to fungus that can quickly kill them.
Gloves are another thing that’ll help you avoid dirt, at least on your hands. Make sure you choose a pair made of a soft material and that they fit you properly.
Prepare some rhizome clips to hold the orchids in place.
A New Pot
Not every pot will satisfy the needs of orchids. First, they need to be wide and deep enough.
Second, they must be made of specific materials and have drainage holes in the bottom.
Third, they need to be sterilized. Never forget orchid sensitivity!
Let’s find out more!
Size
Unlike some other common houseplants, orchids don’t need much space to grow, and can deal with being slightly rootbound.
If you want your orchid to produce flowers, you’ll need to choose a larger pot, but not too much larger as the roots really don’t need much space to grow.
Actually, your adult orchid may be rootbound for its entire life, but the seedlings are the problem. They are what need repotting.
The size of the roots will determine the size of the new pot. It doesn’t matter if you have a mature dendrobium orchid because only the root volume should be considered.
It would be best if you aimed for a pot that is about one or two inches larger than the previous one.
Your orchid may sometimes have a lot of dead roots and a root system that is relatively small. In that case, the pot size should be adjusted.
Material
I know that some pots look prettier than others, but the material they are made of plays a more important role. Orchids look fascinating no matter the pot design, so don’t worry.
So, which materials are most perfect for orchid pots?
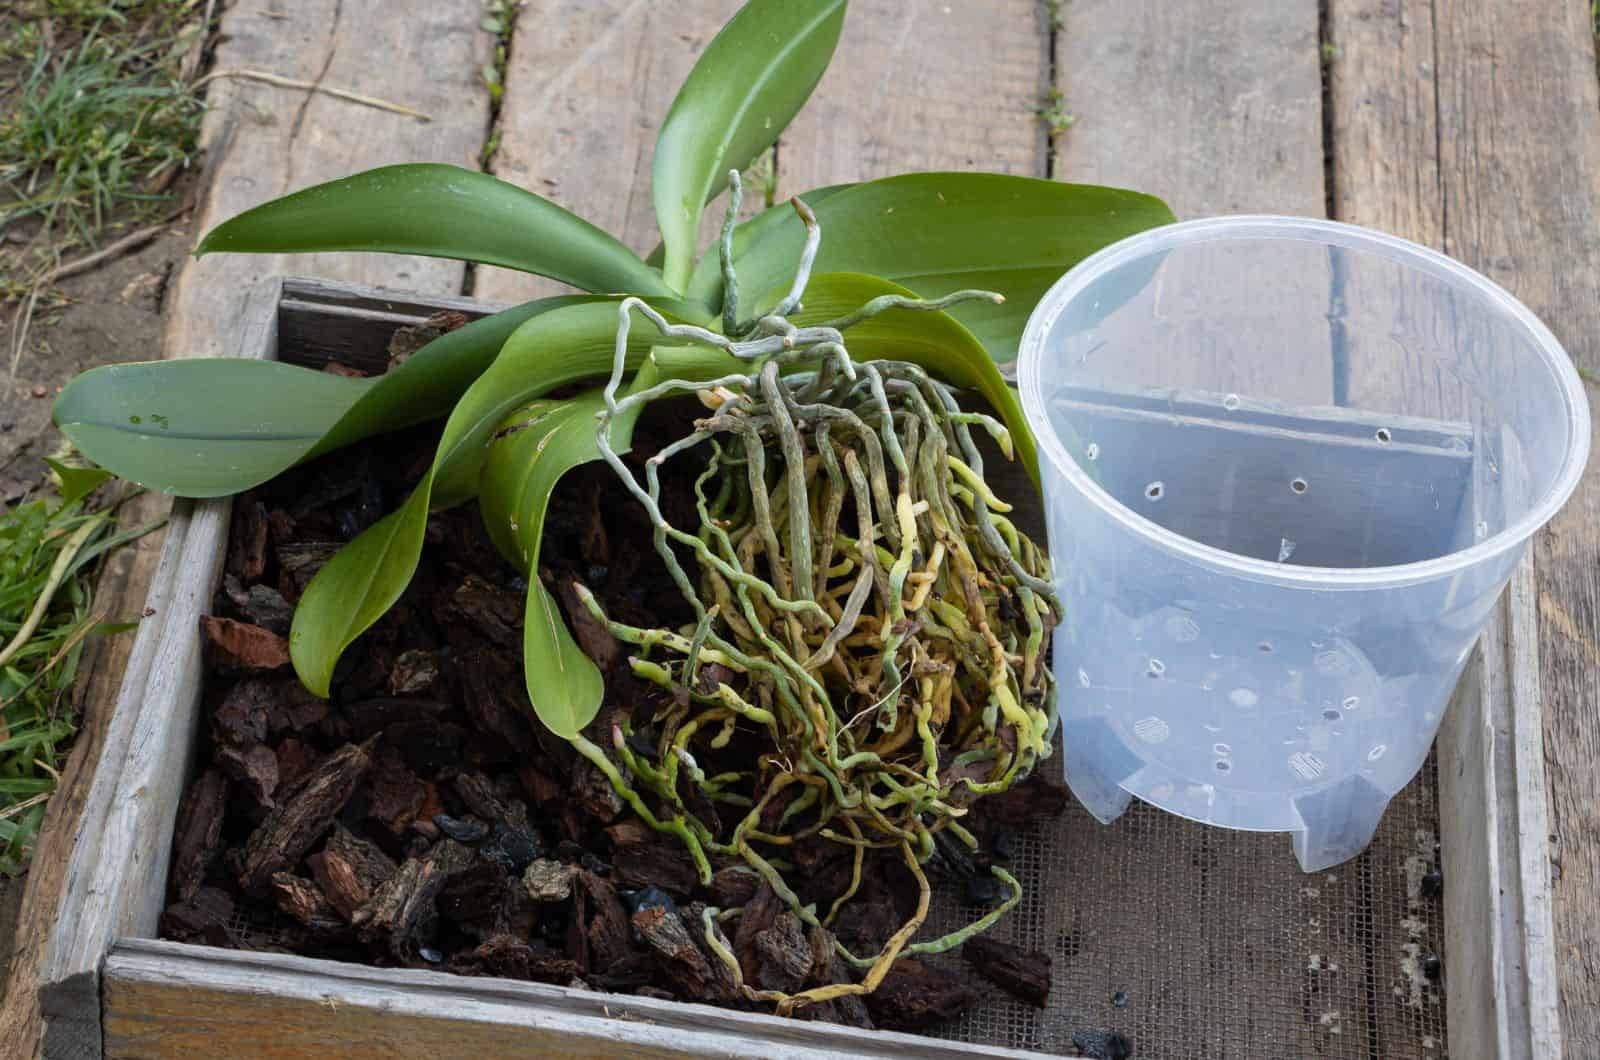
You can choose between plastic or clay pots.
I stick to transparent plastic pots as I’m curious about what’s going on with the orchid root system.
Clay pots are a great choice if humidity is higher in your household. They’ll aid water evaporation from the soil and prevent water retention.
Plastic pots are more suitable for dry places as they retain water better (but not too much).
Bear in mind that plastic pots may not be heavy enough to hold orchids, but you can always add some broken pieces of terracotta to the bottom of the pot.
Drainage Holes
An orchid pot should also have drainage holes. I actually recommend these pots to every grower, no matter the plant type.
This is because most houseplants despise water pooling, and one of the ways to avoid it is by purchasing the above mentioned pots.
The holes shouldn’t be only in the bottom of the pots, and most pots for orchids on the market also have side holes.
Sterilization
Again, sterilization is the key to healthy orchids!
I always sterilize the pot the day before I repot my orchids. This way, I prevent transmitting any bacterial or fungal growth or pest infestation.
Here are the steps for how to sterilize the orchid pot:
1. Clean the new pot with hot water.
2. Mix bleach and water (1:10) in a bucket and immerse the pot in it. I recommend leaving the pot submerged in the solution for 20 minutes minimum.
3. Immerse the pot in clean water.
4. If you decide to use a clay pot, I suggest baking it at 400 degrees Fahrenheit for about 60 minutes.
The Best Potting Mix To Use For Repotting Orchids
There are numerous varieties of planting materials available.
Here’s a list of materials perfect for an orchid potting mix:
1. Fir bark: This material serves as a great base for potting soil. It will fulfill the needs of your orchid plant, especially if mixed with other materials like charcoal. A good alternative to fir bark is coconut husk.
2. Sphagnum moss: This material will aid in water retention. If you use porous materials, always add some sphagnum moss. This type of material should be used for the soil of Phalaenopsis orchids.
3. LECA: Orchids are perfect plants for LECA. It will promote air circulation and prevent waterlogging.
4. Coco coir: This material is great for a potting mix as it’s well-aerated and holds moisture at the same time.
5. Charcoal (horticulture): Charcoal promotes drainage and removes harmful salts from the soil.
6. Lava rock: Promotes aeration and won’t decompose.
7. Perlite: This is the best material for improving air circulation.
8. Pumice: It makes a great addition to potting soil due to its well-draining properties.
9. Peat moss: This potting material aids water retention and combines well with well-draining materials such as perlite.
How To Repot Orchids
Now that you have determined that your orchid needs fresh potting mix and a new pot, and you have prepared all the tools you’ll need, it’s time to learn all the steps.
Repotting orchids includes removing the orchid plant from its pot, removing the old potting mix, cleaning the roots, dividing the rootball, putting your orchid in a new pot, and staking it.
Let’s get into detail!
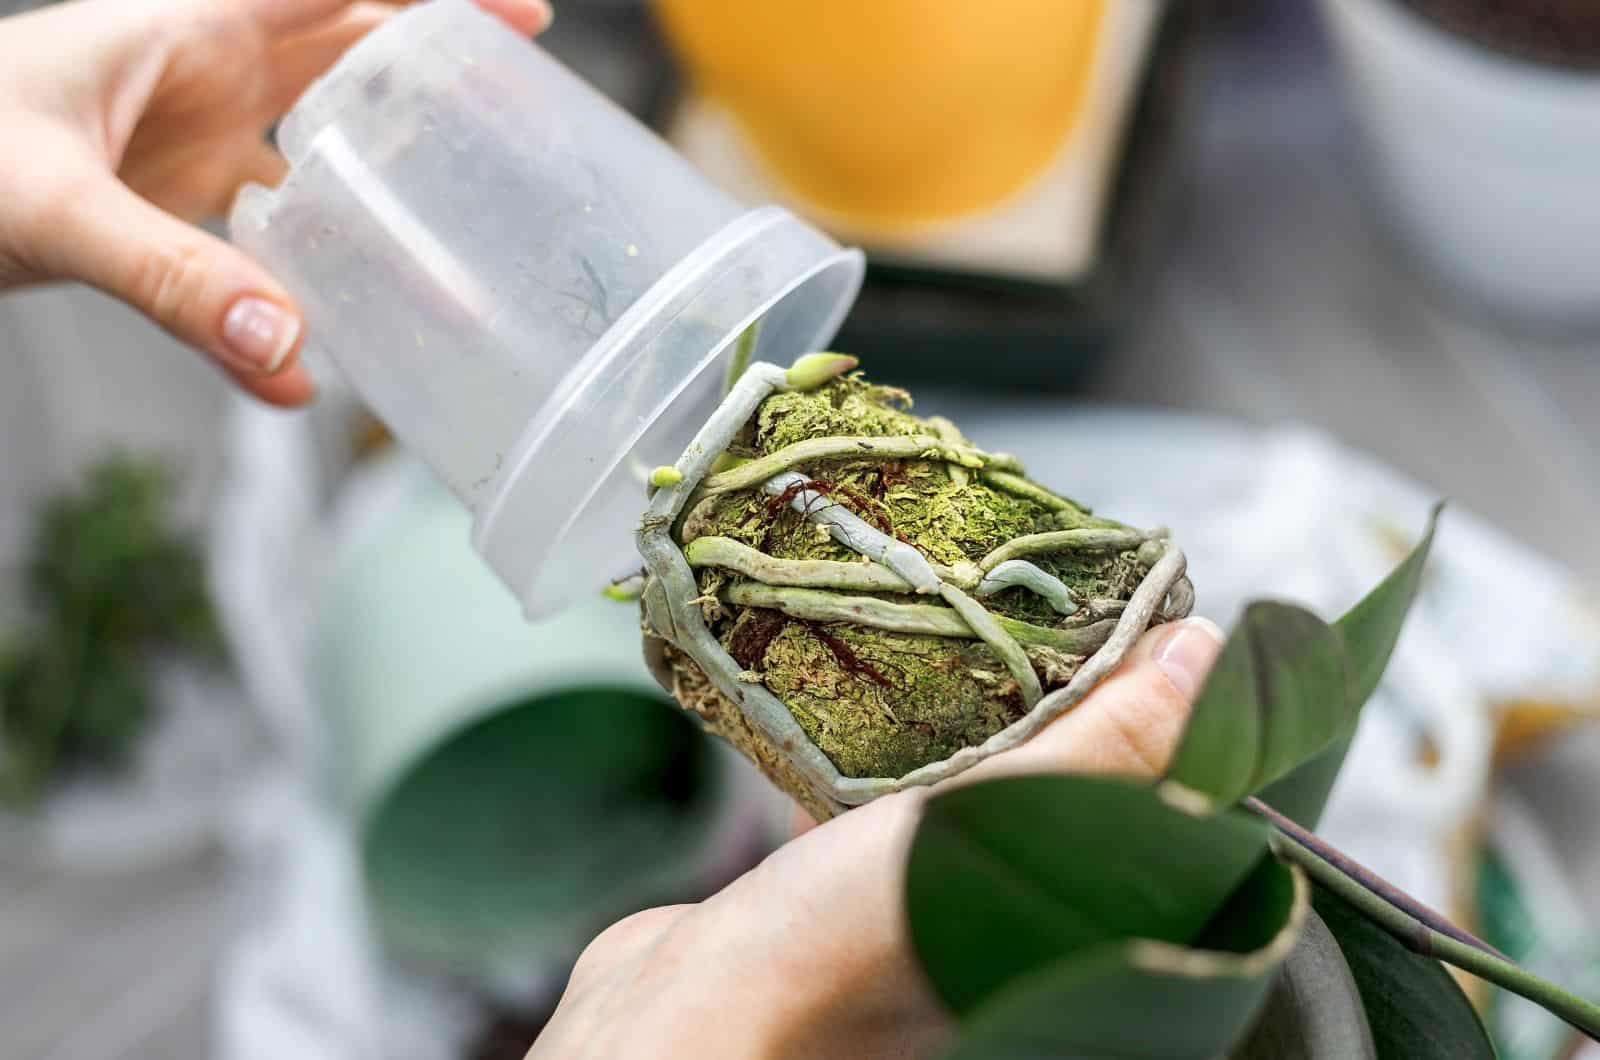
Take Your Orchid Out Of Its Pot
If you decide to pot your orchid in orchid bark, you’ll need to soak the bark first to make the process easier.
I mentioned that orchids are sensitive, and this includes the roots. When taking your orchid out of its pot, you’ll need to be extra careful not to break any roots.
If your orchid doesn’t come out easily, you can actually break the pot open and then start untangling the roots.
If you do break open the orchid pot, some pieces of the pot may be attached to the roots, but this isn’t a big problem.
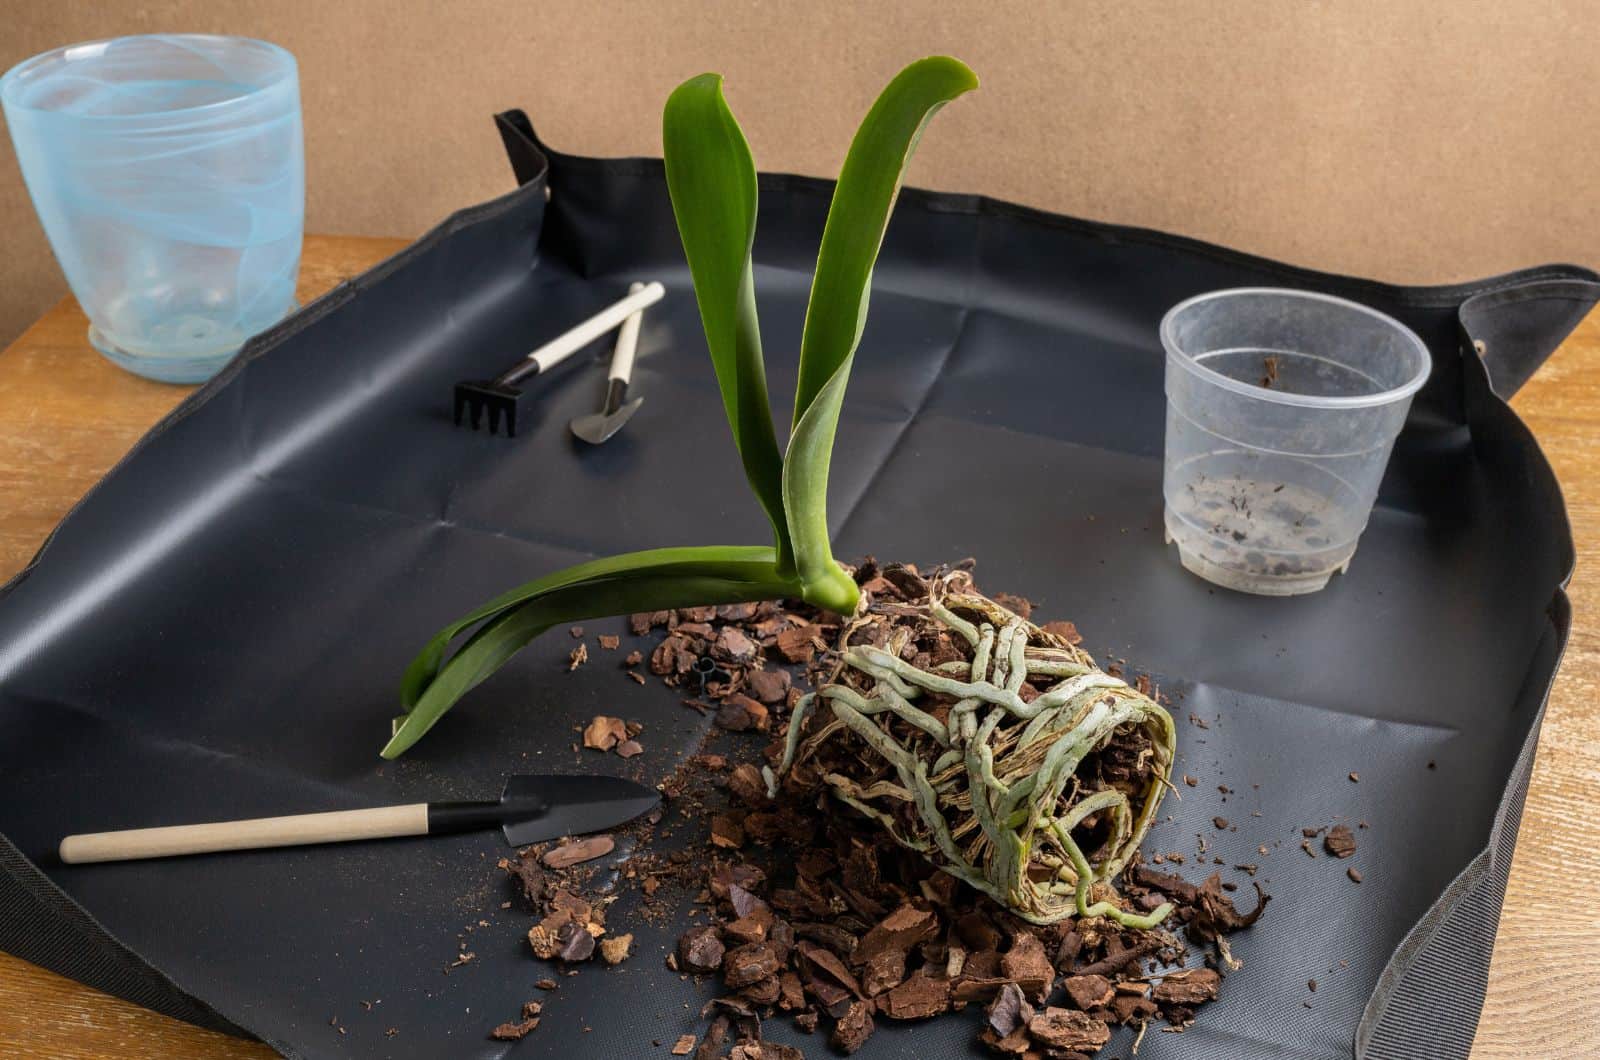
Remove The Old Soil
Once your orchid is out, you can dispose of the old pot or sterilize it if you want to reuse it. If you haven’t broken it, of course!
Never reuse the old potting soil. It may be contaminated, and trust me, you want to avoid contaminating your other plants or any new orchids.
Second, your orchid plant needs new nutrients, and the appropriate potting mix will ensure them. This means you won’t need to fertilize your orchid at this point.
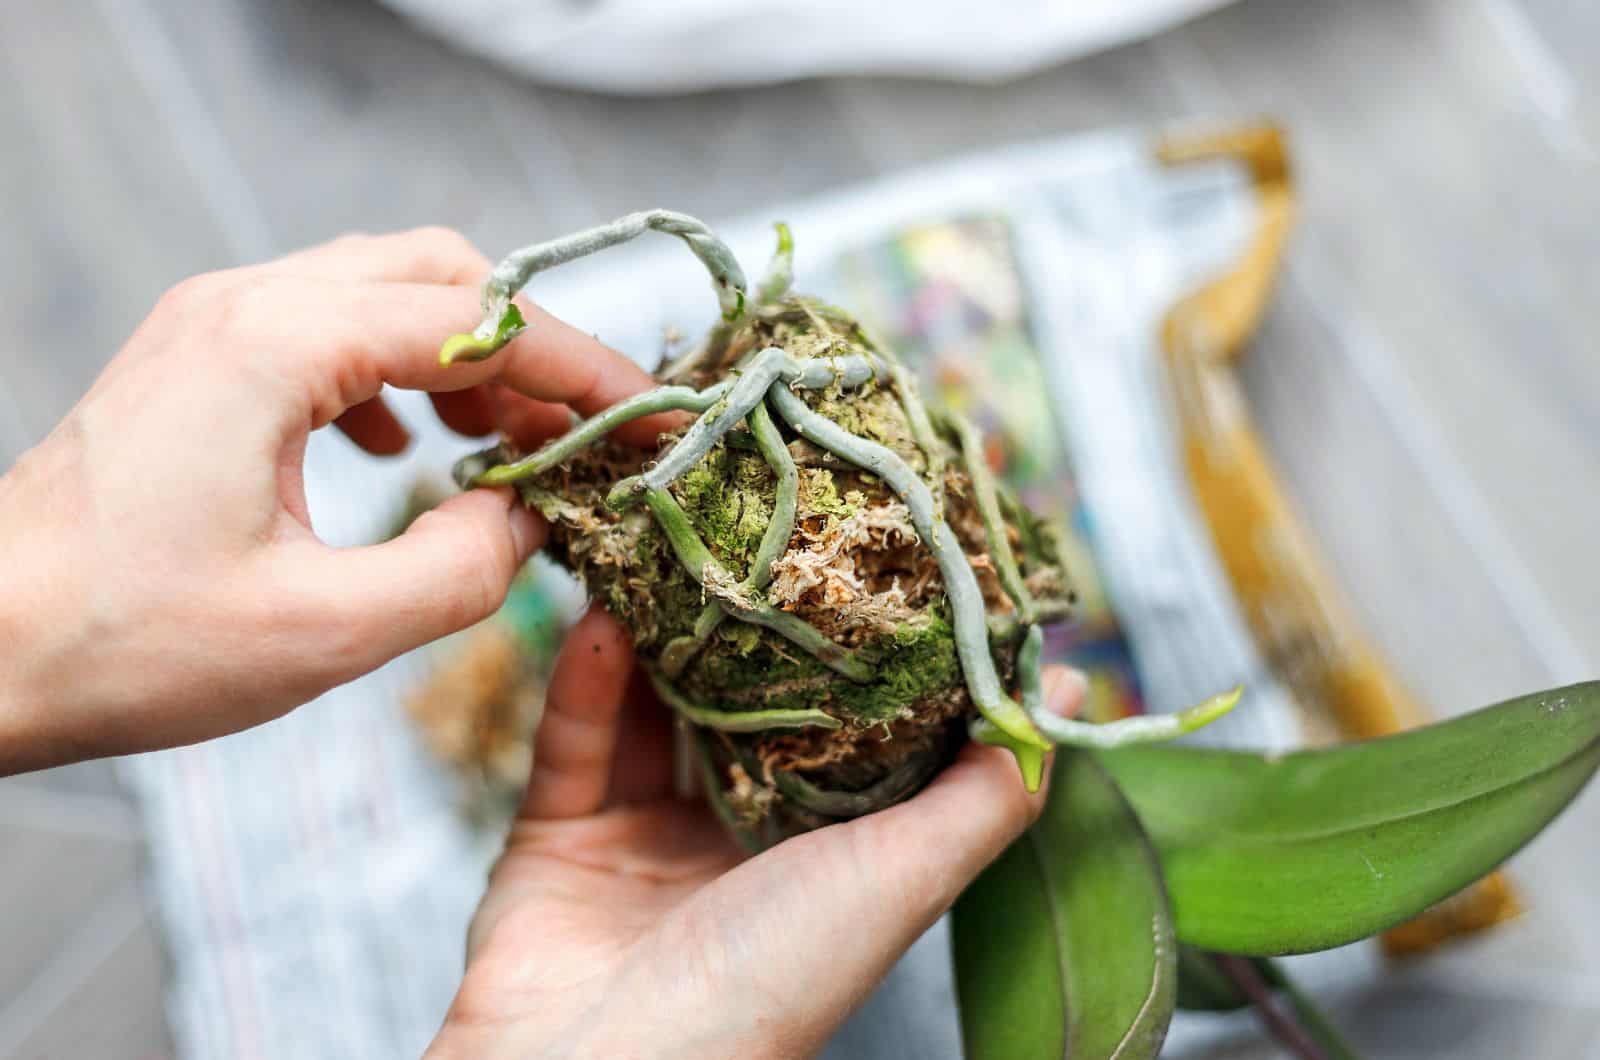
If you grow a thin, fine-rooted orchid, removing the old soil from the roots will require a little more skill.
You’ll need to inspect the root system, and if your orchid has any diseased roots you’ll need to remove them.
Diseased roots will be dark or mushy, making them easy to spot. On the other hand, healthy roots of orchid plants are typically white or green.
Wash the roots with room temperature tap water after removing the old soil mix and cutting off any dead roots.
Divide Your Orchid
If you have a large, mature orchid, you can divide it at this point. This mainly refers to sympodial orchids, such as dendrobiums or cattleyas.
These orchids spread out on a rhizome, and some of them may develop pseudobulbs that serve as water storage.
Simply split the pseudobulbs into groups of four or five and pot each group separately.
This is a fantastic opportunity to broaden your collection and explore new orchids.
Put The Orchid In A New Pot
It’s crucial to position the orchid correctly, which depends on how it grows. Check the type of orchid before placing it in a new pot.
This is essential because sympodial and monopodial orchids have distinct requirements when it comes to repotting.
For example, if you grow monopodial orchids, such as moth orchids (Phalaenopsis), they should be positioned in the middle of the container so that they resume growing vertically.
On the other hand, sympodial orchids, such as dendrobiums, should be planted in such a way that their oldest roots are positioned against the edges of the pot.
New growth of sympodial orchids will be oriented towards the center of the container.
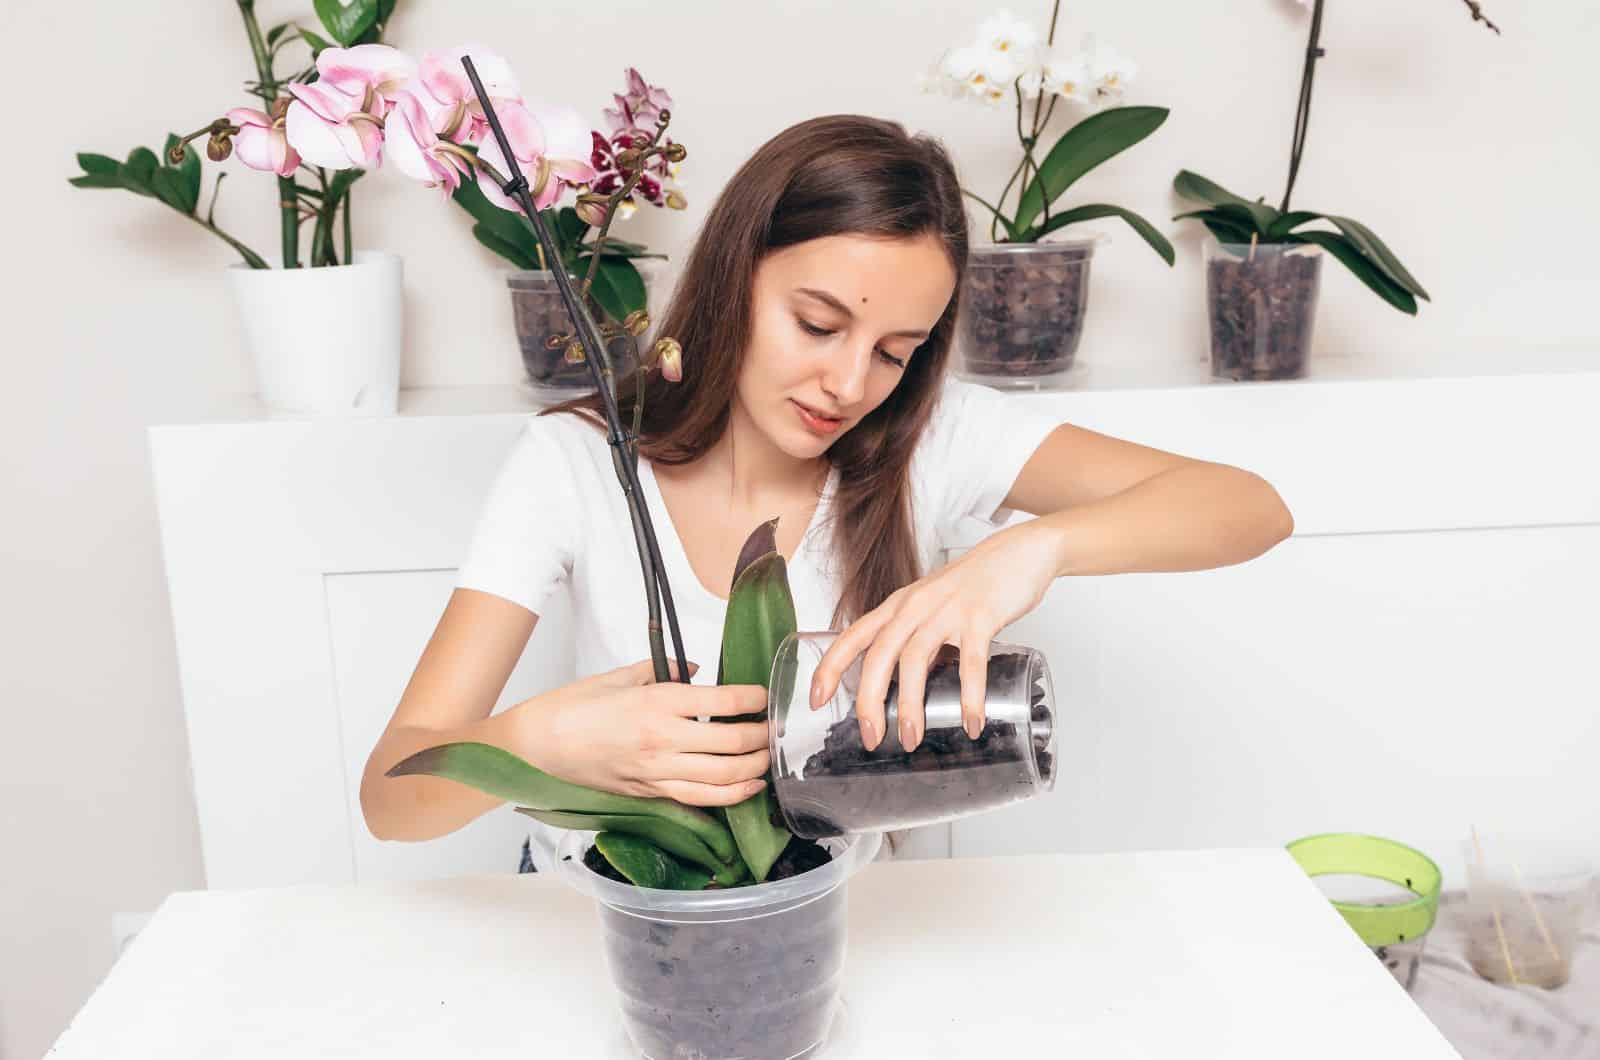
Add Potting Mix
Now you need to add some new soil. You can either use your fingers or a chopstick to arrange the soil around the roots.
Be really careful and make an effort not to disturb any roots.
Fill as much potting mix through every root as possible.
I must remind you that the orchid crown prefers a dry environment, so ensure it’s not covered with the orchid mix.
Similarly, the aerial roots should also be above the soil line.
Stake Your Orchid Plant
Orchid repotting ends with staking or securing them. The roots have a tendency to grow up and extend above the soil line.
In addition to being unsightly, this will cause the orchid roots above the base of the plant to dry up more quickly than the roots below the soil line.
Rhizome clips, for example, will hold dendrobium orchids in place.
Moth orchids don’t grow rhizomes, so their stem base should be slightly above the potting media.
Orchids need moisture after repotting, so you’ll need to mist them until you notice new growth.
What Can Happen If I Don’t Repot An Orchid?
If you want to grow orchids in pots, they’ll need repotting sooner or later.
I mentioned the signs of when it’s time to refresh the potting mix and plant your orchid in a new pot.
But what will happen if you skip repotting?
The orchid roots keep growing, and once they overgrow the sides of the pot they will start drying out.
One of the consequences of skipping repotting is orchids not flowering.
The old potting soil won’t have enough nutrients, and without them your orchid can’t produce new flower spikes or anything new.
Another problem is water retention. I mentioned that the materials in the potting media lose the ability to drain well over time.
Water can quickly pool around the roots and lead to rotting. This is an extremely dangerous condition for orchids and may quickly kill them if left untreated.
Is There Anything Else To Do Instead Of Repotting?
Skipping repotting is a terrible idea if you want to grow orchids in pots. However, there is one alternative, and it’s called orchid mounting.
In this case, you’ll need to forget pots and rely completely on potting media.
What is orchid mounting? Instead of putting your orchid in a pot, you plant it into a potting media only, and if the mount is long-lasting you won’t need to replace it for years.
Sounds amazing, right? Well, nothing is perfect, and mounting isn’t an exception. You’ll need to hang it and ensure it gets plenty of humidity and light. Additionally, your orchids will need more water.
If orchid care isn’t too challenging for you, then you should try this method.
How To Mount Orchids
Before you start mounting, prepare the mounting material, such as oak, cedar, or redwood.
You’ll also need sphagnum moss, a colorless fishing line, wire, a drill, and pliers.
First, you’ll need to remove your orchid from its pot. There shouldn’t be any soil on the orchid roots, so clean them well before attaching them to the mount.
If you decide to keep mounted orchids indoors, you’ll need to hang them. Just make tiny holes on the mount ends using a drill and insert the wire.
Soak the sphagnum moss and put it on the mount. Put your moth orchid or Dendrobium on the mount top. If you are mounting Dendrobiums, make sure the oldest pseudobulbs are over the moss.
Now you need to secure everything. Use a colorless fishing line and wrap it around moss and Phalaenopsis or Dendrobium.
That’s it! You no longer need a pot, and your orchid still looks amazing!
How To Care For Orchids After Repotting
Although plants go through shock after repotting, they can quickly recover if all their requirements are met.
I’ll show you the basics of orchid plant care so you know what to do and what to expect.
Let’s get started!
Light
Orchids love light, and if not given enough they won’t reward you with their unique and captivating flowers.
So, low light isn’t a good choice for these plants, which is why you should keep your orchids away from north-facing windows or use grow lights.
Another problem for orchids is direct sunlight. You don’t want to burn or scorch their fascinating leaves or destroy the blooms, so I recommend giving your orchids bright indirect light.
Temperature & Humidity
Orchids are used to warmer temperatures, but have adapted well to average temperatures in households.
As long as the daytime temperatures range from 65 to 80 degrees Fahrenheit, and nighttime temperatures range from 60 to 70 degrees, your orchids will grow just fine.
An orchid will grow healthily if you provide it with high humidity. This will aid in water evaporation and reduce the risk of root rot.
There are plenty of options for raising humidity, such as humidity trays, misting, or using a humidifier.
Watering
Believe it or not, overwatering is the easiest way to kill an orchid. It’ll affect the delicate roots by causing them to rot. Additionally, it causes the orchid crown to rot, and the chances of saving orchids with crown rot are very low.
On the other hand, your orchid will need water and won’t survive long periods without it.
You’ll need to wait until the top inch of the soil is dry and then water it thoroughly.
Many gardeners advise using ice cubes for watering, but I’m definitely not one of them. I mean, these plants are from tropical regions, so why on earth should they be watered with ice-cold water?!
Of course, boiling water isn’t an option either.
Lift the orchid pot, and if it’s lightweight you can water it. Put your finger in the orchid potting mix, and if it’s dry an inch below the soil line you can give your orchid a good soak.
You can also purchase a moisture meter for precise moisture detection.
Water less during winter because your orchid is taking a rest (dormancy) during this time, and water it more during hot summer days.
Fertilizing
If you are a beginner grower, you need to know that orchids are heavy feeders.
You’ll need to apply fertilizer approximately twice a month during the growing season. When your orchid enters dormancy, reduce fertilizing to once a month.
You can use a balanced 20 20 20 fertilizer or go with 30 10 10, both diluted to half strength.
I recommend 20 20 20 before the flowering season.
Wrapping Up
Many growers claim that orchids are demanding plants that require more care than other common houseplants.
That’s true, but only in the beginning.
As far as repotting orchids is concerned, now that you have our step-by-step guide, I’m sure that won’t be a problem either.
Ensure enough light, humidity, appropriate temperatures, light and porous potting mix, water when the top inch is dry (not with ice cubes), and feed it twice a month during the growing season. And, of course, repot your orchid once you spot the signs described in the article.
Good luck, and until next time!
Like this post? Share or pin it for later!