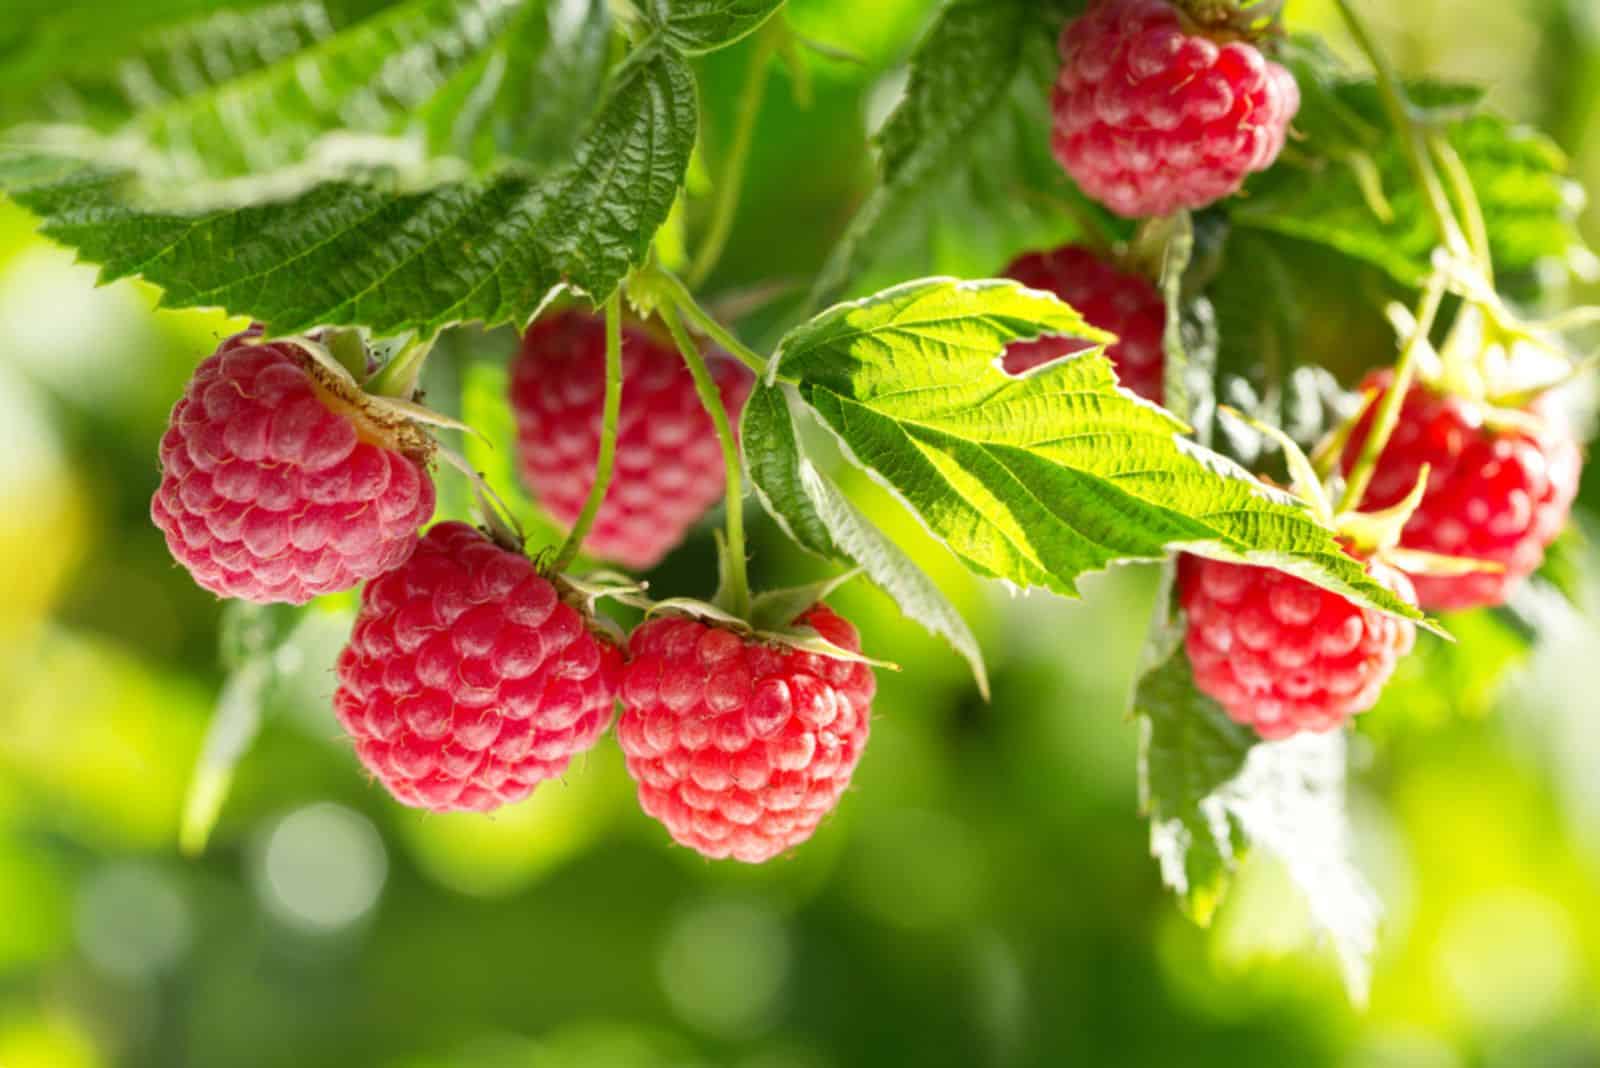
Follow These 6 Steps To Start New Raspberry Canes And Get A Bountiful Harvest

A fruit patch has always been a dream of mine, and I thought long and hard about what to plant. Apple trees and strawberry patches seemed like an obvious choice, so I wanted to go beyond that.
I eventually settled on raspberry canes. One of the reasons was the head-spinning prices of these berries in stores, so growing organic ones was easy on the pocket and made for a great fruit patch.
The best thing about starting new raspberry canes is that it isn’t too difficult, although you will have to put in some effort.
Let’s learn how to do it!
1. Are Raspberry Canes The Right Choice For You?
The first step towards fulfilling your dream of a fruit garden is understanding whether raspberries are the right choice for you.
These vines are hardy in zones 4-8, although certain varieties can handle the heat in zone 9.
The next thing you need to be mindful of is the location. You need to have enough space to accommodate these plants, plenty of sunlight, and enough pollinators.
The good news is that raspberry canes are low-maintenance once they get established, but you need to get through that initial period of hard work. However, from that point onwards, you only need to prune them once a year and the fruit of your labor will come the following season.
Bear in mind that rabbits will nibble on the canes in winter and may damage them, so consider investing in a chicken wire fence to keep them at bay. Once the fruit sets, birds and other wildlife will swoop on them, so be fast to harvest raspberries!
2. Choosing A Suitable Variety
Now that you know raspberries can grow in your climate, it’s time to choose a suitable variety. As tempting as it may sound, taking some canes from your friends’ plot is a bit risky since you don’t know what kind of diseases they may carry.
Any infection they may have can destroy your raspberries and contaminate the soil and other plants, so you’ll have to start them in a different location. That’s why you should go with good stock from a reputable nursery.
When you go to the nursery, you’ll find raspberries in these forms:
1. Transplants – These are established canes that are dug up and planted in different locations.
2. Root cuttings – Raspberry cane pieces that have grown roots before replanting.
3. Suckers – New plant sprouts that grow from the root system, which are cut off and planted on their own.
If you don’t have a nursery close by, you can always order the canes online. Just choose the variety suitable for your hardiness zone.
They’ll arrive dormant, which might scare you since they’ll appear as dead twigs with some dangling roots. But that’s just how they look; plant them and they’ll perk up as soon as the weather warms up a bit.
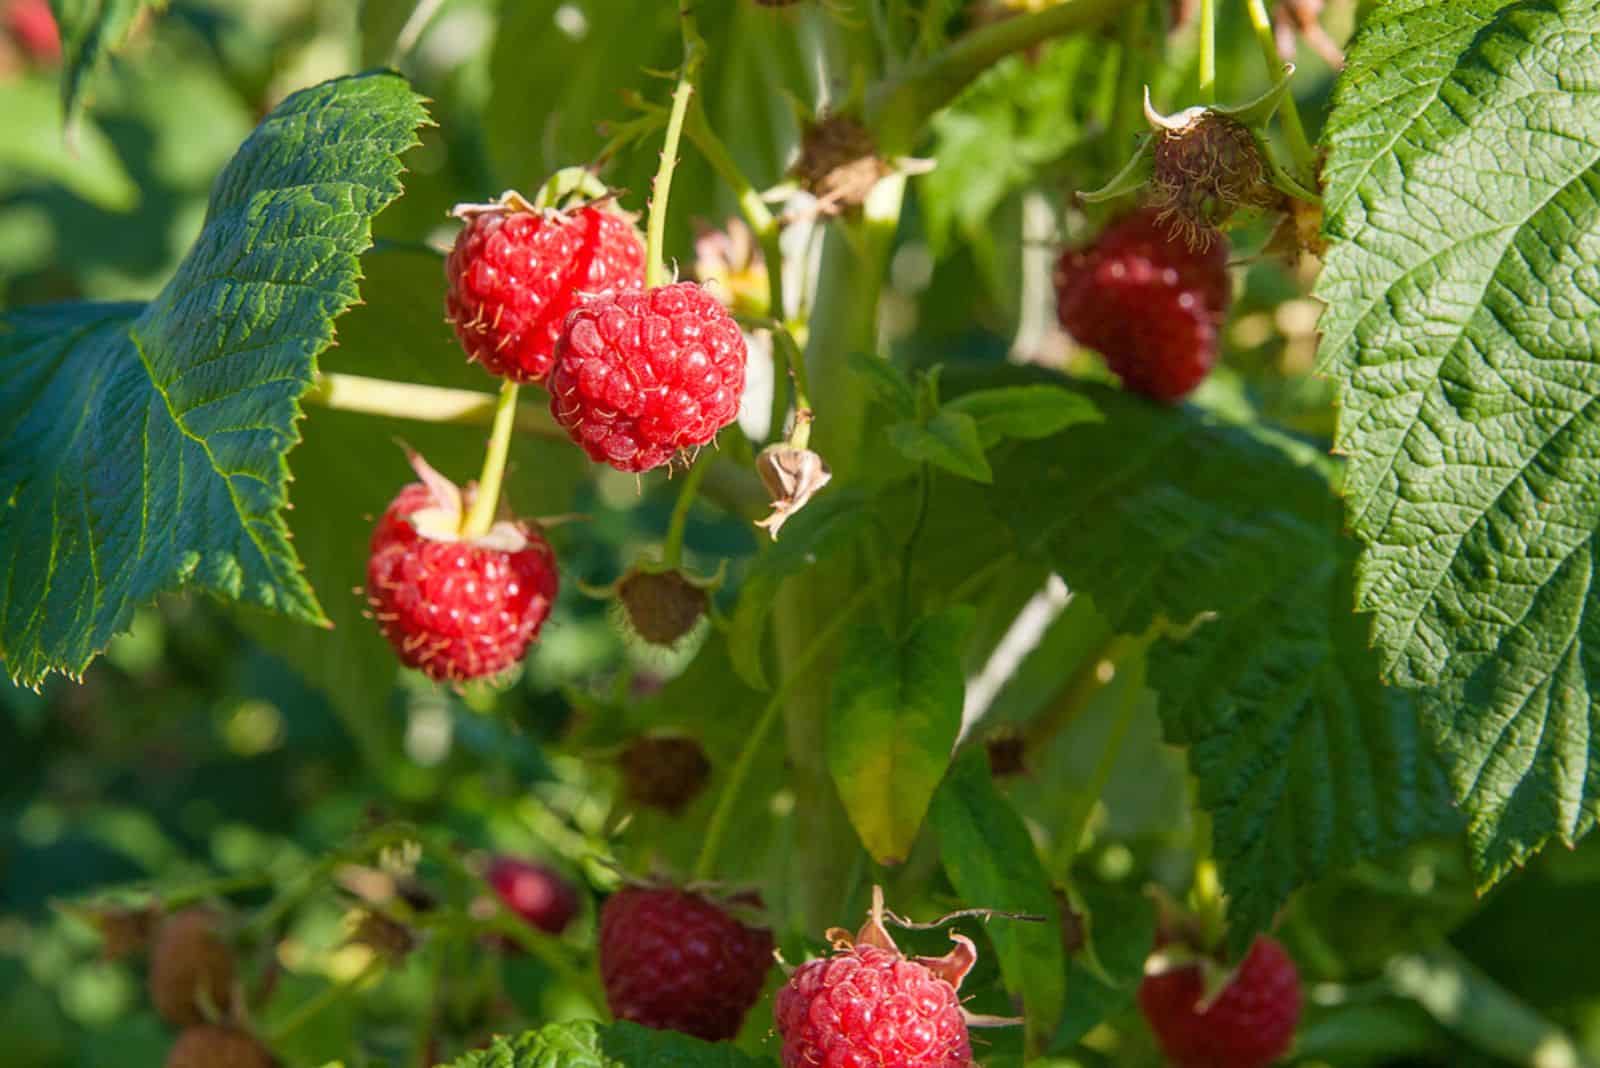
The next thing you have to choose is the color. They come in red, black, purple, and yellow, although the yellow is the same category as the reds, but not pigmented.
They differ in taste as well as growth. For instance, red and yellow varieties send primocanes (new canes) from the buds that grow up from the roots and floricanes (second year’s growth).
That’s why they extend in all directions and need heavy pruning.
Purple and black varieties, on the other hand, only produce new canes from floricanes. That’s the reason they have a clumping growing habit, making them more compact and easier to maintain.
Their fruit also has less seeds and ripens earlier, and their flavor makes them ideal for cooking and canning.
Popular Raspberry Types

Not all raspberries are created equal; some are sweeter, others store better, some produce once a year, while others are everbearing, etc.
But one thing they have in common is that all raspberries have seeds, though there are species that produce less than others.
I’ve started many different types in my garden over the years, and the only ones that thrived were ‘Mysore.’ They’re black raspberries with serious thorns, but the prize is too sweet to miss out on!
If you want more options or a version without thorns, here are some great choices:
• Boyne – If you want a cold and disease resistant raspberry plant, then this sweet-tasting red ‘Boyne’ is perfect for you. It flourishes in zones 3-8, and you can expect a large harvest some time in July.
• Brandywine – This variety and its sister, ‘Royalty’ are hybrids between red and black species that yield purple fruit. ‘Brandywine’ tastes tangy and fruity, isn’t too sweet, and fruits in mid-season. It is perfect for zones 4-8, and is resistant to deer and insects.
• Fall Gold – Another sweet and yellow raspberry is the ‘Fall Gold.’ This one fruits both in summer and fall, and yields large fruit. It is hardy in zones 4-9 and disease-resistant.
• Polka – This variety is everything you could dream of; self-pollinating, thornless, red, and incredibly sweet. It fruits from late summer to early fall, is resistant to various diseases, and grows best in zones 4-8.
• Shortcake – This variety is ideal for anyone who doesn’t have much room because it’s compact and grows well in containers. There’s no need for trellising and it has red berries with a sweet vanilla flavor. They love the warmer conditions of zones 5-8.
Are Everbearing Varieties The Best For You?
When starting a new raspberry plot, we naturally assume that everbearing (fall-bearing) raspberries are the best. I mean, who doesn’t want fruit the first year after planting the canes, or two harvests the following year?
However, you’ll have to pick the everbearing varieties more frequently than the summer-bearing ones, which requires a serious commitment on your part.
Another thing to consider is their fruiting season. These plants usually produce berries in summer and fall up until the last frost. So, if you crave raspberries earlier in the season, summer-bearing ones might be for you.
You can always experiment with both varieties, just don’t interplant them since they have different pruning requirements and you may not be able to tell which is which.
3. Deciding How Many Canes To Plant
To decide how many raspberry canes you want to plant, you’ll have to do some math – but nothing too extensive, I promise.
One plant typically yields 1-2 quarts of fruit, so the general rule is to plant 4-5 raspberry plants per member of your household. If you want to freeze, can, or turn them into a juice or jam, you’ll have to plant more than that.
But it’s always better to start small since that won’t drain all your energy, and you’ll have an easier time getting the hang of caring for them. Once the plants get established, they’ll practically care for themselves and you’ll only have to prune them.
You can train them on a trellis to reduce your work even more!
4. Planting Raspberry Canes
The best time to plant raspberries is in fall or early winter while the soil is still moist and workable. You can do it whenever they’re dormant, so any time from November to March.
If you order the canes from a nursery, you’ll get them with moist organic matter around their roots and wrapped in plastic to prevent drying out.
The best practice is to plant the canes as soon as you get them, but if something’s stopping you, you can heel them in. This means digging a shallow and protected row, laying the cane on the side, and covering the roots with a couple of inches of soil.
If you keep the soil moist, the raspberries will be able to survive 1-2 months in this state. You can also store the canes in the fridge if you plan on planting them within the next 1-2 weeks.
The most complicated step in planting raspberry canes is preparing the soil, but if you get it right, it’s smooth sailing from there. You have to ensure that the growing medium is well-draining, fertile, and slightly acidic.
Test the soil, and if it’s too acidic (pH lower than 6), add some lime to increase it. Additionally, if your substrate is too heavy, plant the canes in a raised bed since it will allow for better drainage. Fill it with 4 parts topsoil and 1 part sand and manure mixture.
You can also amend your garden soil with compost to make it more draining, moisture-retentive, and introduce more nutrients.
You don’t have to soak the raspberries in water before planting, and you definitely don’t need to use vitamin B1 to support root growth because it doesn’t work. (1)
Plant the canes about a foot deep, just enough to accommodate their root system, and space them 1.5-2 feet apart. If you want to plant more rows, make sure they’re about 8 feet apart to give your plants room to grow.
Backfill the hole with more soil, firm it up, and mulch it with wood chips, straw, or some other material. Just don’t add too much of it since it can smother the plant (3 inches are quite enough).
When it comes to aftercare, make sure the canes get plenty of moisture during their first year. You should provide them with 1-2 inches of water each week and up to 4 inches during the fruiting season. Set up drip irrigation to reduce your chores.
The good news is that these vines are fairly pest and disease free, although you might notice some aphids, Japanese beetles, fruit worms, and weevils as they start fruiting.
I struggle with squash bugs on my ‘Mysore’, so I remove them by hand as soon as I notice them. I also get rid of all the foliage with squash bug eggs on the bottom side.
Of course, birds can also nibble on your berries, and the only thing you can do is harvest the fruit first or use bird netting if absolutely necessary.
Finally, you can always incorporate some raspberry companion plants to keep them safe from pests, improve their taste, and attract pollinators.
Pro tip: Avoid planting raspberries in the same location as last year’s tomatoes, potatoes, peppers, eggplants, and strawberries. These locations may contain fungal diseases that can kill your cane roots. (2)
Here are some more tips for planting raspberries:
5. Installing A Trellis
Young raspberry canes don’t require staking during their first year, but installing some chicken wire fence will keep them safe from rabbits and other nuisances.
As the plant grows, it’ll need more support to keep its berries off the ground. Installing a trellis will also provide enough air circulation, which will help keep the plants pest and disease free – not to mention making harvest a lot easier!
There are various systems you can choose from, but they usually involve a T-post with some wiring that supports the raspberries. The key is to get the plants to drape over the wire.
You can do this by bending the branches into an arch and tying them to the trellis.
Here’s some more info on how to do it:
6. Pruning Raspberries
Raspberries are amazing fruit vines to grow in your garden, but they require pruning to keep them that way and prevent them from turning your yard into a jungle.
Trimming the old canes of your plants and allowing new growth to appear will also maximize your yield. The best time to do it is in spring, before they wake up from dormancy.
If you have fall-bearing varieties, you have two alternatives. The first one is to prune the canes down to an inch from the ground. But that will delay fruiting and you’ll have to wait until fall to enjoy the raspberries, cutting your harvest in half.
The other option is to prune primocanes and level them with the top-supporting wire, and trim floricanes to an inch from the ground. That way, your plant will produce the first batch in July and push out new vines that will have fruit ready for the fall harvest.The same technique works well with summer-bearing varieties.
The best idea is to top-dress the pruned raspberries with some compost or manure to fire up the following growing season.
Pruning will also keep your plants healthy as it will allow for proper airflow and prevent fungi from breeding on your plants.
If you notice fruit rot, take your pruners and start cutting (and avoid wetting the foliage since that can cause this disease too).
To get the best results from your raspberries, planting some pollinator-friendly flowers will attract bees and butterflies, lead to pollination, and increase your yield.
Here is some additional pruning advice:
5 Things To Do With Your Harvest
Getting the initial hard work done will leave you satisfied, and even more so once you see how bountiful your harvest is.
From that point onwards, your only trouble will be how to use all those raspberries!
Here are some great options:
Freezing
This obvious idea is one of the best. You’ll have a summer-tasting smoothie in the middle of winter, materials for your cheesecake, and more.
Just pick the raspberries, wash them, and freeze them on parchment paper if you don’t want them to stick together. Once they’re frozen, put them in a freezer bag and place them on ice.
But if you’re like me and don’t mind mushing them together, put them in a freezer bag immediately and toss them in the freezer.
Making A Jam
Nothing beats homemade crepes with a raspberry jam and vanilla dressing. Simply mix raspberries with some sugar, bring it to a boil, and keep stirring until it gets a gel-like consistency.
Mixing It In A Syrup
Raspberry syrup and butter on your morning pancakes will make you forget about maple syrup altogether.
Here’s how to make it:
Making Sorbet
One of my favorite things to do with raspberries is make a sorbet. Simply freeze the berries, blend them, add some honey or maple syrup and lemon juice, and that’s it.
Freeze it again, and enjoy!
Making Raspberry Vinegar
Apple cider vinegar gets all the fame, but homemade raspberry vinegar doesn’t fall short. It is packed with antioxidants and is a great way to extend your harvest.
I hope you enjoyed this article.
Until next time!
References:
1. Chalker-Scott, L. (n.d.). The Myth of Vitamin Stimulants: “Vitamin B-1 reduces transplant shock by stimulating new root growth.” Horticultural Myths, Washington State University Extension.2. Hassani, N. (2020). Raspberry Planting and Care for Home Gardeners. PennState Extension.