The Oregon Garden Pests That Show Up Every June And How To Stop Them
June is when Oregon gardens start feeling busy in every direction. Beans climb, tomatoes stretch, and flowers finally look like they got the memo. Then the tiny troublemakers arrive.
Not with a dramatic entrance, of course. More like a few chewed leaves, a sticky stem, or one suspicious hole that was definitely not there yesterday. That is how June pests work.
They show up quietly, settle in fast, and make gardeners question every plant they trusted.
Warm days mixed with lingering moisture can give pests the perfect opening, especially in beds packed with fresh growth. The annoying part is that damage often starts small enough to ignore.
By the time it looks serious, the pest party may already be well underway. Catching the signs early can save a lot of plant drama later.
Oregon gardens have enough going on in June without bugs treating them like an all inclusive resort.
1. Aphids Cluster On Tender New Growth
Soft, tiny, and surprisingly destructive, aphids are one of the first pests to appear every June in home gardens across this state.
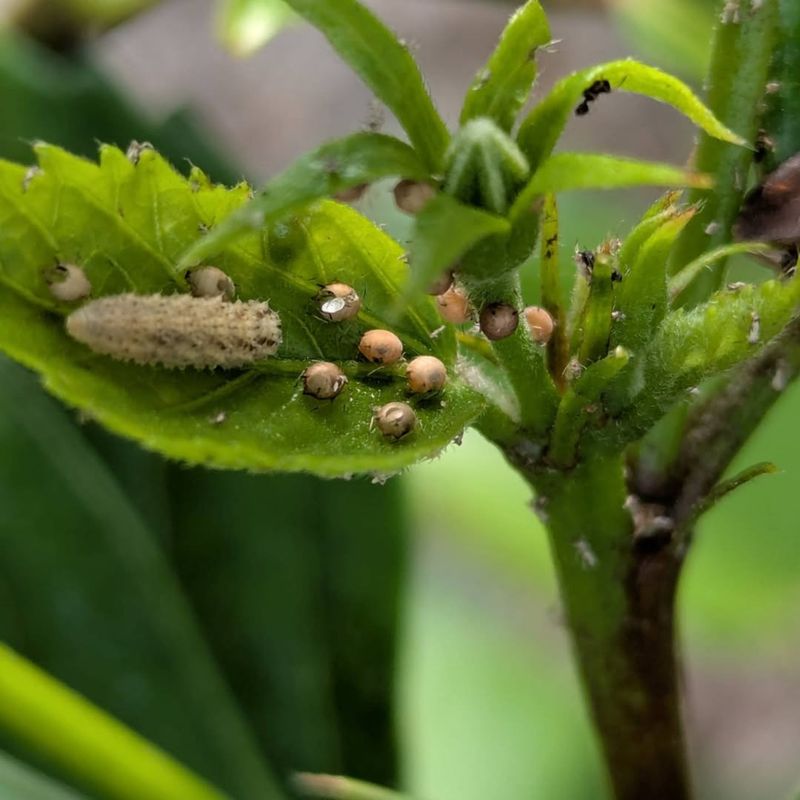
They tend to gather in large numbers on the newest, softest parts of your plants. Stems, buds, and the undersides of young leaves are their favorite spots.
Aphids feed by sucking out plant sap, which weakens the plant over time. You might notice leaves curling, yellowing, or becoming sticky.
That stickiness is called honeydew, and it attracts ants and can lead to a black mold growing on your plants.
One of the easiest ways to deal with aphids is a strong blast of water from a garden hose. Knock them off the plant and most will not find their way back. Repeat this every couple of days until numbers drop.
Neem oil spray is another solid option. Mix it with water and a few drops of dish soap, then apply it directly to the affected areas. It works best in the early morning or evening to avoid burning leaves.
Encouraging natural predators like ladybugs and lacewings in your garden also helps keep aphid populations in check without any extra effort.
Planting flowers like dill or fennel nearby attracts these helpful insects naturally. Staying consistent with monitoring is really the most important step you can take.
2. Cabbage Worms Chew Holes In Brassicas Fast
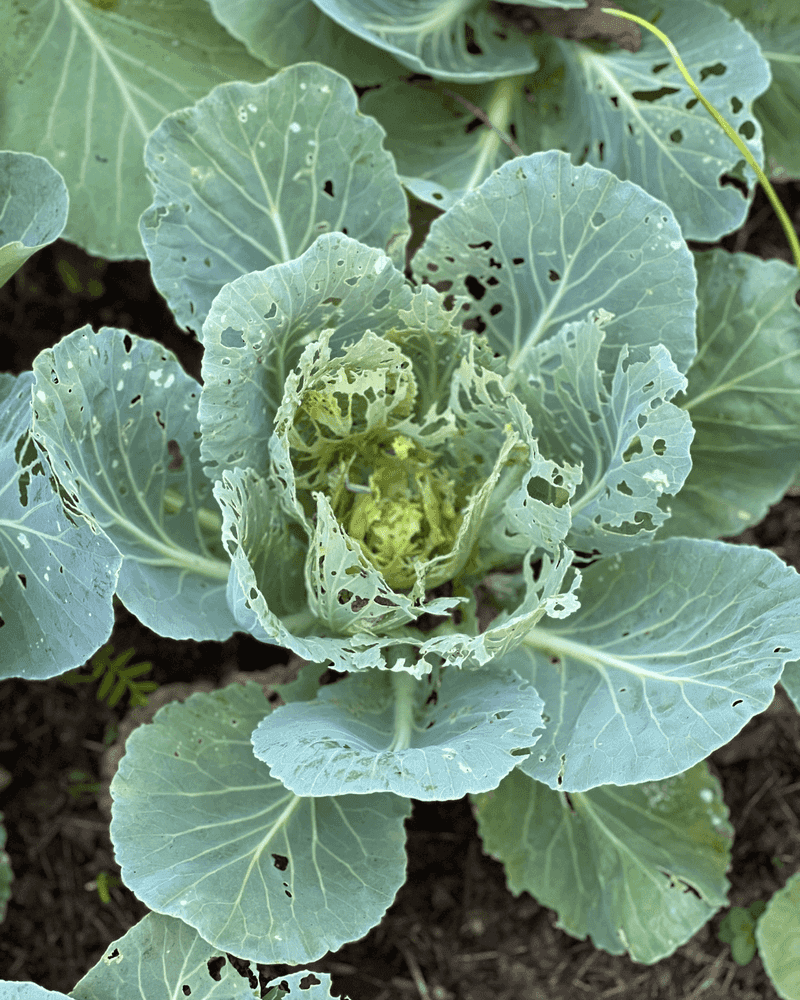
If you grow broccoli, kale, cabbage, or cauliflower, you have probably already met cabbage worms.
These pale green caterpillars blend in so well with leaves that many gardeners do not notice them until the damage is already done. By June, they are actively feeding and growing fast.
Cabbage worms are the larvae of white butterflies you might see fluttering around your garden.
Those butterflies are laying eggs on the undersides of your brassica leaves. Each egg hatches into a hungry caterpillar that starts chewing almost immediately.
Check the undersides of leaves regularly, especially on plants that look ragged or full of holes. Remove any worms you find by hand and drop them into a bucket of soapy water. It takes a few minutes but makes a real difference.
Your Oregon Garden Changes Every Week. Your Plan Should Too.
Gardening in Oregon changes quickly throughout the season. Every Friday you’ll receive a simple weekly plan showing exactly what to plant, prune, fertilize, harvest, and protect so you never miss the right timing.
Row covers are one of the most effective tools you can use. Placing lightweight fabric over your brassica beds keeps butterflies from landing on the plants and laying eggs in the first place. Put them on early in the season before the butterflies arrive.
Bacillus thuringiensis, commonly called Bt, is a natural bacteria-based spray that targets caterpillars without harming other insects.
It is widely available at garden centers and works very well on cabbage worms. Apply it after rain washes it off for best results. Staying ahead of this pest early in June saves a lot of headaches later.
3. Cucumber Beetles Show Up Right As Vines Take Off
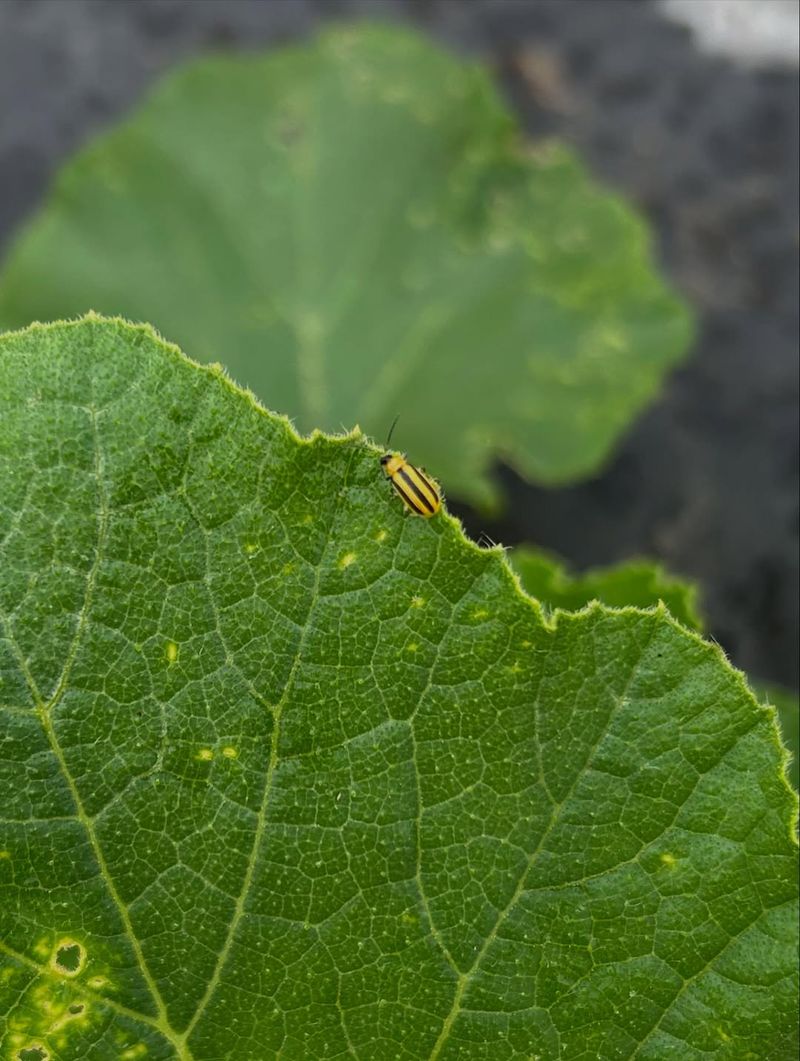
There is something almost cruel about cucumber beetles timing their arrival just as your vines start to grow vigorously.
These small, yellow-green beetles with black stripes or spots show up in June and immediately go after cucumbers, squash, melons, and related plants. They are fast movers and hard to catch.
The damage they cause goes beyond just chewing on leaves. Cucumber beetles spread a bacterial disease called cucumber wilt, which can cause entire plants to collapse within days. Once a plant is infected with this disease, there is no saving it.
Prevention is your best strategy. Yellow sticky traps placed near your plants can help monitor and reduce adult beetle populations. Check the traps every few days and replace them when full.
Row covers work well here too, just like with cabbage worms. Keep them on until your plants start to flower, then remove them so pollinators can do their job. Timing matters a lot with this approach.
Kaolin clay is a natural product that can be dusted or sprayed onto plant surfaces. It creates a barrier that confuses and irritates beetles, making them less likely to feed or lay eggs. It washes off in rain, so reapplication after wet weather is necessary.
Planting resistant cucumber varieties is also smart. Check with your local nursery for options that hold up better against beetle pressure in our region. Early action in June keeps your cucumber harvest on track.
4. Cutworms Can Drop Seedlings Overnight
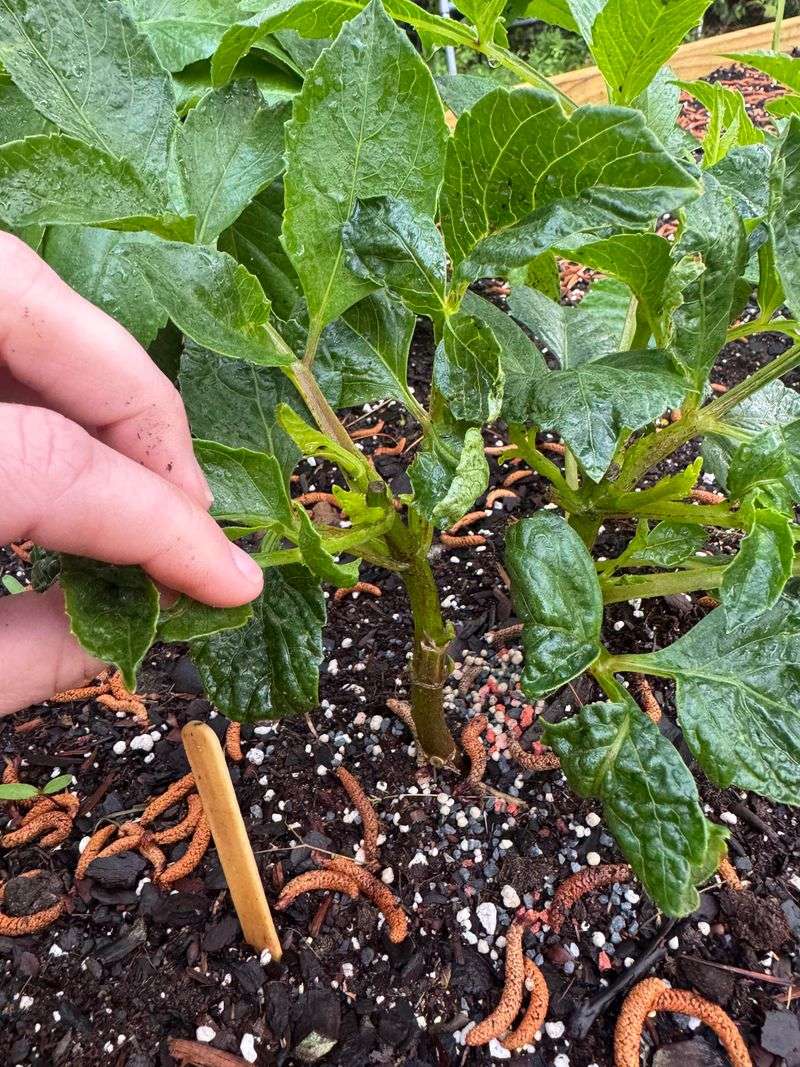
Few things are more discouraging than walking out to your garden in the morning and finding healthy seedlings lying flat on the ground.
Cutworms are the usual suspects behind this kind of damage. They feed at night, cutting through the base of young stems right at or just below the soil surface.
These pests are the larvae of certain moths, and they spend most of their time hidden in the soil during the day.
By June, they are large and hungry enough to take down a seedling in one feeding session. Transplants and freshly direct-seeded plants are especially vulnerable.
One of the simplest protections is a physical collar placed around each seedling. Cut the bottom off a paper cup or use a cardboard tube, then press it about an inch into the soil around the stem. This barrier stops cutworms from reaching the plant.
Diatomaceous earth sprinkled around the base of plants can also help. It is a natural powder made from tiny fossilized organisms, and it irritates soft-bodied pests when they crawl over it. Reapply after watering or rain.
Beneficial nematodes are another solid option. These microscopic organisms are watered into the soil and naturally reduce cutworm populations underground. They are safe for plants, people, and pets.
Apply them in the evening when the soil is moist for the best results. Getting ahead of cutworms early in the season really pays off as your garden fills in.
5. Spider Mites Thrive When Conditions Turn Hot And Dry
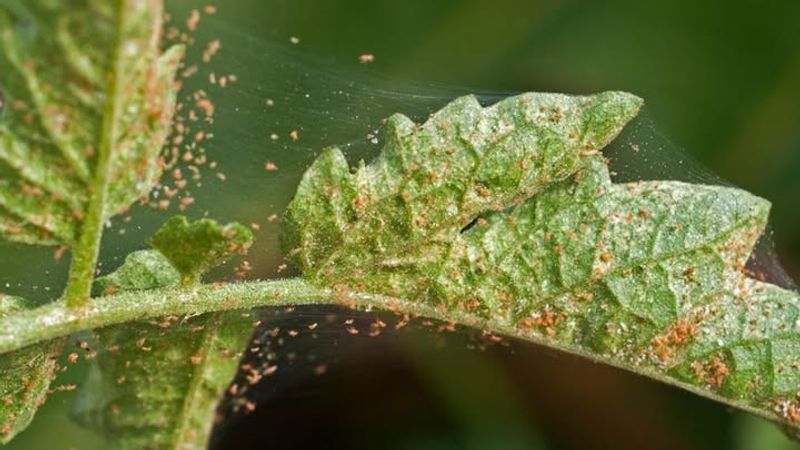
Hot, dry spells in June create ideal conditions for spider mites, and this state sees plenty of those weather shifts.
These pests are barely visible to the naked eye, but the damage they leave behind is hard to miss. Leaves start looking dusty, speckled, or bronze-colored, and you might notice fine webbing on the undersides.
Spider mites are not actually insects. They are arachnids, closely related to spiders. Because of this, many common insecticides do not affect them much.
You need products specifically labeled as miticides, or you can rely on some very effective natural alternatives. Keeping plants well-watered during dry stretches is one of the best defenses.
Mites struggle in humid conditions, so consistent moisture around your plants creates a less welcoming environment. Do not let your garden dry out completely during a heat wave.
Spraying plants with a strong jet of water knocks mites off leaves and reduces their numbers quickly. Focus on the undersides of leaves where mites prefer to live. Do this every other day during a flare-up.
Neem oil mixed with water and a little dish soap is effective against spider mites. It smothers eggs and disrupts the mite life cycle without harming beneficial insects when applied carefully.
Insecticidal soap sprays work in a similar way and are easy to find at garden stores. Checking plants weekly during warm, dry periods gives you the best chance of catching mite problems before they spread widely across your garden.
6. Flea Beetles Pepper Leaves With Tiny Holes
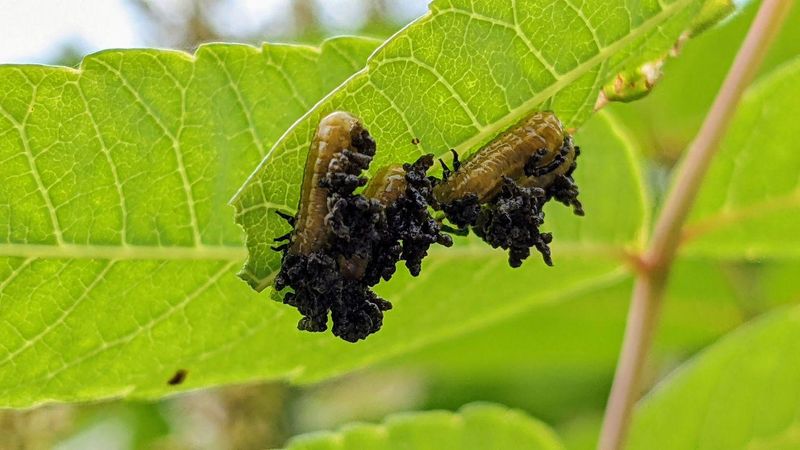
Have you ever gone out to check on your seedlings and found the leaves looking like someone went at them with a tiny hole punch?
That is the signature damage of flea beetles. These small, shiny, black or bronze-colored beetles jump like fleas when disturbed, which makes them tricky to catch.
They are especially hard on young seedlings of eggplant, tomatoes, peppers, radishes, and leafy greens.
Established plants can usually handle some flea beetle feeding, but seedlings can be seriously weakened if the population is large enough.
Timing your planting can actually help. Flea beetles tend to be most active in early June. If you wait until mid-June to transplant warm-season crops, you may avoid the worst of their activity.
Older, stronger plants are much more resilient. Row covers work well here too. Placing them over seedbeds right after planting keeps flea beetles from accessing your plants during that vulnerable early stage.
Remove covers once plants are bigger and well-established. Sticky yellow traps placed near affected plants help monitor beetle numbers and catch adults before they can lay eggs.
Diatomaceous earth dusted on leaves and around the base of plants adds another layer of protection.
Kaolin clay spray creates a physical barrier on leaf surfaces that confuses flea beetles and reduces feeding.
It needs to be reapplied after rain. Planting trap crops like radishes nearby can also draw beetles away from your main garden beds and concentrate them in one easy-to-manage spot.
7. Leafminers Leave Tunnels Through Greens
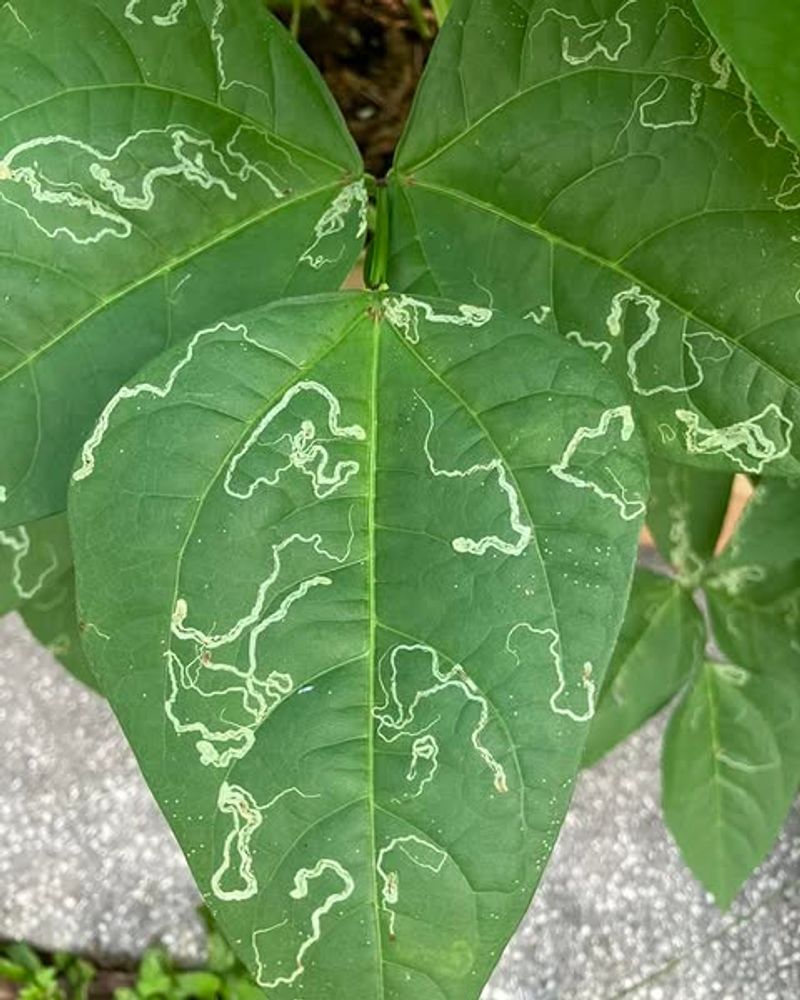
Those squiggly white trails you sometimes see winding through the leaves of your spinach, chard, or beet greens are not random.
They are the work of leafminers, tiny larvae that feed from inside the leaf itself. The adult is usually a small fly or moth that lays eggs directly on leaf surfaces in late spring and early June.
Once the eggs hatch, the larvae burrow between the upper and lower layers of the leaf and feed as they tunnel along.
The trails they leave behind are called mines, and they can cover large portions of a leaf. Heavily mined leaves look pale, papery, and weak.
Removing affected leaves as soon as you spot damage is the first thing to do. Toss them in the trash rather than composting them, since the larvae inside can survive and continue their cycle. Acting quickly slows the spread.
Row covers placed over leafy greens early in the season prevent adult flies from landing and laying eggs.
This is the most effective preventive measure available to home gardeners. Put them on before you see any damage.
Neem oil applied to leaf surfaces can deter adult leafminers from laying eggs. It also disrupts larval development in some cases. Consistent application every seven to ten days during peak season gives the best results.
Encouraging parasitic wasps by planting small-flowered plants like sweet alyssum nearby helps too.
These wasps naturally target leafminer larvae and can significantly reduce populations over time without any extra work from you.
8. Codling Moth Can Ruin Apples And Pears Early
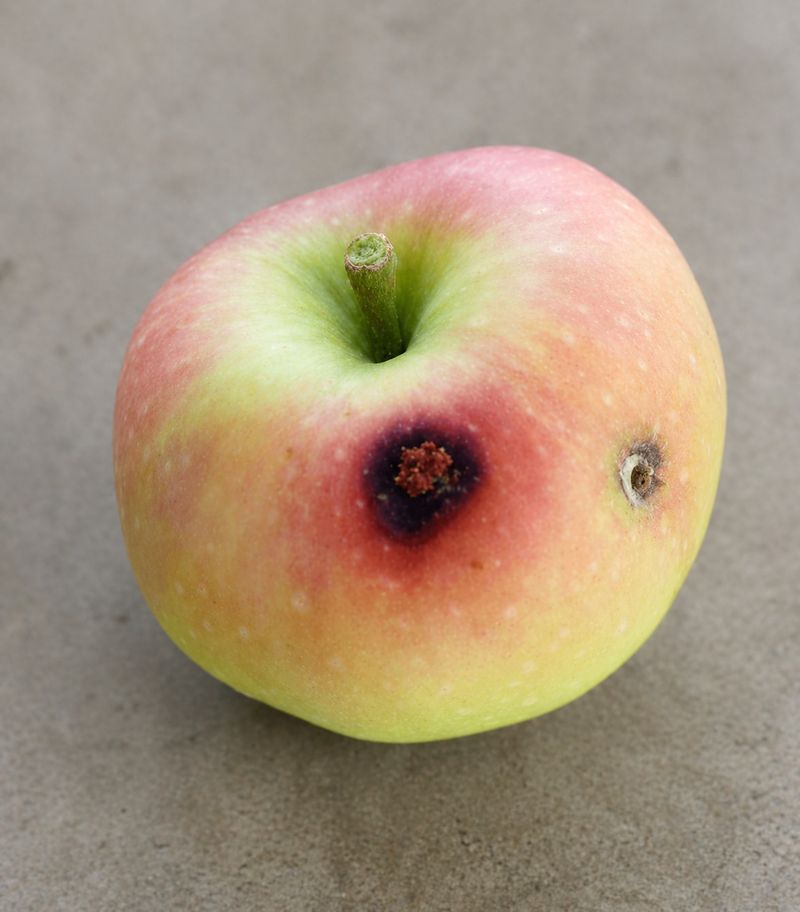
Biting into a homegrown apple and finding a worm inside is one of the most classic garden disappointments.
Codling moth is the pest responsible, and it is extremely common in home orchards across this state. Adult moths emerge in spring and lay eggs on developing fruit and nearby leaves as temperatures warm in June.
The larvae hatch and bore directly into the fruit, tunneling toward the core where they feed on seeds.
By the time you see the entry hole on the outside of the apple or pear, the damage is already done deep inside. Catching this pest early requires monitoring before you see fruit damage.
Pheromone traps are one of the best tools for managing codling moth. These sticky traps use synthetic moth attractants to lure and capture male moths. Hang them in your trees in early May and check them weekly.
High trap counts signal that it is time to spray.
Kaolin clay applied to fruit and leaves creates a physical barrier that makes it harder for larvae to burrow in. Reapply every seven to ten days and after rain throughout the season.
Spinosad, a natural insecticide derived from soil bacteria, is very effective against codling moth when timed correctly.
Apply it at petal fall and again every two weeks during June. Always follow label directions carefully.
Thinning fruit early in the season also helps, since touching fruits give larvae an easier path between them. Good sanitation, like removing fallen fruit promptly, reduces the number of larvae completing their cycle near your trees.
9. Cherry Fruit Fly Targets Ripening Cherries
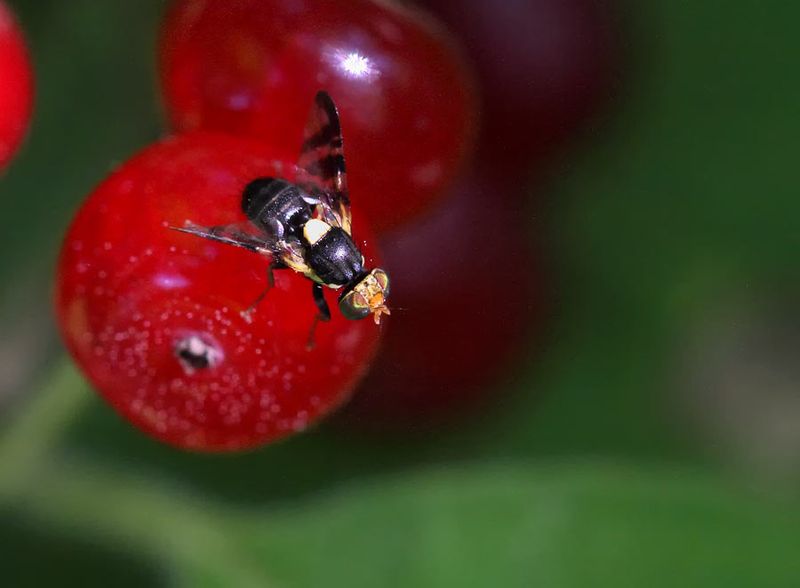
Cherry season is one of the highlights of summer gardening in our state, but cherry fruit fly can turn that excitement into disappointment fast.
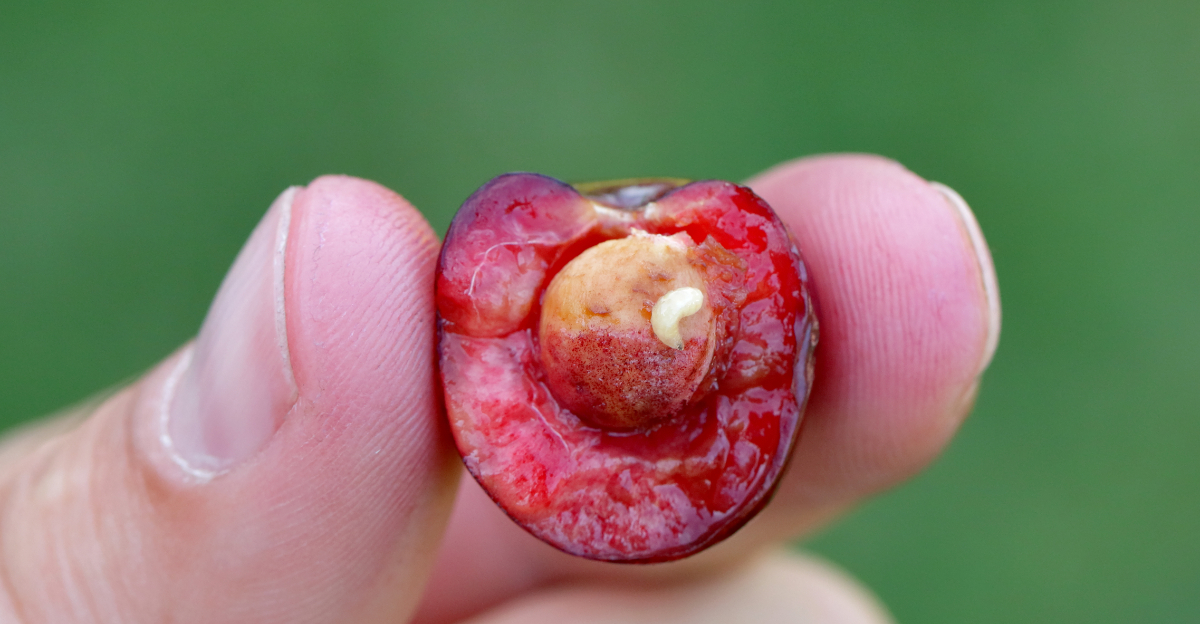
This small fly lays its eggs inside ripening cherries, and the larvae feed on the fruit flesh from the inside. By the time you notice soft or discolored cherries, the damage is well underway.
Adult flies emerge from the soil in late spring and become most active in June as cherries begin to ripen.
The female uses a sharp egg-laying organ to puncture the skin of the cherry and deposit a single egg inside. The larva that hatches feeds until the cherry is fully damaged.
Yellow sticky traps with a special cherry fruit fly lure are widely available and work well for monitoring.
Hang them in your cherry trees by late May. High catch numbers mean you need to act quickly before egg-laying peaks.
Kaolin clay spray applied to the fruit and foliage every week starting in early June creates a physical barrier. It makes it harder for the fly to land and lay eggs. Consistent reapplication after rain is essential for this method to work.
Spinosad spray is another effective option and can be applied every seven to ten days during the risk period. Always read the label and follow the waiting period before harvesting fruit after any spray application.
Harvesting cherries as soon as they ripen, without leaving them on the tree too long, also reduces your losses. Removing fallen fruit from under trees breaks the pest cycle and lowers pressure the following year.