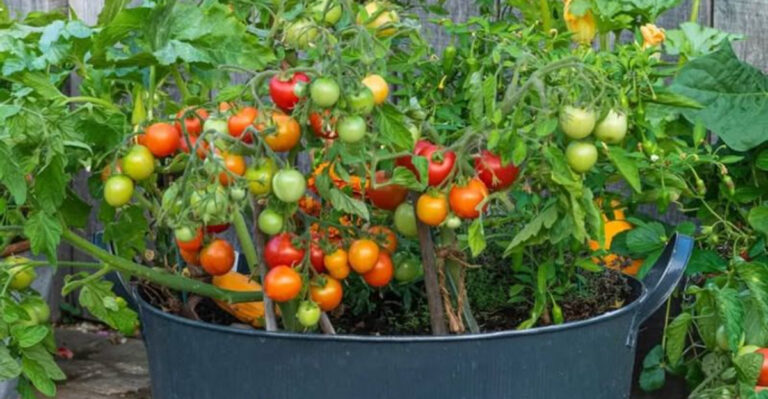
These Are The Tomato Mistakes California Gardeners Make Every Summer
California summers can be tough on tomato plants, even for gardeners who know their way around a backyard bed. The sun is strong, the soil dries fast, and one small habit can turn a promising plant into a sad, floppy mess.
Tomatoes may look easy, but they are picky in their own sneaky way. Give them too much water, not enough support, or the wrong kind of care, and they will let you know fast.
The tricky part is that many common mistakes seem harmless at first. A little extra fertilizer sounds helpful.
A quick afternoon watering feels kind. Skipping pruning just saves time, right? Not always. These summer tomato slip ups can affect growth, flavor, and the size of your harvest.
The good news is that most are easy to fix once you spot them. Your tomatoes might be dramatic, but they are not impossible.
1. Watering Shallowly Instead Of Deeply

Most gardeners water their tomatoes too often but not long enough. A quick sprinkle every morning might feel like enough, but it only wets the top inch or two of soil.
The roots stay shallow because the water never reaches deeper ground.
Shallow watering trains roots to stay near the surface. That becomes a serious problem when summer heat kicks in and the topsoil dries out fast.
Surface roots cannot handle heat stress the way deep roots can.
Deep, slow watering once or twice a week is far better than light daily watering. You want the moisture to reach at least 8 to 10 inches into the soil.
This encourages roots to grow downward where the soil stays cooler and holds moisture longer.
A simple way to check is to push a wooden skewer or your finger into the soil after watering. If it only feels wet near the top, you need to water longer.
Drip irrigation systems are great for this because they deliver water slowly right at the root zone.
Soaker hoses are another affordable option that works really well in raised beds and in-ground gardens. They keep water low and slow, reducing evaporation.
With deep watering, your plants will handle summer heat much better and produce more fruit overall.
2. Letting Containers Dry Out Between Waterings

Container tomatoes are one of the trickiest things to grow during a hot summer. Pots heat up fast in direct sun, and the soil inside can go from moist to bone dry in just a few hours on a really hot day.
Many gardeners do not realize how quickly this happens.
When a container dries out completely, the roots suffer right away. The plant wilts, leaves curl, and blossoms can drop before they ever become fruit.
Even if you water it again quickly, some damage has already been done.
Consistency is the key with container tomatoes. Check the soil every single day during a heat wave.
Stick your finger about an inch into the soil. If it feels dry, water it right away and do not wait until the next morning.
Your California Garden Changes Every Week. Your Plan Should Too.
Gardening in California changes quickly throughout the season. Every Friday you’ll receive a simple weekly plan showing exactly what to plant, prune, fertilize, harvest, and protect so you never miss the right timing.
Larger containers hold moisture longer than small ones. If you are using pots smaller than five gallons, consider upgrading to something bigger.
A 10 to 15-gallon container gives roots more room and holds water much longer between sessions.
Adding a layer of mulch on top of the potting mix also slows evaporation. Even a one-inch layer of straw or shredded bark helps a lot.
Self-watering containers with a built-in reservoir are worth the investment if you grow tomatoes in pots every year.
3. Skipping Mulch Before The First Heat Wave

Mulch might be the most underrated tool in a summer vegetable garden. Many gardeners skip it because it seems optional, but in this state, it is practically essential once temperatures start climbing.
Without it, soil moisture disappears fast.
Bare soil heats up quickly under direct sun. When the ground gets too hot, roots struggle to absorb water and nutrients properly.
That stress shows up as wilting, yellowing leaves, and reduced fruit production even when you are watering regularly.
A good layer of mulch keeps the soil cooler and holds moisture in much longer. Straw, shredded wood chips, and dried grass clippings all work well.
Aim for a layer that is two to three inches thick around the base of each plant.
Apply mulch before the first real heat wave of the season, not after. Once the soil has already baked and dried out, it takes much longer to recover.
Getting ahead of the heat is always easier than playing catch-up in July or August.
Keep the mulch a few inches away from the main stem to avoid rot. Pull it back slightly when you water so moisture gets through easily.
Replacing mulch midseason is also a smart move since it breaks down over time and loses its ability to insulate the soil effectively.
4. Planting Tomatoes Too Close Together

Spacing might not seem like a big deal when you are planting small seedlings in spring. They look tiny and far apart, and it is tempting to fit in as many plants as possible.
But tomatoes grow fast, and by midsummer, things can get very crowded very quickly.
When plants are too close together, airflow between them drops significantly. Poor airflow creates the perfect environment for fungal diseases like early blight and powdery mildew.
These problems spread quickly from plant to plant once they get started.
Crowded plants also compete for water, nutrients, and sunlight. Each plant ends up getting less of everything it needs to produce a full crop.
Fruit size and flavor both suffer when plants are stressed from competition.
Most standard tomato varieties need at least 24 to 36 inches of space between plants. Indeterminate varieties that grow tall and keep spreading need even more room.
Check the spacing recommendation on the seed packet or plant tag before you put anything in the ground.
If you are working with a small garden, try growing a compact or determinate variety. These stay smaller and work better in tighter spaces.
Proper spacing is one of the simplest ways to prevent disease, improve airflow, and give every plant the best possible chance of producing a full and healthy harvest.
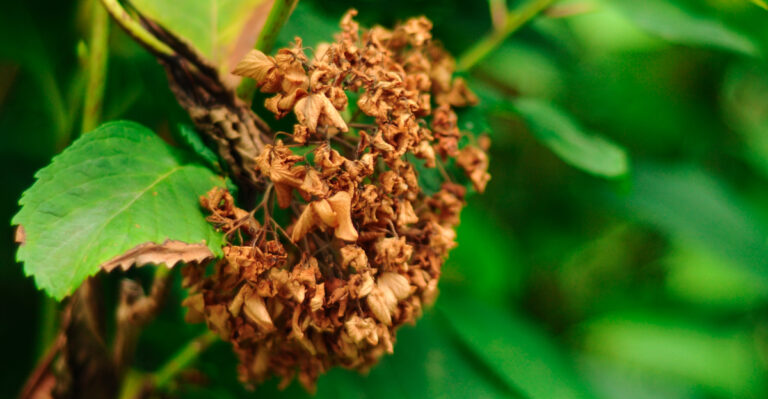
5. Ignoring Afternoon Sunscald On Exposed Fruit

Sunscald is one of those problems that sneaks up on gardeners who are used to thinking more sun always means better tomatoes. In this state, summer afternoons can get intense enough to actually damage exposed fruit right on the vine.
The result is a pale, leathery patch that ruins the tomato.
It usually shows up on the side of the fruit facing the afternoon sun. The skin turns white, yellow, or papery in texture.
The damaged area may also attract mold or insects, which makes the problem worse over time.
Sunscald happens most often after heavy pruning removes too much foliage. Leaves and stems that were shading the fruit are suddenly gone, leaving the tomatoes fully exposed.
This is why aggressive pruning during summer heat can backfire quickly.
The best prevention is to keep enough leaf cover around developing fruit. You do not need a jungle of leaves, but a moderate amount of foliage helps shield the fruit from intense afternoon rays.
Shade cloth rated at 30 to 40 percent is another option for the hottest weeks of summer.
Positioning your garden where it gets morning sun and some afternoon shade can also help. West-facing beds get the brunt of afternoon heat.
If you cannot change the location, shade cloth is your best friend during peak summer heat in warmer inland areas of the state.
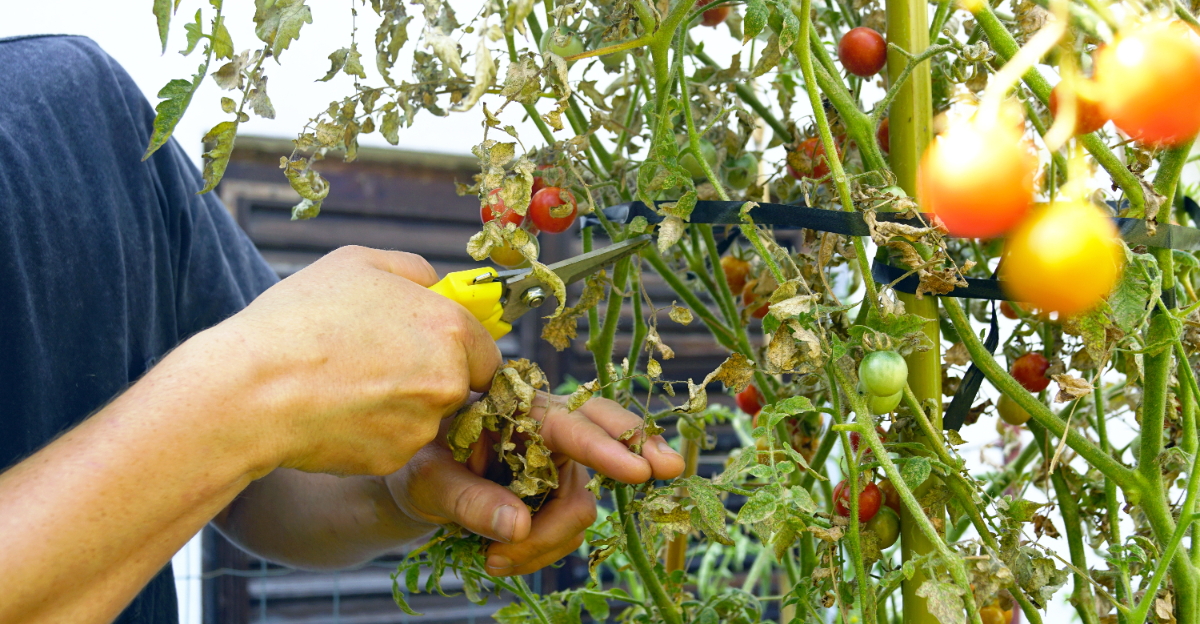
6. Pruning Too Much During Extreme Heat

Pruning tomatoes is genuinely helpful when done at the right time and in the right amount. But during a heat wave, cutting too much off your plants can cause serious problems fast.
Many gardeners go overboard trying to keep their plants tidy and end up regretting it.
Leaves do more than just feed the plant through photosynthesis. They also act as a natural sunshade for the stems and fruit growing beneath them.
Remove too many at once during hot weather and you expose the plant to heat and sun stress it cannot handle well.
A heavily pruned plant also has less surface area to cool itself through transpiration. That means internal temperatures rise faster on hot days.
The result can be wilting, flower drop, and fruit that stops developing properly until conditions improve.
During extreme heat, it is better to do light maintenance pruning only. Remove suckers that are very small and focus on any dead or diseased material.
Save bigger pruning sessions for cooler mornings in early summer or fall when temperatures are more manageable.
If you do need to prune during a heat spell, do it in the early morning so the plant has time to adjust before the hottest part of the day hits. Water thoroughly after any pruning session.
Giving the plant extra support after cutting helps it recover faster and stay productive through the rest of the season.
7. Assuming Blossom-End Rot Means A Calcium Shortage

Blossom-end rot is one of the most frustrating sights in a summer tomato garden. That dark, sunken, leathery patch on the bottom of the fruit makes the whole tomato unusable.
Most gardeners immediately assume the soil is low in calcium and rush to add supplements.
Here is the thing though: calcium deficiency in the soil is rarely the actual cause. Most garden soils already have plenty of calcium.
The real problem is almost always inconsistent watering, which prevents the plant from absorbing the calcium that is already there.
Calcium moves through a plant with water. When watering is irregular, the uptake of calcium slows down or stops.
The bottom of the developing fruit, which is the last place water and nutrients reach, suffers first. That is where the rot appears.
Fixing your watering routine is the most effective solution. Water deeply and consistently, especially during fruit development.
Avoid letting the soil swing from very wet to very dry, because that cycle is exactly what triggers the problem in the first place.
Mulching helps a lot here too by keeping soil moisture more stable. If your soil is genuinely low in calcium, a soil test will confirm it.
Adding crushed eggshells or agricultural lime can help in that case. But before buying supplements, fix the watering first and see if the problem resolves on its own.
8. Forgetting To Check For Hornworms

Tomato hornworms are masters of disguise. They are big, bright green, and somehow almost invisible on a tomato plant until the damage is already obvious.
By the time most gardeners notice stripped stems and missing leaves, a hornworm has been feeding for days.
These caterpillars can strip a plant shockingly fast. A single large hornworm can eat through several stems and dozens of leaves in just a couple of days.
Younger plants are especially vulnerable and can look completely bare almost overnight.
Checking plants regularly is the best way to catch them early. Look carefully along stems, under leaves, and near the top of the plant where new growth is most tender.
Hornworms tend to hang out near the top where feeding is easiest.
Their droppings are a helpful clue. Look for small dark pellets on leaves or on the soil beneath the plant.
If you spot droppings, look above that spot on the plant and you will usually find the hornworm nearby.
Hand-picking is the most effective removal method and does not require any sprays or chemicals. Drop them into a bucket of soapy water to keep them from returning.
Checking plants two or three times per week during summer makes a big difference. Encouraging natural predators like wasps and birds in your garden also helps keep hornworm populations under control naturally and without effort.