17 Tips For Growing Irises Like A Pro
Irises are some of the most breathtaking flowers you can grow—their tall, elegant blooms and sword-like leaves add instant drama to any garden. I still remember the first time mine bloomed; it felt like a little victory. But as beautiful as they are, irises do need a bit of know-how to truly thrive.
Whether you’re just starting out or have a few seasons under your belt, growing irises can be incredibly rewarding with the right approach. I’ve made a few mistakes along the way, but each one taught me something valuable.
These 18 tips are everything I’ve learned to keep irises healthy, happy, and blooming their best year after year. From planting and dividing to sunlight and soil tricks, they’ll help you grow a stunning display you’ll look forward to every spring.
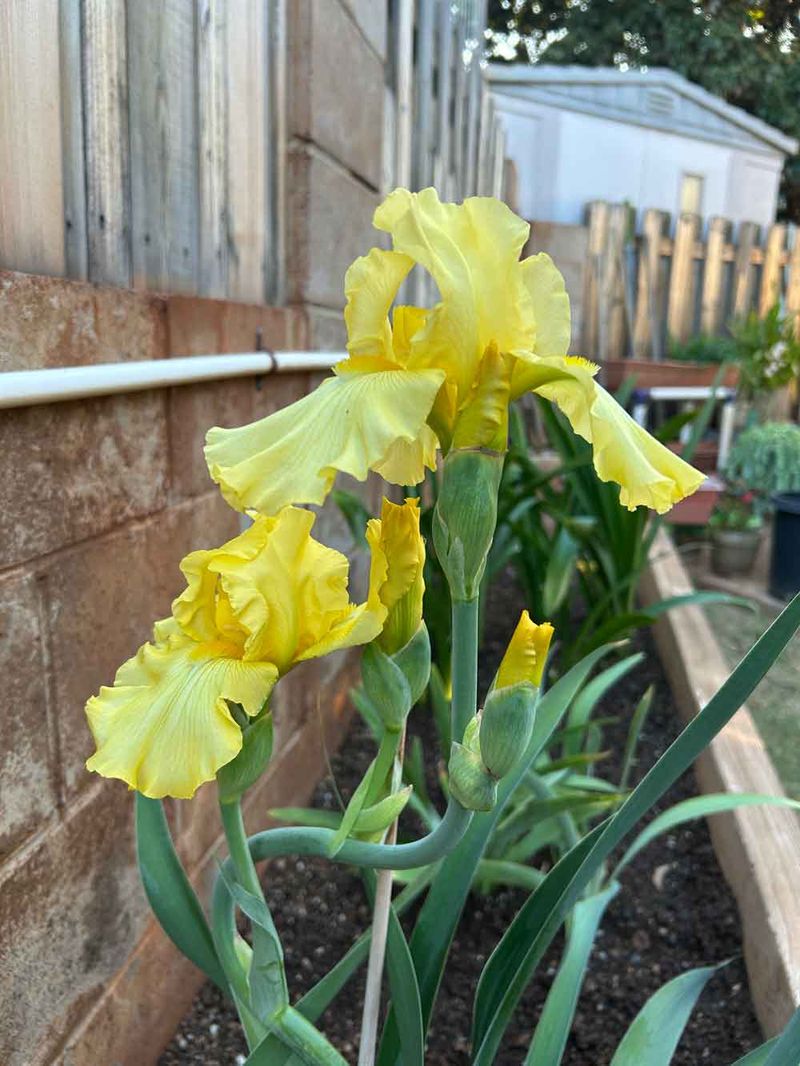
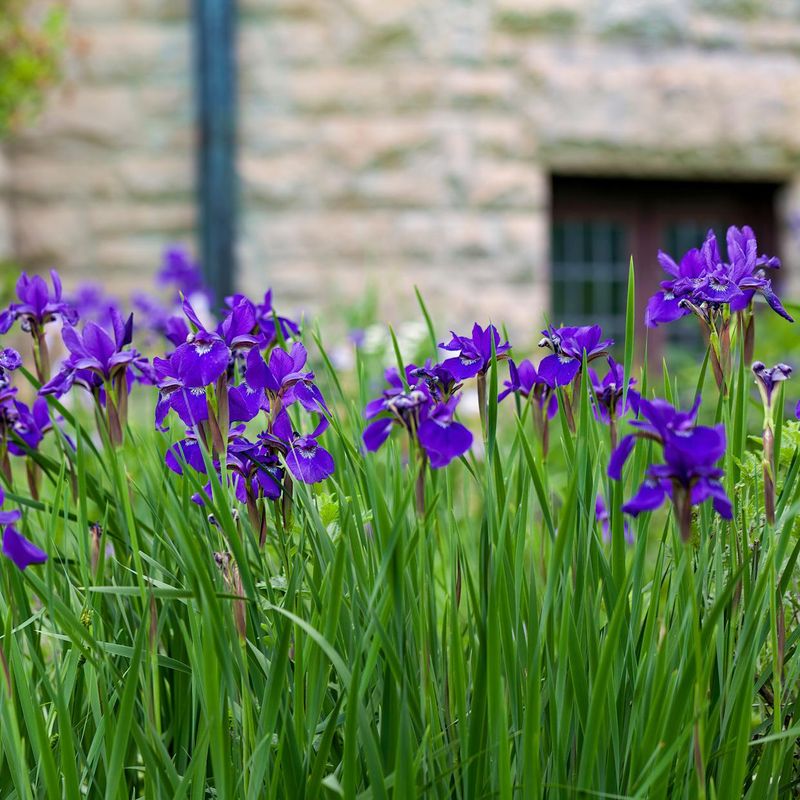
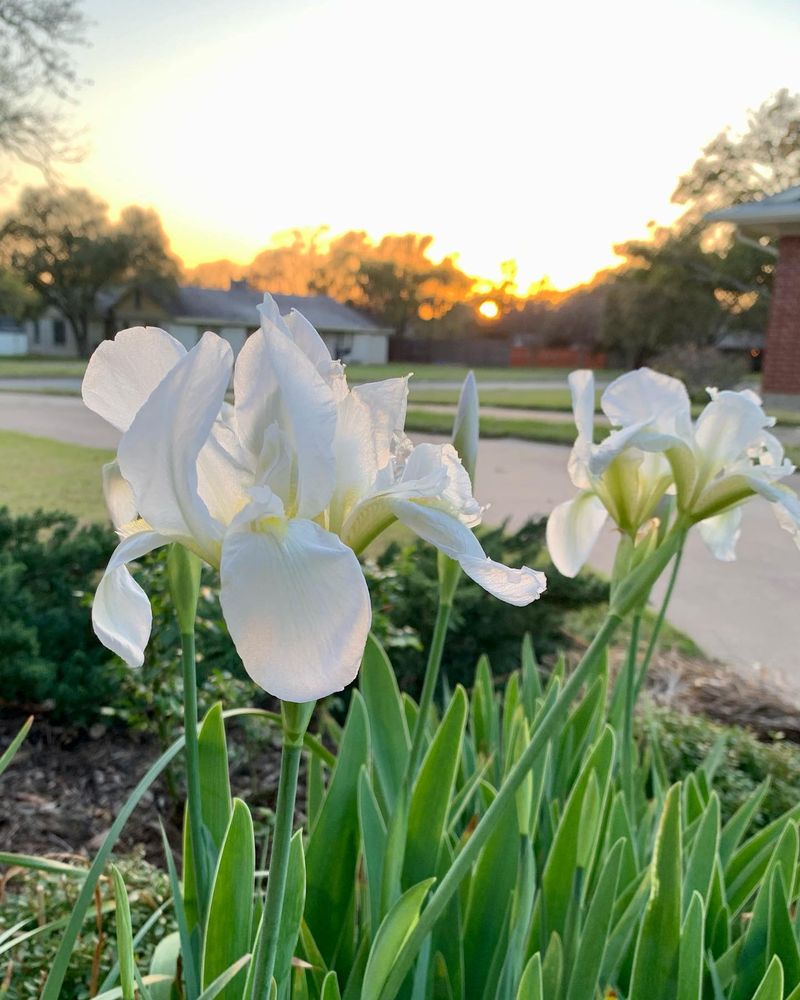
1. Choose The Right Planting Location
Irises love sunbathing! Plant them in spots that receive at least 6 hours of direct sunlight daily. In my experience, morning sun with afternoon shade works well in hotter climates, preventing scorched leaves and faded blooms.
The location should have good air circulation to reduce disease problems. I’ve found that planting irises near walls or fences where air gets trapped leads to more leaf diseases and rot issues.
Avoid areas where water collects after rain. My first iris bed failed because it was in a low spot—the rhizomes rotted during spring rains. Slightly elevated beds or slopes work much better for these plants.
2. Prepare Soil That Drains Well
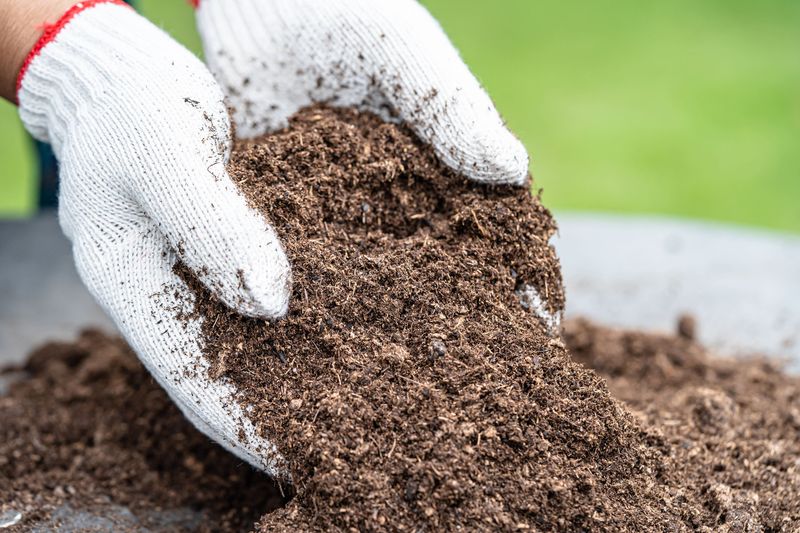
Soil preparation makes or breaks iris success. These plants absolutely hate wet feet and will rot quickly in soggy conditions. I add plenty of compost but balance it with coarse sand to ensure excellent drainage.
Test your soil pH before planting. Irises prefer slightly acidic to neutral soil (pH 6.0-7.0). When I first started growing irises, I ignored this step and wondered why my plants struggled until I discovered my soil was too acidic.
Remove all weeds and grass from the planting area completely. Competing roots will stress your irises and reduce flowering. I spend extra time on this step because it saves countless hours of weeding later.
3. Plant At The Correct Depth
Planting depth is crucial for iris success. Unlike most plants, iris rhizomes should sit at or just below the soil surface with their tops exposed to sunlight. I made the rookie mistake of planting mine too deep my first year and got lots of leaves but no flowers.
Fan the roots out beneath the rhizome when planting. This creates a stable anchor and helps the plant establish faster. I’ve found that taking time with this step results in stronger plants that withstand wind better.
After positioning, firm the soil around the roots but leave the top of the rhizome visible. In very hot regions, a light dusting of soil over the rhizome is okay, but never bury them completely.
4. Water Newly Planted Irises Correctly

Water thoroughly immediately after planting to settle the soil around roots. Then practice restraint! New gardeners often overwater irises, which can cause rot. I water deeply but infrequently to encourage roots to grow downward.
Let the soil dry between waterings. Stick your finger an inch into the soil—if it feels dry, it’s time to water. My irises suffered from rot until I adopted this simple check-before-watering habit.
Reduce watering in late summer and fall as plants enter dormancy. Excess moisture during this period often leads to bacterial soft rot. I made this mistake my second year and lost several plants, so now I’m extra careful with fall watering.
5. Feed With The Right Fertilizer
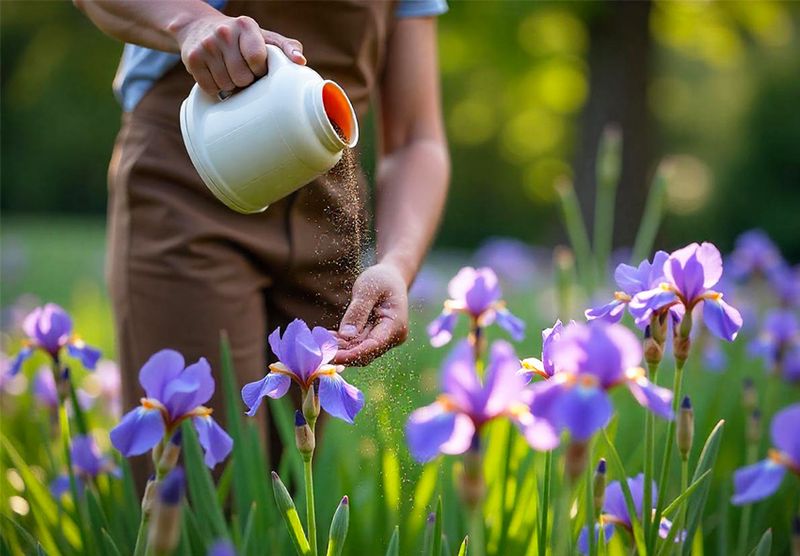
Irises aren’t heavy feeders, but they appreciate a balanced, low-nitrogen fertilizer. High nitrogen causes excessive leaf growth at the expense of flowers. I use a 5-10-10 formula that promotes robust root development and abundant blooms.
Apply fertilizer in early spring as new growth appears, then again after flowering. Avoid letting fertilizer touch the rhizomes directly as it can burn them. I learned this the hard way after dumping fertilizer right on top of my plants and causing leaf burn.
Skip fertilizing newly planted irises until they’ve established. For first-year plants, I wait until spring before feeding them. This gives them time to develop strong roots without pushing too much top growth.
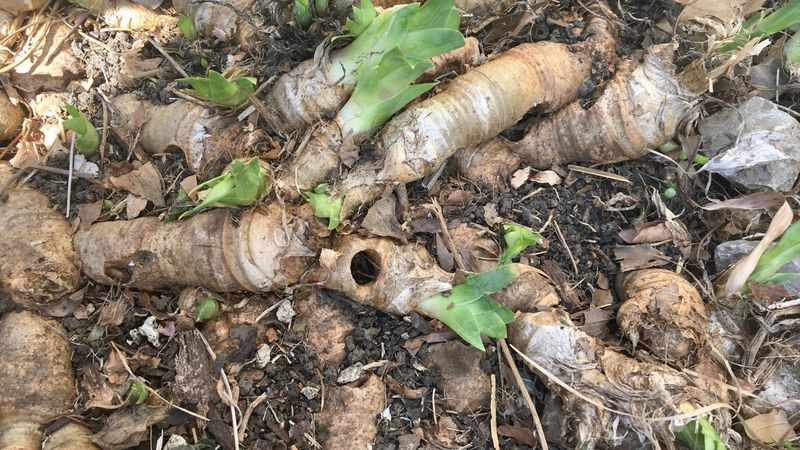
6. Divide Overcrowded Clumps
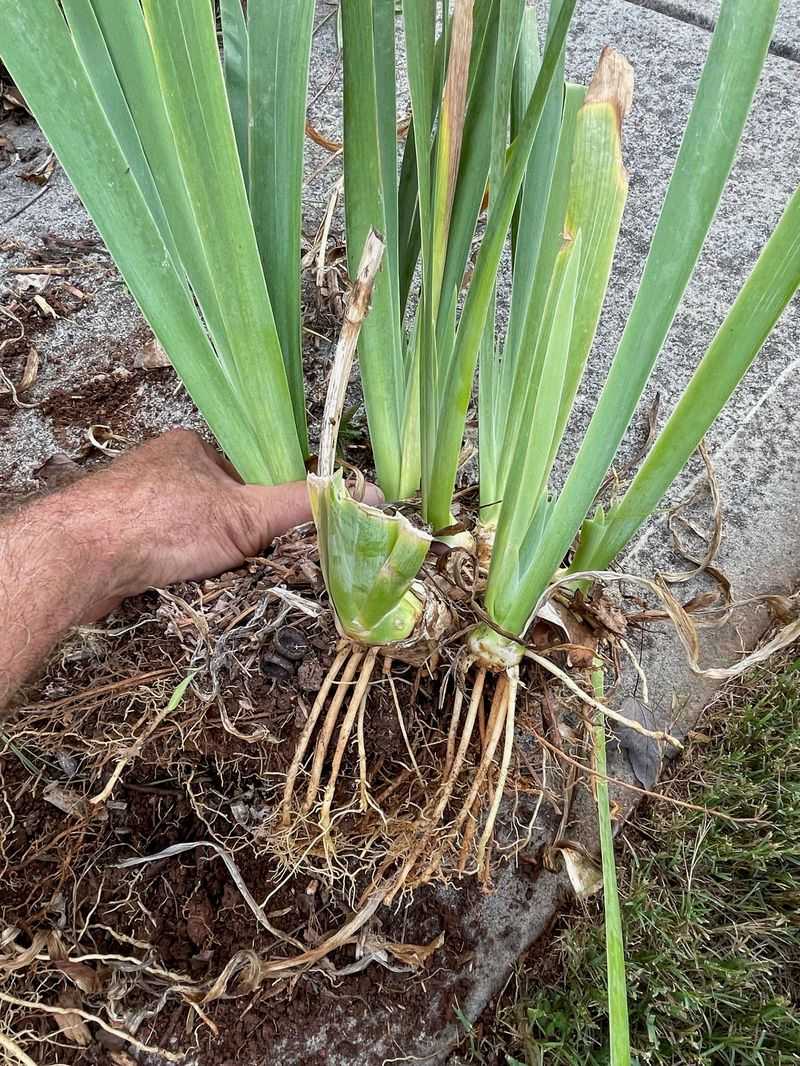
Irises need dividing every 3-5 years when flowering decreases or clumps become congested. The best time is 6-8 weeks after flowering when plants are semi-dormant. I mark declining clumps during bloom time so I remember which ones need attention later.
Lift entire clumps carefully with a garden fork, then wash off soil to examine rhizomes. The first time I divided irises, I was shocked to find how much the original plant had expanded underground!
Select firm, healthy rhizomes with fresh leaf fans and discard old, leafless central portions. I cut selected rhizomes to 4-6 inches with a clean knife, keeping at least one fan of leaves trimmed to about 6 inches. This balance between roots and foliage helps plants re-establish quickly.
7. Remove Spent Blooms Promptly
Deadheading spent iris flowers prevents seed formation and keeps the garden looking tidy. Cut the individual flower stem just above where it joins the main stalk. I carry small pruners in my pocket during iris season to snip faded blooms during my morning garden walks.
Leave the main stalk until it turns brown. The green flower stalk continues photosynthesizing and feeding the rhizome even after blooms fade. My neighbor cuts everything down after flowering and wonders why her irises don’t perform as well as mine.
Remove seed pods unless you want to try growing irises from seed. Seed production drains energy that could go to next year’s flowers. I once left pods on my purple irises and had significantly fewer blooms the following spring.
8. Maintain Good Garden Hygiene
Clean up iris beds in fall to prevent pest and disease problems. Remove all dead leaves, flower stalks, and debris that could harbor insects or pathogens. I’m particularly thorough with this task because I’ve battled iris borers in the past.
Cut back foliage to about 6 inches after the first frost. This reduces hiding places for pests and disease spores. My first year growing irises, I left all the foliage intact over winter and had serious leaf spot problems the following spring.
Avoid mulching directly over rhizomes. Unlike most perennials, irises prefer their rhizomes exposed to sun and air. I keep mulch pulled back a few inches from the rhizomes while still using it between plants to suppress weeds.
9. Combat Iris Borers Effectively
Iris borers are the most destructive pest of irises. These moth larvae tunnel through leaves and into rhizomes, causing severe damage. I inspect my iris leaves weekly in spring for tiny pinholes or wet-looking streaks, which are early signs of borer activity.
If you spot damage, follow the tunnel down to find and destroy the caterpillar. Sometimes I’ve had to cut away affected leaves or even dig up and clean rhizomes to eliminate borers. It’s tedious but worth it to save prized plants.
Apply beneficial nematodes to the soil in spring as a preventive measure. Since using these microscopic predators, I’ve seen a dramatic reduction in borer problems. Clean fall garden hygiene is also crucial for breaking the borer life cycle.
10. Prevent And Treat Leaf Spot Diseases
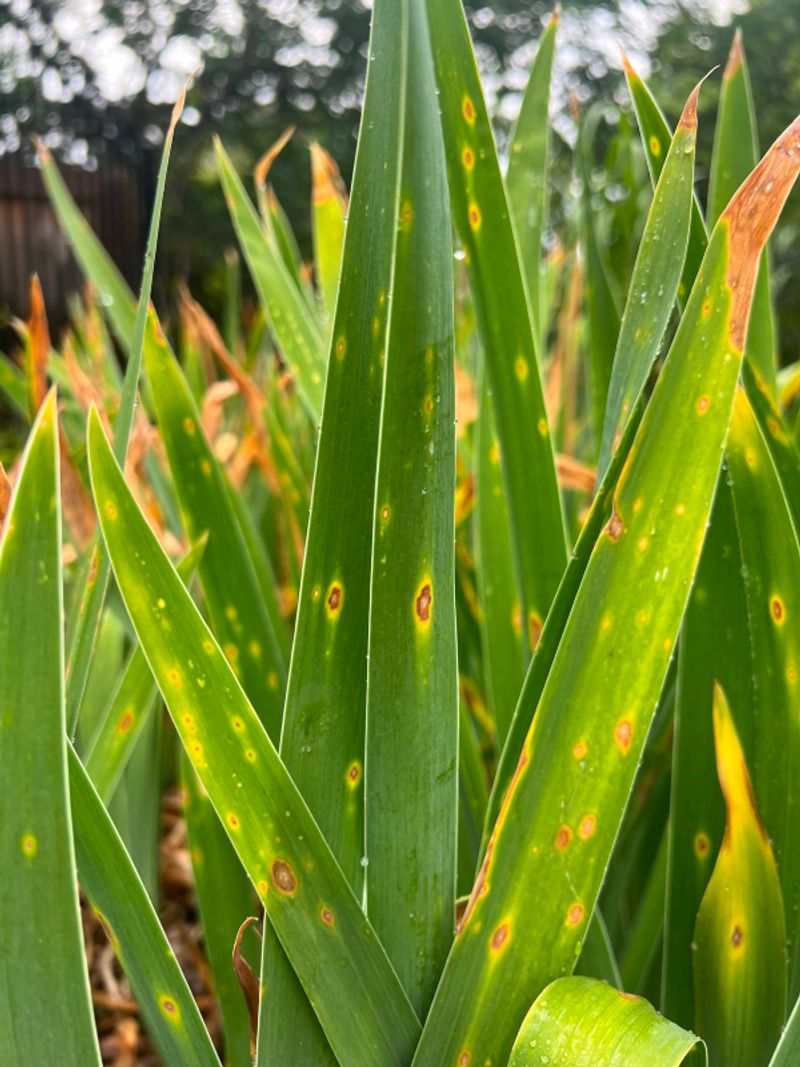
Leaf spot diseases create unsightly brown or purple spots on iris foliage. These fungal problems thrive in wet, humid conditions with poor air circulation. I’ve found that proper spacing and avoiding overhead watering are the best preventive measures.
Remove and destroy affected leaves at the first sign of disease. Don’t compost this material, as it can spread the fungus. The first time I noticed leaf spot, I ignored it, and within weeks it had spread to my entire iris collection.
Apply a copper-based fungicide in early spring and after heavy rains if leaf spot has been a problem in your garden. I follow the label directions carefully and make sure to spray both sides of the leaves. For severe infections, I remove all foliage in fall and apply a dormant oil spray to the garden bed.
11. Protect From Soft Rot
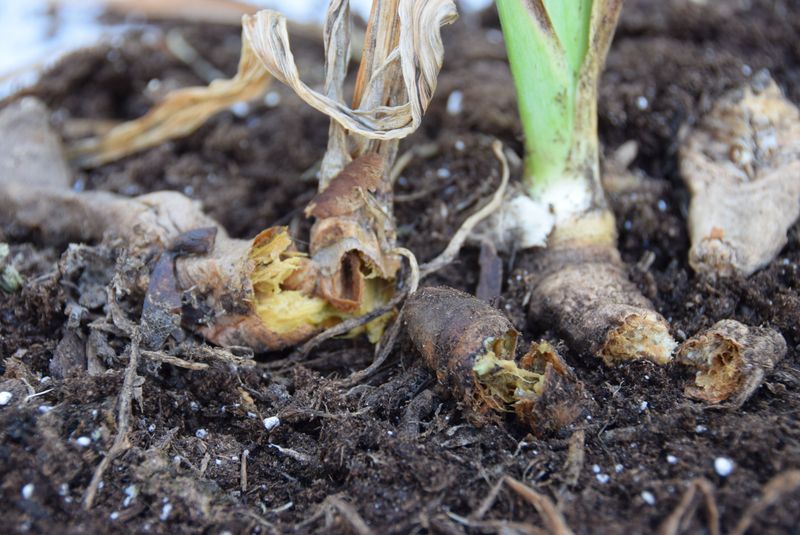
Soft rot causes rhizomes to become mushy and foul-smelling. This bacterial disease thrives in wet conditions and often enters through wounds. After a particularly rainy season, I lost several plants before learning how to manage this problem effectively.
Improve drainage immediately if you notice rot symptoms. Sometimes I’ve had to rebuild entire beds with better drainage to save my collection. Dig up affected rhizomes and cut away all soft, smelly tissue until only firm, healthy rhizome remains.
Dust cut surfaces with garden sulfur or cinnamon powder (a natural fungicide) and allow rhizomes to dry in the sun for a day before replanting. I always disinfect my cutting tools between plants using a 10% bleach solution to prevent spreading the bacteria.
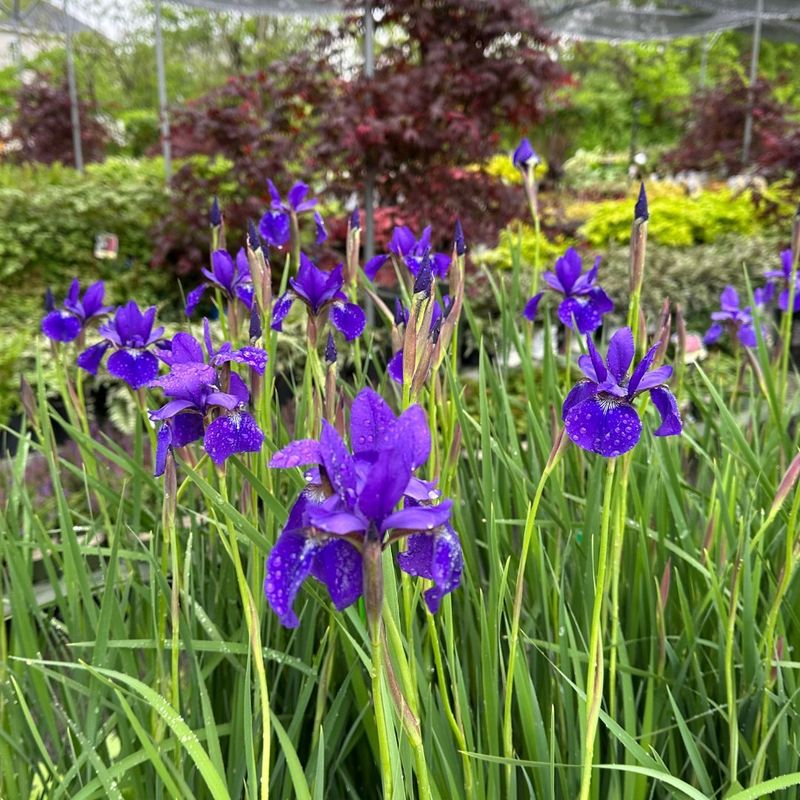
12. Select Varieties for Your Climate
Not all iris varieties thrive in every climate. Bearded irises generally prefer colder winters and perform poorly in hot, humid regions. After several disappointing attempts with bearded types, I switched to Louisiana irises in my warm southern garden and saw immediate improvement.
Research which iris types are recommended for your specific growing zone. Siberian and Japanese irises tolerate wet conditions better than bearded types. I grow these in a low spot in my yard where bearded irises repeatedly failed.
Consider bloom time when selecting varieties. By mixing early, mid, and late-season bloomers, you can enjoy iris flowers for many weeks. My garden now features a sequence of iris blooms from April through June thanks to careful variety selection.
13. Provide Winter Protection
Winter protection needs vary by climate and iris type. In cold regions without reliable snow cover, newly planted rhizomes benefit from light mulch after the ground freezes. I use pine needles since they don’t hold excessive moisture against the rhizomes.
Remove winter mulch early in spring before new growth starts. Leaving it too long can cause rot or delay growth. I made this mistake once and found pale, leggy growth stretching through the mulch, making my plants more vulnerable to disease.
In freeze-thaw prone areas, plant rhizomes a bit deeper than usual. The extra soil coverage protects from heaving during temperature fluctuations. After losing several plants to frost heaving, I now plant rhizomes about an inch deeper in my zone 5 garden, with excellent results.
14. Extend Bloom Time With Reblooming Varieties
Reblooming irises flower in spring and again in late summer or fall, extending the iris season dramatically. Not all rebloomers perform equally in all climates—they generally need a long, warm growing season to build energy for a second bloom cycle. I’ve had the best reblooming success with ‘Immortality’ and ‘Feed Back’ in my garden.
Give rebloomers extra care to encourage second flowering. This includes regular fertilizing, consistent moisture, and prompt deadheading. When I neglect these steps, my rebloomers rarely produce fall flowers.
Don’t give up if rebloomers don’t perform the first year. They often need time to establish before showing their full potential. My ‘Autumn Tryst’ iris didn’t rebloom until its third year but now reliably flowers twice annually.
15. Master The Art Of Iris Companion Planting
Complement irises with plants that bloom when irises don’t. Early daffodils, late daylilies, and summer phlox keep the garden colorful throughout the growing season. I’ve arranged my beds so something is always in bloom, with irises as the spring highlight.
Choose companions with similar cultural needs. Drought-tolerant perennials like coreopsis, salvia, and sedum make good iris neighbors. My first attempts at companion planting failed because I mixed irises with moisture-loving plants that required different care.
Avoid aggressive plants that might crowd irises. Anything that spreads by runners can quickly overwhelm iris rhizomes. I learned this lesson after planting mint nearby (big mistake!) and spending years removing it from my iris bed.
16. Keep Accurate Garden Records
Label your iris varieties clearly and permanently. Iris identification becomes nearly impossible once tags are lost. I use metal stakes with engraved tags that withstand weather and garden work better than plastic labels.
Create a garden map showing the location and name of each variety. This proves invaluable when dividing plants or planning garden changes. After mixing up several similar white varieties, I now religiously update my garden map each time I add or move plants.
Record bloom times, performance, and any problems for each variety. These notes help identify which irises thrive in your specific conditions. My garden journal revealed that certain varieties consistently underperform in my garden, guiding my choices for future additions.
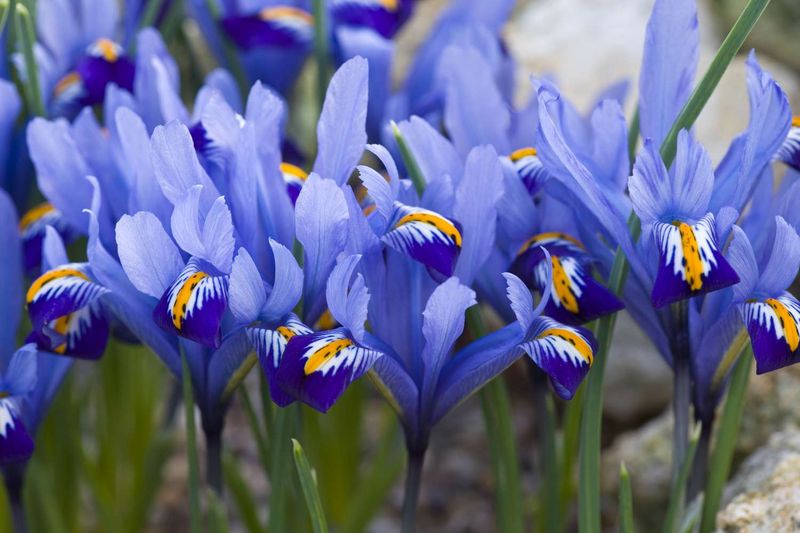
17. Grow Specialty Irises For Unique Gardens
Explore beyond common bearded irises. Dwarf varieties excel in rock gardens, while Japanese and Louisiana irises thrive in moist areas where other irises fail. After struggling with bearded irises in a damp corner, I planted Japanese irises there instead and created one of my garden’s highlights.
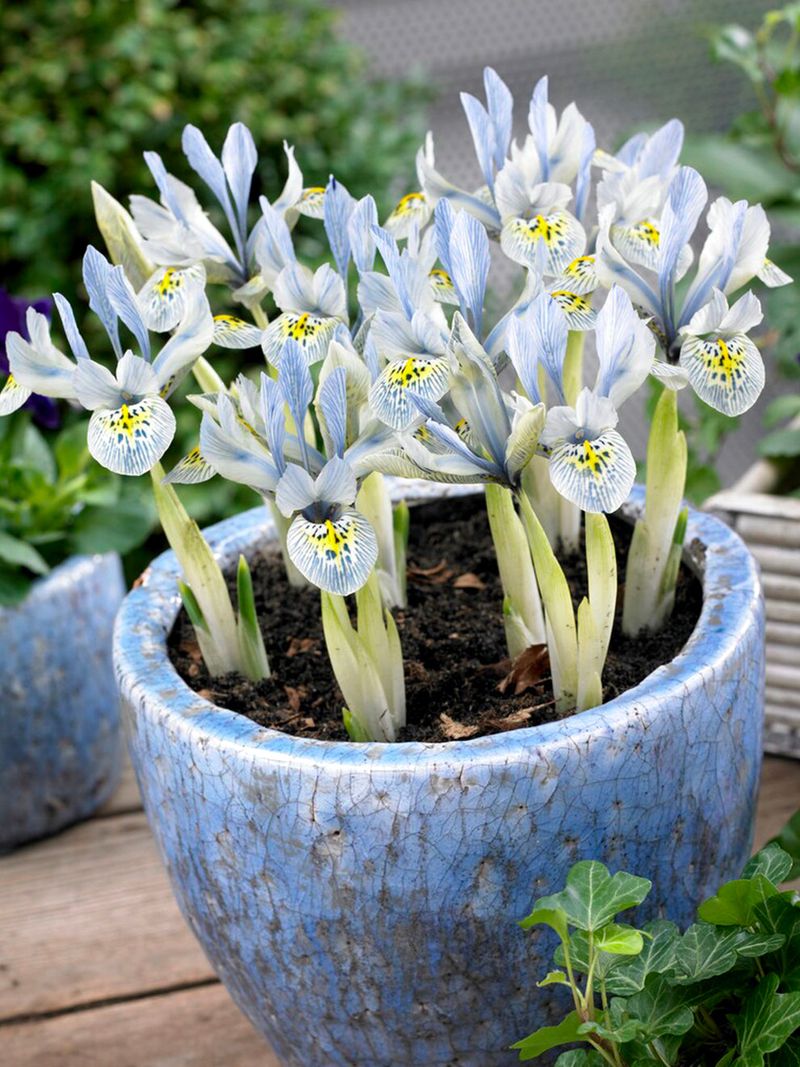
Try miniature iris species for early spring color. Iris reticulata and Iris danfordiae bloom with crocuses and provide beautiful blue and yellow flowers when the garden is just waking up. I plant these bulbs in drifts under deciduous trees for a stunning early display.
Consider iris species for specific challenges. Iris cristata (Crested Iris) grows beautifully in woodland shade where other irises wouldn’t bloom. Discovering these specialty irises opened up new possibilities in areas of my garden I thought unsuitable for iris growing.