8 Small Garden Upgrades That Help California Homeowners Prepare For Winter Rains
A full fifty-gallon barrel of collected rainwater weighs more than four hundred pounds, so it needs a sturdy, level base. I love how small details like that turn a simple weekend project into a smart one.
Collecting rainwater in a simple barrel is legal across California, and many local water agencies even offer rebates. Apricots and cherries, meanwhile, usually get pruned in summer, since winter rain spreads the fungal spores that trouble them.
Looking back, I should have walked my yard during the first storm years ago, umbrella in hand. Watching where water actually flows taught me more than any weekend of guessing ever did.
One fix looks like a giant straw burrito lying sideways across a slope, and another swaps cracked concrete for crunchy, thirsty gravel. Which small change would help your yard the most before the next big storm rolls in?
1. Clear Leaf Clogged Gutters Before The First Storm
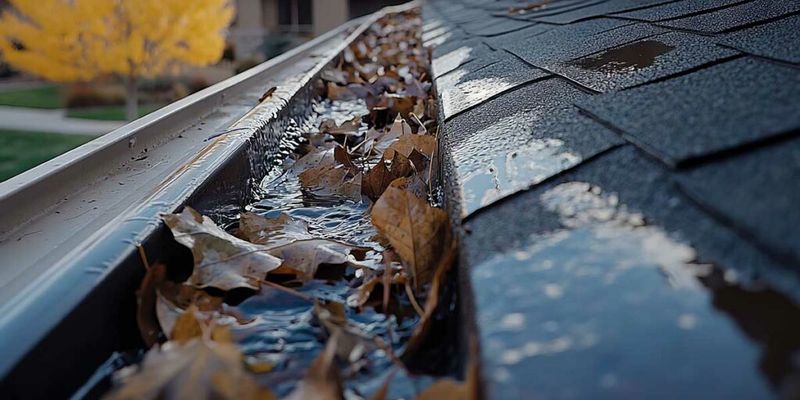
One clogged gutter can dump hundreds of gallons right beside your foundation during a single heavy winter storm. I learned that lesson the soggy way, watching a waterfall pour over my porch like a tiny Niagara.
Fall leaves and pine needles pile up quietly in gutters while we are busy enjoying the warm autumn days. By the first real rain, that soggy mat can block the flow and send water spilling over the edges.
You need to scoop out the debris by hand with gloves, then flush each run with a garden hose. Watch where the water exits, because slow trickles usually mean a hidden clog sits inside the downspout.
Downspouts should carry water away from the house, not into low spots where puddles can linger for days. A simple plastic extension or splash block costs a few dollars and moves that flow several feet out.
Personally, I like flexible extensions that fold up neatly, so the lawn mower can pass by in summer. Gutter guards are another option, though they still need an occasional check for needles and seed pods.
Ladder safety matters here, so keep a helper nearby and avoid climbing on wet or windy days. For tall two-story homes, hiring a gutter service is often the smarter and safer choice overall.
Once the first storm arrives, grab an umbrella and step outside to see how everything flows. Those few minutes of watching will show you exactly where your next drainage fix belongs in the yard.
2. Hook A Rain Barrel To Your Downspout
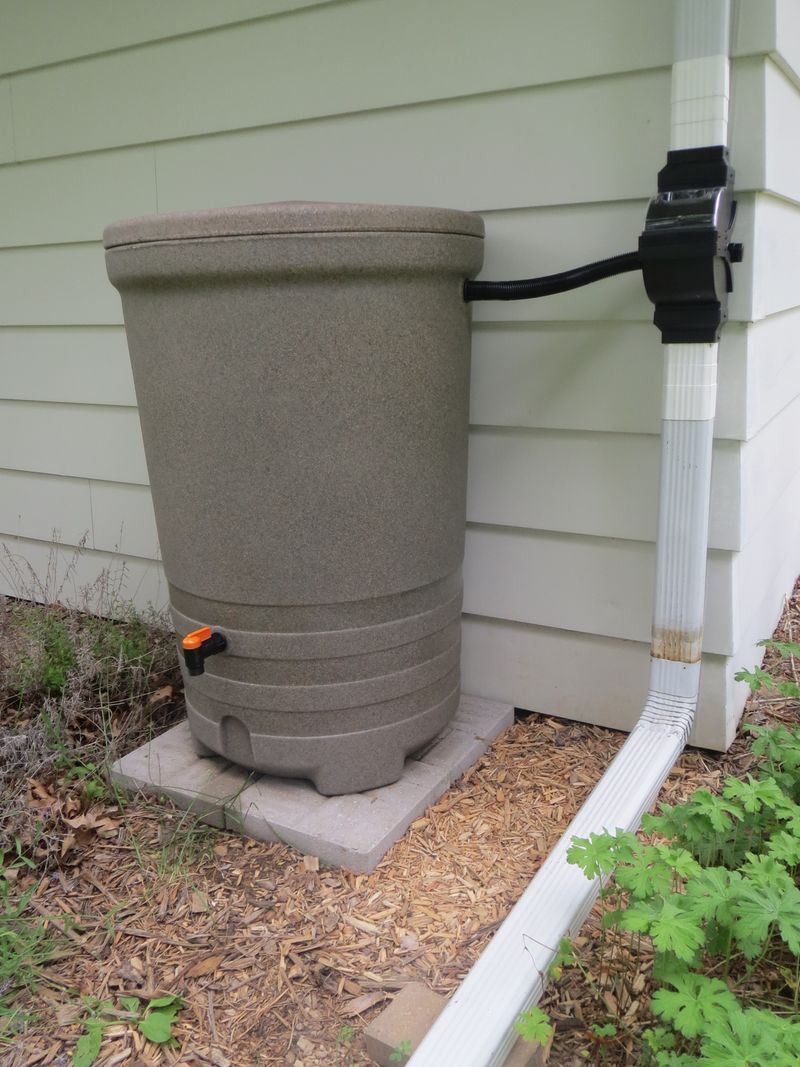
A twelve-hundred-square-foot roof under twenty-two inches of rain can shed roughly fourteen thousand gallons each year. I can’t imagine letting all that free soft water rush straight into the street drain after every downpour.
Rainwater harvesting is legal in California, and homeowners do not need a state permit for simple barrel systems. Many local water agencies even offer rebates, so check your utility website before you buy anything.
A standard fifty-gallon barrel with a diverter fits most homes and tucks neatly beside a downspout. The diverter sends extra water back down the spout once the barrel fills, which prevents messy overflow.
Mosquitoes love still water, so every opening on your barrel needs a fine screen or a tight seal. I check my screens after each big winter storm because leaves and grit can tear or clog them.
Set the barrel on sturdy cinder blocks or a level stand to give your spigot better water pressure. A full fifty-gallon barrel weighs over four hundred pounds, so a firm flat base matters a lot.
Stored rainwater works beautifully on ornamental beds and potted plants during the dry spells between storms. Many experts suggest skipping it on edible leaves, since roof runoff can pick up grime and bird droppings.
You might notice your plants perk up faster after rainwater, which has no added chlorine or hard minerals. One barrel will not solve every drainage problem, but it is a satisfying and surprisingly easy start.
3. Spread A Thick Blanket Of Wood Chip Mulch
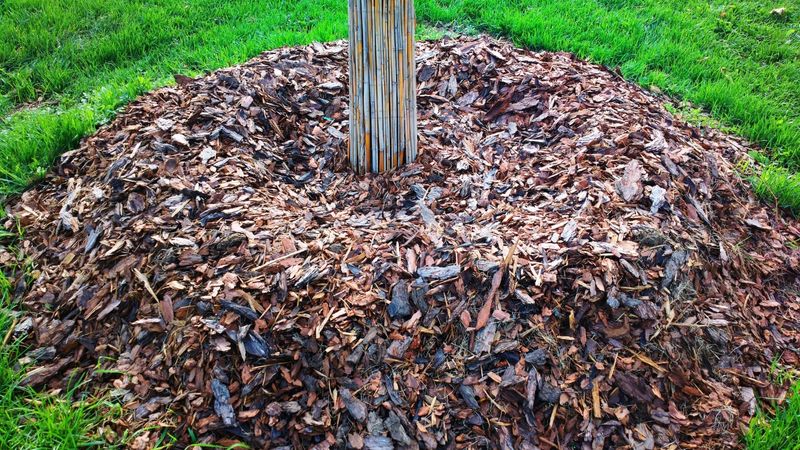
Raindrops hit bare soil like tiny hammers, knocking loose particles that later seal the surface into a crust. A cozy layer of mulch softens every blow, and honestly, I think it is the cheapest upgrade around.
University of California garden experts suggest spreading organic mulch about two to three inches deep before storms. Wood chips and shredded bark both work well, and many tree services drop off chips for free.
Coarse chips hold their place on slopes much better than fine, fluffy material that floats away easily. I learned that after a pricey bag of tiny bark nuggets ended up decorating my neighbor’s sidewalk.
Keep mulch at least six inches away from tree trunks, and pull it back from plant stems too. Damp mulch piled against bark invites rot, and nobody wants that problem lurking under a cute volcano shape.
Beyond stopping erosion, mulch helps soil hold moisture longer once the rainy season fades into spring. It also smothers many weed seeds that would otherwise sprout the minute winter rain soaks the ground.
Over time, the chips break down slowly and feed earthworms, which tunnel and help water sink deeper. You might notice darker, crumblier soil under old mulch, and that change is a happy sign.
Top up thin spots each fall, because older layers settle and shrink as soil life munches through them. Grab a rake and a wheelbarrow, and your soil will be dressed for winter by lunchtime.
4. Dig A Shallow Rain Garden Full Of Native Sedges

Some of my favorite garden beds look dry and quiet in summer then hold sparkling puddles after storms. A rain garden is a shallow planted dip that catches roof runoff and lets it soak in slowly.
Instead of racing down the gutter, that water recharges groundwater and carries less sediment toward local creeks. Some cities even offer rebates for building one, so check your water district before grabbing a shovel.
Location matters most, so keep your rain garden at least ten feet from the house foundation. Stay clear of septic systems and wells, and avoid digging under the drip line of big trees.
Mixing several inches of compost into the native soil helps water drain instead of sitting there for weeks. A healthy rain garden should empty within one to five days, which keeps mosquitoes from moving in.
Plants for the basin need a split personality, handling soggy winter roots and bone-dry summer months. Clustered field sedge, Carex praegracilis, and spreading rush, Juncus patens, both handle that job surprisingly well.
Along the drier rim, I love tucking in yarrow and deer grass for soft texture and pollinator visits. Bees and butterflies visit yarrow flowers in spring and summer, so the basin earns its keep year-round.
Start small, maybe just a kidney-shaped dip below one downspout, and watch how it performs this season. I have to admit, seeing a muddy problem spot turn into a lively garden feels pretty magical every winter.
5. Swap Solid Concrete For Gravel And Permeable Pavers
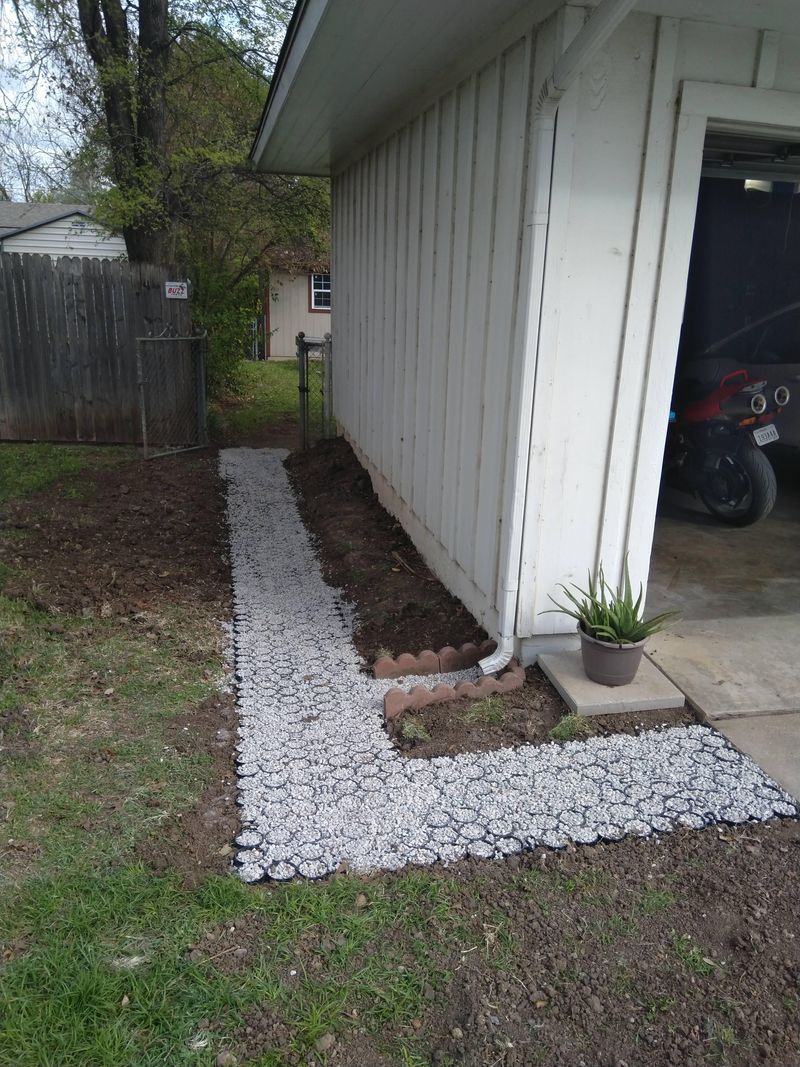
Solid concrete sheds almost every drop that lands on it, sending a fast sheet of water toward the street. Permeable surfaces work more like a sponge, and I find that idea wonderfully satisfying on a stormy afternoon.
You do not have to rip out the whole driveway to see a real difference after heavy rain. A small gravel path or a decomposed granite patio without binder lets water slip right into the ground.
Interlocking permeable pavers are another favorite, with gaps filled by small stones that let rain pass through. They look tidy and polished, yet underneath sits a deep gravel bed that stores water while it drains.
Fewer puddles mean safer footing, and you might notice less muddy splashing on your walls and windows. Soil under the surface also filters some pollutants before the water reaches creeks, which helps local wildlife.
A quick weekend project might mean replacing a cracked concrete walkway with flagstones set in gravel. Leave generous gaps between stones and fill them with pea gravel or low creeping thyme for charm.
Upfront costs for pro-installed pavers can run higher than poured concrete, so budget carefully before you commit. Lower maintenance over time and possible local rebates can help balance out that bigger first bill.
Every few years, rake the gravel and pull weeds from joints so the gaps stay open and thirsty. Personally, I think a crunchy gravel path sounds as good as it drains, especially on a damp morning.
6. Hold Sloped Soil With Straw Wattles And Jute Netting
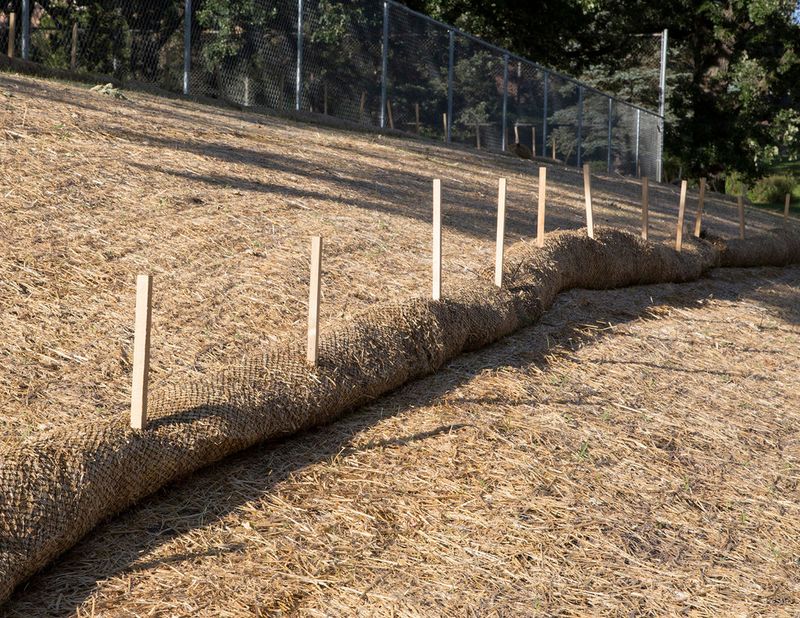
Those long tubes of straw you see on fire-scarred hillsides are called wattles, and they work wonders at home too. They look like giant burritos lying sideways, which makes erosion control feel a little more fun.
Wattles slow water rolling downhill, giving it time to drop soil and sink in before it picks up speed. Lay them across the slope along the contour, not straight down, so they act like small speed bumps.
Set each wattle into a shallow trench a few inches deep, then pin it firmly with wooden stakes. Gaps underneath let water sneak through, so press the soil tight against the uphill side of each roll.
On steeper banks, biodegradable jute netting holds mulch and seed in place while young roots get established. Choose plastic-free netting when you can, since plastic mesh can trap snakes and other small wildlife.
Both tools are temporary helpers, so plan to plant something with deep roots behind them this season. Fall and early winter planting suits many natives here, since the rains help roots settle before summer heat.
Sturdy natives such as California lilac, a Ceanothus with clouds of blue spring flowers, grip slopes nicely. Pick a variety suited to your area, because some types prefer coastal fog while others handle inland heat.
I believe wattles are one of the most underrated tools a hillside gardener can keep in the garage. They cost little at most garden centers and slowly break down into the soil as plants take hold.
7. Sow Crimson Clover And Fava Beans As Winter Cover Crops
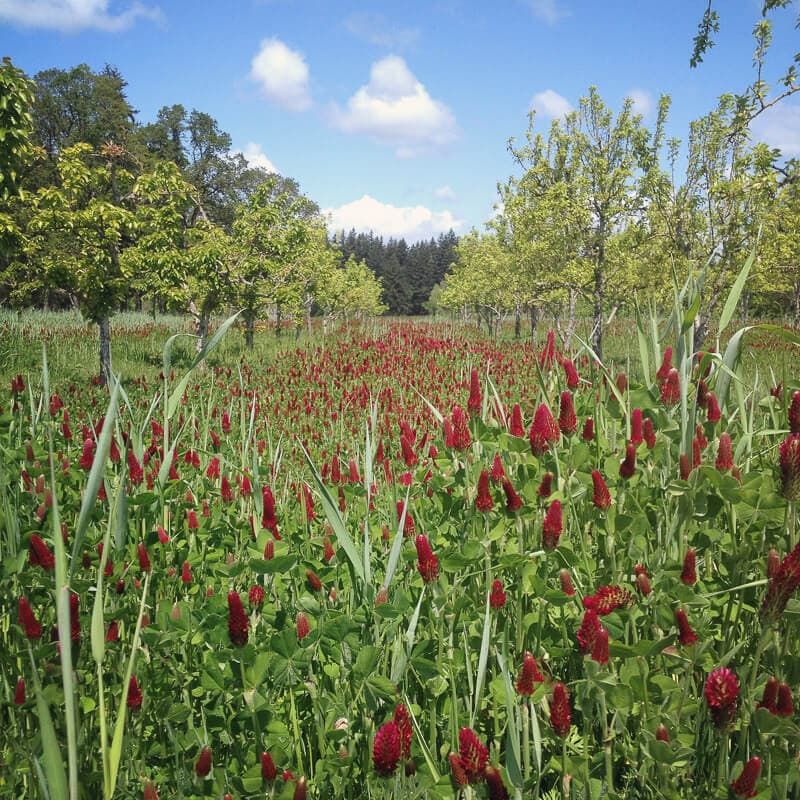
Bare vegetable beds in winter are an open invitation for rain to carry your best topsoil away. I prefer giving those empty spaces a green coat, and crimson clover blooms look like little red torches.
Cover crops shield the ground from pounding drops, while their roots knit soil together and slow runoff. Crimson clover, Trifolium incarnatum, and fava beans also team up with soil bacteria to capture nitrogen.
Fall is the usual sowing window, letting autumn showers or a little hose water sprout the seeds. Scatter clover seed over freshly raked soil, and push fava seeds about an inch or two deep.
Cereal rye is another sturdy option, building a dense root mat that grabs soil on gentle slopes. For heavy clay, daikon radish punches thick roots downward, leaving channels that help future rain soak in.
You might notice bees buzzing around the clover blossoms on mild late-winter or early spring afternoons. Fava flowers are lovely too, with white petals and dark spots that look like tiny painted eyes.
Come spring, cut the plants down before they set much seed and let them wilt on the surface. Turn them in or leave them as mulch, then wait a few weeks before planting summer crops.
Some people with an inherited enzyme condition called G6PD deficiency can react badly to eating fava beans. If that applies to your household, crimson clover and cereal rye make an easy and worry-free swap for you.
8. Trim Weak Tree Limbs Before Winter Winds Arrive
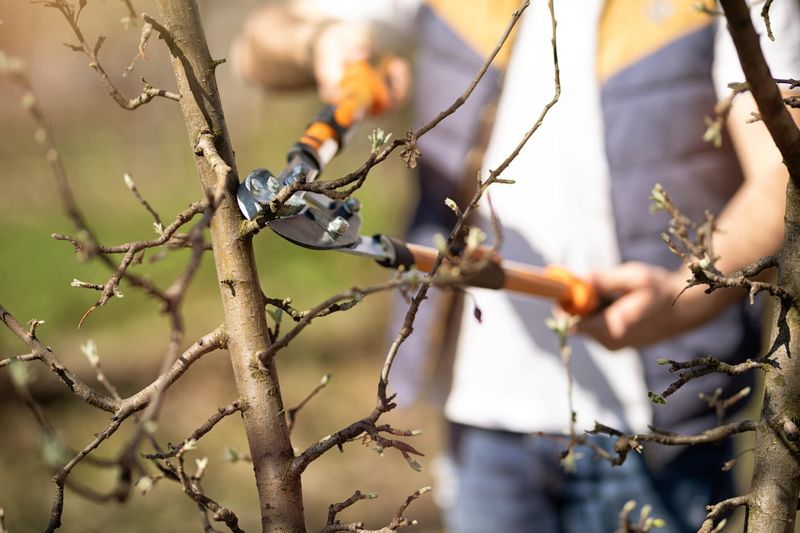
Soggy soil and gusty wind make a sneaky pair, because wet roots loosen their grip just as branches sway. One weak limb crashing onto a fence can ruin a peaceful morning, and I speak from experience.
Walk around your trees now and look for cracked branches or limbs that hang loosely after summer. Removing weak or diseased wood lowers the chance that wind will snap it onto your roof or car.
Thinning crowded growth also lets air move through the canopy, which helps leaves dry faster after rain. Better airflow can reduce fungal problems that love damp, still conditions during the cool rainy months.
Deciduous fruit trees like apples and peaches get their main pruning in the dormant season after leaves drop. Thoughtful dormant cuts can set the stage for stronger growth and better harvests the following summer.
Apricots and cherries are exceptions, because UC experts suggest pruning them in summer to reduce fungal infections. Rain spreads those spores easily, so these two trees are better left alone until the dry season.
Clean, sharp tools make smooth cuts that seal over better, and I wipe my blades between every tree. Cut just outside the branch collar, that slightly swollen ring where a limb joins the trunk.
Large limbs high in the canopy are a job for a certified arborist, not a wobbly ladder. A little careful trimming now can keep your yard calmer and your gutters clearer once storms roll through.