12 Plants Michigan Gardeners Should Prune This Week
Garden slugs often lay clusters of pearly eggs in autumn, tucking them under soggy leaves to hatch next spring. That quiet little detail changed how I look at my flopped, frost-bitten flower beds every single November.
Many fungal spores ride out winter on old stems, then wake up when warm, damp spring weather returns. Mildew on summer flowers, for example, often starts from leftovers we left lying around the previous fall.
I have to admit, I used to leave every stalk standing and called it a natural winter look. Then my Michigan garden taught me that some plants truly benefit from a sharp, well-timed fall haircut.
You still want plenty of seed heads for birds, so choosing which plants to cut matters a lot. Which Michigan favorites deserve a trim before the snow flies, and which ones should you leave alone?
1. Hosta
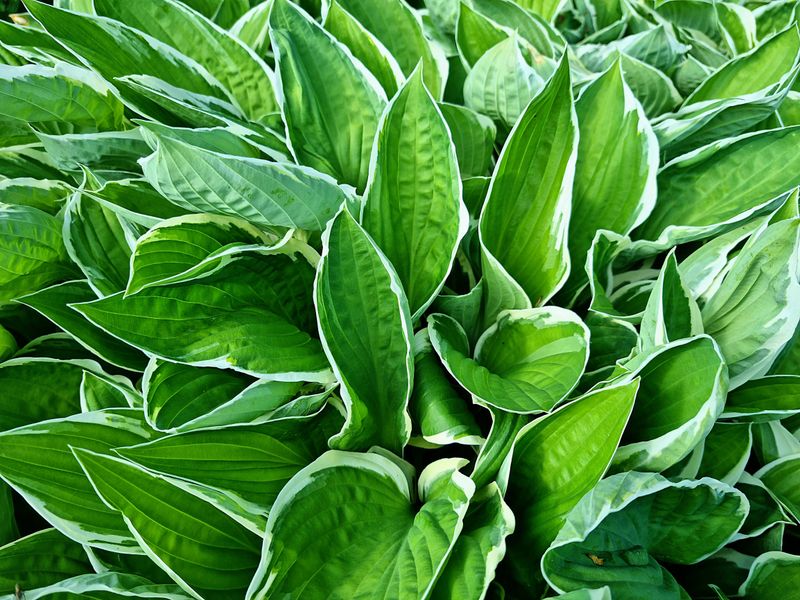
Slugs adore hostas so much that a soggy pile of frosted leaves works like a cozy winter hotel for them. I can almost hear them cheering when gardeners leave that slimy, collapsed foliage lying on the cold ground.
Once a hard frost turns the leaves translucent and mushy, your hostas have finished their work for the year. Extension experts suggest removing the leaves and stems at this stage, since slug eggs often hide underneath them.
Grab a clean pair of pruners and cut each stem close to the crown, leaving about one or two inches. Wear gloves, because frosted hosta foliage feels like cold spinach and sticks to everything it touches.
Voles and mice also like hiding under matted hosta leaves, where they sometimes nibble crowns during the long winter. Clearing that cover gives these little critters fewer places to camp out near your favorite plants until spring.
Toss healthy leaves into your compost pile, but bag anything that looks spotted or chewed by slugs. Leaf spots and rot can linger on old tissue, so keeping that material away from your beds helps a lot.
Personally, I love how a tidy hosta bed looks almost blank in December, like a fresh notebook page. Come April, those tight purple and green shoots poke up without a single soggy leaf blocking their path.
Hostas grow happily in zones three through nine, so nearly every yard can host a few shade-loving clumps. Give them rich soil and steady moisture next summer, and they will reward your fall cleanup with lush leaves.
2. Peony
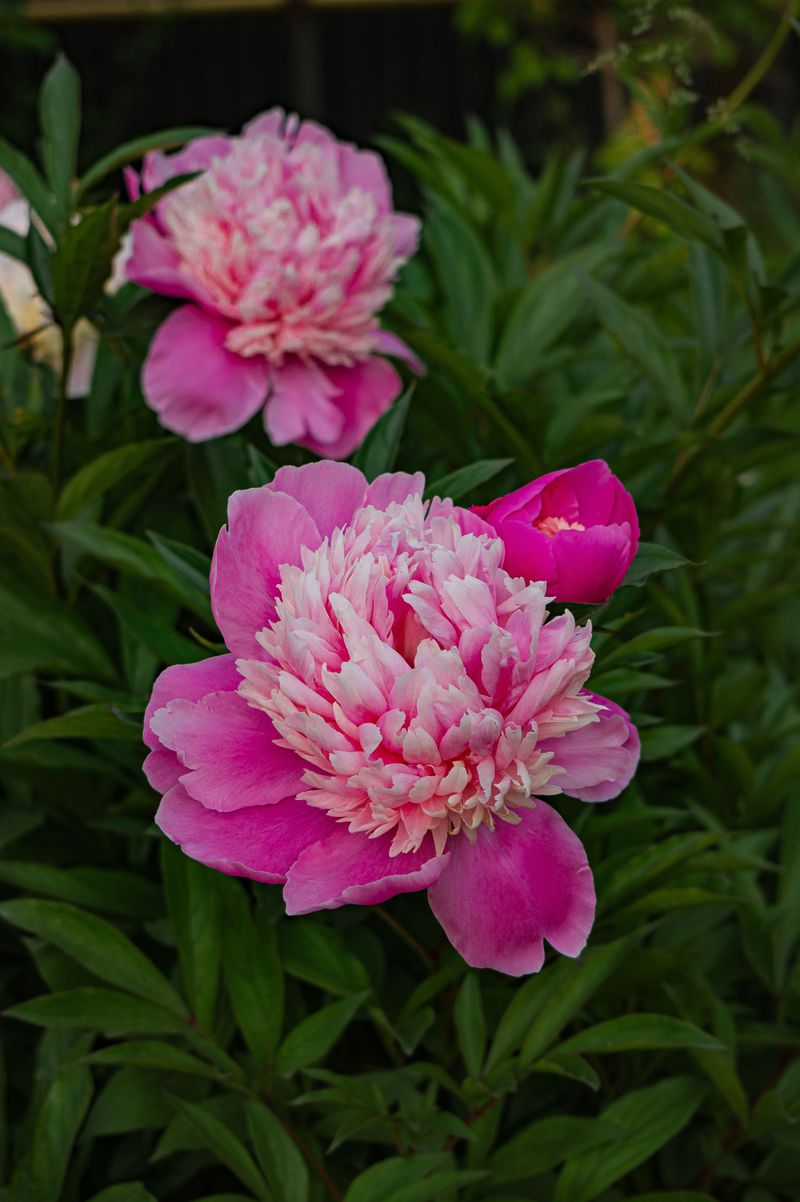
Peony clumps can bloom in the same spot for fifty years or more, which makes them true garden grandparents. Keeping grandma healthy means cleaning up her old leaves before winter settles over the flower beds for months.
A fungus called botrytis causes gray mold and blackened buds on peonies, and it overwinters on old stems. Extension specialists recommend removing all herbaceous peony foliage in fall to lower the amount of disease waiting for spring.
Wait until the leaves turn yellow or bronze, usually after a hard frost, so the roots can store energy first. Then cut every stem down to about one to two inches, right above the soil line near the crown.
You might notice small reddish buds, called eyes, sitting just below the soil surface near the base of stems. Be gentle around these, because they hold next spring’s shoots and the beautiful flowers you have been waiting for.
Skip the compost bin for peony leaves, especially if you spotted moldy buds or brown blotches this year. Bag them up for yard waste pickup instead, so the fungus does not sneak back into your garden beds later.
Tree peonies are a different story, since their woody stems hold next year’s flower buds through the cold. Leave those woody branches alone, and only remove leaves or any obviously broken twigs once they drop in fall.
I believe this cleanup takes about five minutes per plant, yet it pays off for an entire blooming season. Nothing beats walking past fat, healthy peony buds in June, knowing a little autumn effort helped them along.
3. Daylily
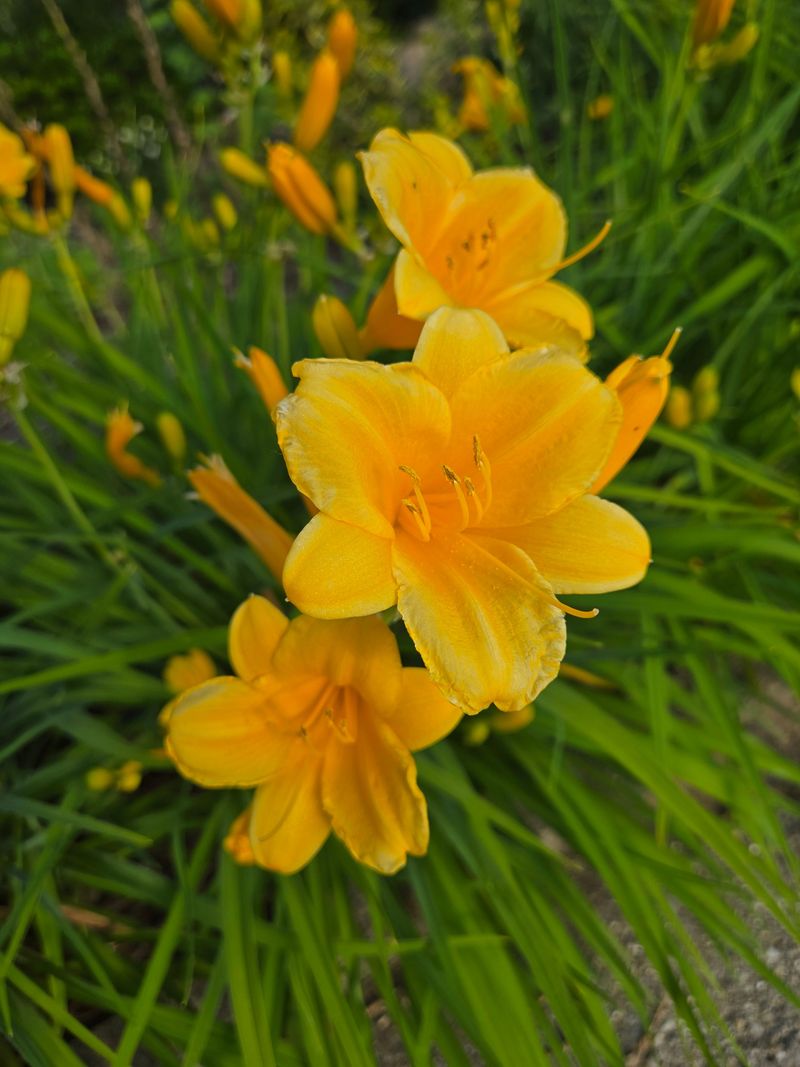
Each daylily flower opens for just one day, which explains the charming name gardeners have used for centuries. By late fall, though, those grassy leaves flop over like wet noodles and look tired across your sunny borders.
After a hard frost, daylily foliage often turns yellow, then brown, and slowly slumps into a slippery mat. That soggy mat can shelter slugs and other small pests, so trimming it away keeps the crowns cleaner over winter.
I like to grab a handful of leaves, hold them together, and cut them about four inches above the crown. Some leaves pull away with a gentle tug once they have softened, which saves your pruners some effort.
Leave a little stubble standing, since those short stubs help you remember exactly where each plant sits. Trust me, finding buried daylily crowns in April without any markers feels like a frustrating game of hide and seek.
Healthy foliage makes great compost, breaking down quickly into rich material for next year’s vegetable beds or containers. Bag any leaves showing orange powder, though, because daylily rust spreads easily through spores on infected plant tissue.
Daylilies handle zones three through nine, and they shrug off clay, sandy soil, and plenty of summer neglect. Full sun gives the most flowers, yet they still put on a decent show in spots with afternoon shade.
You need only ten minutes to tidy a large clump, which makes this one of the easiest fall chores. The fresh green shoots that push up next spring look so much brighter without last year’s brown leftovers.
4. Bearded Iris
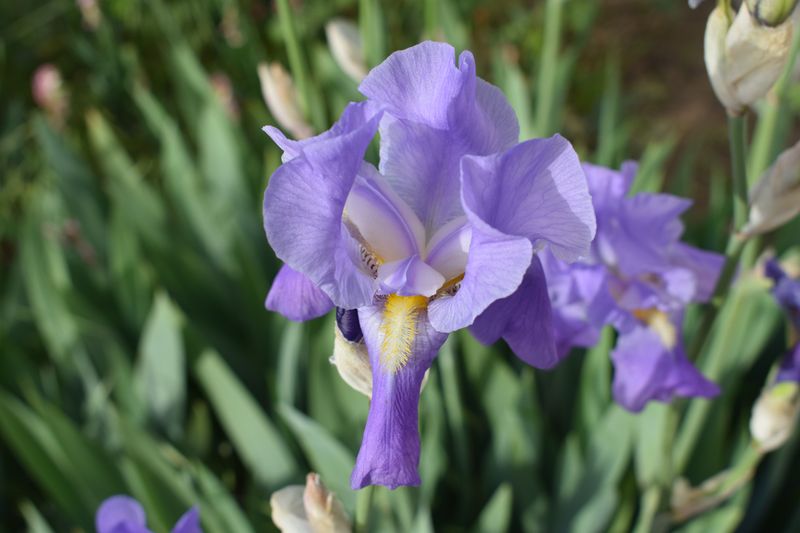
A sneaky moth called the iris borer lays its eggs right on old iris leaves during late summer and fall. Those eggs sit quietly through winter, then tiny caterpillars hatch in spring and tunnel straight down toward the rhizomes.
That sounds like a horror story for your irises, but a simple fall cleanup breaks the cycle beautifully. Removing and disposing of old foliage after a hard frost takes many of those eggs away from your garden.
Cut the leaves down to a few inches, creating neat little fans that sit just above the thick rhizomes. Pull away any brown leaves and garden debris tucked around the base, since eggs often cling to that loose material.
Throw this foliage in the trash or yard waste bin, not the compost pile where eggs could survive. I have to admit, bagging up iris leaves feels oddly satisfying, like taking out the garbage for an entire flower bed.
While you work, give each rhizome a gentle squeeze to check for softness or a bad smell. Mushy spots can signal bacterial soft rot, which often follows borer damage, so trim those sections away with a clean knife.
Bearded irises love full sun and well-drained soil, with rhizomes sitting partly exposed on top of the ground. Avoid piling heavy mulch over them, because they prefer to bask in sunshine rather than stay buried under damp cover.
Next May, you might notice taller, healthier fans and fewer streaky, chewed leaves on your favorite iris clumps. Those ruffled, perfumed blooms seem even sweeter when you know your fall effort helped protect them from borers.
5. Garden Phlox
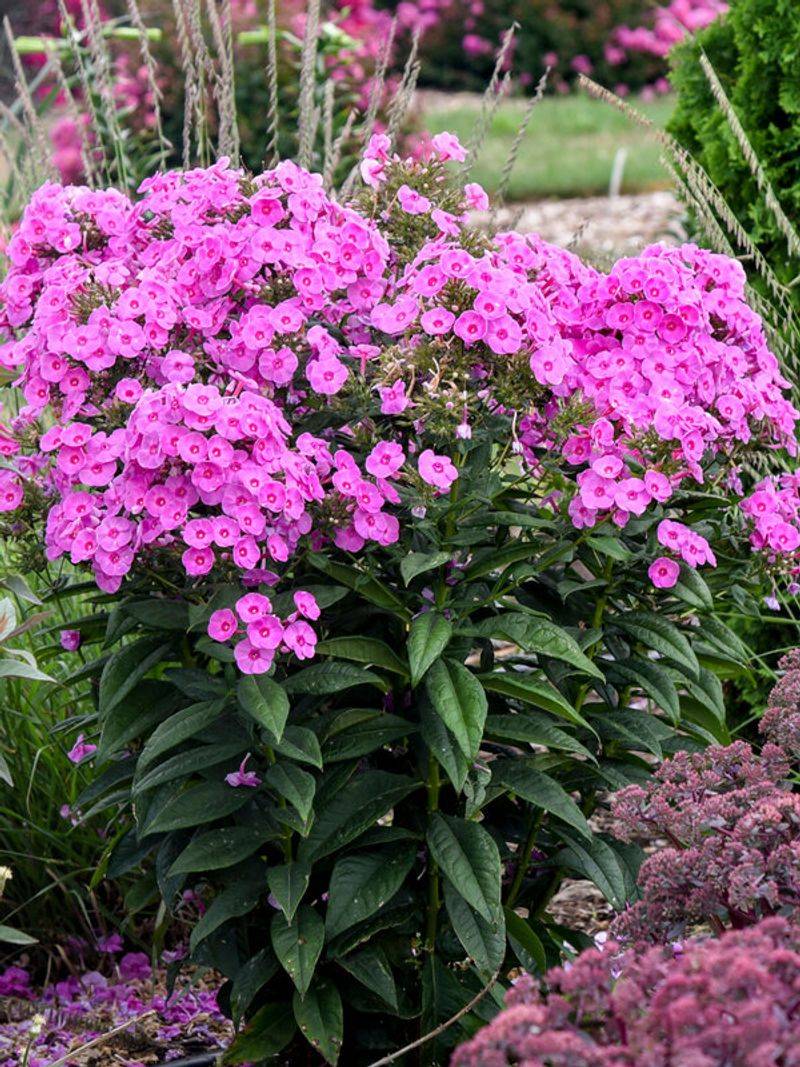
Garden phlox perfumes summer evenings with a sweet, spicy scent that butterflies and hummingbirds find impossible to ignore. Sadly, those tall stems often finish the season wearing a dusty white coat of powdery mildew by late August.
That white film comes from a fungus that can overwinter on infected plant debris left lying in the bed. Cutting phlox stems down to the ground this fall removes much of that fungus before spring weather arrives.
Use sharp pruners and snip each stem at soil level, gathering every fallen leaf you can find nearby. Bag the material for yard waste, since home compost piles rarely get hot enough to break down mildew reliably.
Personally, I keep a separate bucket just for diseased stems, so they never mix with my healthy compost scraps. It sounds fussy, but that small habit has made my phlox look much cleaner during the last few summers.
Crowded clumps trap humid air, which mildew loves, so consider dividing large phlox plants next spring for better airflow. Thinning out a few stems in early summer also helps breezes move through the foliage and dry the leaves.
Varieties like David and Jeana have shown strong mildew resistance in trials, making them smart picks for new beds. Phlox paniculata is native to the eastern United States, and it grows well in zones four through eight.
Water the soil instead of the leaves next year, ideally in the morning, so foliage stays as dry as possible. Pair those habits with this fall cleanup, and your phlox should bloom with far fewer ghostly white leaves.
6. Bee Balm
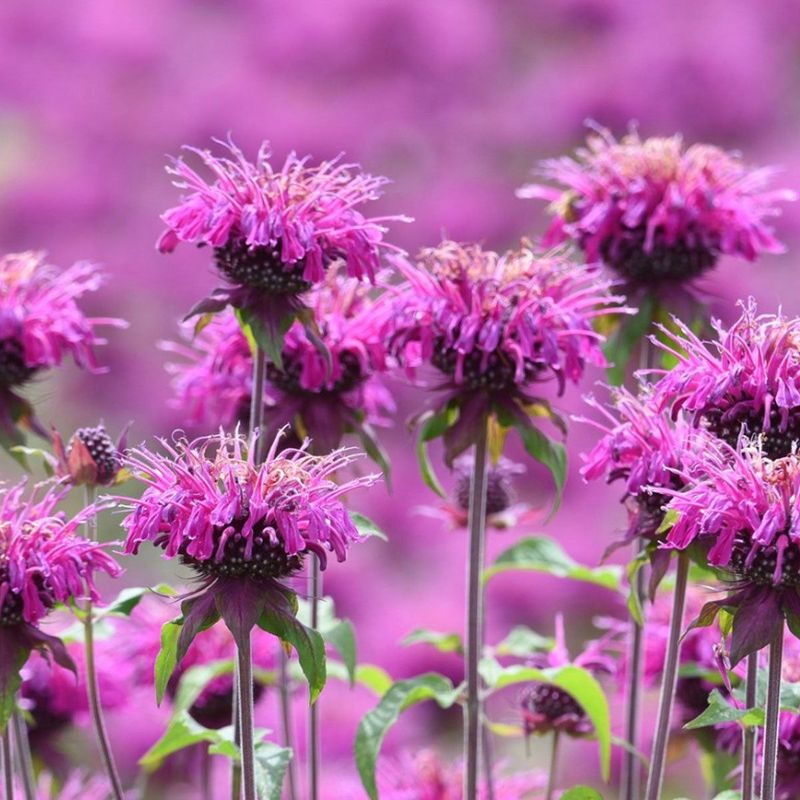
Crush a bee balm leaf between your fingers, and you get a burst of minty, oregano-like fragrance that lingers. Native Americans and early settlers brewed tea from wild bergamot, a close cousin of the bee balm in our gardens.
Like garden phlox, bee balm often struggles with powdery mildew when summer nights turn humid and warm. Michigan summers bring plenty of those muggy evenings, so many clumps look gray and spotty well before frost arrives.
If your plants showed mildew this year, cut the stems down to a couple of inches above the soil. Rake up the fallen leaves too, since spores hitch a ride on that debris and wait for spring.
Healthy bee balm with clean leaves can stay standing if you enjoy the round seed heads in winter. Goldfinches and chickadees sometimes pick at those heads, so a few clean stems left behind can help the birds.
Bee balm belongs to the mint family, and it spreads outward through shallow underground runners over the years. The center of older clumps often thins out, so dividing them every few years keeps plants vigorous and tidy.
Mildew-resistant choices like Jacob Cline and Marshall’s Delight give you fewer headaches during sticky late summer weather. Give them full sun and good airflow, and they will reward you with shaggy red or pink blooms.
I can’t imagine a summer without hummingbirds zipping between bee balm flowers right outside my kitchen window. A little cleanup now helps keep that hummingbird buffet looking fresh and healthy for another busy season.
7. Catmint
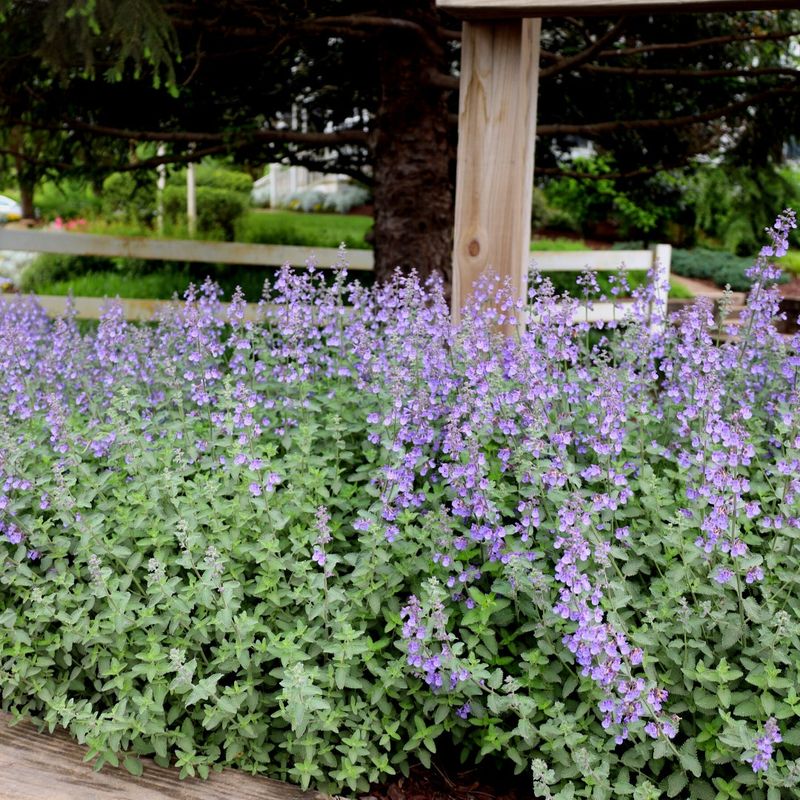
Cats roll around in catnip, but most catmint varieties earn a much calmer reaction from our furry friends. Bees, on the other hand, go wild for those lavender-blue spikes from late spring until frost finally slows them.
By now, catmint often sprawls outward with long, floppy stems that open up the center of the plant. A fall trim tidies that messy shape, and it can make your borders look neater through the snowy months.
You can cut stems back to about three or four inches once frost has dulled the silvery foliage. Some gardeners prefer waiting until spring instead, and that approach works fine too, since catmint handles both timings well.
I like leaving a few inches of stubble, because those short stems help catch fallen leaves and snow. That light covering insulates the crown a bit, which helps young plants settle in during their first winter.
Catmint thrives in full sun and well-drained, average soil, and it rarely needs extra fertilizer or fussing. Rich soil can actually make it floppy, so skip the compost bucket when you plant new clumps next season.
Deer and rabbits usually leave catmint alone, likely because of its strong scent and fuzzy leaves. That tough attitude makes it a handy edging plant near vegetable beds, where hungry visitors often cause the most trouble.
Walk past freshly trimmed catmint, and you will catch a sharp, herbal scent rising from the cut stems. Honestly, that smell alone makes this chore one of my favorite small jobs on a chilly autumn afternoon.
8. Perennial Salvia
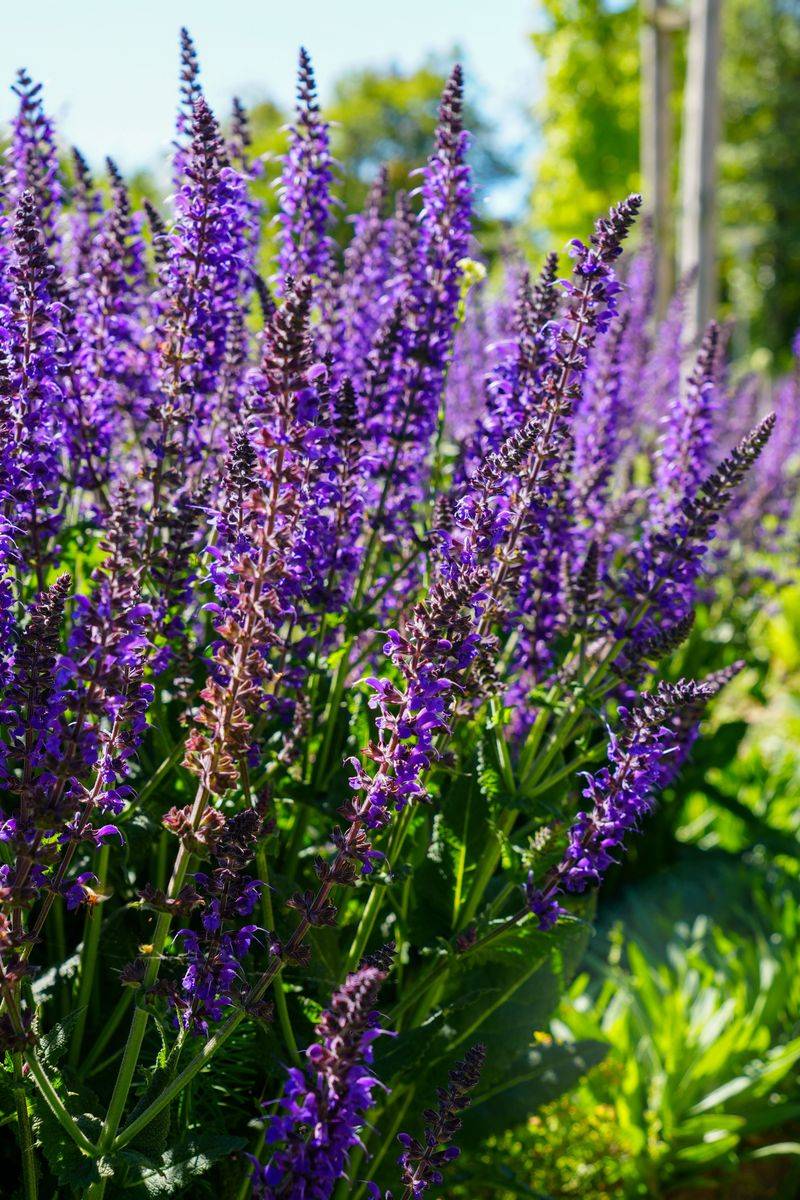
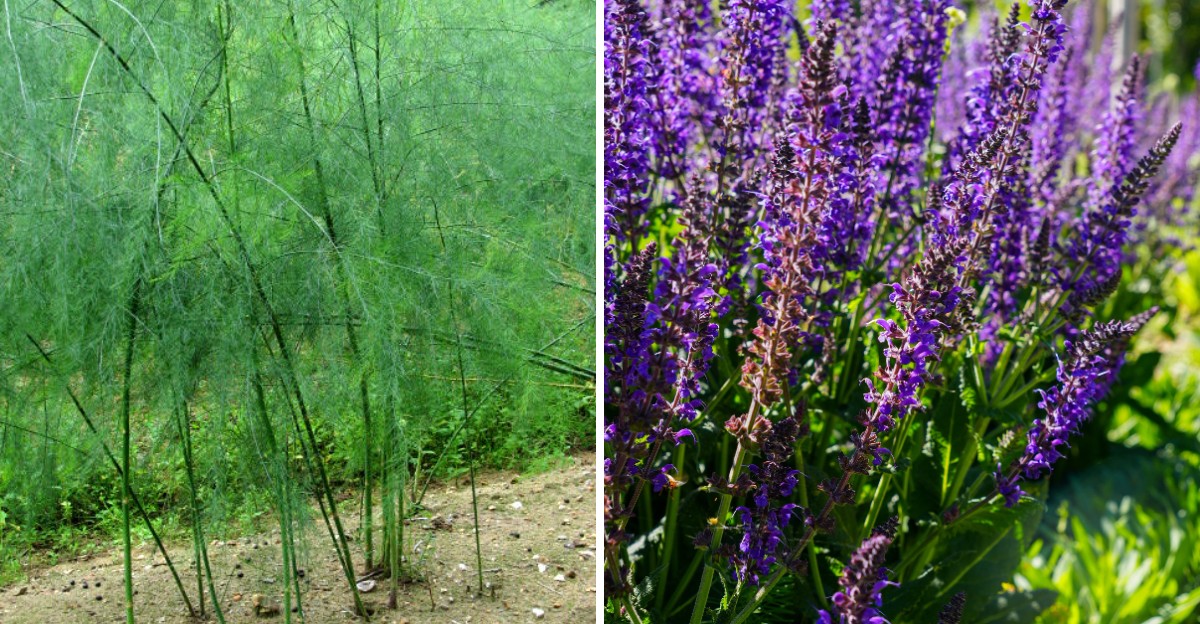
Perennial salvia belongs to the same big family as the sage in your spice rack, and its leaves smell similar. Bumblebees practically line up at those purple flower spikes, bumping from blossom to blossom all summer long.
Salvia nemorosa and its hybrids, like May Night and Caradonna, are the hardy types most gardeners grow in perennial beds. These tough plants handle zones four through eight, and they shrug off dry spells once their roots settle in.
By late fall, spent flower stalks turn brown and stiff, and the leaves start looking ragged after frost. You can trim the stalks and tired foliage back to a few inches, leaving the low basal leaves alone.
That low rosette of leaves at the base helps protect the crown, so try not to scalp the plant. I learned this lesson the hard way after a very short haircut left one of my clumps sulking next spring.
Some gardeners prefer leaving salvia stems standing until spring, and that choice works well in colder, exposed spots. The stems trap snow, which acts like a fluffy blanket, and that insulation can help plants in windy yards.
Either way, wet soil causes more salvia trouble than cold weather, since soggy crowns can rot over winter. Plant salvia in a sunny, well-drained spot, and avoid piling thick mulch tightly against the base of the stems.
Next summer, try shearing spent flowers right after the first bloom to encourage a second flush of color. That trick keeps salvia busy feeding pollinators for weeks longer than it would without a little help from you.
9. Asparagus
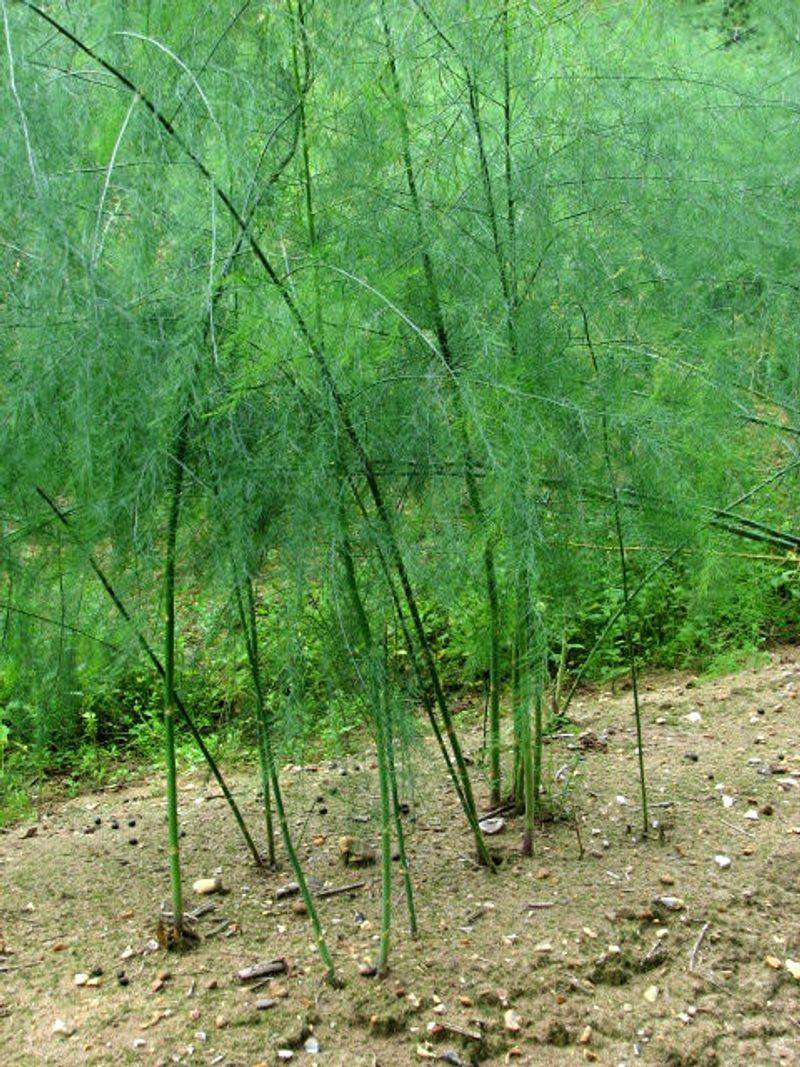
An asparagus bed can keep producing spears for fifteen or twenty years, which makes it a long-term garden friend. By late fall, though, those feathery ferns turn golden brown and lean over like tired umbrellas after a storm.
Asparagus beetles spend winter tucked into garden debris, including the old ferns and stems left in the bed. Michigan State University Extension notes that removing that old growth can reduce beetle numbers and some fungal diseases.
Wait until frost turns the ferns fully brown, since green ferns still send energy down to the crowns below. Then cut every stem down to about an inch or two above the soil with sharp pruners or shears.
You might notice tiny red berries on some ferns, which come from female plants and contain lots of seeds. Remove those berries carefully, because fallen seeds sprout into crowded seedlings that compete with your established crowns.
Some gardeners leave the ferns until spring to catch snow, which can help insulate crowns in colder areas. Both approaches work, so choose fall cleanup if beetles or purple spot disease bothered your bed this past season.
After cutting, spread a few inches of compost or shredded leaves over the bed for a light winter mulch. That layer feeds the soil and helps the crowns wake up strong when spring sunshine finally warms the ground.
I love how tidy the bed looks afterward, like a blank stage waiting for its first performers. Before you know it, fat purple and green spears will start poking up through that mulch on a warm April morning.
10. Summer Bearing Raspberry
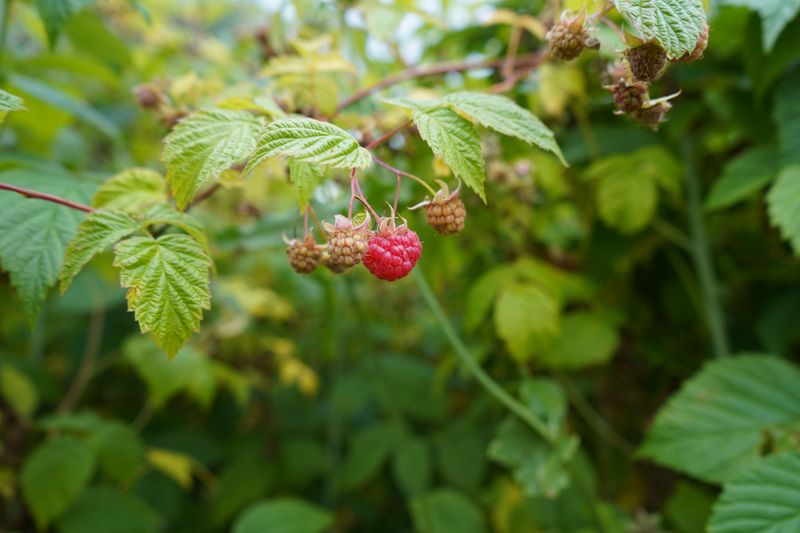
Raspberry roots can live for many years, but each individual cane only lasts for two growing seasons. That quirky life cycle explains why a raspberry patch can turn into a scratchy, tangled thicket if nobody prunes it.
Summer-bearing raspberries grow leafy first-year canes called primocanes, then fruit on those same canes during their second summer. After harvest, the canes that already fruited, called floricanes, turn gray or brown and will not produce berries again.
Cut those spent floricanes right at ground level, and haul them away from the patch for disposal. Old canes can carry diseases like cane blight and anthracnose, so removing them keeps the planting healthier for next year.
Leave the younger, greener canes standing, since those will carry your sweet summer berries next July. I like thinning those remaining canes to about four to six inches apart, which helps sunlight reach every branch.
Thick leather gloves make this job much more pleasant, especially with thorny varieties that grab sleeves like tiny hooks. Trust me, your forearms will thank you after an hour of wrestling with stubborn canes in a crowded row.
Fall-bearing raspberries work differently, and many gardeners simply mow all their canes to the ground after leaves drop. That method sacrifices the small summer crop but encourages one big, reliable harvest in late summer and early fall.
Raspberries grow best in full sun with well-drained soil, and they appreciate a trellis to keep canes upright. Clean pruning now means easier picking later, when you are reaching for berries instead of dodging old thorns.
11. Smooth Hydrangea
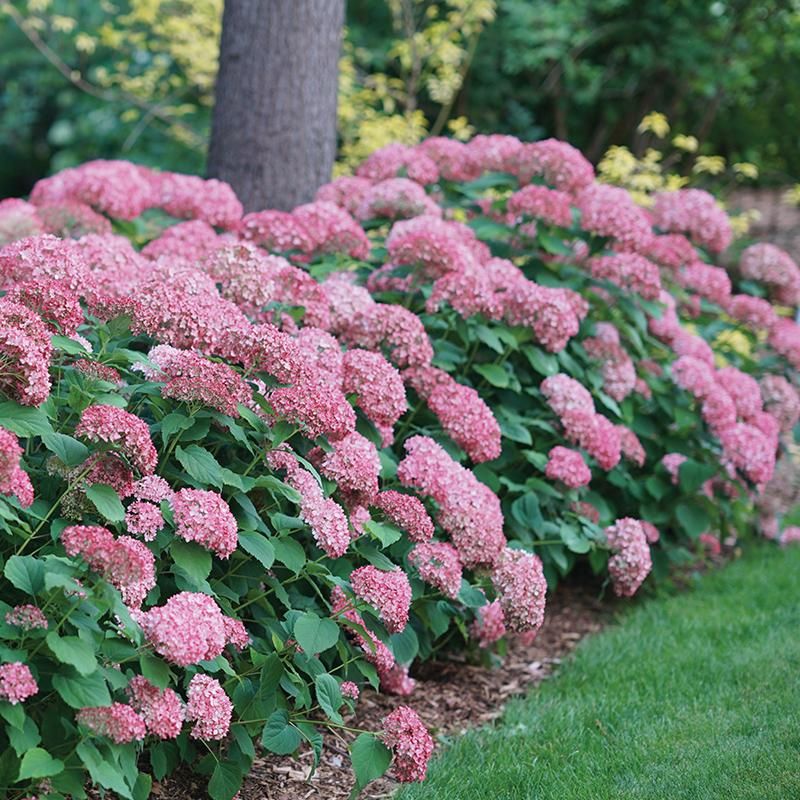
Annabelle hydrangeas were discovered growing wild near Anna, Illinois, which is how this famous cultivar earned its name. Those giant snowball flowers can grow wider than a dinner plate, and they often bend stems toward the ground.
Smooth hydrangeas bloom on new wood, meaning they form flower buds on stems that grow during the current season. That trait makes them wonderfully forgiving, since cutting them back in fall or early spring will not remove next summer’s flowers.
Once the leaves drop and the shrub goes dormant, you can trim stems back to about one or two feet. Cutting at that height helps the new stems grow sturdier, so they hold up heavy blooms a little better.
Some gardeners leave the papery flower heads standing for winter, because snow on dried blooms looks absolutely lovely. Either choice works, so prune now if the drooping stems bother you or tend to break under snow.
Be careful with bigleaf hydrangeas, which often bloom on old wood and need different timing to keep their flower buds. Check your plant tag first, since a fall haircut on the wrong hydrangea can cost you an entire summer of blooms.
Smooth hydrangea is native to the eastern United States, and it grows happily in zones three through nine. It appreciates morning sun, afternoon shade, and steady moisture, especially during the hot, dry stretches of late July.
I love how these shrubs bounce back so fast in spring, shooting up fresh green stems within a few weeks. By midsummer, those huge white flower clusters make your fall pruning effort look like pure genius.
12. Hybrid Tea Rose
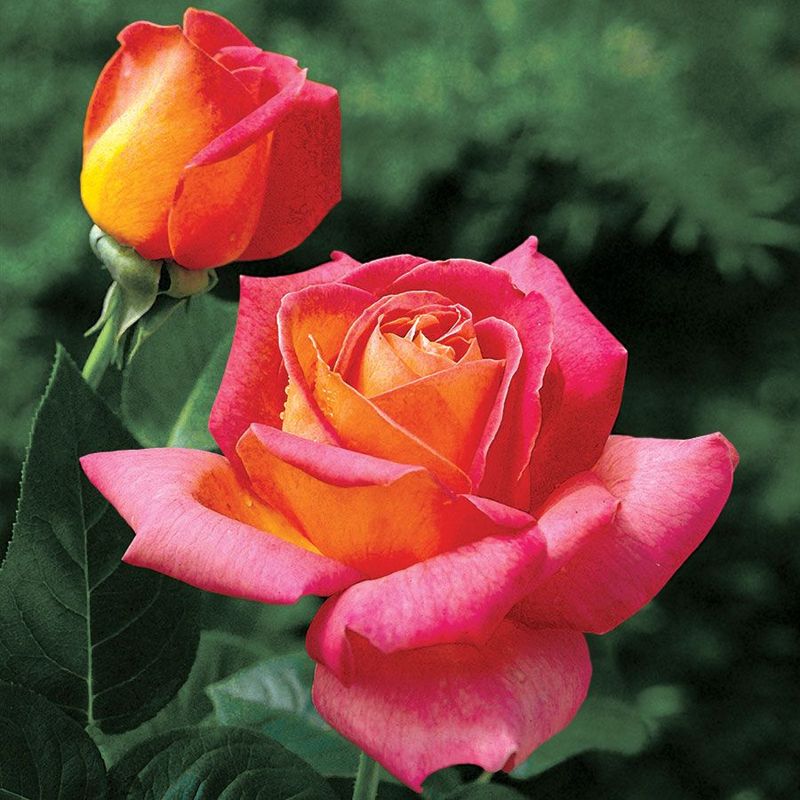
Hybrid tea roses produce one elegant bloom per long stem, which is why florists love them for bouquets. Those tall canes look stunning in June, but they can whip around like fishing rods during gusty winter storms.
Strong winds rocking long canes can loosen roots and crack stems, especially on roses planted in open, exposed spots. A light fall trim helps reduce that swaying, so your bushes stay more stable when cold winds blow across the yard.
After a few hard frosts, shorten any extra long canes enough to keep the plant from flopping or snapping. Save the major shaping for early spring, once you can see which canes made it through the cold months.
Remove any broken, diseased, or blackened stems while you work, cutting back to healthy green wood. Rake up fallen rose leaves too, since black spot fungus overwinters on that debris and splashes back onto new growth.
Many hybrid teas need extra winter protection in colder parts of Michigan, where temperatures can drop well below zero. Mounding soil or shredded leaves around the base, about ten to twelve inches high, helps protect the graft union.
Shrub roses and many hardy landscape roses usually need far less fuss than their fancy hybrid tea cousins. If winter protection sounds like too much work, those tougher types might be a smart choice for future plantings.
I have to admit, tucking my roses in for winter feels a bit like putting kids to bed. When those first fragrant blooms open next June, all that careful fall attention feels completely worth the trouble.