The Easy Celery Regrowing Trick Ohio Gardeners Can Try At Home
Most people throw away the base of a celery bunch without a second thought. It goes in the compost bin or straight to the trash, which is completely understandable because it looks like there is nothing left worth keeping.
Turns out there is. Ohio gardeners have been quietly getting extra mileage out of grocery store celery for years, and the process is about as low effort as gardening gets.
No special tools, no greenhouse, no experience required. Just a base, some water, and a little patience.
It does not replace a full garden harvest, and nobody is claiming it does. But for something that was headed to the bin anyway, what you get back is hard to complain about.
1. Start With A Healthy Celery Base From The Kitchen
Picture yourself at the kitchen counter, slicing stalks off a fresh bunch of celery for a recipe. Before you toss the base, take a closer look at it.
That flat-bottomed piece, usually about two inches tall, is where the growing magic actually lives.
The base holds the plant’s central growing point, which is the small, tightly packed core right in the middle. Loose individual stalks pulled away from the bunch will not do the same thing, because they no longer have that center attached.
You need the whole bottom section to stay together as one piece.
Choosing the right base matters more than most beginners expect. Look for a base that feels firm and solid, not soft or mushy.
The cut end should look fresh, not slimy or dried out, and the center should still look pale green or yellowish rather than brown or shriveled.
If the celery has been sitting in your fridge for two weeks and is starting to look tired, the experiment may not go as well. Fresher celery simply gives you a better starting point.
Ohio grocery stores and farmers markets carry plenty of good celery during spring and fall, which are the best seasons to try this project anyway.
Use a sharp knife to trim the stalks off cleanly, leaving about two inches of the base. Set the stalks aside for cooking, and keep that base ready for the next step.
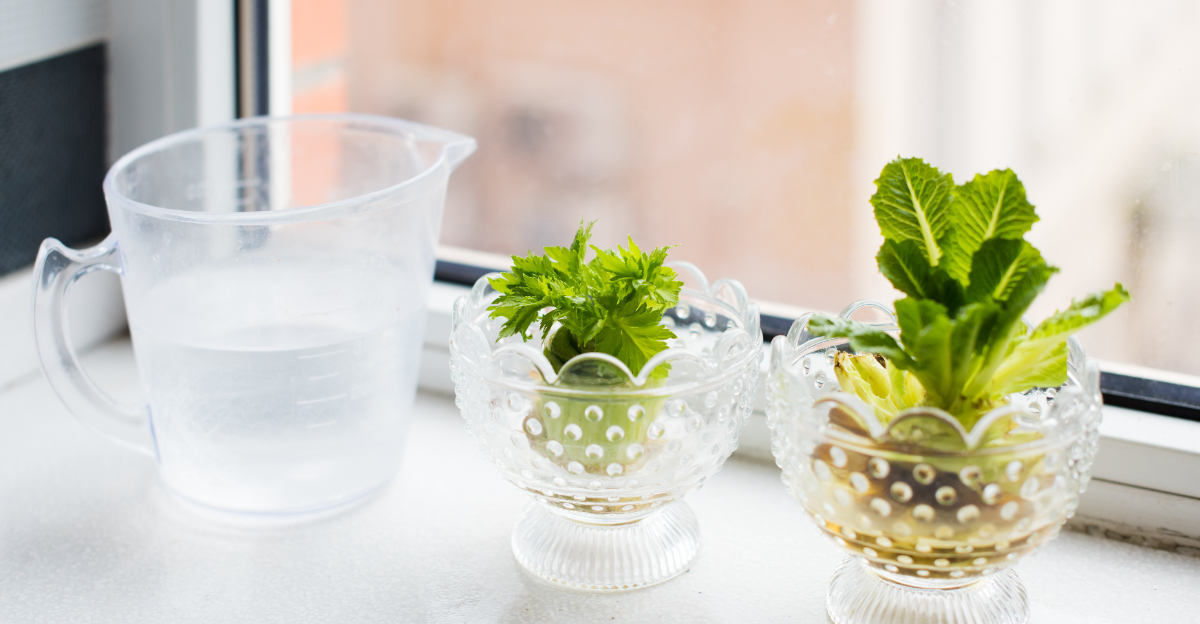
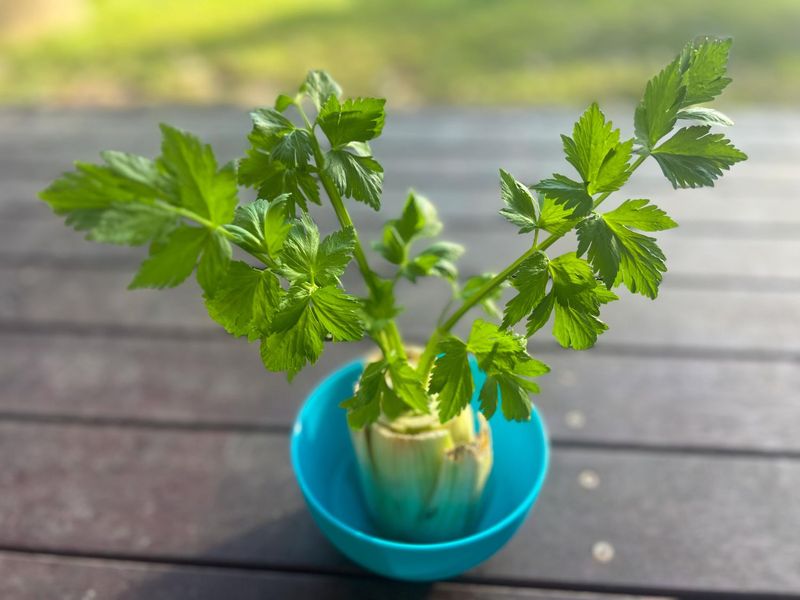
2. Set The Stump In Shallow Water First
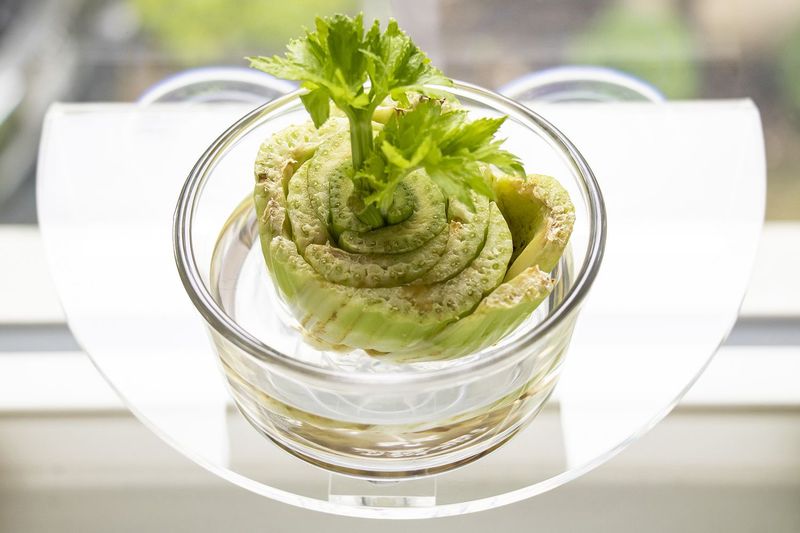
A small bowl, a little water, and a bright windowsill are really all you need to get this project started. Place the celery base cut-side up and root-end down in a shallow dish or saucer.
Pour in just enough water to cover the very bottom of the base, roughly a quarter to half an inch deep.
You want the cut top to stay above the water line, not submerged. Submerging the whole base tends to cause it to break down faster rather than encouraging fresh growth.
The goal here is to give the base just enough moisture to wake up the center growth point without drowning it.
A bright windowsill works well for this step. Indirect light is ideal, meaning the kind of soft, steady brightness you get near a sunny window without harsh afternoon sun baking the dish.
Ohio kitchens with south- or east-facing windows are often a good match for this setup during spring and early fall.
Keep the dish steady so the base does not tip over. A small ramekin, a short jar, or even a mug can hold the base upright if a flat saucer does not keep it in place.
The base should sit level so water reaches the bottom evenly.
Do not rush this step. Give the base a few days to settle in before expecting anything to happen.
Patience makes this project a lot more enjoyable.
3. Change The Water Before It Turns Cloudy
Fresh water makes a real difference in how well the celery base holds up during the early days of this experiment. Letting the water sit too long gives bacteria a chance to build up, which can cause the base to soften, smell unpleasant, or stop progressing altogether.
A good habit is to change the water every day or every couple of days. Each time you refresh it, take a moment to rinse the dish and give the base a gentle look.
Check that the bottom still feels firm and that the center looks like it is staying healthy. If you notice the water going cloudy sooner than expected, just change it a little more often.
Ohio tap water is generally fine for this project, but if your water has a strong chlorine smell, letting it sit in an open glass for an hour before using it can help. Some gardeners use filtered water, but that is not required to get results.
Starting over is completely fine if the base goes soft or starts to look like it is breaking down. Not every base will cooperate, and that is just part of the experiment.
Grab a fresh bunch of celery and try again with a firmer base.
The simple act of checking the water every day also keeps you engaged with the project, which makes it easier to notice when tiny new growth first begins to appear in the center.
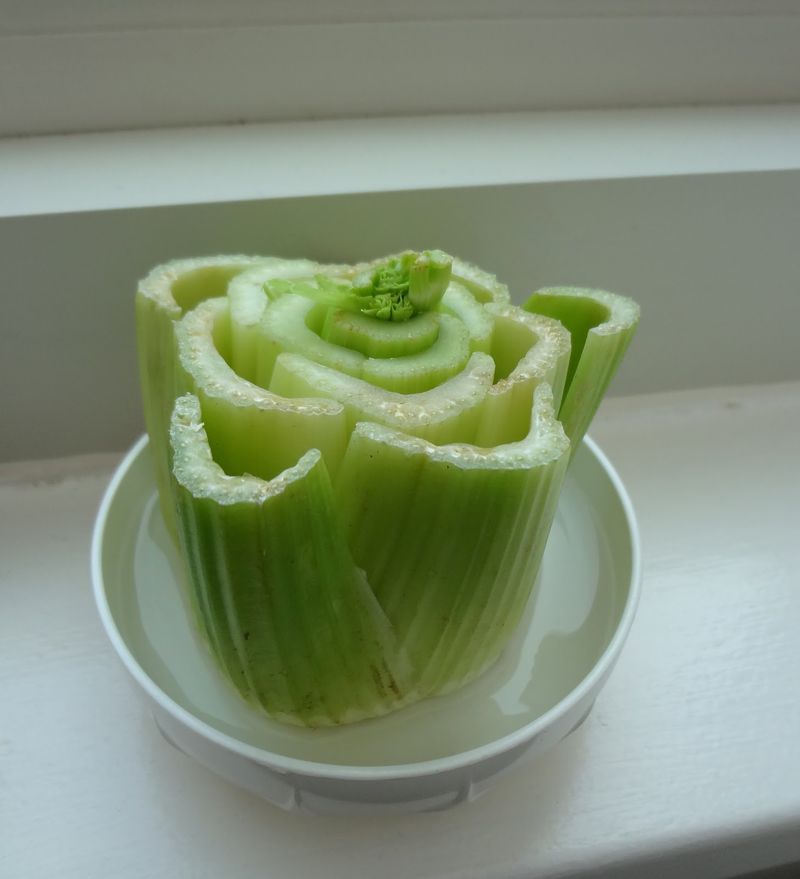
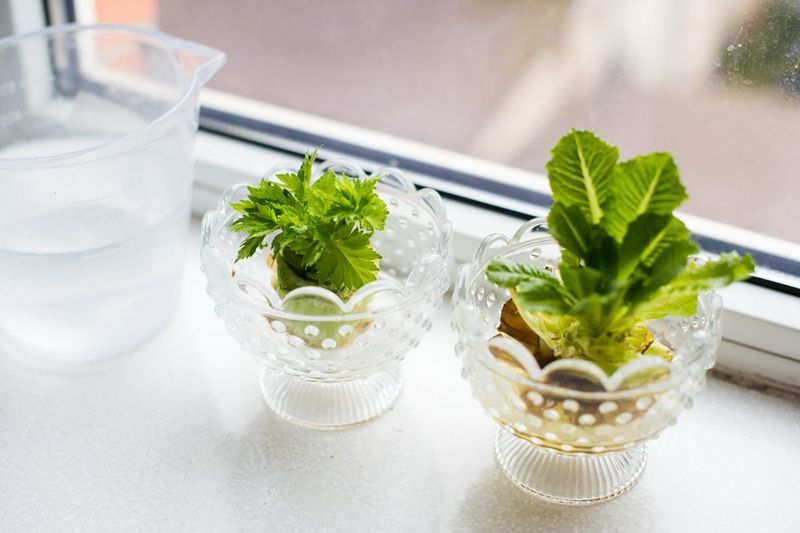
4. Watch For Tiny Leaves Before Expecting Stalks

A few days into the water-starting step, something small and exciting usually happens in the center of the celery base. Tiny pale green or yellowish-green leaves begin to push upward from the middle.
This is the moment the experiment starts to feel real.
Those early leaves are tender and small, nothing like the thick stalks you see at the grocery store. That is completely normal.
The base is not going to transform into a full bunch overnight, or even over several weeks. Regrowing celery from a kitchen scrap is a gradual, modest process, and the early growth reflects that honestly.
Some bases show new center growth within three to five days. Others take a little longer, especially if the celery was not super fresh to begin with.
Watching for steady progress over a week or two is a healthier way to evaluate the project than checking every few hours and feeling disappointed.
The leaves that appear first are actually usable. They carry real celery flavor and can be snipped into soups, salads, or scrambled eggs even at this early stage.
So even a modest result has practical value in the kitchen.
Ohio gardeners who try this project with kids often find that watching for the first little leaves is the most exciting part of the whole experience. Mark the day you start with a small note or a photo so you can track progress and appreciate how far the base has come.
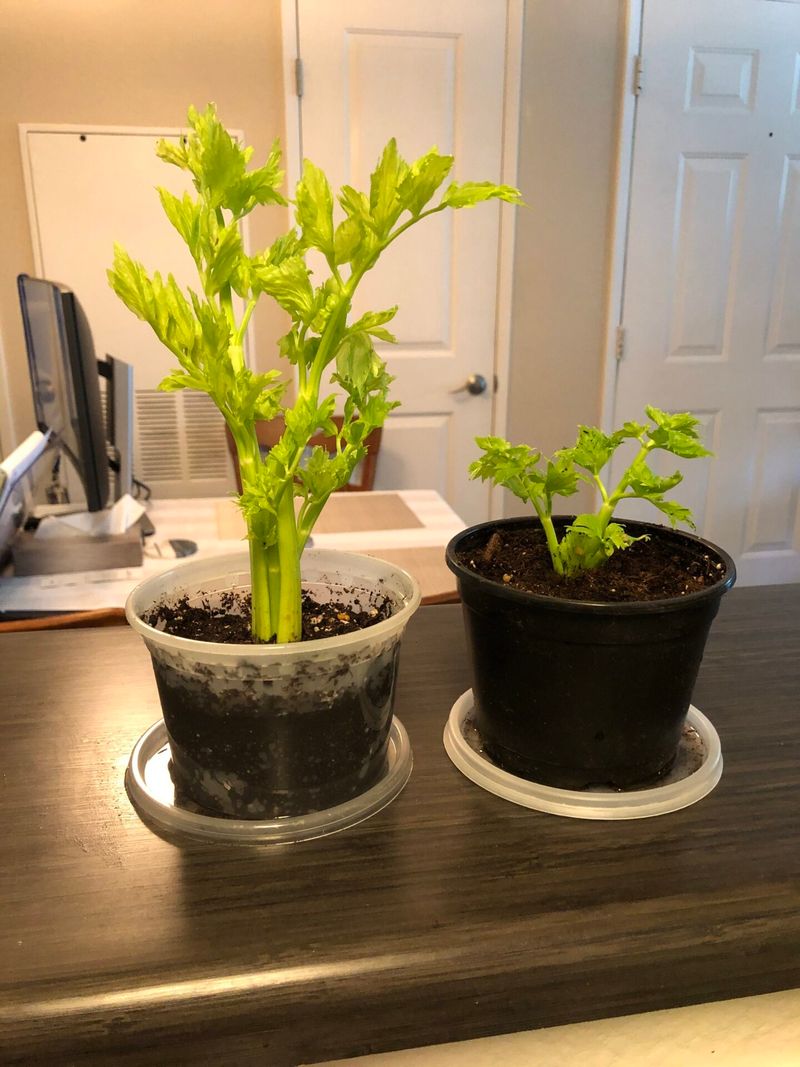
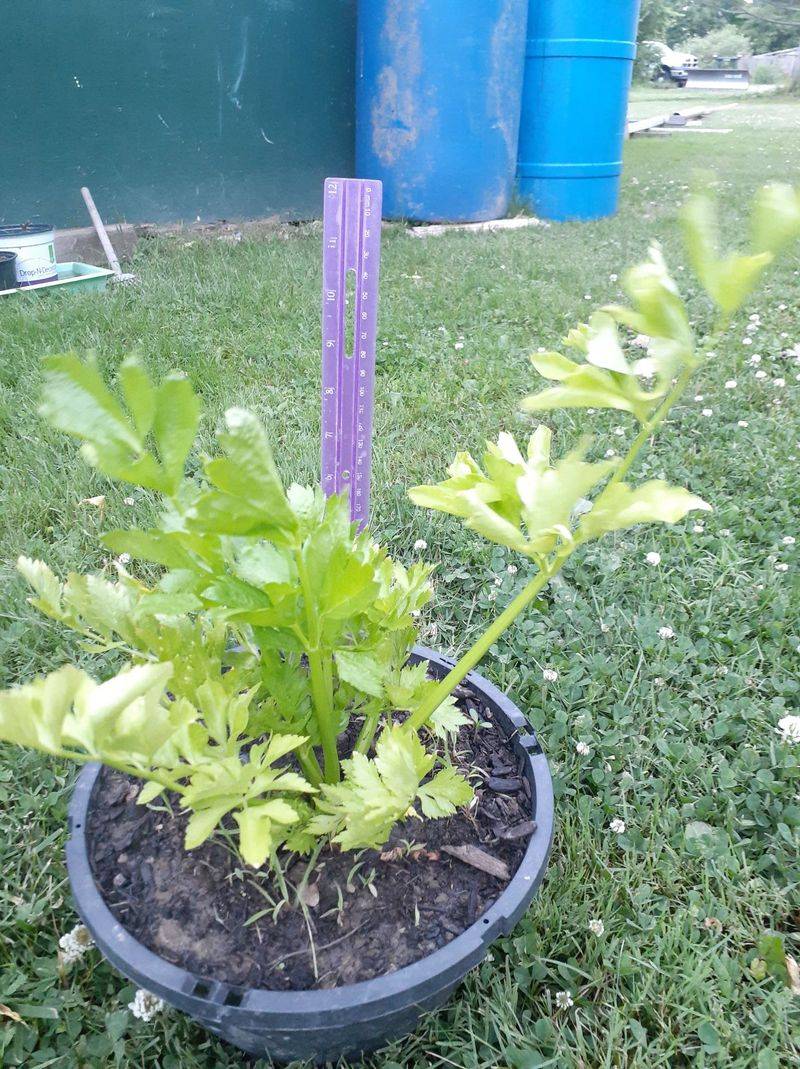
5. Move It To Soil Once Roots Begin To Show
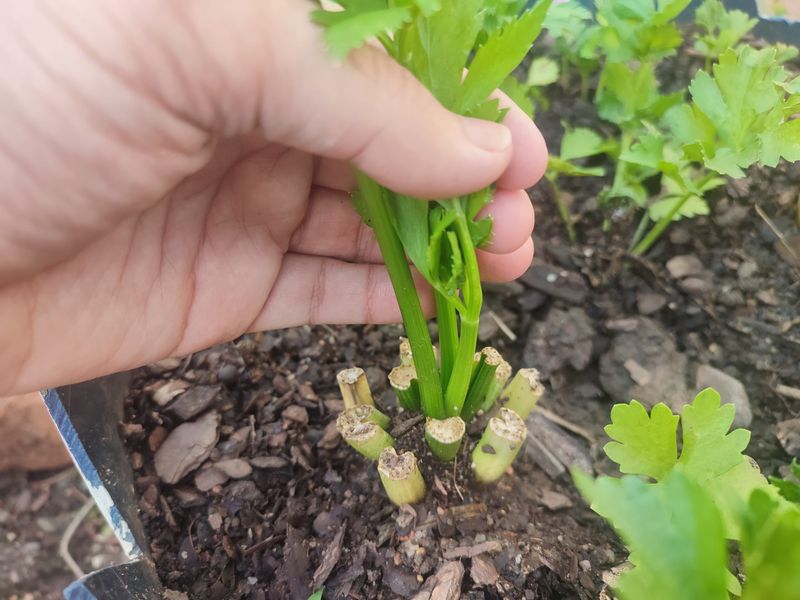
Water gets the process started, but soil is where the celery base can actually grow stronger. Once you notice small roots forming along the bottom of the base, or once the center leaves look steady and are pushing up consistently, it is a good time to make the move to a pot.
Choose a small container with drainage holes at the bottom. A four- to six-inch pot works well for this stage.
Fill it with moist, well-drained potting mix rather than garden soil from the yard, which can be too heavy and compact for a container setup.
Set the base into the potting mix so the crown, which is the center where the new leaves are emerging, sits just slightly above the soil line. Burying it too deeply can slow growth and cause the base to break down.
Press the soil gently around the sides to hold it steady without packing it too tight.
Water the pot lightly right after transplanting to help the base settle in. Keep the soil moist but not waterlogged.
Ohio gardeners often find that a pot near a bright window indoors works well for the first few weeks before moving the plant outside in cooler weather.
The transition from water to soil can cause a brief slowdown in visible growth, so do not worry if the leaves look a little still for a few days. The roots are adjusting, and the plant will usually pick back up once it settles into the new environment.
6. Give Ohio Celery Cool Weather And Steady Moisture
Celery has a reputation for being one of the pickier vegetables to grow, and moisture is a big reason why.
The plant has shallow roots that cannot reach deep into the ground for water, so it depends on the gardener to keep conditions consistently moist without going soggy.
Ohio springs are actually a nice fit for celery because the weather is cool and often damp, which is exactly what celery prefers.
However, Ohio summers can swing quickly toward heat and humidity, which can stress a young plant that is still getting established from a kitchen scrap.
Keeping the pot in a shaded or partially shaded spot during warm spells helps. A covered porch, a north-facing patio, or a spot near a window that gets morning light but avoids harsh afternoon sun can extend the comfortable growing window for your celery project.
Check the soil regularly by pressing a finger about an inch into the mix. If it feels dry, add water.
If it still feels moist, wait another day. Consistent checking beats guessing, especially during Ohio’s unpredictable spring weather patterns.
Avoid letting the pot sit in standing water, because soggy roots cause problems just as quickly as dry ones. A pot with drainage holes and a saucer underneath is the easiest way to manage moisture without overwatering.
The goal is steady and even, not drenched and then forgotten.
7. Harvest Leaves And Small Stalks Without Expecting Grocery Store Size
Regrown celery from a kitchen base is not going to fill a grocery bag, and that is perfectly fine. The real payoff from this experiment is smaller and more personal: fresh celery leaves, tender young shoots, and modest stalks that carry genuine celery flavor.
Those small leaves work beautifully in soups, homemade stocks, chicken salad, egg salad, potato salad, and as a simple garnish on top of a bowl of chili.
Ohio cooks who use their gardens to stretch everyday recipes will find the regrown leaves genuinely useful, even if the amounts are modest.
Snip lightly when harvesting. Take a few outer leaves at a time and leave the center growth alone so the plant can keep producing.
Stripping the whole plant at once will set it back significantly and may stop new growth from continuing.
The stalks that do form will likely be thinner and more tender than store-bought celery. Some gardeners find them milder in flavor, while others notice a slightly stronger, more herby taste.
Either way, they are worth using.
Treat every small harvest as a win. You grew something from a piece of kitchen scrap that most people throw away, and that counts for something real.
The experience of snipping fresh leaves from your own little celery plant and dropping them into a pot of soup is genuinely satisfying, no matter how modest the yield turns out to be.
8. Treat It As A Low Cost Garden Experiment
Even if your celery base only grows a handful of leaves before it stops progressing, the experiment still teaches you something valuable. You watched a kitchen scrap respond to water, form roots, push out new growth, and move into soil.
That is a real gardening lesson packed into a very small container.
For kids, this project is especially engaging because the results show up quickly and visibly. Seeing tiny green leaves appear from something that looked like trash is genuinely surprising the first time.
Ohio families with young gardeners often find that kitchen scrap projects like this spark a longer interest in growing things.
Apartment gardeners, patio growers, and windowsill gardeners can all participate without needing a yard, a raised bed, or a large investment. The only real cost is the celery you were already going to buy.
Everything else, the dish, the water, the pot, the potting mix, you likely already have at home.
The connection between kitchen and garden is one of the most rewarding parts of growing your own food, even in a small way. Regrowing celery from a base makes that connection feel tangible and immediate rather than distant or complicated.
Ohio gardeners who try this once often find themselves looking at other kitchen scraps differently afterward. Green onion bottoms, romaine lettuce bases, and herb stems all hold similar potential.
Start with celery, enjoy the process, and see where your curiosity takes you next.