Smart Tricks Ohio Gardeners Should Use To Prevent Weeds Between Pavers
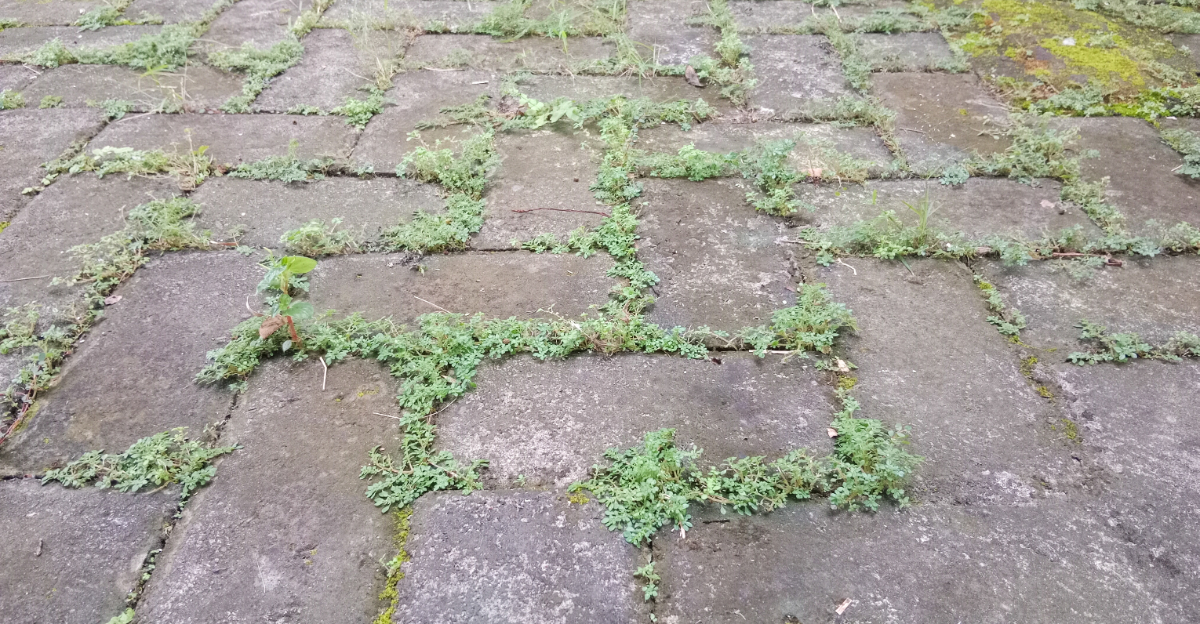
Pavers look sharp when they’re first laid. Clean lines, even gaps, exactly the look you were going for.
Then the weeds find those gaps and the whole picture changes. What makes paver weeds particularly stubborn is their location.
You can’t just run a hoe through them. Pulling by hand gets tedious fast and rarely gets the root.
Spraying risks the surrounding plants. Most Ohio homeowners end up in a cycle of pulling, waiting, pulling again, never quite getting ahead of it.
What actually breaks that cycle isn’t one single fix. It’s a combination of approaches that address the problem at different levels, from the soil beneath the pavers to the surface between them.
Ohio gardeners who stay ahead of paver weeds aren’t working harder, they just stopped approaching it as a reactive problem.
1. Start By Clearing Every Weed And Root

Before any prevention plan has a chance to work, the slate has to be clean. Skipping the initial cleanup and jumping straight to sand or sealant is like painting over a crack.
The problem stays hidden and comes back faster than ever.
Pull weeds right after a rain or after you have watered the area. Damp soil releases roots much more easily than dry, compacted ground.
Getting the full root out matters because broken root pieces left behind can sprout again, especially in warm, humid weather during our growing season.
Work through the joints with a hand weeder, a stiff brush, or a flat paver tool to clear out loose debris, packed dirt, and any broken root fragments. Seed heads are just as important to remove as the plants themselves.
One dandelion head left sitting in a joint can drop dozens of seeds before you get back outside.
After pulling, sweep or blow the joints out carefully. You want to remove as much loose organic material as possible before adding any joint filler or taking further prevention steps.
Leaving behind a layer of compost-like debris between pavers gives the next round of weed seeds a ready-made growing medium.
For stubborn weeds with deep roots, a narrow weeding knife or a crack weeder tool works well for getting into tight joints without disturbing the surrounding pavers. Take your time during this first step.
A thorough initial cleanup makes every other prevention method you use after it significantly more effective and longer lasting.
2. Sweep In Polymeric Sand The Right Way

Polymeric sand has become one of the most popular joint-filling materials for paver patios, driveways, and walkways, and for good reason. When installed correctly, it binds together when activated with water and creates a firm, stable joint that makes it much harder for weed seeds to take hold and sprout.
The catch is that installation matters more than the product itself. Polymeric sand can cause haze on the paver surface if it is swept in while the pavers are damp.
It can also create weak joints or crumbling joints if activated with too much water at once. Always follow the product directions closely and check that the pavers and joints are completely dry before you begin.
Your Ohio Garden Changes Every Week. Your Plan Should Too.
Gardening in Ohio changes quickly throughout the season. Every Friday you’ll receive a simple weekly plan showing exactly what to plant, prune, fertilize, harvest, and protect so you never miss the right timing.
Sweep the sand into the joints in layers, working it down into the full depth of each joint with a plate compactor or hand tamper if needed. Remove all excess sand from the paver surface before wetting.
Leftover sand sitting on top of pavers during activation is one of the most common causes of the white haze that is so hard to remove later.
Water the joints carefully using a gentle spray, not a hard blast, to avoid washing sand back out before it sets. Most products need a full cure period before rain or foot traffic, so check the label and plan accordingly.
Polymeric sand does not permanently seal joints forever. Over time, freeze-thaw cycles common in many parts of the state can crack and loosen it.
Plan to inspect and touch up joints every couple of years to keep them weed-resistant and stable.
3. Fix Low Spots Where Water Collects

Standing water between pavers is more than just a nuisance after a spring storm. Low spots that hold moisture for hours or days after rain create exactly the kind of damp, debris-filled environment where weed seeds love to germinate.
If you have noticed certain areas of your patio or walkway that seem to sprout weeds faster than others, low spots and drainage issues are often the reason.
Soil, organic debris, and fine particles tend to wash into and settle in these lower areas. Over time, that material builds up into a thin growing medium right inside the joint, essentially a tiny raised bed for whatever seed happens to land there.
Fixing the drainage problem removes the conditions that make weeds thrive.
Resetting sunken pavers is a straightforward fix for most homeowners. Lift the affected paver, add or re-level the base material underneath, and reset the paver so it sits flush with or slightly above the surrounding surface.
A slight slope of about one-quarter inch per foot moving water away from the house or toward a drain is the general recommendation for good patio drainage.
Check that downspouts and runoff paths from the roof or lawn are not directing water across your paved areas. Even a slow trickle across a patio during every rain event can deposit enough fine soil over a season to fill joints with weed-friendly material.
Correcting drainage is one of the most overlooked parts of paver maintenance. It pays off in fewer weeds, longer-lasting joints, and a patio that holds up better through this state’s winter freeze-thaw cycles.
4. Use Boiling Water Carefully On Small Weeds

Pouring boiling water on weeds sounds almost too simple, but it actually works well on small sprouts growing in paver joints, particularly when you catch them early. The heat damages the plant tissue quickly.
For shallow-rooted seedlings, one application is often enough to stop them without reaching for any chemical product.
Safety has to come first with this method. Boiling water causes serious burns instantly if it splashes back onto your skin, feet, or legs.
Always wear closed-toe shoes, long pants, and oven mitts when carrying and pouring. Move slowly and pour in a controlled, low stream directly into the joint rather than from a height.
Keep children and pets well away from the area while you work.
Be aware that boiling water does not stay put. If it runs off the paver surface and into a nearby garden bed or across lawn edges, it can damage or harm the desirable plants growing there.
Use this method in areas where the surrounding plantings are set back from the paver edges, or where runoff can safely drain away from beds.
Boiling water works best as a quick response to small, isolated weeds, not as a whole-patio treatment. For large areas or established weeds with deep roots, it is not a practical solution on its own.
Think of it as a useful tool in your regular maintenance routine rather than a one-step fix.
Repeat applications may be needed if roots were not fully reached the first time. Combining this approach with regular joint maintenance gives the best results over the course of our growing season.
5. Keep Soil And Mulch From Washing Into Joints

Every time mulch, compost, soil, or leaf debris washes or blows across your paver surface and settles into the joints, it creates a tiny pocket of growing medium. Weed seeds need very little material to germinate.
Even a thin layer of organic matter packed into a joint is enough to get a new plant started. That is especially true during the warm, humid stretches common through our growing season.
Spring storms and summer downpours are particularly good at moving material around. A heavy rain can wash a surprising amount of mulch off a nearby bed and deposit it across a patio or walkway in a single afternoon.
Checking your paver surfaces after significant rain events and sweeping or blowing them off is one of the simplest things you can do to reduce weed pressure over time.
Keep mulch beds that border paver edges well-contained. Avoid piling mulch higher than the paver surface.
When mulch sits above paver level, rain and foot traffic push it directly into joints. Keeping bed edges slightly lower than the paver surface, or using a physical edging barrier, helps hold material in place.
Grass clippings are another overlooked source of joint debris. If your mower discharges clippings toward a walkway or patio, redirect the discharge or blow clippings back into the lawn before they settle into joints.
Even a small amount of decomposing organic matter is enough to feed a new weed sprout.
Regular sweeping goes a long way toward keeping joints clean. Even a quick pass once or twice a week during active growing periods makes the joints less hospitable to seeds looking for a place to take root.
6. Edge Nearby Beds Before Weeds Creep In

A clean edge between your Ohio garden beds, lawn, and paved surfaces does more than just look sharp. It creates a physical barrier that slows the gradual creep of soil, roots, and organic material into paver joints.
Without that clear separation, grass, groundcovers, and spreading perennials can work their way right up to and into the seams between pavers over the course of a season.
Grass is especially persistent along walkway edges. Turf that is not regularly trimmed will send runners across the paver surface and root into any joint that has enough debris to support growth.
A simple pass with a manual edger or a string trimmer along the paver border every few weeks keeps that creep in check. It also makes the whole area look more finished and intentional.
Spreading groundcovers planted near paver paths can cause similar problems. Plants like creeping Jenny, ajuga, or certain sedums are beautiful in beds, but they spread quickly and will fill paver joints if left unchecked.
Trim them back before they reach the seam line rather than after they have already rooted in.
Physical edging products, such as steel, aluminum, or composite landscape edging, can create a more permanent separation between beds and paved areas.
These products help hold mulch and soil in place while keeping lawn edges from migrating toward the pavers over time.
Spending ten or fifteen minutes on edge maintenance every few weeks during the growing season saves considerably more time later.
A tidy edge is one of those small habits that quietly prevents several different weed and debris problems from building up at once around your hardscape areas.
7. Stay Ahead With Quick Weekly Touch-Ups

Catching weeds when they are tiny is about as close to easy as yard work gets. A sprout that is three days old comes out with a light pinch.
That same weed three weeks later has a root system, a seed head, and a head start on next year’s crop of weeds in the same joint. Weekly touch-ups are the single most practical habit you can build around paver maintenance.
Set aside just ten to fifteen minutes once a week during the active growing season to walk your patio, driveway edges, and garden paths. Look for new sprouts in the joints and sweep off any debris that has collected on the surface.
Check for joints that may have shifted or opened up after recent rain or temperature swings. Small problems caught early are almost always faster and easier to address than the same problems left for a month.
After heavy storms, do a quick check even if it has not been a full week. Spring in particular can bring back-to-back rain events that wash debris into joints and create damp conditions perfect for germination.
A fast sweep and a few minutes of hand-pulling after a big storm can prevent a week’s worth of weed growth from getting established.
Keep a small weeding tool, a hand brush, and a bucket near your patio door so the supplies are always within reach. When the barrier to starting is low, the task actually gets done regularly.
Prevention is a routine, not a one-time project. Keeping that mindset is what separates a patio that always looks tidy from one that feels like it is constantly fighting back.