The Mulching Mistake That Damages Arizona Plants In Summer Heat
Few things make a garden look more polished than a fresh layer of mulch. Planting beds instantly look cleaner, weeds seem easier to manage, and everything appears ready to handle another long stretch of summer weather.
That is exactly why so many people assume more mulch is always a good thing.
The trouble starts when mulch is applied the wrong way. What seems like extra protection can sometimes create the very problems plants struggle with during hot weather.
Stress begins building below the surface while everything still looks perfectly fine from a distance.
When temperatures stay high for weeks at a time in Arizona, small mistakes can have a much bigger impact than expected. One of the most common ones is hiding in plain sight, and many healthy looking garden beds are making it right now.
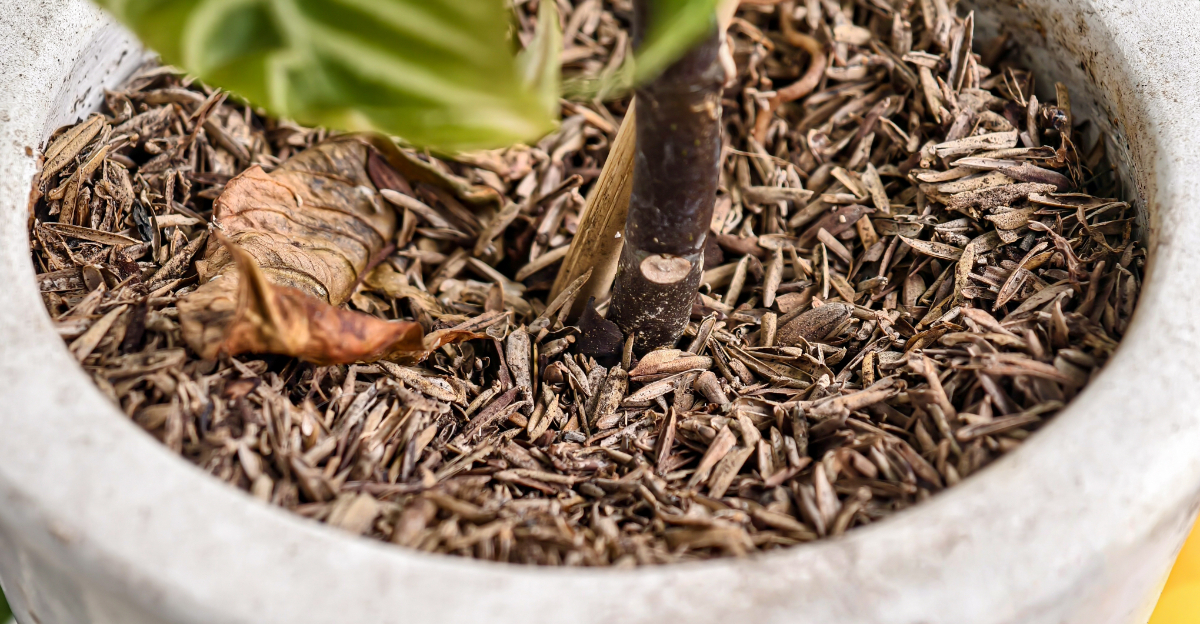
1. Piling Mulch Against Plant Stems Causes Summer Damage

Bark and stems need air to stay healthy. When mulch touches them directly, it traps heat and moisture against tissue that should stay dry.
Summer humidity from irrigation combined with insulating mulch creates perfect conditions for fungal growth and bacterial soft rot.
Desert plants evolved with exposed root crowns that breathe freely. Covering this area changes the environment completely.
Tissues soften as they stay constantly damp. Insects burrow into the moist mulch and find easy access to weakened plant material.
The problem intensifies during monsoon season when humidity spikes. Mulch piled against stems holds extra water that never evaporates quickly.
Roots near the surface start rotting before you notice above-ground symptoms. Leaves may yellow or branches decline while the real damage stays hidden beneath the mulch layer.
Many gardeners pile extra mulch thinking it provides more protection from heat. The reverse happens.
That thick layer against the stem acts like a wet blanket that won’t dry out. Bark stays soggy for days after watering instead of drying within hours.
Check your plants now before temperatures climb higher. Look for mulch touching any woody stems or green tissue.
2. Pull Excess Mulch Away From The Base

Your first fix takes just minutes per plant. Grab a hand rake or use gloved fingers to move mulch back from every stem.
Create a clearing that exposes the soil right around the base. This simple action stops ongoing damage immediately.
Work carefully to avoid disturbing shallow roots. Pull the mulch straight back rather than scraping downward.
Most desert plants have feeder roots within the top few inches of soil. Rough handling tears these delicate structures that absorb water and nutrients.
Start with your most valuable plants first. Established trees and large shrubs take years to replace if they decline.
Young transplants also need immediate attention because they have less resilience to stress. Move through the garden systematically so nothing gets missed.
Some mulch will have matted together from repeated watering. Break up these clumps as you pull them away.
Matted mulch prevents water penetration and creates an uneven surface. Loose material allows irrigation to soak through evenly across the entire root zone.
You might find insects, pill bugs, or other creatures living in the mulch you remove. This is normal but confirms why keeping it away from stems matters.
3. Leave A Clear Gap Around Every Stem

Three to four inches of bare soil should surround each plant. This gap allows air to reach the root crown and lets the stem dry completely between waterings.
Measure this distance from the outer bark, not from where you think the stem begins underground.
Larger plants need wider gaps. Mature shrubs benefit from six-inch clearings.
Trees should have bare soil extending outward at least eight to twelve inches from the trunk. These wider spaces account for the greater volume of water these plants receive and their larger root crowns.
The gap doesn’t need perfect edges or exact measurements. A rough circle works fine as long as no mulch touches the plant anywhere.
Some gardeners use the width of their hand as a quick measuring tool. Spread your fingers and place your pinky against the stem.
Your thumb shows roughly where mulch should begin.
Maintain this gap throughout the growing season. Mulch migrates as you water and during summer storms.
Check monthly and push back any material that has crept inward. This quick maintenance prevents problems from restarting after you’ve corrected them.
Newly planted specimens need special attention to gap maintenance. Their smaller root systems can’t tolerate any stem contact with wet mulch.
4. Spread Mulch Evenly Across The Soil Surface

Uneven mulch depth creates problems beyond stem contact. Thin spots expose soil to direct sun, causing rapid moisture loss.
Thick areas stay soggy and prevent water from reaching roots below. Aim for consistent coverage across the entire planting bed.
Use a rake to level high spots and fill in bare patches. The goal is smooth, uniform coverage that looks intentional rather than randomly dumped.
Even distribution helps water move through the mulch layer predictably. You’ll use less irrigation water when coverage is consistent.
Pay attention to slopes and berms where mulch naturally slides downhill. These areas need regular redistribution.
Gravity constantly pulls material toward low spots. After heavy rains, walk through the garden and push mulch back uphill to maintain even coverage.
Edges of planting beds often end up too thin. Mulch gets kicked away or blown off the outer perimeter.
Keep these border areas topped up to the same depth as the center. Exposed edges allow heat to penetrate the bed from the sides, warming soil more than necessary.
Even spreading also prevents water from channeling. When mulch piles unevenly, irrigation flows around the high spots rather than soaking straight down.
5. Remove Old Buildup Before Adding More

Mulch breaks down over time into a dense, matted layer that resembles soil. This decomposed material stops functioning like fresh mulch.
It blocks water instead of allowing it through. Before adding new mulch each year, remove or break up the old compacted layer.
Check depth by pushing your fingers down to the soil. If you hit a hard, compressed layer before reaching bare ground, that old mulch needs removal.
Use a cultivator or sturdy rake to break it up. Some gardeners remove it entirely and start fresh.
Decomposed mulch can be worked into the soil as organic matter. This adds nutrients and improves soil structure.
Spread it thinly and mix it into the top two inches. Then apply fresh mulch on top at the proper depth.
Excessive buildup creates the same problems as piling mulch against stems. Total depth becomes too great even if you maintained proper gaps initially.
Six or eight inches of layered mulch, even with a gap at the stem, still holds too much moisture and blocks air circulation around roots.
Schedule this removal task for late spring before temperatures peak. Fresh mulch applied after cleanup provides maximum cooling benefit through the hottest months.
6. Check Beneath Mulch For Excess Moisture

Soil under mulch should feel damp but not soggy. Lift the mulch layer regularly to inspect actual soil conditions.
Surface appearance can be deceiving. Mulch might look dry on top while soil underneath stays waterlogged.
Squeeze a handful of soil from beneath the mulch. It should form a loose ball that crumbles easily.
If water drips out or the soil stays in a tight, muddy clump, you’re watering too frequently. Excess moisture under mulch during summer heat creates root problems that weaken plants rapidly.
Different soil types hold water differently. Clay soils stay wet much longer than sandy ones.
Adjust your inspection frequency based on your specific conditions. Clay-heavy areas might need checking twice weekly during peak irrigation season.
Sandy soils dry faster and may need daily monitoring.
Smell the soil when you lift the mulch. Healthy soil has an earthy, fresh scent.
Sour or rotten odors indicate anaerobic conditions where roots can’t get oxygen. This happens when soil stays saturated too long between waterings.
Time your inspections for morning before irrigation starts. This shows you how well soil dried overnight.
If it’s still very wet from the previous day’s watering, reduce your irrigation frequency or duration.
7. Maintain A Mulch Depth Of Two To Four Inches

Two inches provides minimum benefits. Four inches offers maximum cooling without creating problems.
Measure depth after the mulch settles, not right after application. Fresh mulch compresses within a few days as pieces nest together and material absorbs moisture.
Use a ruler or mark a stick at two and four inches for quick reference. Push it down through the mulch to the soil in several spots.
This gives you an average depth across the bed. Adjust thin areas up to the minimum and rake down spots that exceed the maximum.
Deeper mulch doesn’t equal better protection. Layers beyond four inches actually reduce soil oxygen and create habitat for pests.
The extra depth also makes it harder to monitor soil moisture accurately. You can’t easily check conditions under six inches of mulch without major disruption.
Shallow mulch under two inches fails to insulate soil from extreme heat. Surface temperatures still spike during afternoon sun.
The thin layer also breaks down faster, requiring more frequent replacement. It provides minimal weed suppression compared to proper depth.
Replenish mulch as it decomposes to maintain the target range. Most organic mulches need topping up once or twice per year depending on material type and climate exposure.