These Are The Signs Your Michigan Tomatoes Are Getting Blight And What To Do Before It Spreads
Tomato blight moves through a Michigan garden with real speed, and the window between early symptoms and serious damage is shorter than most gardeners expect.
The tricky part is that early blight and late blight look different from each other and also resemble a few other common tomato problems, so it’s easy to misread what’s actually happening until things have already gotten out of hand.
Michigan’s humid summers create conditions where both forms of blight thrive, and a garden that had problems last year carries extra risk this season if nothing changed about how the beds were set up.
Catching the right signs early and responding correctly makes an enormous difference in what happens next.
The plants that make it through to a full harvest are almost always the ones where the gardener knew what they were looking at and acted while there was still time to act.
1. Early Blight Versus Late Blight: Why Identification Matters

Not all tomato blight is the same, and knowing which one you are dealing with can completely change how you respond.
Early blight is caused by a fungus called Alternaria solani, and it tends to show up mid-season on older, lower leaves as small dark brown spots with distinctive concentric rings that look like a bullseye target.
Late blight, on the other hand, is caused by Phytophthora infestans, a water mold that can spread shockingly fast and is far more aggressive.
Late blight produces large, water-soaked, greasy-looking patches that quickly turn brown and can appear anywhere on the plant, including stems and fruit. Early blight is serious but moves more slowly, giving gardeners a bit more time to respond.
Late blight can devastate an entire planting within days under the right Michigan weather conditions, so urgency matters enormously when you suspect it.
Correct identification helps you choose the right fungicide, decide how aggressively to prune, and figure out how quickly you need to act. When in doubt, your local Michigan State University Extension office can help confirm what you are seeing.
Getting this step right is the foundation of everything else you will do to protect your garden.
2. Know Where Symptoms Usually Start

Blight almost always gives you clues about where to look first. Early blight typically begins on the lower, older leaves of the tomato plant closest to the soil.
Those leaves have been around longest, making them more vulnerable to fungal spores that splash up from the ground during rain or watering.
You will notice small dark spots that develop yellow halos around them and eventually form that classic bullseye ring pattern as the infection grows.
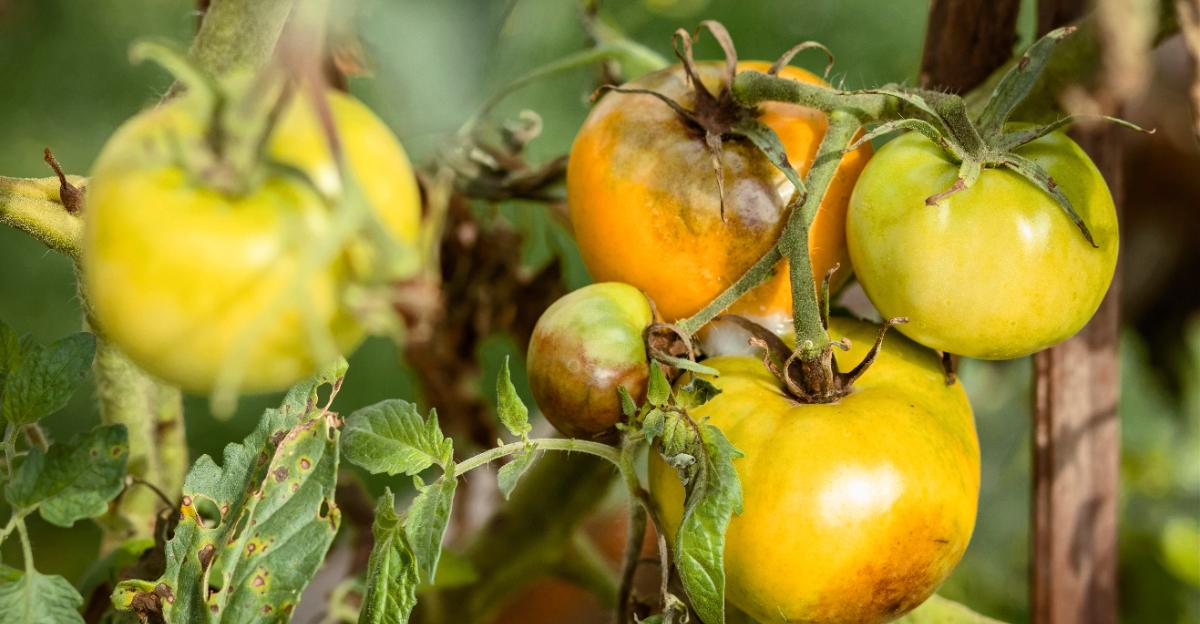
Late blight plays by different rules. It can appear on any part of the plant, including upper leaves, stems, and even green fruit.
The spots look water-soaked and greasy at first, almost like someone pressed a wet cloth against the leaf.
Under humid conditions, a white fuzzy mold can appear on the underside of infected areas, which is a strong indicator that late blight is present rather than early blight.
Michigan gardeners should make it a habit to check their tomato plants every single week during warm, rainy stretches, especially from July through August. Flip leaves over, look at stems, and check near the soil line.
Weekly checks take only a few minutes but can catch problems when they are still small and manageable. The sooner you find symptoms, the more options you have for stopping the spread before it gets out of hand.
3. Michigan Weather Can Make Blight Spread Fast

Michigan’s climate is practically tailor-made for tomato blight. Warm days, cool nights, frequent summer rain, and high humidity create the exact conditions that fungal spores and water molds thrive in.
When leaves stay wet for extended periods overnight, blight pathogens get the foothold they need to penetrate leaf tissue and begin spreading through the plant. It does not take long for a small problem to become a big one.
Late blight in particular can spread at an alarming rate during wet summers. Under ideal conditions for the pathogen, it can move through an entire row of tomatoes within a week.
Early blight spreads more gradually but still accelerates noticeably after rainy spells. Both diseases love the combination of warmth and moisture that Michigan summers deliver so reliably from late June through August.
Paying close attention to weather forecasts is genuinely useful for tomato growers in Michigan. When you see several days of rain and clouds in the forecast, that is your cue to inspect plants before the wet stretch begins and again shortly after it ends.
Applying a protectant fungicide right before a rainy period, rather than after symptoms appear, gives you the best chance of keeping your tomatoes healthy.
Staying one step ahead of the weather is one of the smartest things a Michigan tomato gardener can do all season.
4. Leaf Spots Versus Stem Lesions

Spots on leaves are concerning, but when blight moves onto the stems, the situation becomes significantly more serious.
Leaf symptoms alone suggest the infection is still relatively contained and manageable with careful pruning and fungicide applications.
Stem lesions, however, mean the pathogen has worked its way deeper into the plant’s structure, which limits what you can do to save it.
Early blight can produce dark, sunken lesions on stems, especially near the soil line, often surrounded by a lighter border. These collar-like lesions can girdle young stems and cut off water and nutrient flow to the plant above.
Late blight creates large, dark brown to purplish-black lesions on stems that spread quickly and have a greasy, water-soaked appearance. Both are visually distinct from the target-ring leaf spots that most people recognize first.
When you find stem lesions, your decision-making needs to shift. Pruning away infected leaves is still helpful, but stem involvement tells you the plant is under greater stress and may struggle to recover fully.
If lesions are limited to one section of a stem, aggressive pruning and immediate fungicide application may still help.
But when lesions wrap around a stem or appear in multiple locations, the plant’s ability to transport water and nutrients is compromised, and removal may be the most practical choice to protect neighboring plants from further spread.
5. How Blight Moves Through A Tomato Garden

Blight is a traveler, and it uses several routes to move from one plant to the next. Rain splash is one of the most common ways early blight spreads, as water hits infected soil or debris and carries spores up onto lower leaves.
Overhead watering creates the same problem, which is why Michigan gardeners are often advised to water at the base of plants rather than from above. Even a garden hose held carelessly too high can splash spores onto healthy foliage.
Late blight spreads differently and more aggressively. It produces airborne spores that can travel on wind currents, sometimes for miles, which is part of why late blight outbreaks can sweep through entire regions quickly.
Wet foliage, crowded plants, and poor air circulation all make it easier for spores to land, germinate, and infect. Infected plant debris left in the garden over winter can also harbor early blight spores for the following season.
Gardeners themselves can accidentally move blight around. Handling wet plants, using contaminated pruners, or walking through a blighted area and then touching healthy plants are all ways the disease can hitch a ride.
During humid or rainy weather in Michigan, try to avoid working among tomato plants until the foliage has dried.
When you do prune or inspect, sanitize your tools between plants using a diluted bleach solution or rubbing alcohol to avoid carrying spores from one plant to another.
6. What To Do As Soon As You Spot Symptoms

Speed matters the moment you notice something wrong with your tomato plants. The very first thing to do is take a close look at the affected area and try to determine how widespread the symptoms are.
If you are seeing spots on just a few lower leaves and the rest of the plant looks healthy, you are in a good position to act quickly and keep the problem contained. Catching it at this stage gives you the most options.
Remove the affected leaves carefully, placing them directly into a plastic bag or bucket rather than dropping them on the soil. Spores that fall to the ground can splash back up onto plants during the next rain.
Never add blighted plant material to a compost pile, since backyard compost often does not reach temperatures high enough to destroy fungal pathogens. Bag the material and place it in the trash instead.
After pruning, sanitize your pruners thoroughly before touching any other plants. A quick wipe with rubbing alcohol or a dip in a diluted bleach solution takes only seconds but makes a real difference.
Wait until the foliage is completely dry before applying any fungicide, since wet leaves do not absorb or hold sprays properly.
Apply a protectant fungicide to the remaining healthy tissue promptly, following label directions carefully, to create a barrier that can help prevent the infection from advancing further up the plant.
7. Fungicide Options And Their Limits

Fungicides can be genuinely useful tools for managing tomato blight, but they work best when you understand what they can and cannot do. The most important thing to know is that fungicides are protectants, not cures.
They create a barrier on healthy plant tissue that prevents new infections from taking hold, but they cannot reverse damage that has already occurred. Once a leaf is infected, no spray will fix it.
For home gardeners in Michigan, two commonly available options are copper-based fungicides and chlorothalonil, both of which are labeled for use on tomatoes and are sold at most garden centers.
Copper fungicides are considered acceptable for organic gardening when used according to label directions, while chlorothalonil is a conventional option that offers broad-spectrum protection.
Always read the label before applying, follow all directions for mixing and timing, and observe any pre-harvest intervals listed on the product.
Michigan’s frequent summer rain creates a real challenge for fungicide effectiveness, since heavy rain can wash protective coatings off leaves within hours of application. This means repeat applications are often necessary, especially during prolonged wet stretches.
Check the product label for recommended reapplication intervals and stick to them. Applying fungicides preventively before a rainy period is far more effective than scrambling to spray after symptoms have already spread.
Think of fungicide as part of a broader management plan rather than a standalone solution that solves the problem on its own.
8. Watering Habits That Reduce Disease Pressure

How you water your tomatoes has a surprisingly large impact on blight risk.
Overhead watering, whether from a sprinkler or a hose held above the plants, wets foliage and creates the moist leaf surfaces that blight pathogens need to germinate and spread.
Michigan summers already deliver plenty of natural rainfall, so adding more moisture to the leaves through careless watering habits only increases your risk of a blight problem developing.
Drip irrigation and soaker hoses are the gold standard for tomato watering in blight-prone regions. Both methods deliver water directly to the soil at the root zone, keeping foliage dry while still giving plants everything they need.
If you do not have drip or soaker systems, watering with a wand or hose held close to the soil surface works well too. The key is keeping water off the leaves as consistently as possible throughout the season.
Timing matters just as much as method. Watering in the morning, rather than the evening, gives any accidental leaf moisture a chance to dry off during the warmest part of the day.
Wet foliage sitting overnight creates perfect conditions for fungal spores to germinate. Adding a layer of mulch around the base of plants also helps by reducing soil splash during rain and irrigation.
A few inches of straw, shredded leaves, or wood chips can make a noticeable difference in how much blight pressure your tomatoes face throughout the growing season.
9. When A Tomato Plant Is Too Far Gone

Sometimes, despite your best efforts, a tomato plant reaches a point where saving it is no longer realistic. Recognizing that moment is just as important as knowing how to treat early symptoms.
When a plant has lost most of its leaves, shows stem lesions in multiple locations, and continues to decline rapidly despite pruning and fungicide applications, it is telling you that the infection has progressed beyond what treatment can reverse.
Late blight in particular can move so fast that a plant that looked manageable on Monday can be collapsing by Friday.
Signs that a plant is beyond recovery include widespread stem involvement, soft or rotting fruit, growth tips turning brown and wilting despite adequate soil moisture, and new symptoms appearing faster than you can prune them away.
At this stage, leaving the plant in the garden creates a reservoir of spores that will continue spreading to neighboring plants.
Removing the plant carefully is the right call. Do not yank it out and shake it, since that can release spores into the air and soil.
Instead, place a large plastic bag over the plant from the top down before pulling it out, then seal the bag and remove it from the garden entirely. Avoid composting any blighted material.
After removal, avoid planting anything in that spot for the rest of the season and consider applying fresh mulch to reduce any residual spore splash from the surrounding soil.
10. How To Lower Blight Risk Next Season

The end of one tomato season is actually the beginning of preparation for the next one. One of the most effective things Michigan gardeners can do to reduce blight problems the following year is practice crop rotation.
Moving tomatoes to a different section of the garden each year helps break the cycle of early blight, since Alternaria solani spores can survive in infected plant debris left in the soil.
A three to four year rotation away from the same spot is ideal when garden space allows. Cleaning up thoroughly at the end of the season is equally important.
Remove all tomato plant debris, including fallen leaves, stems, and fruit, and dispose of it rather than tilling it into the garden.
Late blight generally does not overwinter in Michigan garden soil without living host tissue to sustain it, but early blight can persist in debris, making cleanup especially worthwhile. Fresh mulch applied to beds over winter can also help reduce carryover.
Spacing plants properly, staking or caging them to improve airflow, and choosing resistant varieties are all strategies that pay off over multiple seasons.
Varieties like Defiant, Mountain Magic, and Iron Lady have been bred with resistance to common tomato diseases and perform well in Michigan gardens.
No variety is completely immune, but resistant types give you a meaningful head start.
Combine good variety selection with smart watering, regular inspection, and timely pruning, and your tomato garden will be in a much stronger position from the very first day of next season.