How To Create A Stunning Living Wall On Your Florida Lanai With Potted Plants
Many Florida lanais have a wall that is doing absolutely nothing.
Not ugly. Not damaged. Just blank. A flat surface behind the furniture that everyone faces away from, decorated with nothing but the shadow of the screen frame and whatever light comes through in the afternoon.
That wall is wasted potential on a property in one of the best climates on the planet for growing things.
Have you ever walked into someone’s lanai and felt like you stepped into a different world entirely? Where the whole back wall was alive with color and texture and plants at every level?
That effect is not expensive. It is not complicated. It does not require a professional installation or a landscape designer or a significant renovation.
It requires a plan, the right containers, and an understanding of what grows in Florida’s particular mix of heat, humidity, and filtered lanai light.
The results are genuinely dramatic. A living wall changes how the entire space feels, not just how it looks. It changes how long people want to stay out there.
The blank wall is the starting point.
1. Plan Your Vertical Space Before Adding Plants

Start with a tape measure, not a shopping cart. Knowing your exact wall dimensions before spending anything is the move that separates a living wall that works from one that gets redesigned three times before it looks right.
Measure the height and width of your lanai wall. Write it down. Note where electrical outlets, light fixtures, and windows sit so you can plan around them rather than discover them after the first bracket goes in.
A rough sketch on paper takes ten minutes and saves significantly more time later.
Weight is the next consideration, and it matters more than most people realize upfront. Lanai walls and screen frames are not designed for heavy loads.
Lightweight containers, fabric grow bags, and modular pocket planters are the practical choices here. When in doubt about your wall’s capacity, a contractor can clarify before anything goes up.
Watch how light moves across your wall at different times of day before committing to plant selections.
Does morning sun hit hard? Does afternoon shade arrive early? South and west-facing walls in Florida can run quite hot, while north-facing walls stay considerably cooler throughout the day.
Your lanai has its own microclimate shaped by roof overhang, screen type, and whatever landscaping surrounds it. Spend one full day observing how the light shifts across the wall.
That single observation session will make every subsequent plant decision faster, cheaper, and considerably smarter.
The wall already knows what it needs. It just requires someone to pay attention first.
2. Choose Florida-Friendly Plants That Thrive In Pots

Florida gives lanai gardeners an unfair advantage. Tropical and subtropical plants that require a greenhouse in most of the country grow outdoors here for the majority of the year. The plant palette available to you is genuinely extraordinary.
Pothos is a reliable starting point for almost any living wall configuration. It tolerates low light, recovers well from occasional missed waterings, and trails beautifully over container edges.
Golden pothos, marble queen, and neon varieties each bring different textures and color tones to the display.
Bromeliads are another strong choice. They thrive in containers, love Florida’s natural humidity, and produce long-lasting blooms in reds, oranges, and purples.
Many species are epiphytic and need very little soil, which makes them ideal for wall-mounted applications where weight matters.
Boston ferns fill out quickly and add a genuinely lush look to vertical arrangements. They love humidity, which Florida provides without any assistance from you. Pair them with upright plants like snake plants or cast iron plants for visual contrast.
For color in shadier spots, pentas, impatiens, and begonias perform consistently well in containers and attract pollinators through the season.
Most of these species are well-adapted to Florida’s hardiness zones across the state, which means reliable performance without constant replacements.
Florida’s climate is the secret ingredient in every great lanai living wall. You just have to choose plants that know how to use it.
3. Pick Containers That Support Growth And Drainage

Not every pot belongs on a wall. The container choices you make for a living wall directly affect root health, moisture management, and whether the whole structure stays safely in place through Florida’s humid summer conditions.
Drainage is the first requirement. Every container needs at least one hole at the bottom. Waterlogged roots in Florida’s humidity create problems faster than almost any other condition.
If a decorative pot has no drainage, use it as a cachepot and slip a plastic nursery pot inside to do the functional work.
Lightweight containers are essential for wall-mounted arrangements. Fabric grow bags promote air pruning of roots, stay light even when damp, and dry at a healthy rate between waterings.
Modular felt pocket planters stack neatly, look cohesive, and keep total weight manageable across the whole wall.
Container size affects how often you need to water. Small containers dry out quickly in Florida’s heat. For most lanai plants, six to twelve inches strikes the right balance between adequate root space and manageable weight.
Terracotta looks appealing but gets very heavy when filled with wet soil. Lightweight faux-terracotta resin pots replicate the aesthetic without the weight penalty.
Always calculate the total loaded weight of containers, soil, and water combined before finalizing your wall support plan.
A container that drains well and stays light keeps the plants happy and keeps the wall where it belongs.
Has anyone ever said that about a heavy terracotta pot after a rain? The answer is no.
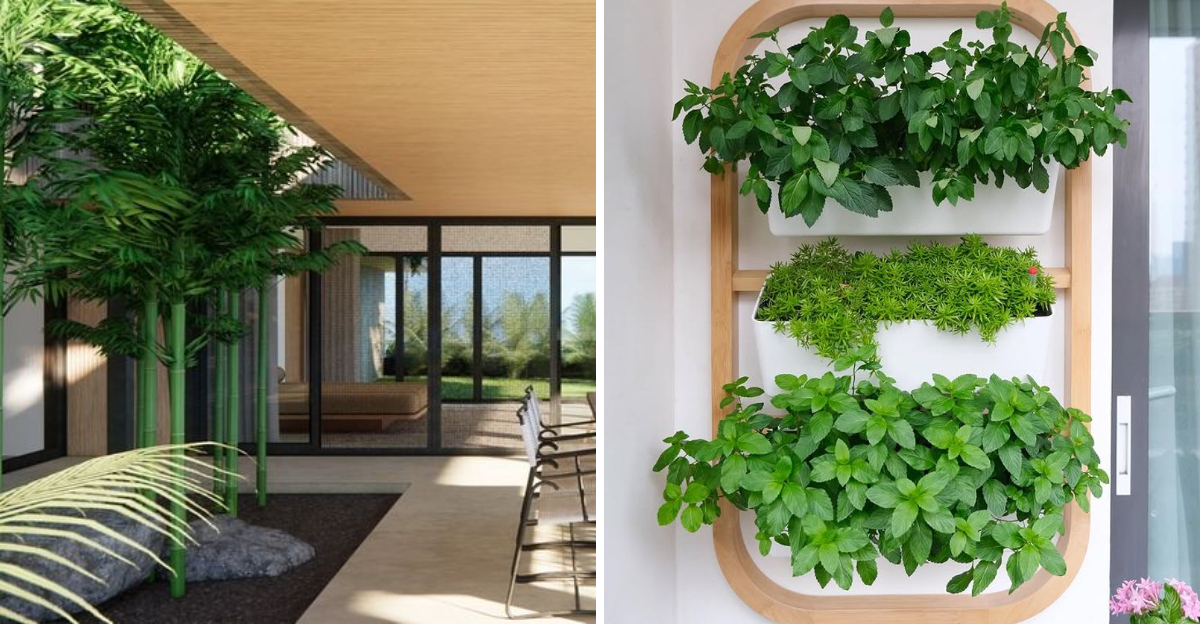
4. Create Layers With Different Heights And Textures

A flat row of matching pots is a shelf. A living wall with real visual presence works in layers, textures, and contrasts that pull the eye upward and keep it moving across the whole surface.
Organize your wall into three visual zones. The top zone suits trailing plants best. Pothos, string of pearls, and creeping Jenny spill downward and soften hard edges naturally.
The middle zone works well for bushy, medium-height plants like ferns, peace lilies, and nerve plants that fill in the bulk of the composition.
The bottom zone is where upright architectural plants anchor the arrangement. Snake plants, cast iron plants, and small cordylines provide strong vertical lines that balance the cascade of trailing plants above and give the whole display a finished, grounded quality.
Leaf texture creates depth as effectively as plant height. Fine feathery fern fronds next to the bold glossy leaves of a pothos or philodendron generate visual contrast that reads beautifully both in person and in photographs.
A spiky bromeliad or fuzzy-leaved episcia adds another layer of contrast that keeps the display interesting at close range.
Color variation builds on texture. Deep greens alongside chartreuse, burgundy, and silver variegation add richness even within an all-foliage arrangement.
A well-layered living wall becomes something people stop and look at rather than just notice in passing.
What is the last wall in your home that made someone stop walking? This one can.
5. Arrange For Sun And Shade Patterns On Your Lanai

Florida sun is generous. On some walls and at certain hours, it is also intense enough to stress the wrong plants considerably. Getting light placement right is the single most impactful decision in a lanai living wall project.
Florida lanai screens filter roughly thirty percent of direct sunlight, which creates a bright, indirect light environment for most of the day.
This suits a wide range of tropical plants. Pothos, philodendrons, peace lilies, and ferns all perform reliably in this filtered light without needing any adjustments.
South and west-facing walls receive the most intense afternoon sun. In those positions, choose sun-tolerant plants like bromeliads, succulents, and ornamental grasses that handle heat and bright light without scorching.
North and east-facing walls run shadier and cooler. These positions suit moisture-loving, shade-tolerant species well. Nerve plants, peace lilies, and cast iron plants appreciate the lower light and cooler temperatures.
Florida’s sun angle shifts meaningfully between summer and winter. A spot shaded in July may sit in full afternoon sun by December.
Reassessing container placements as the seasons change keeps every plant receiving what it actually needs rather than what it needed three months ago.
Rotating containers seasonally is not extra work. It is the habit that keeps every plant in the wall looking its best rather than just surviving its position.
The wall does not move. The sun does. Plan accordingly.
6. Install Wall Supports Or Vertical Structures Safely

A living wall that pulls away from the wall at three in the morning is not the outcome anyone is working toward.
Secure installation is the foundation of everything else, and it deserves more attention than it typically receives in living wall planning conversations.
Bracket shelves are among the most versatile support options. Sturdy metal brackets mounted into wall studs or masonry hold multiple rows of potted plants reliably.
Near the Florida coast, stainless steel or powder-coated hardware resists humidity and salt air significantly better than standard fasteners.
Freestanding structures like ladder shelves, tiered plant stands, and custom wooden towers work well when drilling into lanai walls is not preferred.
They reposition easily and remove entirely when needed, which makes them practical for renters or anyone who wants flexibility.
Modular pocket planter systems attach with minimal hardware and distribute weight across multiple anchor points rather than concentrating load in a single location. Follow manufacturer weight limits precisely and do not estimate.
Trellises support climbing plants like pothos, monstera, and passionfruit well. Plants grow into the framework over time and eventually form a dense living curtain. Space anchor points no more than sixteen inches apart for consistent stability.
Before drilling anything, locate wall studs with a stud finder and confirm you are using the correct anchor type for your specific wall material. The plants will grow as long as the structure holds.
Getting that part right in hour one prevents a completely different kind of project in month six.
7. Water Smartly With Efficient Irrigation

A wall of containers in Florida’s heat is a daily watering commitment unless a system is in place that handles it automatically.
Building smart irrigation into the project from the start is considerably easier than retrofitting it after the wall is fully planted.
Drip irrigation is the most reliable approach for living walls. A basic drip system connects to the outdoor faucet and delivers a slow, consistent trickle directly to each container’s root zone.
It reduces evaporation, prevents the overwatering that invites fungal problems in Florida’s humidity, and can be automated with a simple timer.
That timer matters when travel comes up. A fully automated drip system keeps the wall watered on schedule regardless of who is home.
For smaller walls or gardeners who prefer hands-on daily interaction, a long-neck watering can or gentle hose nozzle works perfectly well.
Water in the early morning when temperatures are lower and evaporation is minimal. Avoid afternoon watering in direct sun since moisture on leaves under intense Florida heat can cause spotting and stress.
Checking soil moisture before watering prevents the most common container mistake. A wooden chopstick pushed two inches into the soil provides an immediate read.
Clean and dry means water now. Damp soil clinging to the wood means wait another day.
Moisture-retaining additives like coir or perlite in the potting mix extend the time between waterings in Florida’s warm conditions.
A drip timer does not take vacations. For a lanai living wall, that is its best quality.