If Your Oregon Hydrangeas Look Tired, Do These Recovery Steps Now
Hydrangeas can look full and fresh in spring, then start acting worn out once Oregon summer settles in. Drooping leaves, faded blooms, or weak-looking stems can make gardeners worry fast.
The good news is that a tired hydrangea is often asking for better timing, not a total rescue mission. Heat, uneven watering, and too much afternoon sun can all push the plant out of balance.
The tricky part is figuring out which stress is behind the slump. Give the wrong kind of help, and the shrub may look worse before it improves.
A few careful recovery steps can make a big difference now. Check the soil first, watch the leaves closely, and adjust care before the plant spends more energy struggling.
With the right attention, your hydrangeas can still look beautiful through the season.
1. Check Whether The Soil Is Dry Or Soggy

Before doing anything else, get your hands in the dirt. Soil moisture is the number one factor affecting how a hydrangea looks and feels.
Wilting leaves can mean the soil is too dry, but they can also mean the roots are sitting in too much water. Both problems cause the same sad, droopy appearance.
Push your finger about two inches into the soil near the base of the plant. If it feels bone dry, the plant needs water right away.
If it feels wet and almost slimy, you may have a drainage problem that is suffocating the roots. Healthy soil should feel moist, like a wrung-out sponge.
In Oregon, heavy clay soils are common and they hold water longer than sandy or loamy soils. This can trick gardeners into thinking the plant is dry when it is actually waterlogged.
Checking the soil directly removes all the guesswork.
Do this check in the morning before the sun heats things up. Morning readings give you the most accurate picture of overnight moisture levels.
If the soil feels right but the plant still looks tired, move on to the next steps.
Also check the area around the plant for standing water or puddles. Poor drainage is a fixable problem.
Adding compost or moving the plant to a raised bed can help improve soil structure over time and prevent future stress.
2. Water Deeply At The Base, Not Over The Leaves

Watering correctly is one of the biggest game-changers for a stressed hydrangea. Many people grab a hose and spray the whole plant from above.
That feels like the right thing to do, but it actually causes more harm than good. Wet leaves in warm weather can lead to fungal problems and do almost nothing to help the roots.
Always water at the base of the plant, right at the soil level. Let the water soak in slowly and deeply.
A slow, steady flow for several minutes works much better than a quick splash. Deep watering encourages roots to grow downward, which makes the plant stronger and more heat-resistant over time.
In the summer months across Oregon, hydrangeas may need watering two to three times per week during dry spells. The large leaves of these plants lose moisture quickly on hot days.
A plant that looks wilted by afternoon may simply be dealing with heat, but if it still looks droopy in the cool morning hours, it definitely needs more water.
Use a soaker hose or drip irrigation if you have one. These tools deliver water directly to the root zone without wetting the foliage.
They also save water and reduce the time you spend in the garden.
Water early in the morning when possible. Morning watering gives the soil time to absorb moisture before the afternoon heat arrives, making every drop count for your thirsty plant.
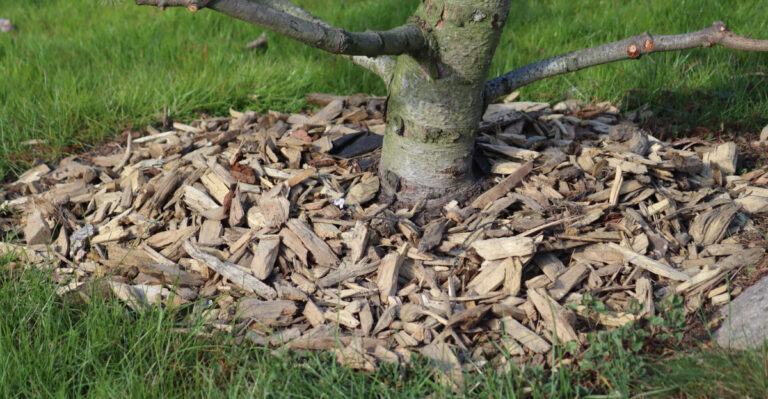
3. Add Mulch To Cool The Root Zone

Mulch might be the most underrated tool in any gardener’s toolkit. A good layer of mulch around your hydrangea does several important things at once.
It keeps the soil cool, slows down water evaporation, and protects the roots from temperature swings that happen on hot summer days.
Apply two to three inches of mulch around the base of the plant. Keep it a few inches away from the main stem to prevent rot.
Wood chips, shredded bark, or straw all work well. Avoid using rocks or gravel near hydrangeas because those materials absorb heat and can actually make the root zone hotter.
Summer temperatures can spike unexpectedly, especially in the Willamette Valley and southern inland areas. Roots that stay cool and moist are much better at sending water and nutrients up to the leaves and blooms.
Mulch acts like a cozy blanket that keeps everything underneath stable and protected.
Fresh mulch also gives your garden a neat, tidy look while doing all this behind-the-scenes work. It is a small effort that pays off in a big way throughout the entire growing season.
If you already have mulch in place, check its depth. Mulch breaks down over time and may need to be refreshed.
Adding a fresh layer at the start of a heat wave or dry stretch can make a noticeable difference in how quickly your plant bounces back from stress.
4. Give Wilting Plants Temporary Afternoon Shade

Sometimes the sun is simply too much for a struggling hydrangea. Most varieties prefer morning sun and afternoon shade, but not every yard is set up that way.
If your plant sits in full sun all day and is looking wilted and washed out, giving it some temporary shade can help it recover faster.
You do not need anything fancy. A piece of lightweight shade cloth draped over a simple frame does the job well.
You can also use an old bedsheet or even a large piece of cardboard propped up on the west side of the plant to block the harshest afternoon rays.
The hottest sun in Oregon typically hits between 1 p.m. and 5 p.m. Blocking that window of intense light gives the plant a chance to recover without completely cutting off photosynthesis.
Morning sunlight is gentler and still gives the plant the energy it needs to grow.
This temporary fix is not meant to last all season. Once temperatures cool down or the plant shows signs of recovery, remove the shade covering and let it adjust back to normal light levels gradually.
If your hydrangea consistently struggles in its current spot, consider transplanting it in the fall to a location with better natural shade. Many experienced Oregon gardeners recommend spots on the east or north side of a building for the best long-term results with these moisture-loving plants.
5. Do Not Fertilize A Heat-Stressed Hydrangea

When a plant looks sick, the instinct is to feed it something. It makes sense to think that a boost of nutrients will perk things up.
But fertilizing a heat-stressed hydrangea is one of the worst things you can do. It adds more pressure to a root system that is already struggling to keep up with basic survival.
Fertilizer pushes the plant to grow new leaves and stems. That sounds helpful, but new growth requires a lot of water and energy.
A plant that is already stressed from heat or drought does not have those resources to spare. Adding fertilizer at the wrong time can actually make the wilting worse.
Hold off on any fertilizer until the plant has clearly recovered. Look for signs like firm, upright leaves, healthy green color, and new growth at the tips of the stems.
Once you see those signs, the plant is stable enough to handle a light feeding.
When you do fertilize again, choose a balanced, slow-release formula. Avoid high-nitrogen products during the heat of summer.
A product labeled for flowering shrubs works well and gives hydrangeas the phosphorus they need to support strong blooms without pushing excessive leafy growth.
The best times to fertilize are early spring and again in early summer before the hottest months hit. Timing your feedings around the weather calendar keeps your plant well-nourished without the added stress of peak summer heat.
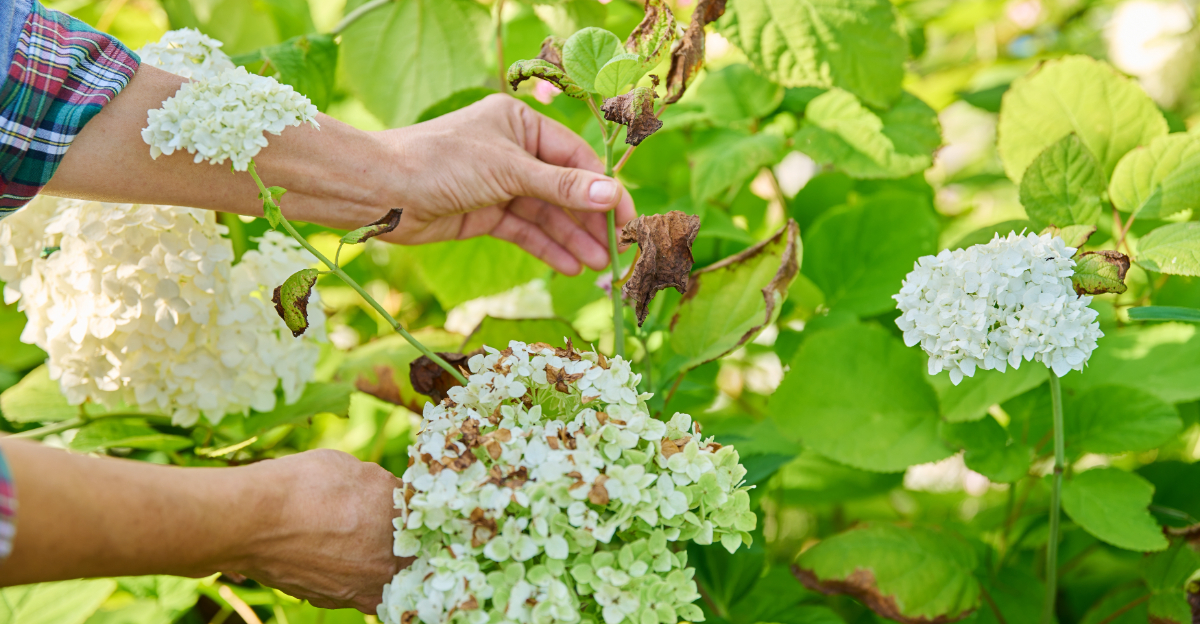
6. Remove Crispy Leaves Only After Stress Passes

Brown, crispy leaves on a hydrangea look awful. It is tempting to start pulling them off right away just to make the plant look better.
But removing damaged leaves while the plant is still under stress can actually slow down recovery. The plant is already working hard, and pruning adds another layer of demand.
Crispy leaves, even damaged ones, still help the plant in small ways. They provide a little shade to the stems and roots below.
They also help the plant conserve energy by reducing the surface area that needs to be maintained. Removing them too early forces the plant to redirect resources to healing pruning wounds.
Wait until the heat wave breaks or the plant shows clear signs of stabilizing. Look for the remaining healthy leaves to firm up and the overall plant to stop drooping.
Once that happens, you can safely remove the damaged foliage without causing extra setbacks.
Use clean, sharp scissors or pruning shears when you do trim. Dirty tools can spread disease from one plant to another.
A quick wipe with rubbing alcohol between cuts keeps everything sanitary and safe.
Do not remove more than one-third of the plant’s foliage at one time. Even if much of the plant looks rough, gradual removal is always the safer approach.
Give the plant a few days between trimming sessions so it can adjust and continue focusing its energy on recovery rather than repair.
7. Deadhead Spent Blooms Without Cutting Buds

Spent blooms left on a hydrangea are not just an eyesore. They also pull energy away from the rest of the plant.
Removing faded flowers, a process called deadheading, helps the plant focus its resources on root strength and healthy foliage instead of trying to maintain old blooms that are past their prime.
The trick with deadheading hydrangeas is knowing exactly where to cut. Cut just below the spent flower head, right above the first set of healthy leaves.
Do not cut further down the stem unless you are sure there are no dormant buds hiding lower on the branch. Cutting too far down can remove next season’s flower buds.
Bigleaf hydrangeas, which are the most common type grown across Oregon, set their buds in late summer and fall for the following year. Cutting into those buds by accident is a very common reason gardeners end up with little to no blooms the next season.
Smooth hydrangeas and panicle hydrangeas are more forgiving. They bloom on new wood, meaning they produce buds on the current season’s growth.
You have more flexibility with those varieties when deadheading or doing light trimming.
When in doubt, cut less. A conservative snip above a leaf node is always the safer choice.
You can always go back and trim a little more, but you cannot undo a cut that removed a valuable bud from a plant that is already working hard to recover.
8. Prune Only After You Know The Hydrangea Type

Pruning a hydrangea at the wrong time or in the wrong way is one of the fastest ways to set a struggling plant back even further. Before picking up any shears, it is worth taking a moment to figure out exactly what type of hydrangea you have.
Different varieties have very different pruning needs, and mixing them up is a common and costly mistake.
Bigleaf hydrangeas bloom on old wood. That means their flower buds were formed last season and are sitting on the canes right now.
Pruning them hard in summer or fall removes all those future blooms. Only remove damaged canes or lightly shape these varieties right after they finish blooming in summer.
Panicle and smooth hydrangeas bloom on new wood. They can handle harder pruning in late winter or early spring without losing next year’s flowers.
These are the varieties you often see with large cone-shaped white or cream blooms that fade to pink or tan as summer goes on.
Oakleaf hydrangeas fall somewhere in between. They bloom on old wood like bigleaf varieties but are generally tougher and more drought-tolerant, which makes them a popular choice in the drier parts of Oregon.
If you are not sure which type you have, wait and observe. Watch when and where new blooms appear.
A little patience now saves you from accidentally removing the very buds that will give you a beautiful flower show next season.