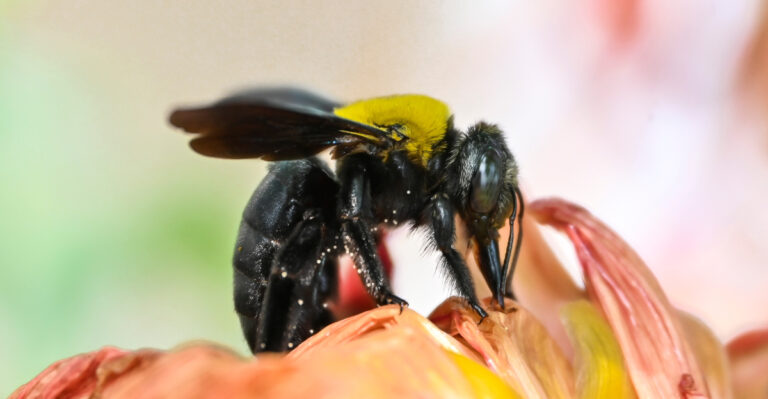
The Simple Pruning Secrets That Give Virginia Clematis More Blooms
Mud presses into your knees. Virginia heat pours down your neck. You reach for your pruning shears, convinced you know exactly what you are doing.
The clematis has other plans. That afternoon, something shifts in how you understand this vine forever. It does not forgive careless cuts quietly.
It just refuses to flower, silently holding its secrets from the trellis all summer long. Ever stared at a vine full of leaves and no blooms?
That is you, standing in your Virginia garden, shears in hand, completely outplayed by a plant. Clematis rewards the gardener who earns its trust. Prune carelessly, you get green chaos.
Prune with intention, you get a breathtaking wave of color that stops people mid-stride on the sidewalk. The secret lives inside your pruning cuts, and once you know it, everything changes fast.
1. Know Your Pruning Group Before You Cut

Before you touch those shears, stop and ask one question: which group is my clematis? Clematis plants fall into three pruning groups, and cutting the wrong one at the wrong time can wipe out an entire season of flowers.
Group 1 includes early spring bloomers that flower on old wood from last year. Group 2 bloomers flower on both old and new wood, giving you two rounds of color.
Group 3 vines bloom only on new growth from the current season. Checking your plant tag or looking up your specific variety online takes about two minutes.
Those two minutes can spare you an entire season of reduced or mistimed blooms. The simple pruning secrets that give Virginia clematis more blooms always start with this identification step.
Skipping it is like cooking a recipe without reading the ingredients first. You might get lucky, but the odds are not in your favor.
Many gardeners plant clematis without keeping the tag, and that is totally understandable. When in doubt, observe when your vine blooms and let that guide your pruning group decision.
Bloom timing is your best clue, and nature will tell you everything you need to know if you pay attention.
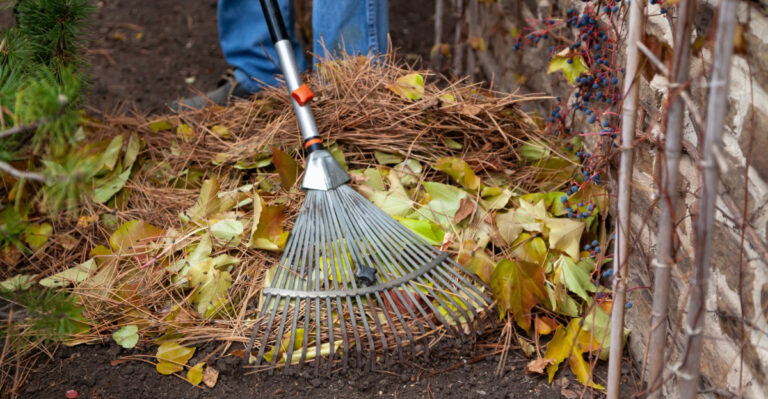
2. Remove Weak And Unhealthy Stems First

Weak stems contribute little to the plant’s flowering output. They divert energy away from more productive growth without producing a single flower worth admiring.
Every time you prune, start by scanning the vine from top to bottom. Look for stems that are brown, mushy, broken, or so thin they could snap with a light breeze.
These problem stems need to go first, before you make any other cuts. Removing them immediately frees up the plant’s energy for the strong, healthy growth that actually produces blooms.
A good rule of thumb is the pencil test. If a stem is thinner than a pencil, it is probably not worth keeping. Snap it off cleanly or cut it back to where it connects with a healthier section.
Unhealthy stems can also harbor disease and pests that spread quickly to the rest of the vine. Getting rid of them early is both a pruning move and a prevention strategy rolled into one smart habit.
After clearing out the weak material, you will notice the vine looks lighter and more open. That openness allows sunlight and air to reach the center of the plant.
Better airflow means fewer fungal problems and stronger blooms all season long. Your clematis will reward you with a flush of color that makes all that careful work feel completely worth it.
3. Use Clean, Sharp Shears And Cut Just Above A Healthy Bud

Dull shears cause unnecessary damage to stems. They crush rather than cut cleanly, leaving ragged edges that invite disease and slow healing.
Sharp bypass pruners are the tool of choice for most gardeners working with clematis vines. They slice through stems with one smooth motion, leaving a clean wound that heals fast.
Before each pruning session, wipe your blades with rubbing alcohol or a diluted bleach solution. This simple step stops you from accidentally spreading fungal spores or bacteria from one plant to another.
When you make your cut, aim for a spot just above a healthy, swelling bud. About a quarter inch above the bud is the sweet spot.
Too far above and the stub left behind can rot. Too close and you risk nicking the bud itself.
Angle your cut slightly so water runs away from the bud rather than pooling on top of it. This small detail makes a real difference in how well the wound heals over the coming weeks.
A good cut sends a clear signal to the plant. It tells the vine exactly where to direct new growth, and that growth almost always comes in stronger and more floriferous than before.
Sharp tools and smart cuts are a combination that serious gardeners swear by, and once you try it, you will understand why it matters so much.
4. Hard-Prune Group 3 Vines Down To 12 To 18 Inches

Group 3 clematis are the most vigorous of the three groups. They bloom all summer on new growth, which means you can cut them back hard every single year without any guilt.
The target height is 12 to 18 inches from the ground. That might feel uncomfortable the first time you do it, but trust the process because it works. Virginia gardeners who commit to this cut see the difference within a single season.
Cutting back to this low height forces the plant to push out fresh, vigorous shoots from the base. Those new shoots carry all the flower buds for the upcoming season. The more new growth, the more blooms you get.
Consistently skipping this hard pruning causes the vine to become leggy over time. Flowers end up only at the very tips of long, bare stems, and the display looks sparse and disappointing instead of lush.
In Virginia’s humid summers, a leggy vine also struggles more with airflow and fungal issues. Look for two to three healthy buds or a set of strong leaf nodes at the 12 to 18 inch mark.
Cut just above them with your clean, sharp shears. Each of those nodes will send out multiple new stems.
Group 3 varieties popular in Virginia home gardens include Jackman clematis and many of the viticella types. These are some of the most forgiving plants you will ever grow.
Hard pruning them is not a risk; it is a reward. Do it once and watch what happens next spring in your Virginia garden, and you will never hesitate again.
5. Prune Group 1 Spring Bloomers Right After Blooming

Group 1 clematis blooms early, sometimes as soon as late winter or early spring, and it puts on a show that stops people in their tracks. The catch is that all those flowers grow on wood from the previous year.
If you prune Group 1 vines in fall or late winter, you are cutting off the very branches that hold next season’s buds. No old wood means no spring flowers, and that is a frustrating and avoidable outcome.
The correct timing for Group 1 is simple: prune right after the flowers fade. This typically falls somewhere between late spring and early summer, depending on your region and the specific variety.
At that point, the plant has already bloomed and is now pushing new growth that will harden off over summer. That new growth becomes next year’s flowering wood, so you want to encourage it, not remove it.
After blooming, you can cut back any stems that are too long, crossing, or crowding other branches. Light shaping is totally fine.
Just avoid cutting back into old, thick, woody stems unless they are clearly damaged. Montana clematis and armandii are classic Group 1 types that gardeners love for their early season drama.
Treat them gently, prune them at the right moment, and they will reward you with a spectacular display year after year.
Timing is everything with these early bloomers, and getting it right delivers a consistently reliable and satisfying result.
6. Late February To Mid-March Before Buds Swell For Groups 2 And 3

Timing your pruning is almost as important as knowing how to prune. For Group 2 and Group 3 clematis, the window that works best generally runs from late February through mid-March.
Virginia spans several growing zones, so gardeners in cooler northern areas may need to wait a week or two longer than those in the warmer southern regions.
For Group 3, this means a hard prune down to 12 to 18 inches. For Group 2, keep it lighter. Remove only weak or crossing stems and tidy the overall shape.
The old wood on Group 2 carries your first round of spring blooms, so cutting it hard now would cost you that display.
During this stretch, the plant is still dormant but just starting to wake up. You can see tiny buds beginning to swell along the stems, and those buds are your roadmap.
Pruning at this point gives the vine a fresh start before the season kicks into high gear. Cuts heal quickly because the plant’s energy is already rising toward the tips of the stems.
Wait too long and you risk cutting off growth already well underway. Cut too early and fresh wounds may be exposed to hard freezes. Late February to mid-March balances both risks perfectly.
A good trick is to watch for forsythia blooms in your neighborhood. When forsythia lights up yellow, it is time to grab your shears.
Swelling buds, forsythia flowers, and warming soil temperatures all point to the same message: it is time.
Act on that signal, and your clematis will reward you with season-long color that makes the neighbors stop and stare.
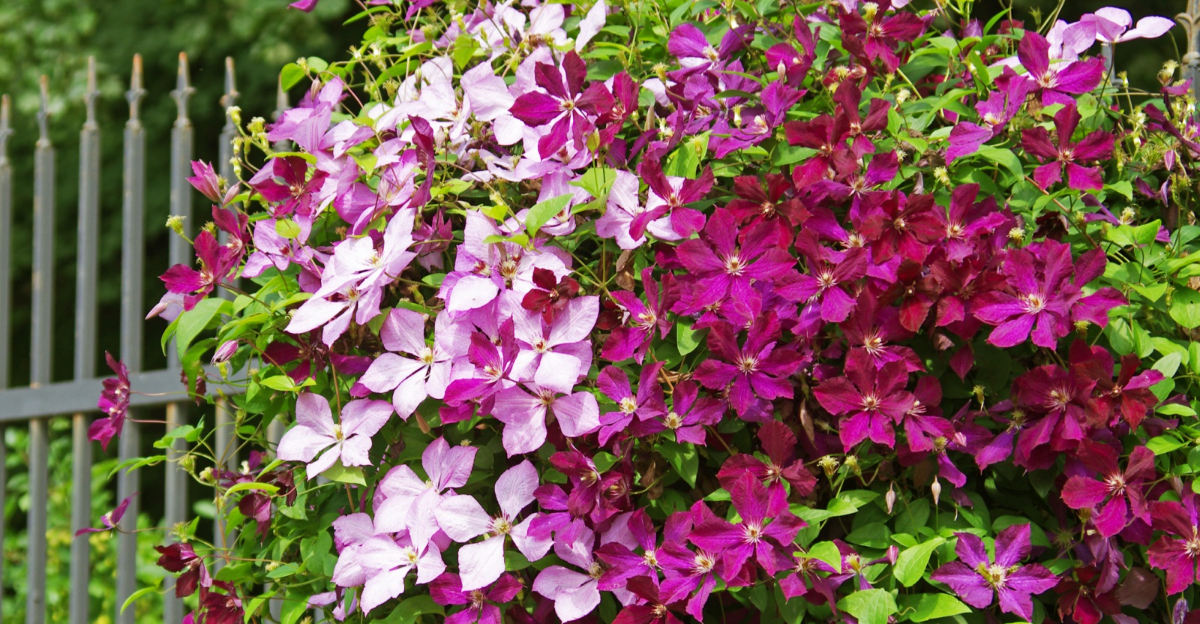
7. Trim Group 2 Repeat Bloomers After The First Flush Of Flowers

Group 2 clematis is the most rewarding, offering two distinct flowering periods. It blooms once in late spring on old wood, and again in late summer on new growth.
To get that second round of flowers, you need to do a light trim right after the first flush fades. This is not a hard prune. It is more of a tidy-up with purpose.
Cut the stems that just finished blooming back by about one third. Look for a healthy pair of leaves or a strong bud below the spent flowers, and make your cut just above that point.
This signals the plant to redirect its energy into producing new stems. Those new stems carry the second set of flower buds, which typically open in late summer and carry the garden all the way into fall.
Skipping this mid-season trim does not ruin your plant, but it does mean fewer blooms in the second wave. The vine may also look tired and overgrown by midsummer if you let it go without any attention.
Popular Group 2 varieties include Nelly Moser, Henryi, and The President, all known for their large, showy blooms. These are the clematis that make guests ask how you do it.
The secret is simple: one strategic cut after the first flush, and you set the stage for a grand encore. You get two distinct flowering displays in a single season.
8. Prune Old-Wood Bloomers Before The End Of July

Old-wood bloomers have a July cutoff, and it matters. Any pruning done after the end of July risks cutting into the buds that are already forming for next spring.
These plants spend late summer and fall quietly building up their flowering buds on the wood they grew this season. By August, those buds are locked in and set for the following year.
If you prune after that point, you are erasing next spring’s flower show before it even begins. That is why the July cutoff is so important for this group of clematis.
Before the end of July, you can do light shaping, remove any crossed or awkward stems, and clean up the overall structure of the vine. Keep cuts light and focused on improving airflow and shape rather than reducing overall size.
This is also a good time to check for any stems that look diseased or damaged. Removing those before they become a bigger problem protects the healthy wood that carries next season’s potential.
Think of it as a summer checkup rather than a full pruning session. You are not redesigning the vine.
You are just keeping it tidy and healthy heading into the second half of the growing season. Stay aware of your July cutoff and act before it arrives. Your old-wood bloomer will thank you next spring.