North Carolina Gardeners Use These Hacks To Harvest More Sweet Potatoes At Home
Sweet potatoes are one of the most naturally suited crops for North Carolina’s long, warm growing season, and yet a surprising number of home gardeners consistently pull smaller harvests than their plants should be capable of producing.
The gap between an average sweet potato yield and an exceptional one almost never comes down to variety selection or soil fertility alone.
It comes down to a collection of specific practices that experienced North Carolina growers have refined over multiple seasons of paying close attention to what these plants actually respond to in this climate.
Several of these hacks run counter to what general gardening guides recommend, which is exactly why they tend to surprise first-time sweet potato growers when they see the difference in harvest volume at the end of the season.
1. Plant Slips On Raised Ridges

Raised ridges might look simple, but they are one of the most effective tricks in the North Carolina sweet potato playbook.
When you mound your soil into a raised row before planting, that elevated bed warms up faster in the spring and drains much better after heavy summer rains.
Both of those things matter a lot when you are trying to grow a big, clean crop of sweet potatoes.
Flat or compacted ground holds water longer, and wet soil around developing roots can cause problems. Roots growing in soggy, hard ground often end up misshapen, small, or cracked.
A well-built raised ridge gives each root the loose, aerated space it needs to size up properly and stay healthy through the season.
Building ridges is not complicated. Use a hoe or a small tiller to pull soil up into rows about 8 to 12 inches high and roughly 12 to 18 inches wide.
Space your ridges about 3 to 4 feet apart so the vines have somewhere to run. In North Carolina yards with heavy clay soil, raised ridges are especially helpful because they lift the roots above the densest, most compacted layer.
Many experienced gardeners say this one change alone improved their harvests more than anything else they tried.
2. Wait Until The Soil Is Truly Warm

Sweet potatoes are serious heat lovers, and they simply do not perform well when the soil is still cold. Planting too early is one of the most common mistakes home gardeners make, and it can set the whole crop back by weeks.
Cool soil slows root development, stresses young slips, and makes the plants more vulnerable right when they need the most energy.
Most North Carolina gardeners aim to plant their slips in May or early June, once the soil has warmed to at least 65 degrees Fahrenheit. In the warmer Piedmont and Coastal Plain regions, planting can happen a bit earlier.
In the mountains, waiting until late May or even early June is usually the smarter move. The good news is that North Carolina has a long enough growing season in most areas that a slightly later planting still leaves plenty of time to reach full maturity.
A simple soil thermometer takes the guesswork out of timing. Push the probe a few inches deep in your raised ridge and check the reading in the morning.
Once the soil stays consistently warm, your slips will establish faster, root more quickly, and start pushing energy toward storage root development sooner.
Warm soil at planting time sets the tone for the entire season, and the difference in early growth can be dramatic compared to plants set out too soon.
3. Use Strong Healthy Slips

Sweet potatoes do not grow from seeds the way tomatoes or beans do. They grow from slips, which are small rooted shoots that sprout from a mature sweet potato.
The quality of your slips at planting time has a direct effect on how well your crop performs all season long, so starting with strong, healthy material is not optional.
Weak or spindly slips often struggle during the transplanting process. They may wilt badly, take longer to root, and burn through the warmest weeks of the growing season trying to recover instead of putting energy toward root development.
A slip that starts strong is one that roots quickly, establishes a healthy vine, and starts building those storage roots earlier in the season.
You can buy slips from a local farm supply store, a trusted seed company, or a nearby grower who specializes in sweet potatoes. You can also sprout your own at home by placing a healthy sweet potato in a warm, bright spot and letting it produce shoots.
Whichever route you choose, look for slips with firm stems, good green color, and at least a few small roots or root nubs already forming. Avoid any that look yellowed, wilted, or overly thin.
Giving your bed the best possible start begins with the slip itself, and that decision pays off at harvest time.
4. Give Every Slip Enough Room

More plants in a small space might sound like a smart way to boost your harvest, but crowding sweet potato slips actually works against you.
When plants are packed too closely together, the roots compete underground for the same nutrients, moisture, and growing space.
The result is often a lot of small, oddly shaped roots instead of the big, smooth potatoes you were hoping for.
North Carolina Cooperative Extension generally recommends spacing sweet potato slips about 12 inches apart within the row, with rows spaced around 3 to 4 feet apart.
That spacing gives each plant enough room for roots to spread out and vines to run without smothering each other.
Following those guidelines is one of the easiest ways to improve the size and quality of your harvest without spending a single extra dollar.
It can be tempting to squeeze in a few extra slips, especially if you have more than you planned for. Resist that urge.
A well-spaced bed with fewer plants will almost always outperform an overcrowded one when it comes to root size and overall yield. If you have extra slips, start a second bed or share them with a neighbor.
Proper spacing also makes harvest day much easier, since the roots have room to develop without tangling into each other. Space is not wasted in a sweet potato bed.
It is an investment in every root that grows.
5. Plant In Loose Well-Drained Soil

Soil texture matters more for sweet potatoes than for almost any other vegetable. Because the part you eat is actually a swollen storage root that grows underground, the soil around it either helps it size up beautifully or fights it every step of the way.
Loose, well-drained soil lets roots expand freely, develop smooth shapes, and reach their full potential size.
Heavy clay soil, which is common in many parts of North Carolina, can be a real challenge. Clay holds water too long, compacts easily, and resists the kind of root expansion sweet potatoes need.
If your yard has dense clay-heavy ground, adding a few inches of finished compost and working it in before planting can make a meaningful difference.
Building raised ridges above the native soil adds another layer of improvement by lifting roots into a looser growing zone.
Breaking up compacted spots with a fork or tiller before you form your ridges also helps.
You do not need perfect sandy loam to grow great sweet potatoes, but you do need a bed that drains well and stays loose enough for roots to push through without restriction.
Avoid planting in areas that stay wet after rain. Standing water is one of the fastest ways to ruin root quality and shape.
A little soil preparation before planting goes a long way toward a harvest you will actually be proud of come fall.
6. Water Deeply While Slips Settle In

The first week or two after planting is one of the most critical windows in a sweet potato’s life. Freshly transplanted slips have just gone through the stress of being pulled from their growing medium and placed into new ground.
They need steady moisture at the root level to recover, anchor themselves, and start pushing new growth.
Watering deeply right after planting helps the soil settle around the roots and gives the slip the hydration it needs to bounce back quickly. During hot, dry North Carolina summers, young slips can wilt dramatically during the heat of the day, and that is completely normal.
What matters is that the soil stays consistently moist a few inches down during those first critical days. Watering in the early morning at soil level, rather than overhead, keeps moisture where it counts without promoting leaf disease.
Once slips are established and actively growing, sweet potatoes are actually fairly drought-tolerant compared to many vegetables. But that early window is not the time to let the bed dry out completely.
Aim for about an inch of water per week through rain or irrigation during the establishment phase. Avoid keeping the soil soggy, though, since waterlogged roots can develop poorly.
Think of early watering as the foundation of a strong plant. Get that right, and your slips will transition into vigorous vines faster than you might expect.
7. Keep Weeds Out Early

Weeds are sneaky competitors. While your sweet potato slips are still small and working hard to establish themselves, weeds are doing the exact same thing, racing to claim water, nutrients, light, and space in your garden bed.
During those first few weeks after planting, weeds can get a head start that costs your crop real growing time and energy.
Early weeding is one of the most practical habits an experienced sweet potato grower develops. Pulling or hoeing weeds when they are tiny takes far less effort than wrestling with established plants later in the season.
Focus on keeping the area between your slips and along the ridge sides as clean as possible during the first four to six weeks. That is the window where weed competition hurts the most.
Here is the good news: once your sweet potato vines start to fill in and spread across the bed, they do an impressive job of shading out new weed growth on their own.
The dense canopy of leaves blocks sunlight from reaching the soil surface, which slows weed germination significantly.
Many gardeners find that after the vines fully cover the bed, weeding becomes much less of a chore. But getting to that point requires keeping the early weeks clean.
A little consistent effort at the start of the season means far less work later on, and a healthier crop throughout.
8. Wait Long Enough Before Digging

Patience is genuinely one of the most powerful tools in a sweet potato gardener’s kit. It is tempting to start digging once the vines look full and established, but pulling roots too early almost always means leaving size and sweetness on the table.
Sweet potatoes need time to reach their full potential, and that takes longer than most people expect.
In North Carolina, most varieties need somewhere between 90 and 120 days from planting to reach maturity, depending on the cultivar and growing conditions. If you planted in late May, that puts your harvest window in late August through October.
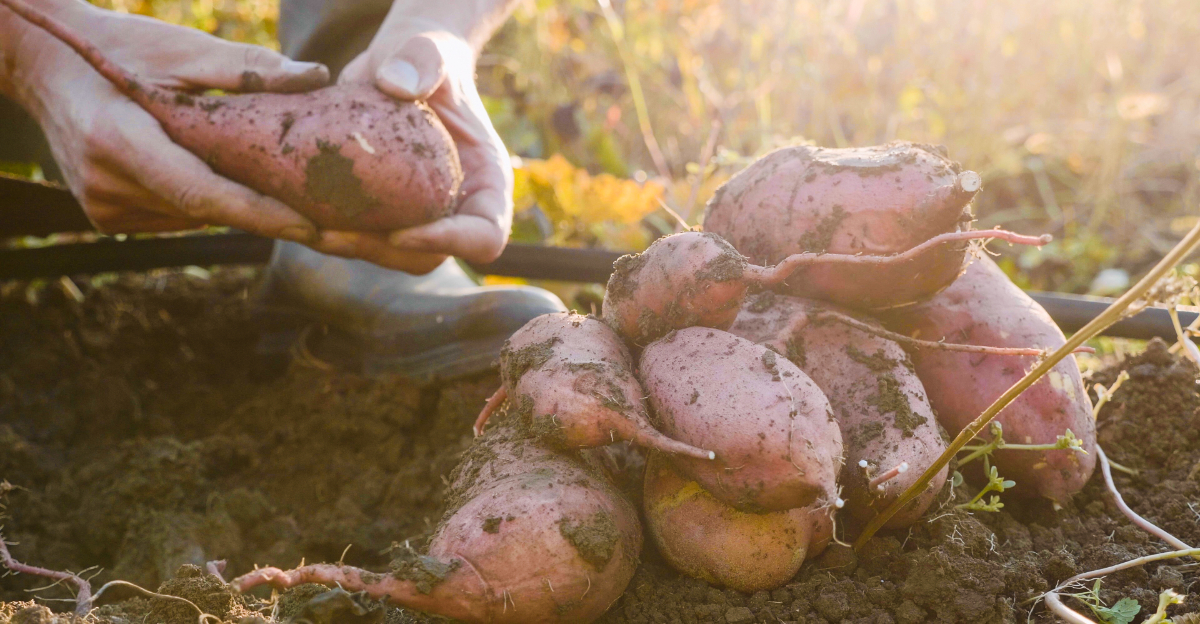
Before committing to digging the whole bed, try gently unearthing one plant near what you think is harvest time. Check the root size and skin firmness, and use that as your guide for the rest of the bed.
One important timing note: sweet potato roots are sensitive to cool temperatures. Once nighttime temperatures start dropping consistently below 55 degrees Fahrenheit, quality can begin to suffer.
Chilling injury affects both flavor and storage life, so aim to get your crop out of the ground before cold nights settle in for good. Harvest on a dry day when the soil is not soaking wet, and handle the roots gently to avoid nicks and scrapes.
Every bruise you prevent now means a better potato in storage later.
9. Cure The Sweet Potatoes After Harvest

Curing is the step that separates a good sweet potato harvest from a truly great one, and it is the hack that home gardeners skip most often. Right after you pull sweet potatoes from the ground, they are not yet at their best.
The skins are thin and easily damaged, the flavor has not fully developed, and small nicks from the digging process need time to heal over before storage.
The curing process involves holding freshly harvested sweet potatoes at a warm temperature with relatively high humidity for about 7 to 10 days.
Most experts recommend a temperature around 80 to 85 degrees Fahrenheit and humidity around 85 to 90 percent.
A warm corner of a garage, a spare room, or even a covered porch during warm fall weather can work well. Lay the potatoes in a single layer so air can circulate around them, and keep them out of direct sunlight.
During curing, small surface wounds heal over, the skin toughens and firms up, and starches begin converting to sugars, which is what gives cured sweet potatoes their rich, sweet flavor. Skipping this step means shorter storage life and less developed taste.
The biggest harvests come from putting the full system together: raised ridges, warm soil, strong slips, proper spacing, steady early watering, clean weed-free beds, balanced feeding, patient harvest timing, and curing every single root before it goes into long-term storage.