Colorado Tomato Leaves Keep Turning Yellow And This Is How To Treat Them
Colorado will humble any gardener. You followed every rule: the right soil, the right seeds, the right watering schedule, and your tomato leaves still went yellow on you.
Blame the altitude. Blame the soil pH that sits stubbornly outside the sweet spot. Blame the mornings that drop to 45°F in July while the afternoon bakes everything at 90°F.
Whatever the cause, yellowing leaves are your plant screaming for help in the only language it knows.
The tricky part is that a dozen different problems wear the exact same symptom. Water too much, water too little, miss one micronutrient, let a fungus take hold and you get yellow every time.
Knowing which problem you are actually dealing with is the only thing standing between a struggling plant and a full harvest.
Colorado does not make that diagnosis easy. Here is how to figure it out before it is too late.
Intense High-Altitude UV Exposure Stresses Plants Rapidly

Step outside on a sunny Colorado afternoon and feel your skin tingle almost immediately. That same fierce UV radiation is scorching your tomato plants faster than you might expect.
At elevations above 5,000 feet, the atmosphere is thinner. Less atmosphere means less natural UV filtering, so plants absorb far more solar radiation than tomatoes grown at sea level.
That excess radiation breaks down chlorophyll, the green pigment inside each leaf. When chlorophyll breaks down faster than the plant can rebuild it, leaves shift from green to yellow in patches.
The yellowing often appears on the upper leaf surfaces first, almost like a sunburn pattern. Leaves may also curl slightly at the edges as the plant tries to reduce its surface area exposed to light.
Shade cloth rated at 30 to 40 percent is one of the most effective tools Colorado gardeners have. Draping it over a simple frame during peak sun hours, usually 11 a.m. to 3 p.m., gives plants critical relief without blocking growth entirely.
Reflective mulch on the soil surface can also help by bouncing scattered light rather than concentrating it on foliage. Pairing shade cloth with proper hydration makes a measurable difference within a week.
Healthy, well-watered plants also handle UV stress better because water helps regulate internal leaf temperature. Think of shade cloth as sunscreen for your garden, a simple fix with serious results.
Alkaline Soil Blocks Nutrient Absorption At The Roots

Colorado soil has a sneaky habit of locking away the nutrients your tomatoes desperately need. The culprit is high soil pH, often sitting between 7.5 and 8.5 across much of the state.
When pH climbs that high, iron, manganese, and zinc become chemically bound to soil particles. Roots cannot absorb what is chemically unavailable, no matter how much fertilizer you add on top.
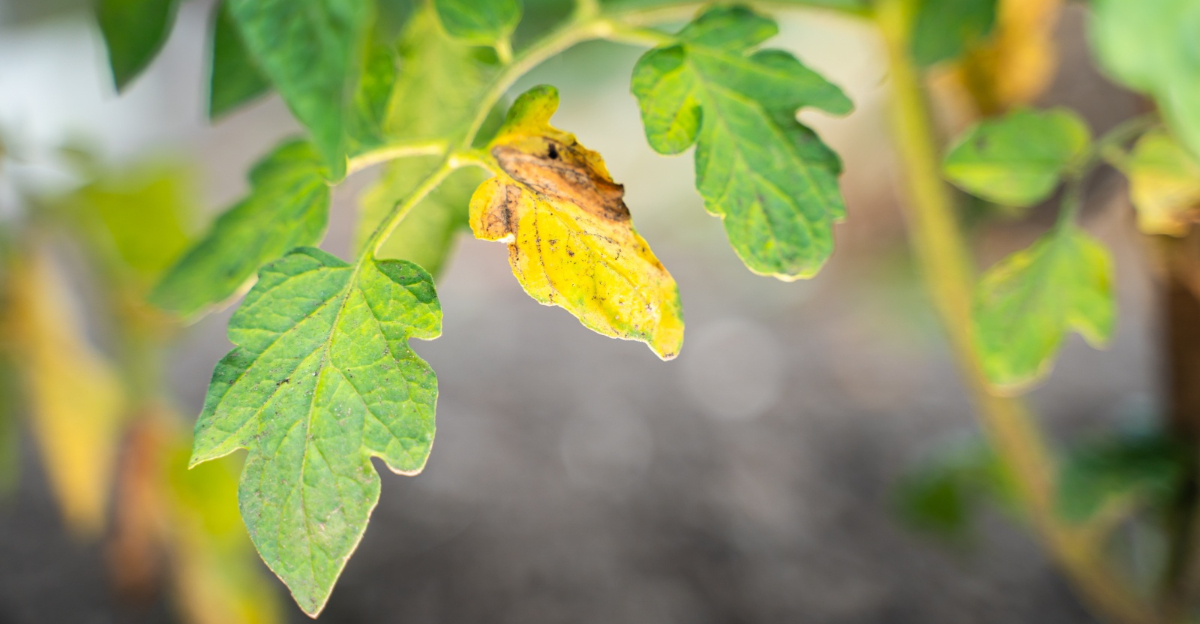
The result is a condition called interveinal chlorosis. Leaves turn yellow between the veins while the veins themselves stay green, creating a striped, almost sickly pattern that is easy to spot.
This pattern is a clear signal that your plant is starving for micronutrients, even if your soil looks dark and rich. Appearance can be deceiving when pH is the real problem hiding underneath.
A simple soil pH test from a garden center costs just a few dollars and takes about five minutes. Knowing your exact pH number is the first step toward fixing the problem correctly.
Sulfur amendments lower pH gradually over weeks, while acidifying fertilizers can help maintain a more plant-friendly range. Organic matter like peat moss also nudges pH downward while improving overall soil structure.
Tomatoes thrive best in soil with a pH between 6.0 and 6.8. Getting into that sweet zone unlocks nutrients already present in your soil.
Yellow leaves often begin greening up within several weeks of treatment, depending on how far pH has shifted and which amendment you use
Wide Temperature Swings Between Day And Night Shock Foliage

Imagine going from a hot sauna to a cold shower twenty times a week. That is essentially what your tomato plants experience in Colorado every single day.
Daytime temperatures can soar into the 90s while nights drop into the 40s or even lower at higher elevations. That 40 to 50 degree daily swing is genuinely brutal for warm-season crops like tomatoes.
When temperatures drop sharply overnight, the plant slows its internal processes almost to a halt. Nutrient transport from roots to leaves gets interrupted, and leaves respond by losing their green color.
Cold nights also cause cell membranes inside leaves to stiffen and sometimes crack. Damaged cells cannot hold chlorophyll effectively, so yellowing spreads from the outer leaf edges inward over several days.
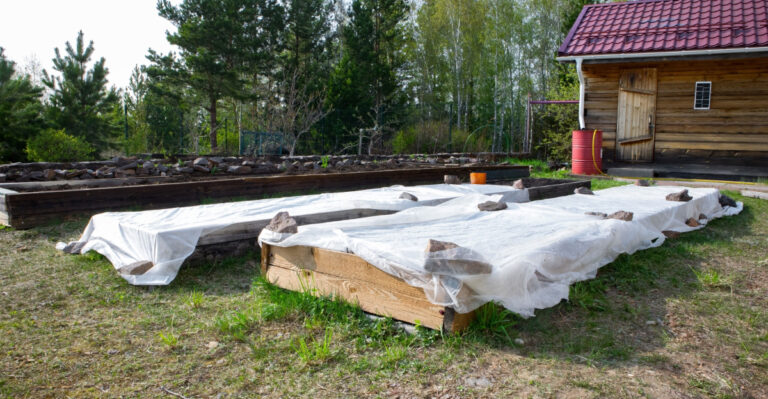
Row covers made from lightweight fabric are a practical solution for protecting plants on cold nights. Draping them loosely over plants traps ground heat and keeps leaf temperatures from crashing too fast.
Many experienced Colorado gardeners keep row covers ready from late spring through early fall because surprise cold snaps happen even in July. Being prepared beats scrambling at midnight when frost warnings pop up.
Consistent overnight protection reduces the cellular stress that drives foliage yellowing from temperature shock.
Plants that stay warmer at night also set fruit more reliably, giving you a bigger harvest reward alongside healthier leaves.
Overwatering In Clay-Heavy Colorado Soil Drowns Roots

More water does not always mean healthier plants, and clay soil makes that lesson painfully obvious.
Many Colorado gardeners make the well-meaning mistake of watering too often in soil that simply cannot drain fast enough.
Clay particles pack tightly together, leaving almost no air pockets between them. Roots need oxygen as much as they need water, and waterlogged clay steadily cuts off their oxygen supply.
When roots cannot breathe, they begin to break down. A compromised root system cannot pull nutrients or water upward effectively.
Overwatered tomatoes often look deceptively similar to underwatered ones, with wilted, yellowing foliage.
Sticking your finger two inches into the soil is the fastest way to tell the difference before you reach for the hose.
If the soil feels wet and cool two inches down, skip watering for at least another day or two. Letting the top layer dry out slightly between waterings encourages roots to grow deeper in search of moisture.
Raised beds filled with a loamy, well-draining mix are a game-changer for clay-heavy yards. Elevating the root zone even six to eight inches above native clay dramatically improves drainage and root health.
Fixing overwatering habits now gives roots the chance to recover before damage becomes serious. Healthier roots mean greener leaves, stronger stems, and tomatoes that actually make it to your dinner plate.
Test And Amend Soil pH To Reach 6.0 To 6.8

Guessing your soil pH is like driving blindfolded and hoping for the best. A quick test gives you the real numbers you need to make smart, targeted changes. Inexpensive test kits are available at most garden centers and home improvement stores.
The CSU Soil, Water and Plant Testing Lab also offers professional soil testing, with a basic soil analysis starting at $38 and a complete analysis at $45.
Once you know your pH, you can choose the right amendment with confidence. Elemental sulfur is the most common choice for lowering alkaline pH, and it works gradually over several weeks as soil bacteria process it.
For faster results, aluminum sulfate lowers pH more quickly but should be used carefully to avoid overdoing it. Always follow package directions because adding too much of any amendment can create new problems.
Organic materials like composted pine bark, peat moss, and coffee grounds also contribute to gentle acidification over time. Blending them into your existing soil improves texture while slowly nudging pH into the ideal range.
Re-testing soil every four to six weeks lets you track progress without overshooting your target. Tomatoes need pH between 6.0 and 6.8 for peak nutrient access, so precision matters here.
Consistent pH management is one of the highest-return actions a Colorado tomato grower can take. Correcting the pH is often the single fix that stops yellowing leaves and gets plant recovery moving in the right direction.
Mulch Heavily To Buffer Temperature Fluctuations Overnight

A thick blanket of mulch around your tomato plants is one of the cheapest and most powerful tools in your garden shed. It does far more than keep weeds down.
Mulch absorbs heat from the sun during the day and slowly releases it back into the soil after dark. That stored warmth acts as a buffer against the sharp nighttime temperature drops that Colorado is famous for.
Straw, wood chips, and shredded leaves all work well as mulching materials. Aim for a layer three to four inches deep, keeping it pulled back slightly from the main stem to prevent moisture buildup at the base.
Beyond temperature regulation, mulch also slows evaporation from the soil surface. Less evaporation means more consistent soil moisture, which directly reduces the watering stress that contributes to yellow tomato leaves.
Soil temperature stability matters enormously for root function. Roots that stay within a consistent temperature range absorb nutrients far more efficiently than roots bouncing between cold nights and scorching midday heat.
Organic mulches also break down slowly, adding carbon and organic matter to the soil below.
Over a full growing season, that decomposition improves soil structure and feeds beneficial microbes that support root health. Think of mulch as a 24-hour caretaker that works while you sleep.
Laying it down early in the season, before temperatures start swinging wildly, gives your tomatoes the steady foundation they need to stay green and productive.
Reduce Watering Frequency And Improve Drainage Immediately

Cutting back on watering feels counterintuitive when your plants look stressed, but sometimes less is genuinely more. Yellow leaves caused by overwatering will not improve until the root zone gets a chance to breathe again.
Start by stretching the time between watering sessions by one or two extra days. Check soil moisture at a two-inch depth before every watering decision instead of following a fixed calendar schedule.
Drip irrigation is one of the most effective upgrades you can make for tomato health. It delivers water directly to the root zone slowly, reducing surface saturation and giving clay soil time to absorb moisture properly.
If your garden beds are in-ground and drain poorly, adding coarse sand or perlite can open up the soil structure. Mixing in 20 to 30 percent perlite by volume significantly improves drainage without harming nutrient levels.
For container-grown tomatoes, check that drain holes are clear and fully functional. Blocked drainage holes are a surprisingly common cause of root problems that show up as yellowing foliage weeks later.
Sloping your garden beds slightly, even just one or two degrees, helps excess water move away from the root zone naturally. Small design changes like this make a lasting difference across the entire season.
Improving drainage is not a one-time fix but an ongoing garden habit. Once roots recover from waterlogged conditions, new foliage grows in greener and the yellow leaves that triggered your concern will fade into memory.
Apply Chelated Iron Or Balanced Fertilizer Directly To Soil

When yellow tomato leaves show that classic green-vein pattern, chelated iron is often the fastest fix available. Standard iron supplements do not work well in alkaline conditions, but chelated iron stays available to roots even at higher pH levels.
Chelation is a chemical process that wraps iron molecules in an organic coating. That coating prevents the iron from bonding to alkaline soil particles, keeping it accessible for root absorption.
Look for products labeled EDTA or EDDHA chelated iron at garden centers. EDDHA works best in highly alkaline soils above pH 7.5, making it the stronger choice for many Colorado gardens.
Apply chelated iron by working granules into the top inch of soil around the plant base. Watering immediately after application helps move the iron down toward the root zone where uptake actually happens.
A balanced fertilizer with equal nitrogen, phosphorus, and potassium numbers, such as 10-10-10, also supports overall plant recovery. Nitrogen fuels new green growth while phosphorus strengthens the root system that delivers everything else.
Avoid high-nitrogen fertilizers alone when leaves are already yellowing from nutrient lockout.
Pumping in nitrogen without fixing pH or drainage first can push lush growth that the stressed root system cannot support.
Foliar sprays of diluted chelated iron can provide faster short-term results while soil amendments take effect.
Foliar applications of chelated iron can produce visible green-up within seven to ten days, while soil-applied chelated iron typically takes a few weeks longer to show results.