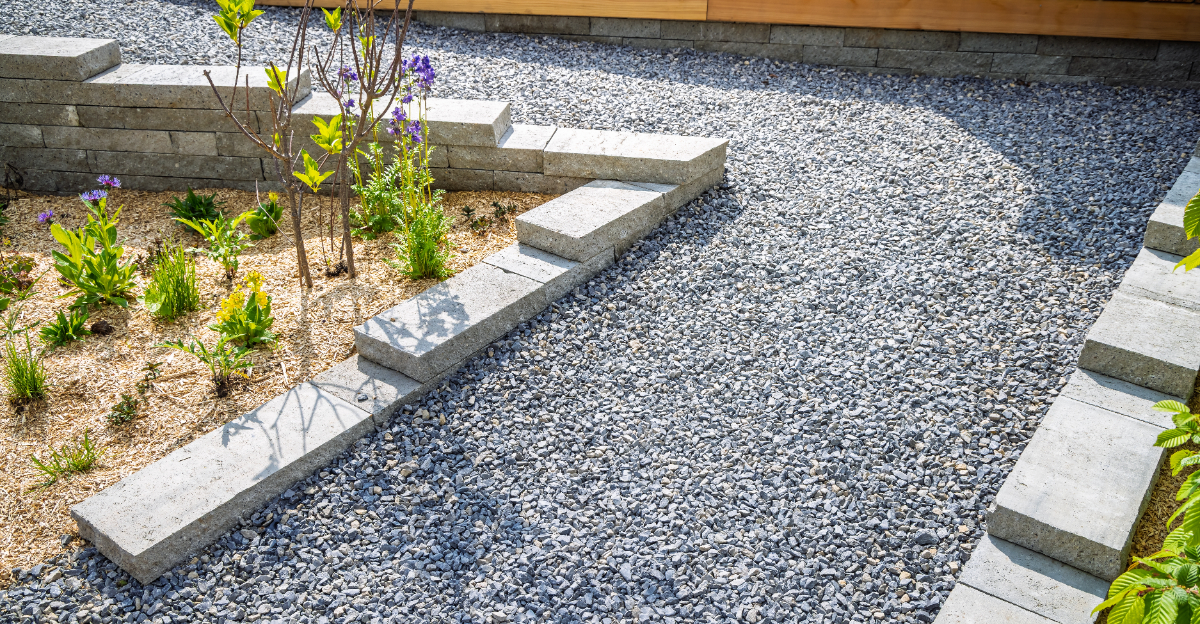
How To Fix An Uneven Arizona Gravel Yard Without Renting Any Heavy Equipment
It does not take a huge dip to make a gravel yard look messy. Even a few uneven spots can stand out every time you pull into the driveway.
Before long, the whole yard starts looking neglected, even if everything else is well maintained.
Many people assume the only real fix involves renting heavy equipment or paying for a complete overhaul.
That belief keeps a lot of projects from ever getting started. The truth is that many uneven gravel yards can be improved with basic tools and the right method.
Arizona yards deal with intense sun, heavy downpours during monsoon season, and shifting gravel over time. Those conditions make uneven areas fairly common, but they do not always require a complicated solution.
Knowing how to level the gravel correctly can save time, reduce frustration, and give your landscape a cleaner look without turning the job into a major expense.
1. Rake Low Spots Before Adding New Gravel

Before you dump a single bag of new gravel, pull out your rake and actually work the surface you already have. Low spots rarely form out of nowhere.
Gravel shifts, settles, or gets kicked aside over time, leaving bare patches and uneven ground.
Start by raking the existing gravel away from each sunken area. Push the loose material toward the edges of the low spot so you can clearly see where the ground has actually dropped.
This step takes maybe ten minutes per section, but it saves you from wasting new material.
Once you clear the area, look at what you are dealing with. Is the soil underneath packed and dry?
Is it soft or crumbly? Soft soil means the ground shifted, not just the gravel.
Hard, cracked soil is more stable and easier to work with.
Rake the surrounding gravel back toward the center slowly. You might be surprised how much material was just displaced rather than missing.
Sometimes raking alone solves a shallow low spot without needing to add anything new.
Work in small sections across the yard instead of trying to fix everything at once. Move methodically from one end to the other.
Mark problem spots with a small flag or rock so you can come back if needed. Getting a clear picture of the whole yard first makes every step after this one go much faster and more efficiently.
2. Fill Sunken Areas A Little At A Time

Pouring too much gravel into a low spot at once is one of the most common mistakes people make. It sounds faster, but it actually creates a mound instead of a level surface.
Adding material gradually gives you real control over the final result.
Grab a five-gallon bucket and fill it about halfway with new gravel. Pour it slowly into the sunken area, spreading it out as you go.
Check the level by eye or use a long board laid flat across the surface to spot any remaining dips.
Add another small amount if the spot still looks low. Let each layer settle before adding more.
Gravel compacts slightly under pressure, so what looks level now might drop a little after you walk on it a few times.
Repeat this process across every sunken spot in the yard. Work one section at a time.
Rushing through multiple areas at once makes it hard to track which spots still need attention.
In dry desert climates, gravel tends to shift more during and after monsoon season. Rain pushes loose material around, and wind carries fine particles away.
Filling low spots before summer storms arrive helps protect the yard from getting worse. Checking the yard a few days after a rain also shows you exactly where water pools, which points you directly to the spots that need the most attention and refilling.
3. Match The New Gravel To The Existing Stone

Nothing stands out more in a gravel yard than a patch of mismatched stone. New gravel poured over old can look like a repair job instead of a finished surface, especially once the sun bleaches everything out over a season or two.
Before buying anything, scoop up a small handful of your existing gravel and take it to the hardware store or landscape supply yard. Hold it next to the bags or bins of available material.
Look at both the color and the size of the stones carefully.
Color matters more than people expect. Desert gravel weathers quickly in intense heat and UV exposure.
A bag labeled the same name as your original material might look noticeably different if it came from a different quarry or supplier batch.
Size matters just as much. Finer gravel settles into gaps and compacts more tightly.
Coarser stone sits higher and shifts more freely. Mixing sizes creates an uneven texture that is hard to rake smooth.
If you cannot find an exact match, buy a slightly larger quantity and spread it evenly across the whole yard rather than just the repaired spots. Blending new material across the surface helps disguise any minor color variation.
It also gives the entire yard a refreshed, uniform look without the obvious patchwork appearance that comes from spot-treating only the damaged sections.
Consistency across the surface makes the finished result look intentional and clean.
4. Use A Landscape Rake To Level The Surface

A standard garden rake works fine for small areas, but a landscape rake changes everything when you are dealing with a full yard. The wider head covers more ground per pass and distributes material far more evenly with less effort.
Hold the rake at a low angle and push the gravel forward in long, smooth strokes. Avoid short choppy movements.
Long passes keep the gravel spread consistently instead of creating ridges or uneven bands across the surface.
Work in one direction first, then go back over the same area from a perpendicular angle. Crossing your passes catches any spots your first round missed.
It sounds like extra work, but it takes only a few minutes and makes a noticeable difference in the final smoothness.
Pay special attention to areas near borders, edging, and pathways. Gravel tends to pile up against hard edges and thin out in open center areas.
Pull excess material away from edges and redistribute it toward the middle sections where depth is lower.
Stand back and look at the surface from a low angle after each section. Viewing the yard from a low vantage point reveals dips and ridges that are invisible when you are standing straight up.
Walk across the raked area slowly and feel for soft or uneven patches underfoot. Adjust as needed before moving on.
5. Check Drainage Before Making Big Changes

Fixing an uneven yard without checking drainage first is a shortcut that usually creates bigger problems later. Water needs somewhere to go.
If your gravel yard sits flat or slopes toward your house, leveling it incorrectly can make flooding worse.
Walk the yard after a rain or run a garden hose across the surface for a few minutes. Watch where water flows and where it sits.
Standing water in any one spot longer than a few minutes is a red flag worth addressing before adding any new material.
Gravel yards should slope gently away from structures. Even a slight grade of one inch per ten feet is enough to move water in the right direction.
Use a long board and a small level to check the slope across different sections of the yard.
If you find a spot where water collects near a foundation or patio edge, do not just fill it with gravel. Adding more material there can redirect water in unexpected ways.
Consider whether the area needs a slight grade correction before you start leveling.
Drainage problems are especially common in Southwest desert regions after monsoon rains. Heavy water hits fast and the ground cannot always absorb it quickly enough.
Getting the slope right before you finalize any gravel work protects both the yard and any nearby structures from water damage.
6. Compact Fresh Gravel With A Hand Tamper

Loose gravel shifts underfoot, migrates with foot traffic, and creates new uneven spots within days of being placed. Compacting it with a hand tamper locks the material in place and gives you a firm, stable surface that holds its shape far longer.
A hand tamper is a simple tool. It is basically a flat metal plate attached to a long handle.
You lift it and press it down firmly onto the gravel surface. Work in small overlapping sections so every inch gets consistent pressure.
Do not try to compact too thick a layer at once. Anything deeper than about two inches should be done in stages.
Compact the first layer, then add more gravel and compact again. Layering this way creates a much more stable base than trying to pack everything down in a single pass.
Pay extra attention to high-traffic areas like pathways, entry points, and spots near gates or doors. These areas get the most foot traffic and tend to develop ruts fastest.
Extra tamping time here pays off quickly in terms of how long the surface stays level.
Compacting is especially important in desert climates where heat and dry conditions cause gravel to shift more freely. Without compaction, even a well-leveled surface can look uneven again within a few weeks.
A hand tamper is inexpensive, easy to find at any hardware store, and completely manageable without any special skills or physical training.
7. Refresh Thin Areas To Keep The Yard Even

Thin spots in a gravel yard are easy to overlook until they become bare patches of exposed dirt. Catching them early makes the fix quick and simple.
Waiting too long means dealing with compacted soil, weeds, and a much bigger repair job.
Walk the yard slowly and look for areas where the gravel layer looks shallow or where soil is starting to show through. These spots are usually near high-traffic zones, along slopes, or at the edges where gravel has been kicked or washed away over time.
Measure the depth of your gravel in a few spots using a small stick or pencil. A healthy gravel layer in a residential yard typically runs between two and three inches deep.
Anything under an inch is too thin and will break down quickly under foot traffic and weather.
Spread fresh gravel evenly over thin areas using a shovel and rake. Do not pile it up.
Bring the depth back to match the surrounding areas and compact it lightly with your hand tamper to help it blend in smoothly.
Refreshing thin areas once or twice a year keeps the whole yard looking uniform and prevents ongoing erosion. Gravel naturally migrates over time, especially in yards with any slope or regular foot traffic.
Staying on top of thin spots is much easier than letting them grow into large bare patches..