The One Thing Ohio Tomatoes Need Right Now Or Blight Spreads To Every Plant
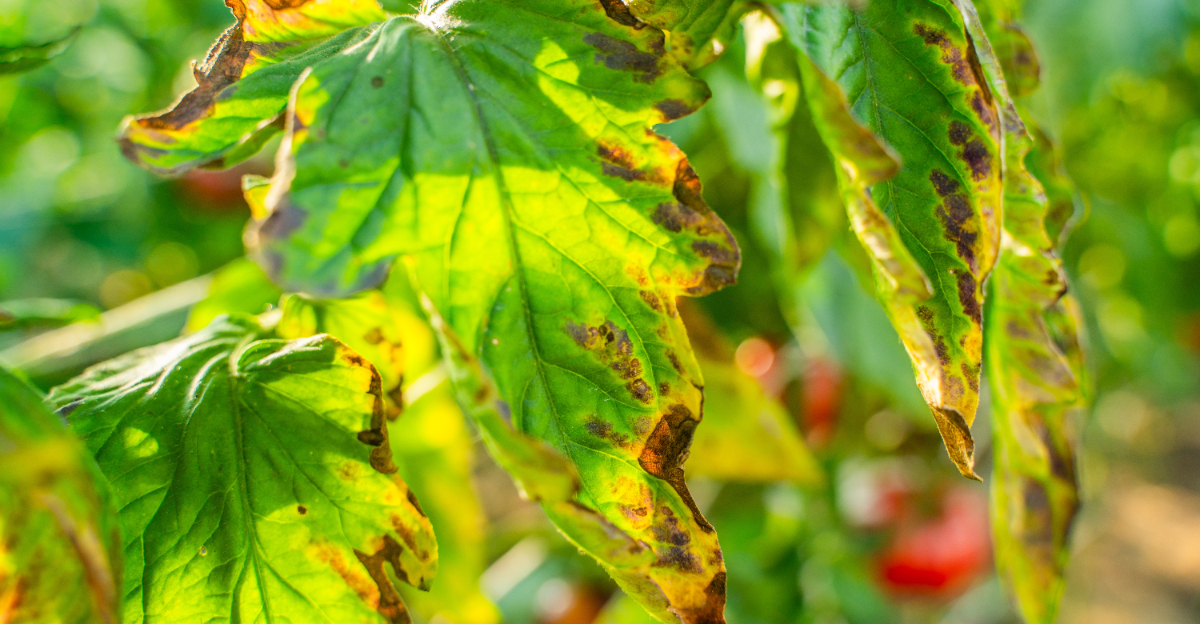
Blight in an Ohio tomato patch does not wait for a convenient moment. One plant shows the first signs, and within days the conditions that allowed it to start are working against every other tomato in the garden.
The window between early detection and a full patch problem is shorter than most gardeners realize until they have already lost it. Ohio summers create exactly the conditions blight needs.
Warm nights, inconsistent rain, humidity that sits on foliage longer than it should. Most tomato plants are already managing more stress than they show, and one missed task tips the balance in the wrong direction fast.
There is something specific Ohio tomatoes need right now that keeps blight from finding the foothold it is already looking for. Miss it this week and the conversation shifts from prevention to damage control.
Every day matters more than most tomato growers want to believe.
1. Remove Spotted Lower Leaves Before Blight Climbs
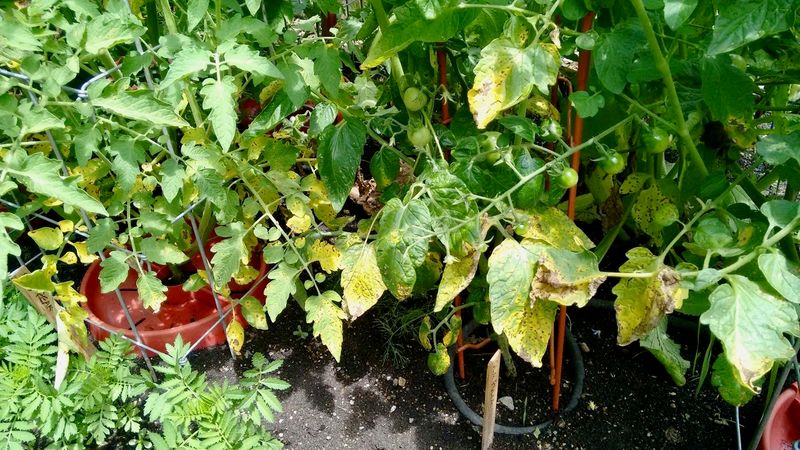
A yellow leaflet near the soil line is usually the first warning your tomato plants send. Lower leaves sit closest to the ground, where soil splash, trapped humidity, and slow air movement create ideal conditions for fungal diseases to take hold.
OSU Extension plant disease guidance notes that diseases like early blight and Septoria leaf spot commonly appear on the lowest foliage first before moving upward.
As soon as you see clearly spotted, yellowing, or lesion-covered lower leaves, remove them carefully. Work when the foliage is dry, since wet plants can transfer spores more easily from leaf to leaf or hand to plant.
Pinch or snip only the leaves that show obvious symptoms, not healthy green foliage that is still doing its job feeding the plant.
Stripping too many leaves at once can expose developing fruit to sunscald, which causes pale, papery patches on the skin. Removing diseased lower leaves is not a cure for tomato blight, but it can help slow the upward climb of the disease.
Paired with other steps, it gives your plants a better chance to keep producing through the rest of the growing season.
2. Bag Diseased Foliage Instead Of Dropping It Nearby
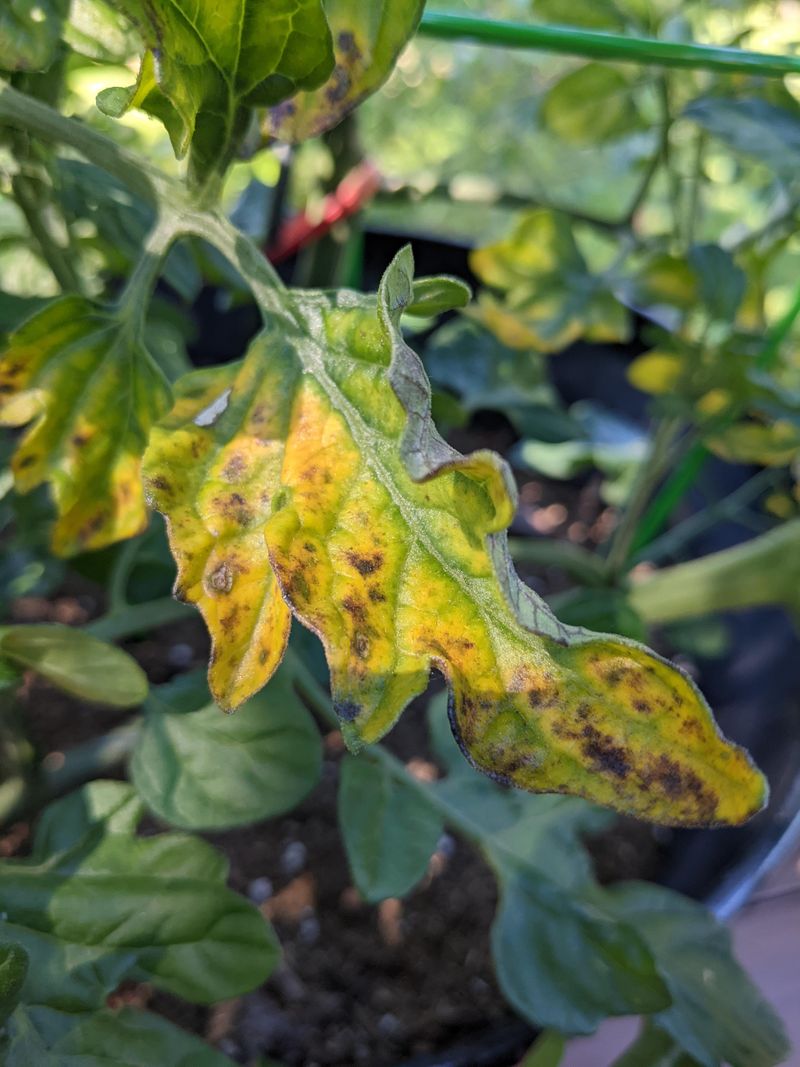
After pulling those diseased leaves off the plant, the next move matters just as much as the removal itself. Dropping infected foliage under the tomato plant or tossing it between rows leaves the problem right where it started.
Fungal spores from diseases like early blight and Septoria leaf spot can survive on deceased plant material. They can splash back onto healthy leaves during the next rain or watering session.
Place removed diseased leaves directly into a plastic bag and seal it before carrying it out of the garden. Check your local waste guidelines for how to dispose of bagged garden debris.
Some municipalities accept it in yard waste pickup, while others recommend placing it in the trash.
Home composting of diseased tomato foliage is risky for most Ohio backyard gardeners. University extension plant pathology resources explain that home compost piles often do not reach or maintain enough heat.
Your Ohio Garden Changes Every Week. Your Plan Should Too.
Gardening in Ohio changes quickly throughout the season. Every Friday you’ll receive a simple weekly plan showing exactly what to plant, prune, fertilize, harvest, and protect so you never miss the right timing.
That heat is needed to reliably break down fungal pathogens. Unless you are experienced with managing compost temperatures, it is generally safer to keep infected tomato leaves out of your pile.
Keeping diseased material away from healthy beds is one of the simplest sanitation habits that can reduce disease pressure over the season.
3. Check Plants When The First Fruit Starts Forming
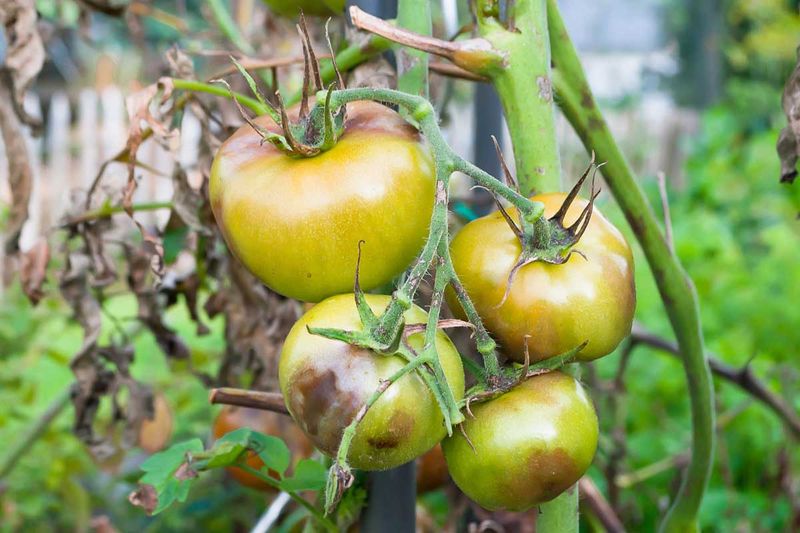
Small green tomatoes hanging on the vine are exciting, but that moment in the season also signals a smart time to give your plants a thorough checkup.
Warm, humid weather often peaks around the same time first fruit forms, and lower-leaf diseases tend to become more noticeable during this stretch.
OSU Extension vegetable guidance encourages Ohio gardeners to watch plants closely as the season progresses, especially when conditions have been wet.
Focus your inspection on the bottom third of each plant. Crouch down and look under the leaves, not just at the tops.
Yellowing, water-soaked spots, small dark lesions with yellow halos, or papery brown patches can all point to different diseases, and they do not all look the same.
Early blight typically shows irregular brown spots with a target-ring pattern. Septoria leaf spot produces small circular spots with dark borders and lighter centers.
Bacterial diseases and nutrient deficiencies can also create spotting that looks similar to fungal problems. Do not guess wildly at the diagnosis.
Compare what you see with images and descriptions from OSU Extension or another university extension resource before deciding on a response. Accurate identification helps you choose the most effective approach for your situation.
4. Water The Soil Instead Of Splashing The Leaves
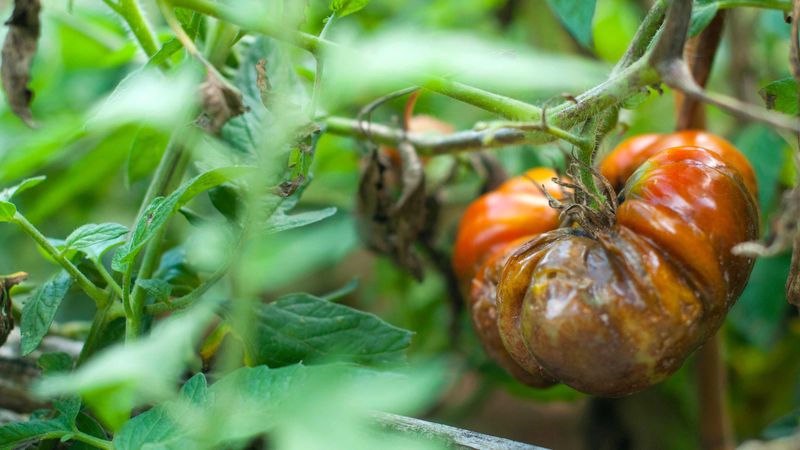
Rain is out of your control, but your watering habits are not. Overhead watering with a sprinkler or a hard-flowing hose can splash soil particles onto lower leaves.
Those particles can carry fungal spores from the ground directly onto the plant. Plant pathology resources explain that soil splash is one of the ways Septoria leaf spot and early blight can move from infected soil or debris onto healthy foliage.
Switching to drip irrigation or a soaker hose keeps water right at the root zone where plants actually need it. If you water by hand, aim the flow at the base of the plant and keep the stream gentle enough to avoid kicking up soil.
Watering in the morning also helps, because any foliage that accidentally gets wet has time to dry before evening temperatures drop and moisture lingers.
Wet leaves that stay wet for extended periods give fungal spores better conditions to germinate and infect. Reducing the time your tomato foliage spends wet is a practical, low-cost step that works well alongside leaf removal and mulching.
No single technique eliminates disease risk on its own. Combining careful watering with other good habits can meaningfully reduce how quickly problems spread down a row.
5. Mulch To Stop Soil From Splashing Disease Upward
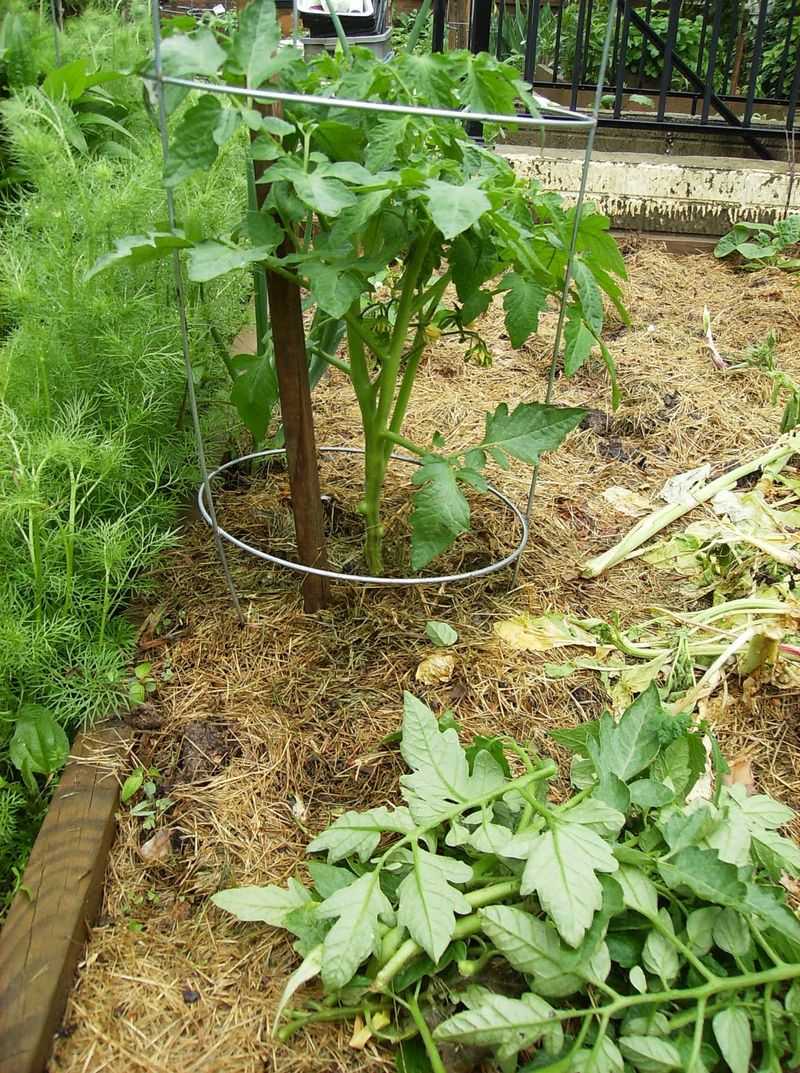
A bare soil surface around your tomato plants is basically a splashpad for disease. Every raindrop that hits exposed soil can kick up a small spray of particles, and those particles can carry fungal material from old plant debris up onto lower leaves.
Adding a layer of mulch around the base of each plant creates a physical barrier that absorbs the impact and reduces that splash.
Clean straw, shredded leaves, or other organic mulch materials work well for this purpose. Horticulture experts advise applying mulch after the soil has warmed in spring or early summer.
Keep the layer a few inches deep while leaving a small gap between the mulch and the plant stem. Piling mulch directly against the stem can trap moisture and encourage rot at the base.
Mulch also helps the soil hold moisture more evenly, which reduces the need for frequent overhead watering. That moisture consistency supports healthier root development and steadier plant growth.
It is worth being clear that mulch does not replace leaf removal, proper spacing, or good sanitation. Do not use diseased tomato plant debris as mulch, since that would reintroduce the same pathogens you are trying to keep away from your plants.
Clean mulch materials are the right choice for a healthy tomato bed.
6. Prune For Airflow Without Stripping The Plant Bare
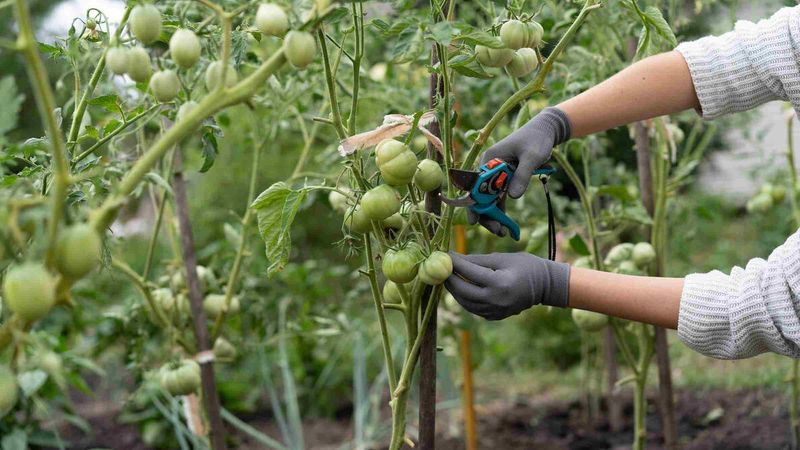
Crowded tomato foliage creates pockets of stagnant, humid air that fungal diseases thrive in. Improving airflow through the plant helps leaves dry faster after rain or dew, which can reduce the window of time that spores need to germinate and infect.
OSU Extension guidance on tomato production notes that good plant spacing and canopy management support healthier plants over the growing season.
Light pruning can open up the lower and middle sections of the plant without causing harm. For indeterminate varieties, removing some suckers from the lower portion of the plant is a common practice that helps reduce crowding.
Determinate varieties grow to a fixed size and set fruit all at once. They are generally pruned less aggressively since removing too much growth can reduce their total yield.
The key word here is light. Healthy leaves are the engine of the plant.
They capture sunlight, produce the energy that feeds developing fruit, and also shade the fruit from intense afternoon sun. Stripping a plant down to bare stems and a few upper leaves can leave tomatoes exposed to sunscald and weaken the plant overall.
Remove what is clearly diseased or crowded, leave what is healthy and functional, and reassess every few days as the season moves forward.
7. Clean Tools Before Moving To The Next Tomato
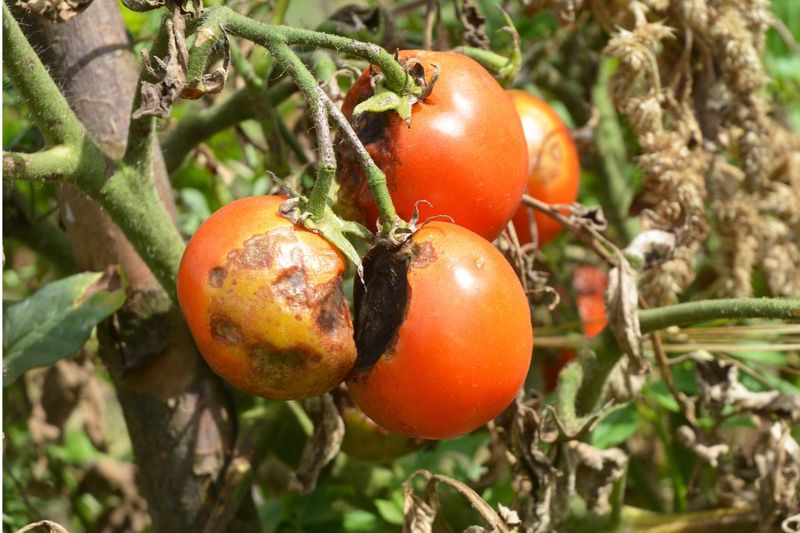
Pruning shears that move from plant to plant without cleaning can carry more than just plant sap. When you cut through a diseased leaf or stem, the blade picks up whatever pathogens are present in that tissue.
Move to the next plant without cleaning, and you may transfer material from a sick plant to a healthy one before you even realize there was a problem.
The habit of cleaning tools between plants takes only a few seconds but can make a real difference in how far disease spreads through a row.
OSU Extension and university extension plant pathology resources recommend disinfecting tools when working around diseased plants.
For guidance on which products to use and how to apply them safely, follow OSU Extension recommendations and the product label rather than improvised recipes.
Hands and gloves can carry the same risks as tools. Washing your hands or changing gloves between plants is a smart move, especially when disease is already present in the garden.
Plant disease guidance also suggests working from the healthiest plants to the most affected plants when possible. That helps avoid carrying problems from a sick end of the row back toward cleaner plants.
Small sanitation habits like these add up over the course of a season.
8. Act Early Before One Sick Plant Seeds The Row
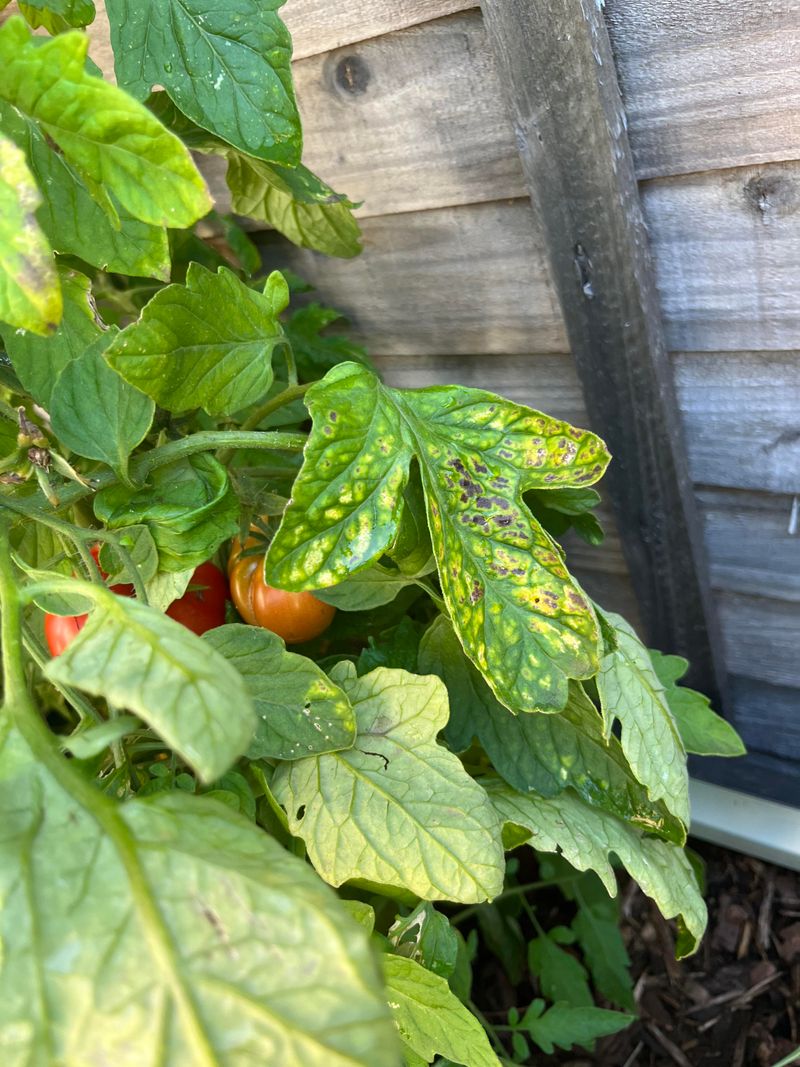
Speed matters more than perfection when it comes to tomato disease management. A single plant with infected lower leaves left unattended can produce a steady source of spores that rain, wind, and splashing water carry to nearby plants.
Vegetable gardening guidance consistently points out that early removal of diseased tissue reduces the amount of inoculum available. Combining it with other sanitation steps helps limit spread through the garden.
Build a simple inspection routine into your week. Walking the row every few days and checking the lower third of each plant takes only a few minutes.
Look for yellowing, spotting, or lesions, and remove any clearly diseased leaves right away. Bag the removed material and get it out of the garden before the next rain arrives.
Combine that leaf removal habit with everything else covered here. Water at the root zone, mulch the soil surface, prune lightly for airflow, and clean tools as you move between plants.
No single action is a silver bullet. Disease pressure in any Ohio garden depends on weather, plant spacing, variety resistance, and the history of the soil.
The sooner you remove that diseased lower foliage and clean up the source, the better the odds for the rest of your row. The plants can keep setting fruit and producing through the end of the season.