Stop Spider Mites From Overwhelming Your Arizona Tomato Plants This Week
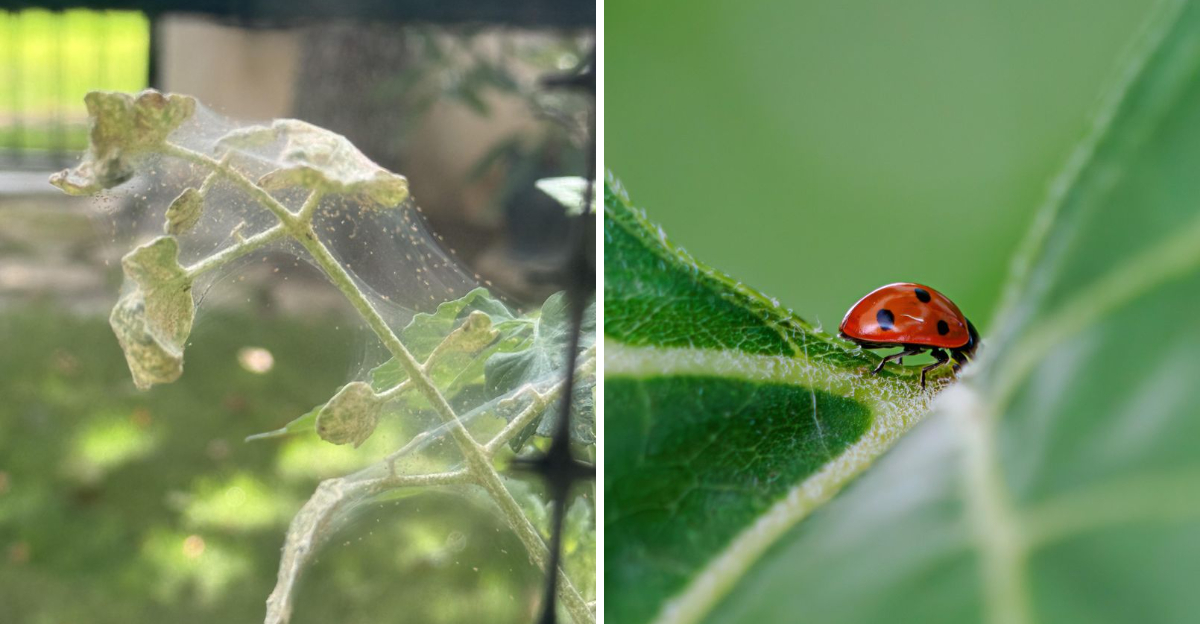
Spider mites do not wait for permission.
One morning, your tomato leaves look a little dusty. By the end of the week, they can look speckled, bronze, curled, and webbed like something quietly took over while you were watering the basil.
Arizona heat gives them an advantage.
Hot, dry weather helps spider mites multiply quickly, especially on stressed tomato plants with dusty leaves and dry soil around them. The earlier you catch the signs, the easier they are to slow down.
This is not a one-spray problem.
Spider mite control works best as a steady routine: check leaves, rinse dust, blast undersides with water, protect beneficial insects, and avoid treatments that burn plants in extreme heat.
So how do you stop spider mites from overwhelming Arizona tomato plants this week?
Start with daily checks, then use water, timing, careful treatments, and follow-up inspections before the colony gets ahead of you.
1. Check Undersides Every Morning
Morning is your best inspection window.
The plants are cooler, the light is softer, and you can spot trouble before the day turns harsh. A quick check before the heat builds can catch spider mites while the problem is still manageable.
Start with the leaf undersides.
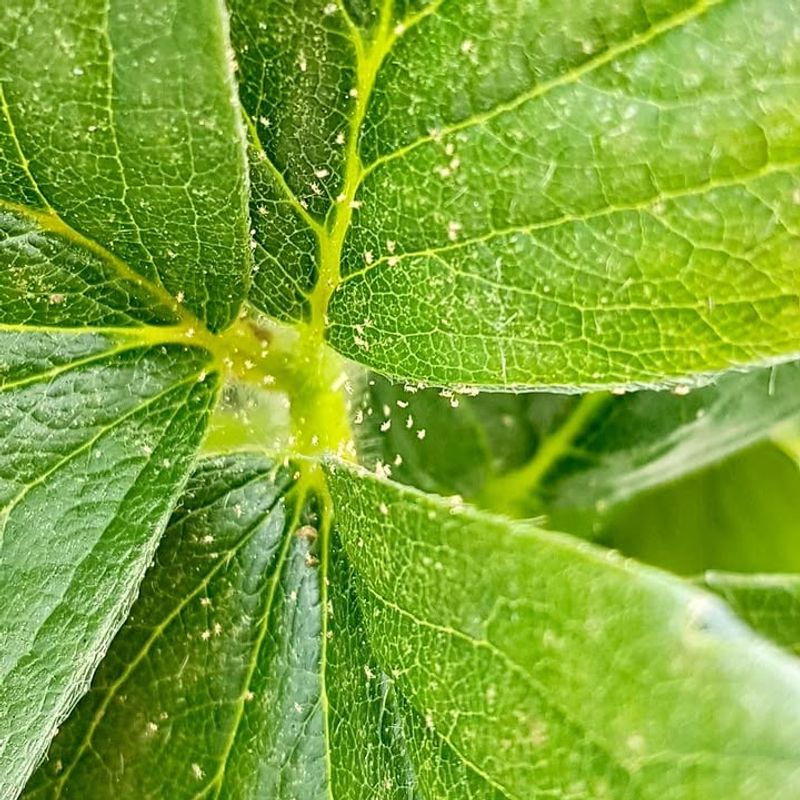
Spider mites usually feed and gather where they are less exposed. Flip leaves gently and look along the veins, stems, and lower leaf surfaces.
Tiny specks matter.
You may see pale dots, reddish or tan moving specks, fine webbing, or a dusty film that was not there before. The mites are small, but their mess is not.
Check the lower leaves first.
Infestations often begin low on the plant, then move upward as numbers build. Lower and middle leaves can tell you what is coming before the top looks bad.
Use a hand lens when possible.
A simple magnifier makes the difference between guessing and knowing. Spider mites become much easier to confirm when you can actually see movement.
Keep the check short but consistent.
Five minutes every morning this week can prevent a much bigger problem later.
Do not wait for heavy webbing.
By the time webs are obvious, the population is already strong.
Early inspection is your first defense, and in Arizona heat, early means this morning.
2. Look For Stippled Leaves
Speckled leaves are often the first visible warning.
Spider mites feed by piercing leaf tissue and pulling out plant cells. Each tiny pale mark is a feeding spot, and thousands of them can drain a tomato leaf fast.
The pattern starts subtly.
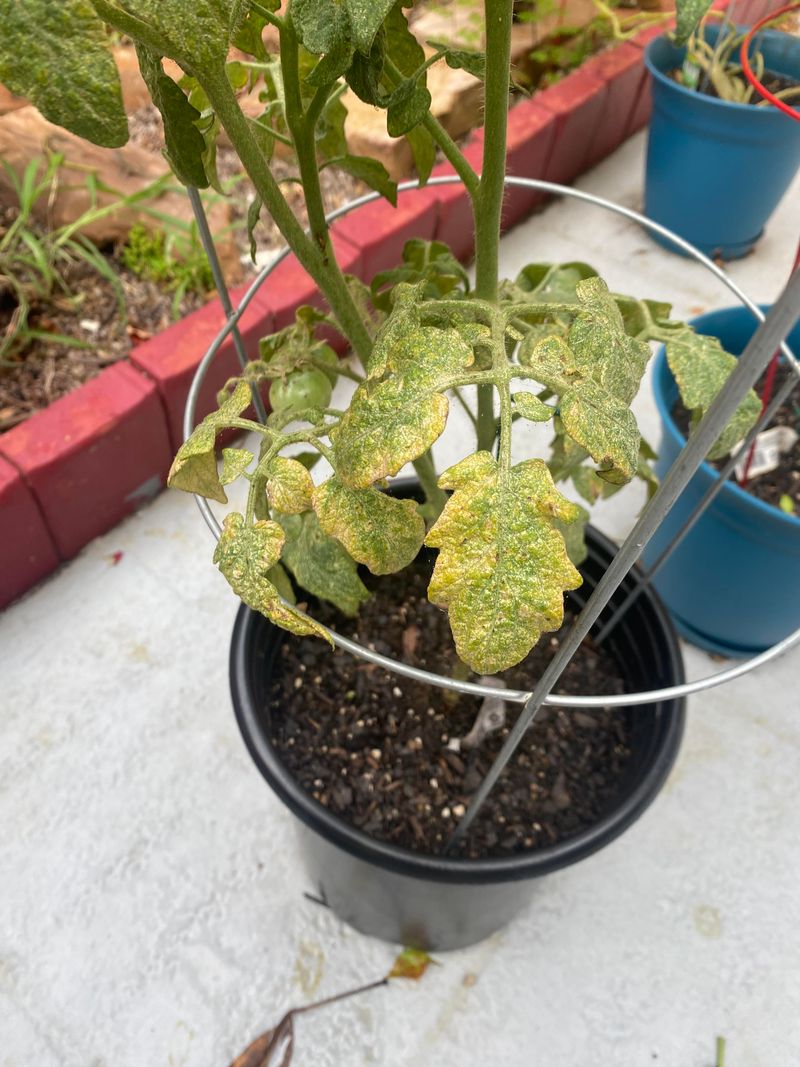
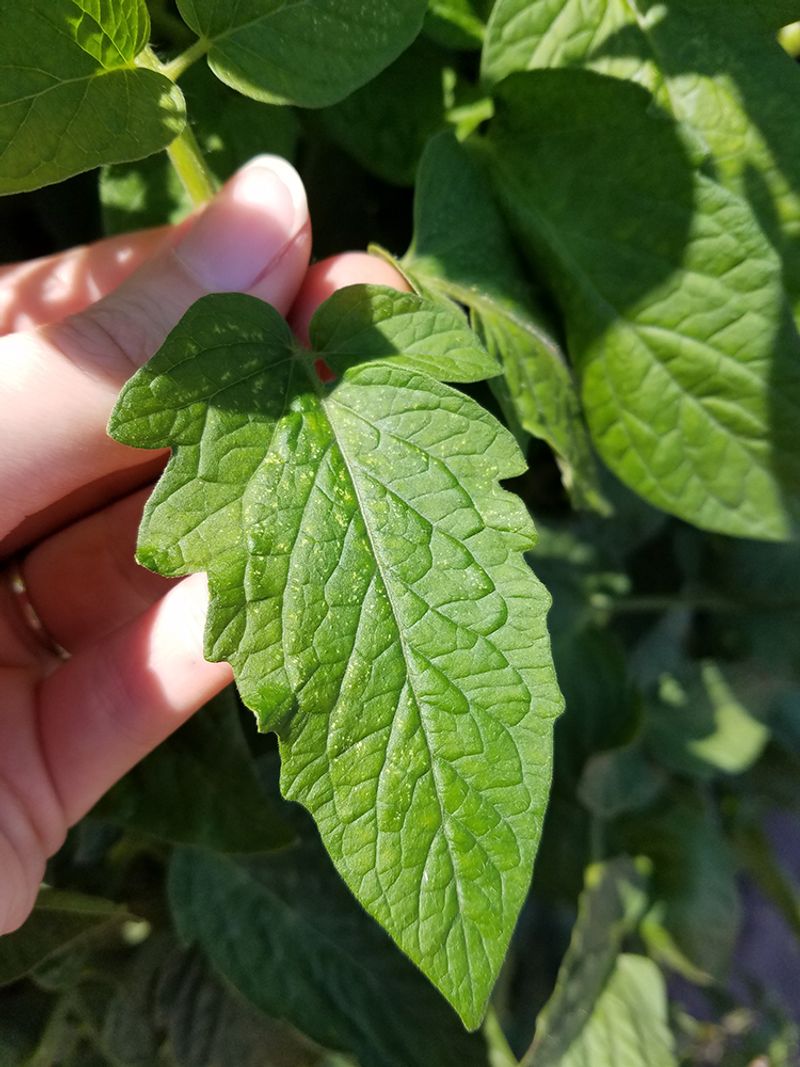
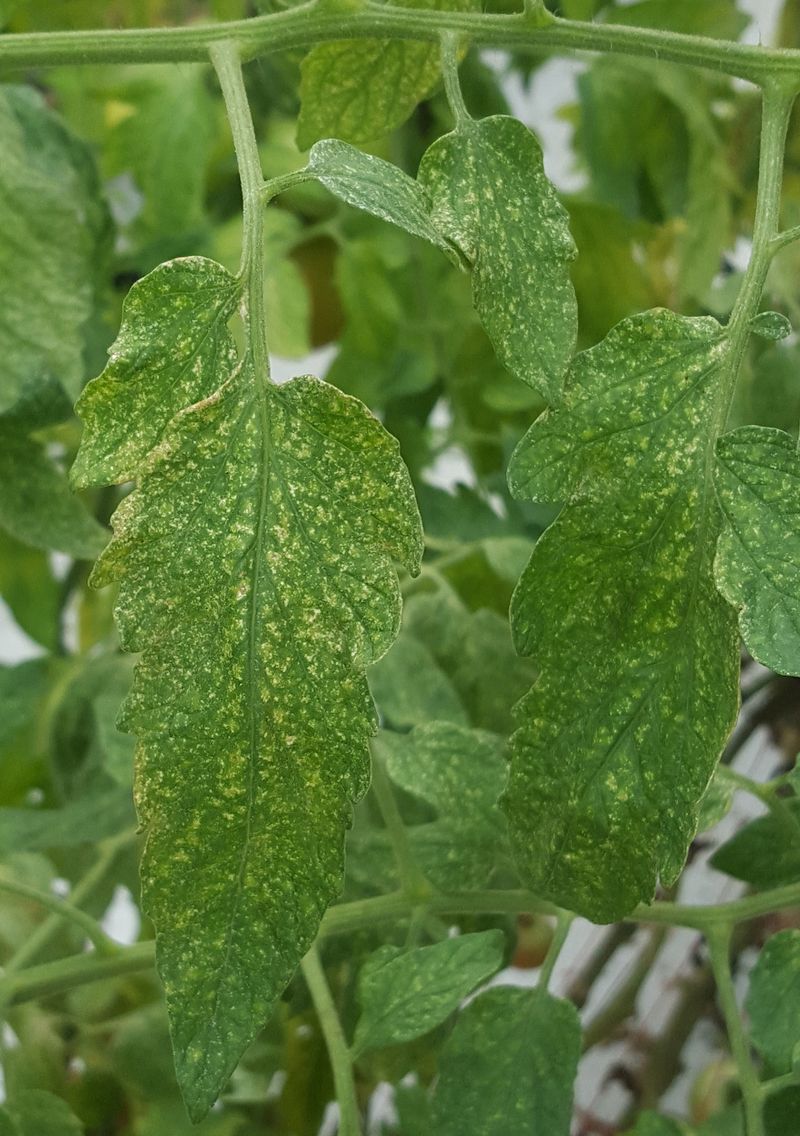
A leaf may look dusty, faded, or lightly freckled. Then the surface turns yellowish, silvery, or bronze as feeding damage spreads.
Bronzing means the problem is building.
Once leaves look dry, papery, or dull brown-green, the plant is losing useful leaf area. That affects photosynthesis and slows the whole tomato plant down.
Webbing is a later clue.
Fine silk between leaf stems, along veins, or across curled leaves means mites have settled in and started expanding. Do not wait for that stage before acting.
Your Arizona Garden Changes Every Week. Your Plan Should Too.
Gardening in Arizona changes quickly throughout the season. Every Friday you’ll receive a simple weekly plan showing exactly what to plant, prune, fertilize, harvest, and protect so you never miss the right timing.
Try the paper test.
Hold a white sheet of paper under a suspicious leaf and tap the leaf gently. Tiny moving dots on the paper strongly point to spider mites.
Compare leaves across the plant.
One damaged leaf may not tell the whole story. Check several plants and several sections so you know whether the issue is isolated or spreading.
Look near dusty edges.
Plants beside dry paths, bare soil, block walls, or gravel often show mite pressure sooner.
A speckled tomato leaf is not just dirty.
It may be the first page of the spider mite story.
3. Spray Dust Off First
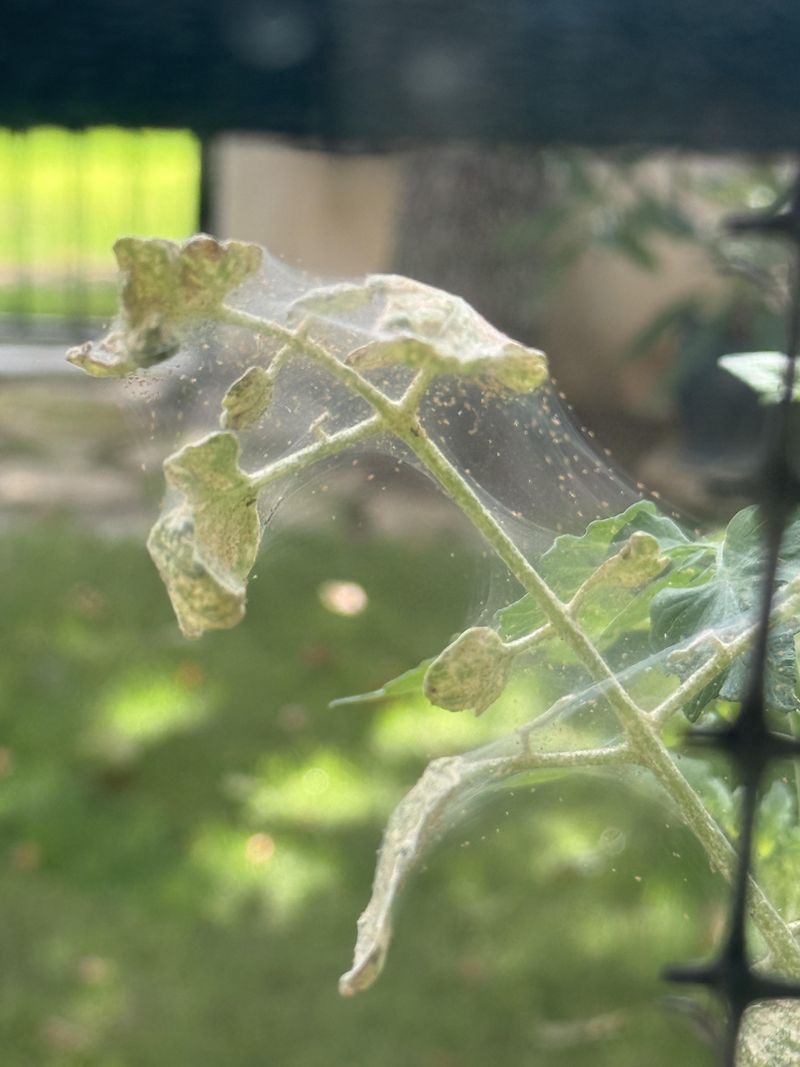
Dust makes spider mites feel right at home.
Arizona tomato leaves collect dust quickly from bare soil, gravel paths, dry wind, and foot traffic. That coating creates the hot, dry surface spider mites love.
Clean leaves handle stress better.
Dust can block light, interfere with leaf function, and make it harder for beneficial insects to move across the plant. Rinsing it away helps the plant and makes the mites less comfortable.
Use water before products.
A gentle rinse is often the smartest first step. It removes dust, exposes mite colonies, and makes later treatments more effective.
Aim at the undersides.
That is where mites gather. Spray upward gently so water reaches the hidden surfaces without shredding tender tomato leaves.
Do it early.
Morning rinsing gives leaves time to dry before the worst heat arrives. Wet foliage during brutal afternoon sun can add stress.
Clean the area around the plants too.
Bare soil and dry paths will send dust right back onto the leaves. Light mulch around tomatoes helps keep soil from blowing upward.
Avoid muddy splash.
Use enough water to rinse, not blast soil onto the lower foliage. Soil splash creates a different set of tomato problems.
Dust removal is not cosmetic.
It is one of the easiest ways to make the plant less inviting before mites take over.
4. Use Water Jets Early
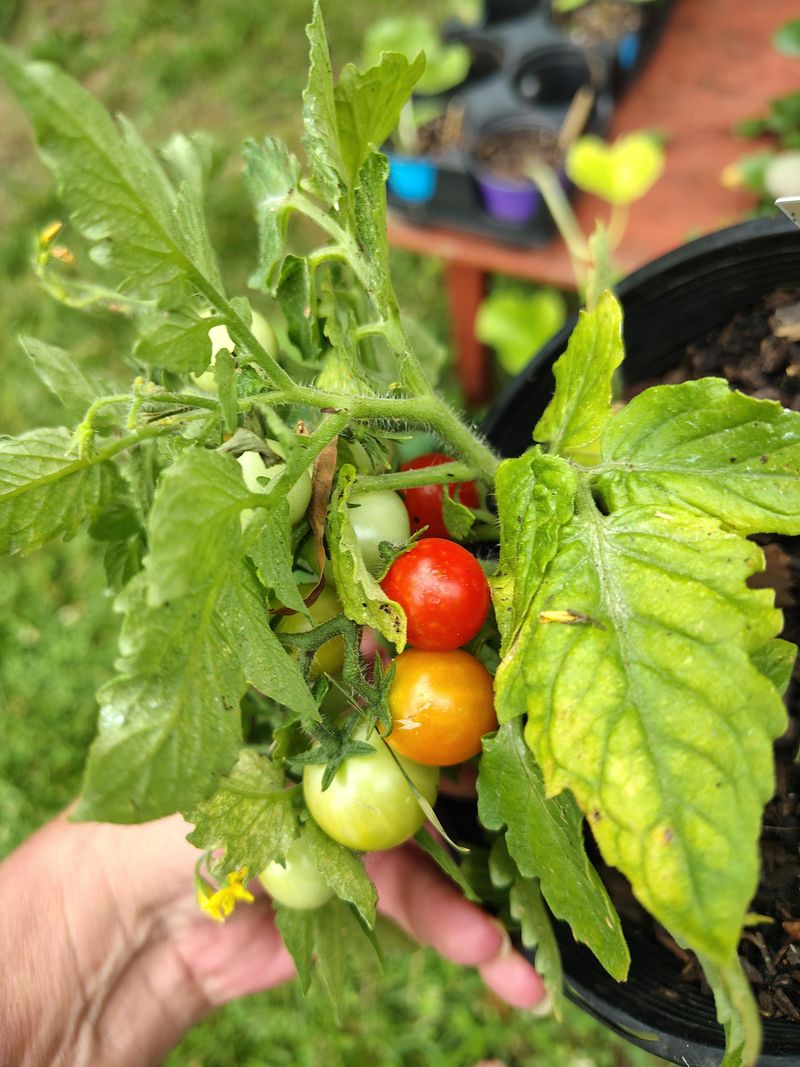
A hose can knock down a mite colony fast.
A firm spray of water aimed at leaf undersides physically dislodges spider mites. Many that fall to the soil will not climb back up successfully.
Pressure should be firm, not destructive.
Use a fan or jet setting strong enough to move pests, but not so strong that leaves tear or stems bend hard.
Work plant by plant.
Start at the bottom, lift leaves gently, and spray the undersides. Then move upward through the plant so you do not miss hidden colonies.
Do not only spray the tops.
Most mites are underneath. A quick overhead shower may make the plant look cleaner while leaving the main population untouched.
Morning timing protects the plant.
Before 9 a.m. is ideal during Arizona summer heat. Leaves dry before the afternoon peak, and the plant avoids extra stress.
Repeat every few days.
Water jets do not remove every egg. New mites can hatch quickly in hot weather, so follow-up sprays keep the next wave from exploding.
Check after spraying.
The plant may look better right away, but inspection still matters. Tap leaves over white paper again and compare activity.
Water is not the whole plan.
It is the fast eviction notice that buys your tomatoes time while the rest of your strategy works.
5. Protect Predator Insects

Beneficial insects are already part of the fight.
Lady beetles, lacewings, minute pirate bugs, and predatory mites can all help reduce spider mite pressure. The problem starts when sprays remove those helpers before they can work.
Broad sprays can backfire.
Many general insecticides harm beneficial insects along with pests. Spider mites often rebound quickly after predators disappear, which can make the outbreak worse.
Look before treating.
Not every small insect on a tomato plant is a problem. Some are hunters. Slow down and identify what is present before spraying anything.
Flowering herbs help.
Dill, cilantro, fennel, basil, alyssum, and other small-flowered plants can support beneficial insects near the tomato bed.
Keep some blooms nearby.
Beneficial adults often use nectar and pollen, while their young or related species feed on pests. A bare tomato row gives them less reason to stay.
Predatory mites can be released.
They are available from garden suppliers and target spider mites specifically. They work best when the outbreak is caught early and broad sprays are avoided.
Pause soaps and oils around releases.
Predators need time to establish. Spraying right before or after release can reduce their impact.
Your goal is balance.
The more allies your garden keeps, the harder it becomes for spider mites to run the whole tomato row.
6. Avoid Hot Day Sprays
A midday spray can hurt more than help.
Arizona tomatoes already struggle through extreme heat. Adding soap, oil, or pesticide to hot leaves during peak sun can cause leaf burn and extra stress.
Heat makes leaves sensitive.
Even products labeled for mites can damage tomato foliage when applied during high temperatures or drought stress.
Do not spray wilted plants.
A plant that is already drooping from heat or dry soil is more likely to react badly. Hydrated plants handle treatments better.
Use the cool window.
Early morning is usually safest. Evening can work in some situations, but leaves may stay damp longer overnight.
Read the label every time.
Temperature limits, dilution rates, and plant warnings matter. Stronger mixes do not mean better control. They often mean burned leaves.
Test first.
Spray a small section, wait a day, and check for damage before treating the whole plant, especially with a product you have not used before.
Skip treatment during heat spikes.
A rough mite problem is frustrating, but scorching the plant will not solve it. Use water jets and shade support until a safer window arrives.
Timing is part of treatment.
In the desert garden, when you spray matters almost as much as what you spray.
7. Apply Soap With Care
Insecticidal soap can help, but only with good coverage.
It works by direct contact, which means the spray must touch the mites. Once it dries, it does not keep protecting the plant.
The undersides need attention. That is where most mites feed and shelter. Spraying only the top of the leaves leaves much of the colony untouched.
Follow the product label. Use the recommended dilution, timing, and safety instructions. Mixing stronger can burn tomato leaves, especially in Arizona heat.
Hydrate plants first. Water tomatoes the evening before a planned morning treatment so they are not drought-stressed when sprayed.
Avoid flowers when possible. Direct sprays on blooms may interfere with pollinators or sensitive flower tissue. Focus on infested leaves and stems.
Repeat treatments are usually needed. Soap does not reliably handle eggs. Follow-up applications several days apart can catch newly hatched mites before they mature.
Watch leaf response. Yellowing, spotting, or burned-looking edges after treatment means the plant may be too stressed or the spray timing was too harsh.
Soap is a tool, not a rescue button. Used carefully, it can reduce spider mites without putting the tomato plant through another round of summer punishment.
8. Repeat Checks This Week
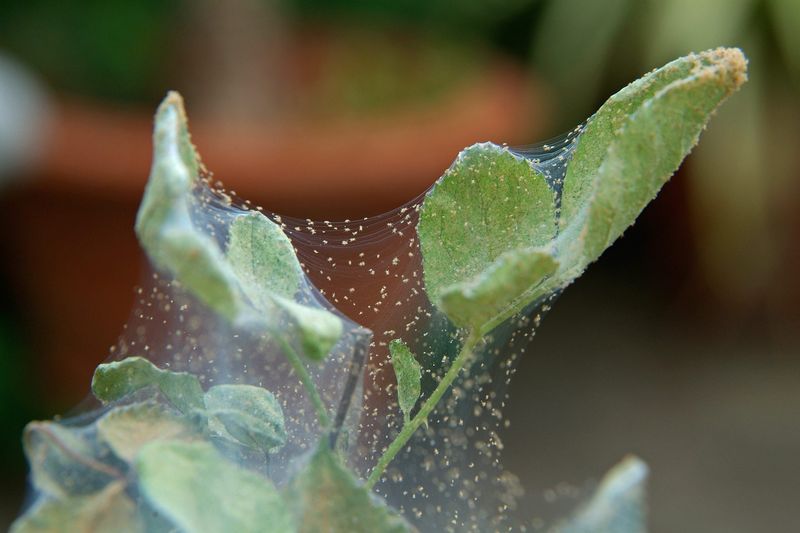
Spider mites can rebuild fast.
Hot weather speeds their life cycle, and eggs can hatch within days. A plant that looks improved after one rinse can look crowded with mites again by the weekend.
Follow-up is the real control. Check daily or every other day this week. Flip leaves, tap over white paper, and compare what you see to the day before.
Track the worst plants. A quick note on your phone can help. Mark which tomato had webbing, which had stippling, and which got sprayed or rinsed.
Look for fresh damage. New pale speckles mean mites are still feeding. Old bronze leaves may not recover, but new growth should stay cleaner as control improves.
Do not forget neighboring plants. Eggplant, peppers, beans, melons, and ornamentals nearby can also host mites. A tomato-only check may miss the source.
Repeat water jets as needed. Every two to three days can keep pressure down while you monitor. Adjust based on how many mites you still find.
Escalate only after confirming. Persistent high numbers may need additional help, but guessing wastes time. Identify the pest, check the severity, and choose the least stressful option that fits.
This week matters. Consistent checks can keep a small mite problem from becoming the thing that ends your tomato season early.